
1989 Dakota 360 Swap Thread (Carb)
#1
 04-14-2011, 08:48 PM

The following is a summation of my experience installing a 5.9l Magnum engine into a 1989 Dakota Sport Pickup. It is by no means a definative source or a "how-to", but a reference for others that are considering a similar project.
The particulars:
Vehicle: 1989 Dakota Convertible Sport with 3.9l engine and A500 automatic trans.
New Engine: 1995 5.9l Magnum Engine from a 2500 series Ram
New Transmission: 1992 A518 (46rh) 4 speed automatic
New Ignition: Mopar 5 wire ignition sourced from a 1977 Dodge Van (with 318)
Other items of importance:
Voltage Regulator from a compatible Chrysler vehicle.
Holley Street Avenger 770 carburetor with a compatible fuel log (however, most any 600cfm to 750cfm 2v or 4v carb will work)
Holley fuel pressure regulator (1- 3/8" fitting, 1- 5/16" fitting, 1- 1/4" fitting for the return line)
M1 Intake for a Magnum style engine (Not neccessary, but a carb compatible intake that fits, also you will need a vacuum source nipple for the intake, a 1/4" fitting for the vacuum sensor that is GM style)
Mopar Aluminum heads for a Magnum style engine (not necessary, stock magnum heads can be used
Exhaust manifolds from a 92 Dakota V8 (not necessary, but flow better than the 94+)
Throttle adapter plate and Lokar throttle cable adapter (sourced from Summit)
3/8" Fuel line (about 6' total- some will be used for vacuum sources)
5/16" fuel line (about 2 feet)
LA style timing chain cover (you can reuse the existing cover)
LA style water pump you can reuse your water pump)
LA style distributor (must be sourced from an earlier model) or equivalent
Vacuum switch and two oil pressure sensors (I chose 48 and 54 psi for the OD and LU converter) which CAN BE sourced from PATC.
I have heard that the stock radiator can be used, but in my experience, it did not work out. I installed a universal 4 row aluminum type that had a automatic trans cooler built within.
Electric fan with MINIMUM 2000 cfm. A 2500+ would be ideal in warmer climates.
Plan ahead for sure. In addition to the above, you will need fluids or recycle the old fluids, clamps, and extra wire/solder/solder iron or small torch, and any other items that you feel should be replaced during the swap.
Unfortunately, there are a few items that I bought, but could not, or did not use which obviously added to my total. If you are savvy and a good teardown bagger, then you will not have to pay for ancillaries. For instance, I bought $130 worth of bolts that I ended up not using, and 5 coolant hoses, 3 of which I didn't need. I also, purchased new sensors, when I could have reused the old ones, but let your conscious be your guide when evaluating what you want versus what you need. While every builder has an different opinion of what they want, this is my build and the information will be limited to what I wanted. There are several sources that cover this swap, this is just mine.
The following pictures should give you an idea of what to expect during the swap, and I will try to show areas that need special attention.
Last edited by siggie30; 04-14-2011 at 08:51 PM.
#2
04-14-2011, 08:49 PM
Initially, it is best to find an area that you can occupy for a time without the neccessity of moving, as parts will "spread out". I initially removed all of the wash bottles, computer, plugs, harness wires and hoses that I could. When removing hoses, it is best to cap the lines after removing the hoses to prevent fouling of the line.
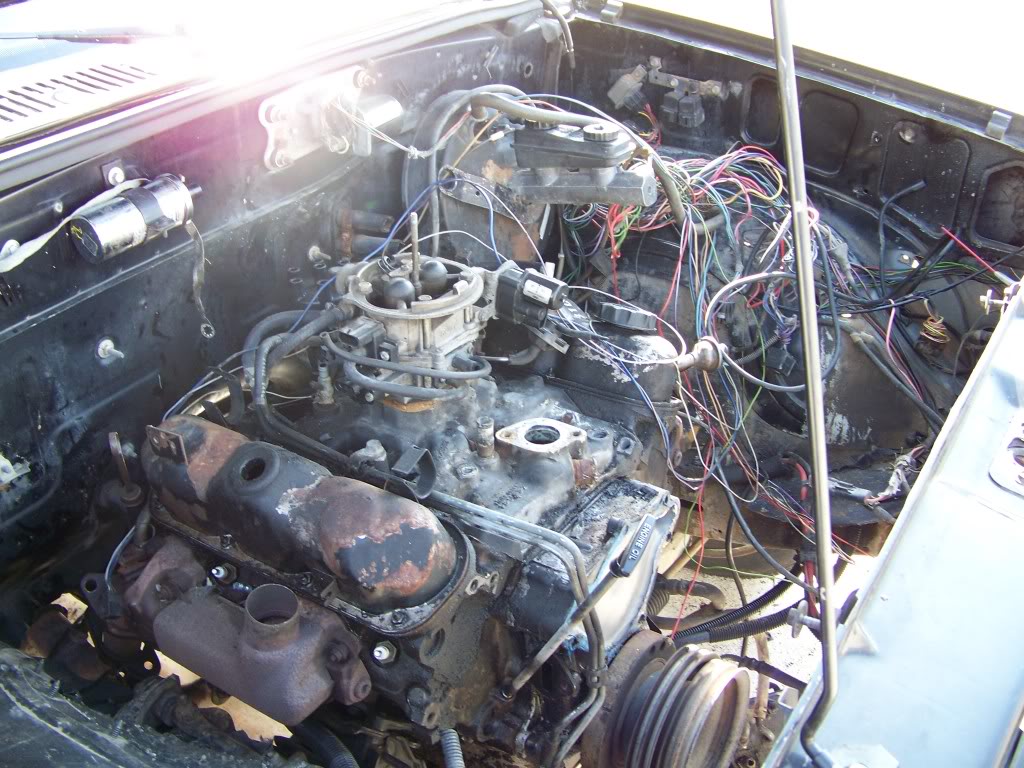
The V6 ready to be removed: (driveshaft disengaged and stored in a dry area, transmission mounts removed to include crossbrace, wheels chocked and frame supported, engine mount bolts removed, exhaust disassembled, hoses removed, etc.)
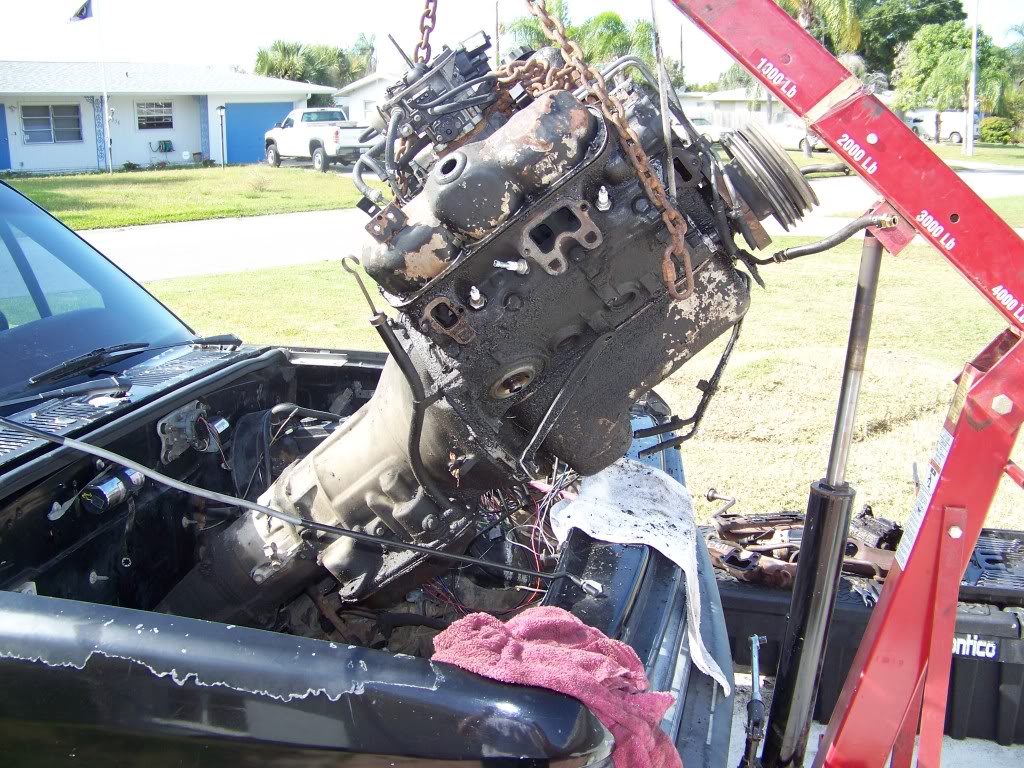
I removed the engine with a hoist by myself, but I would recommend a helper if you have the option, if for nothing else, for safety. While it is not shown, I have a large plastic tub beneath the transmission for transmission fluid to leak out into. If you have not drained the fluids from the engine your behind.
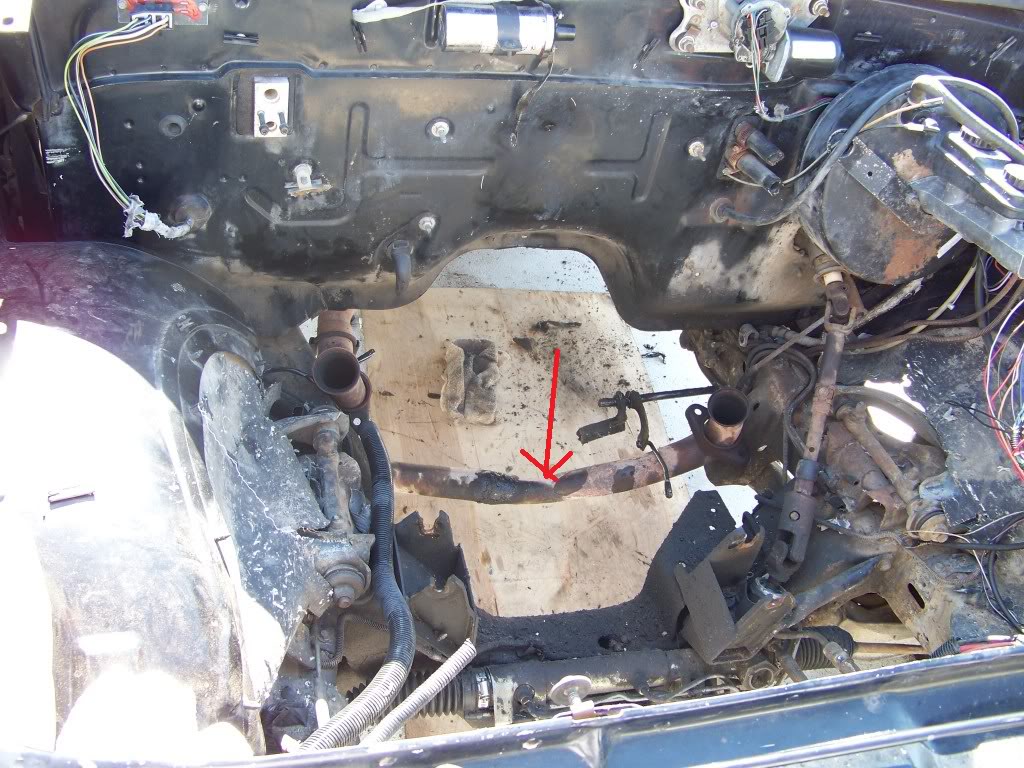
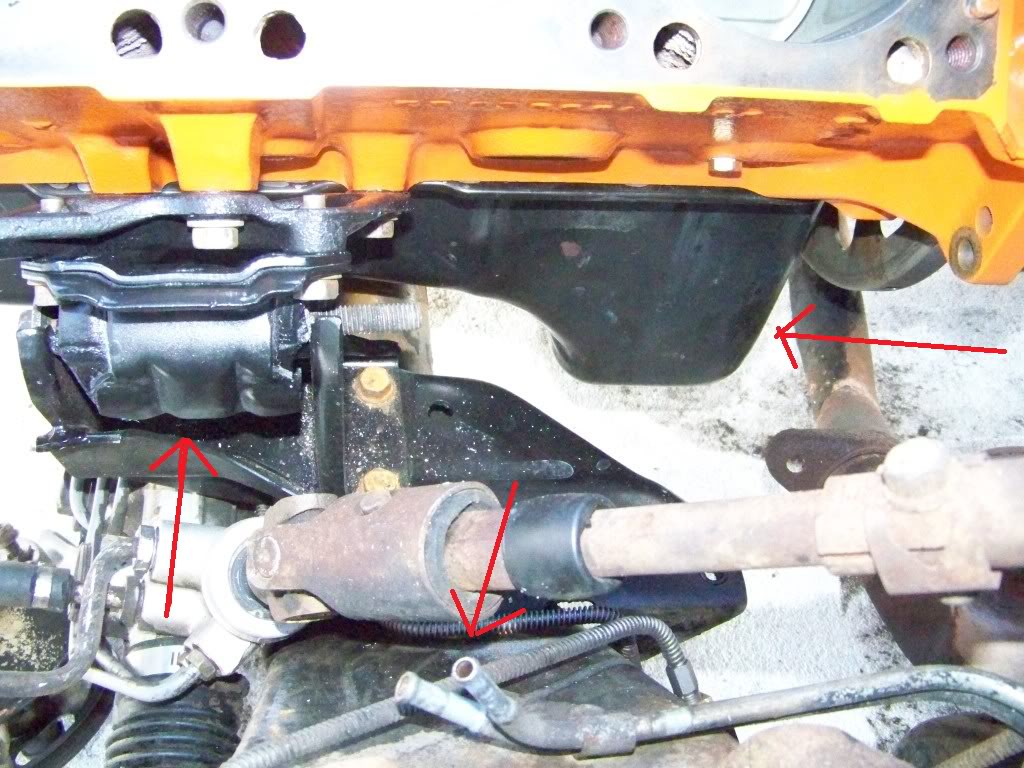
Empty engine bay. This is a good time to degrease and repair anything that needs it. If your repainting then delay your install until after the paint. Servicing the suspension, steering or other subsystems at this time is very opportunistic. You can scrap the exhaust y-pipe as it will not clear the larger transmission.
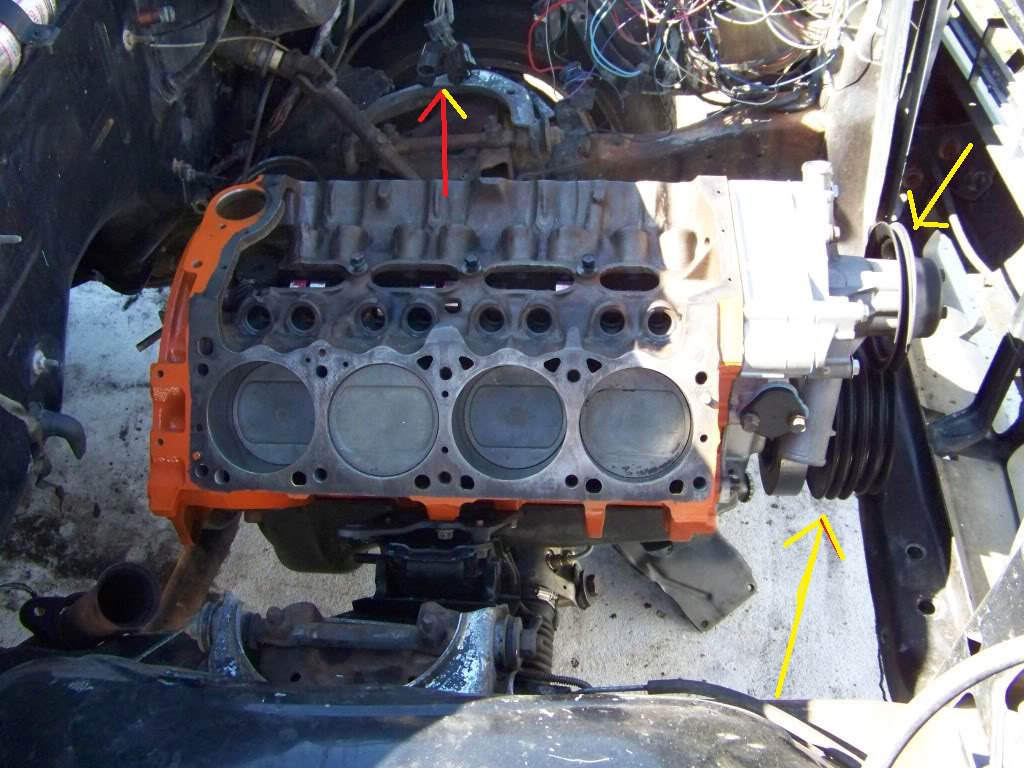
Since I was by myself, I opted for a block install and build in chassis. However, you could assemble the engine and transmission outside of the bay and install at one time, which is the preferred way. Do not cut the plugs at the top of the picture. They go to the fuel system and rear lighting. The single channel water pump pulley is fine for this application unless your going to try to use a smog pump (lol). The four row pulley at the crank could be swapped to a 3 pulley system for the same reason.
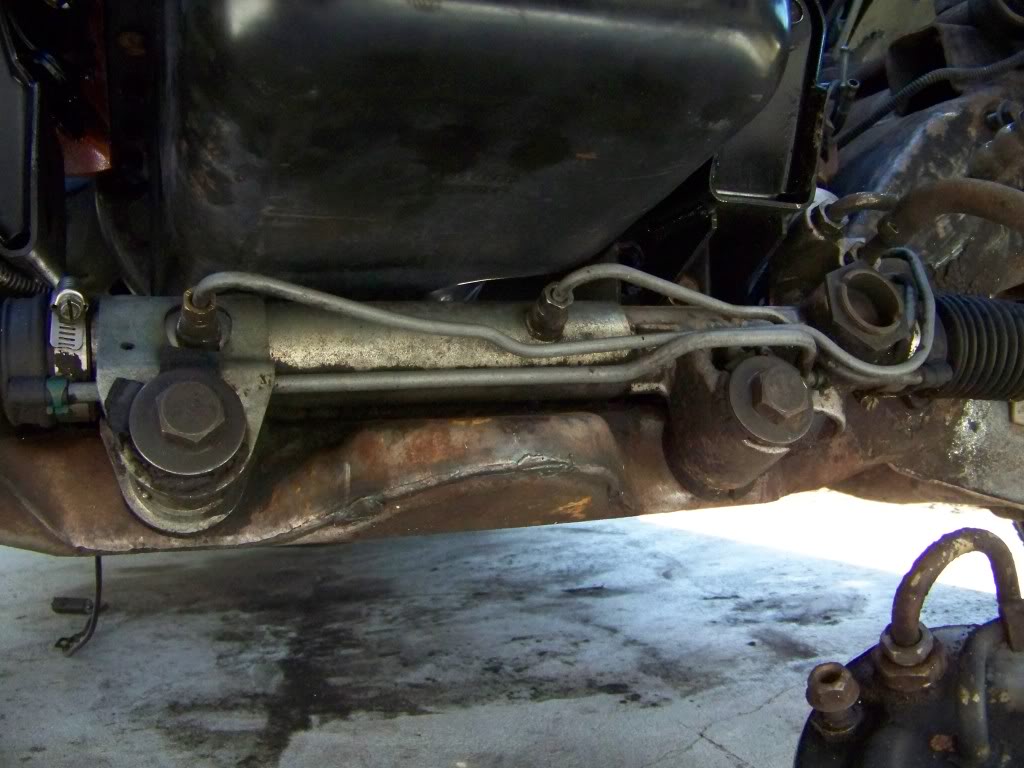
Note the fuel lines at the bottom. They should be protected from fouling. The oil pan is from a Durango or Dakota V8 magnum engine. It is shaped a little different than the Ram pan, and fits fine. The engine mounts in this photo were replaced with V8 mounts which look a little different, but it is not necessary.
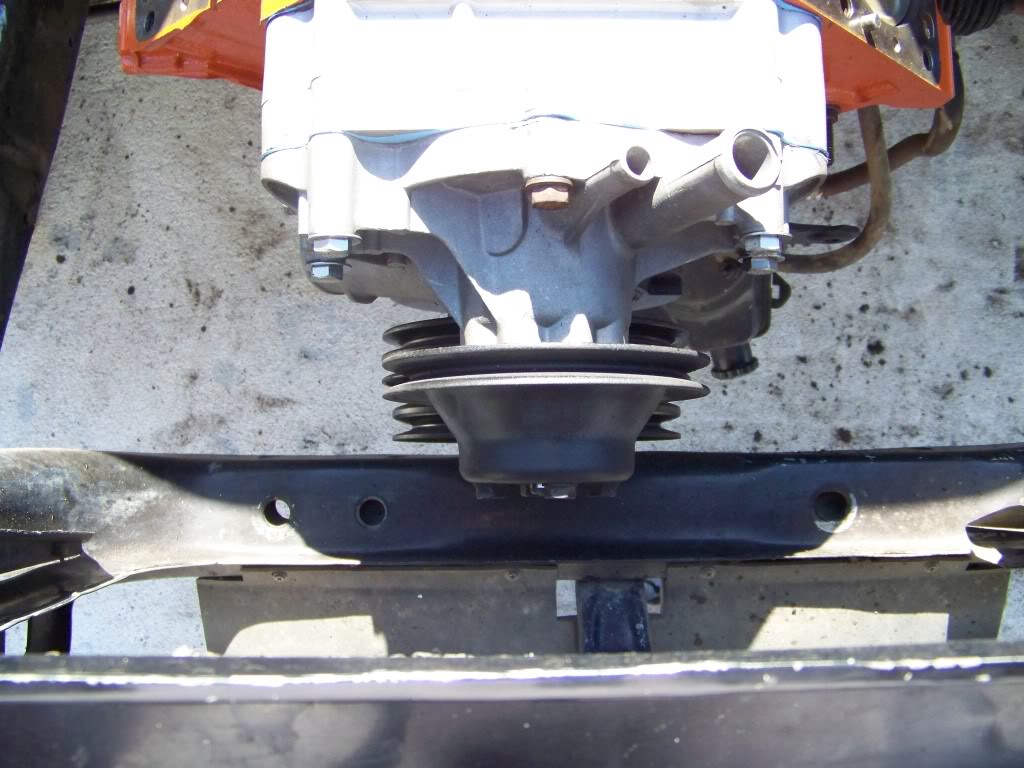
Underside of oil pan.
The clearance of the waterpump to radiator is very restricted in the pre 91' Dakota since the front is built differently in the 91-95 Dakota's. As you can see, the stock radiator does not clear.
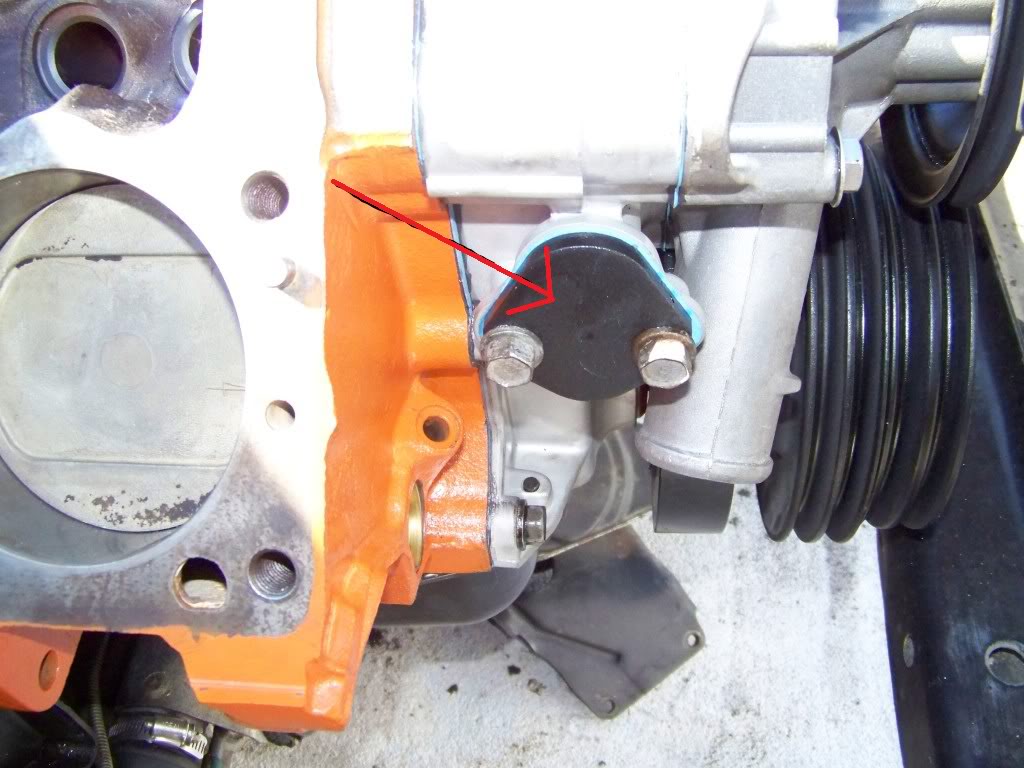
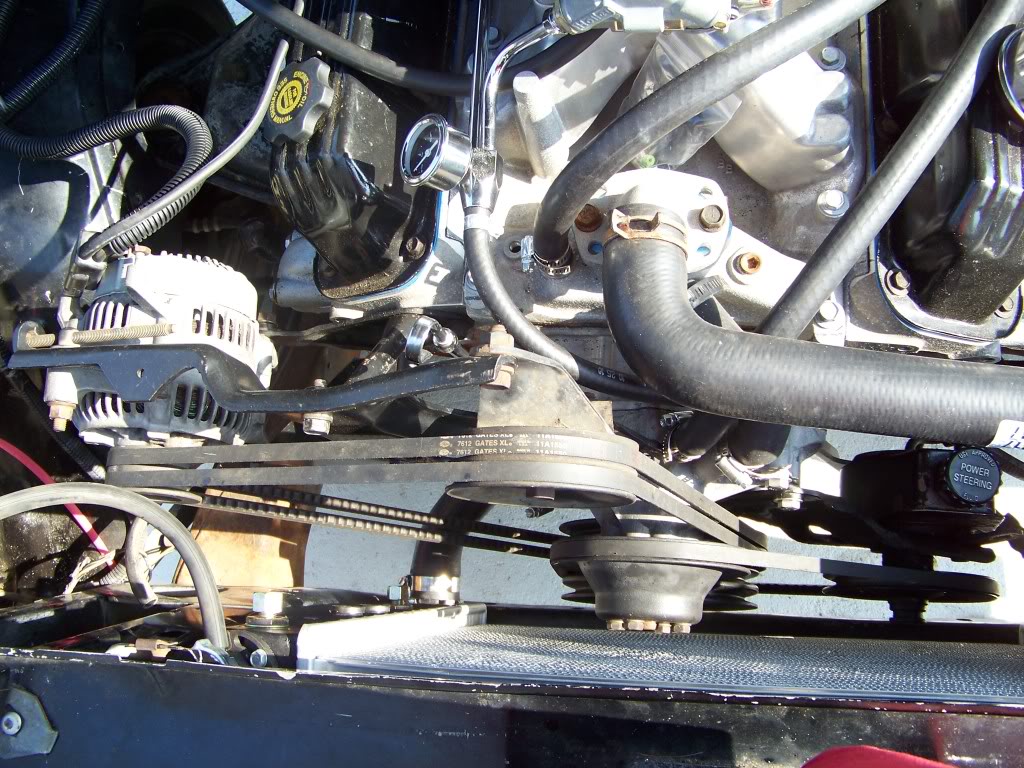
You can reuse the timing chain cover, fuel pump block off plate, and the front accessory brackets from the V6. All will bolt to the engine just fine. I recommend a new timing chain and waterpump before the engine is installed. You can also use the V6 engine mounts since they are indexed correctly.
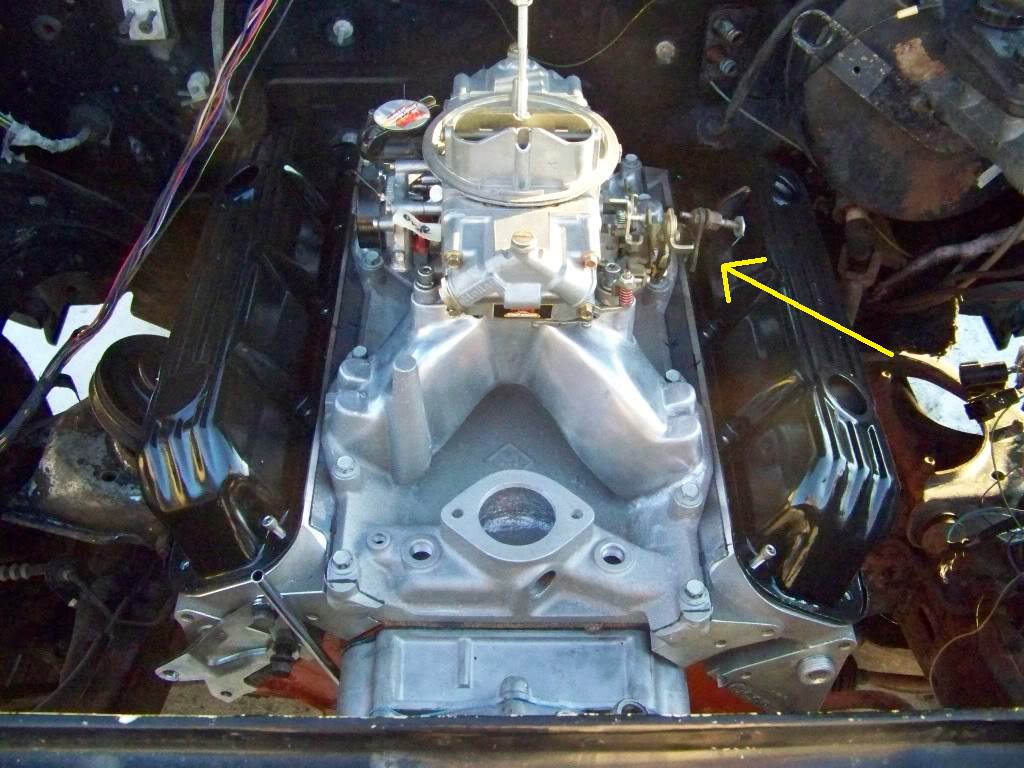
With the intake on and carburetor, you must purchase a bracket that will allow your pedal and transmission to access the carburetor. The Chrysler specific throttle adapter bracket can be seen here. The bracket is designed to keep proper geometry between the TV cable and accelerator cable. The throttle cable attaches to this extra bracket.
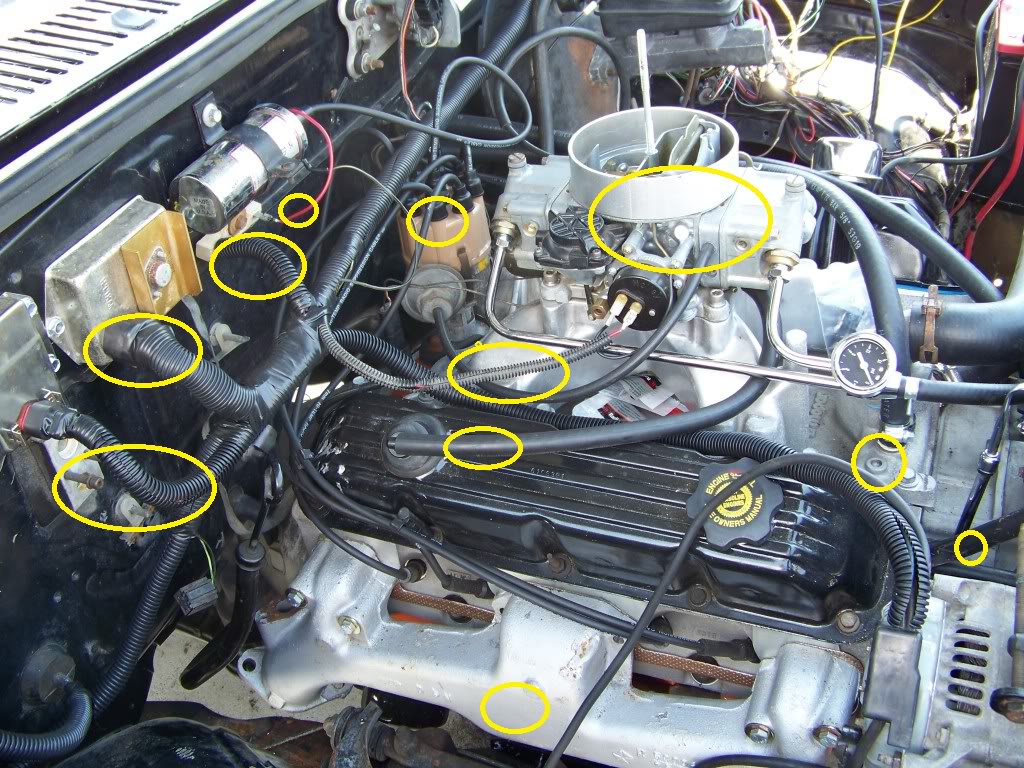
This picture shows a ignition setup for chryslers. There are different methods to provide ignition from a standalone distributor, to an all out custom EFI setup. Prices vary so attention to budget is critical.
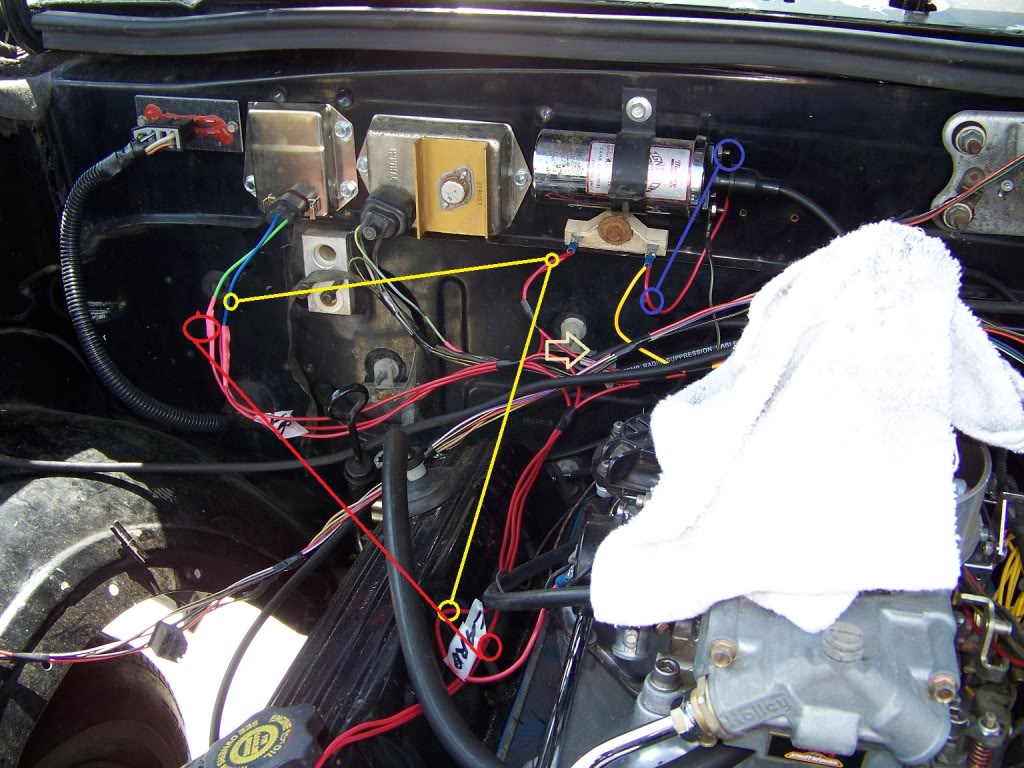
Prewiring for ignition.
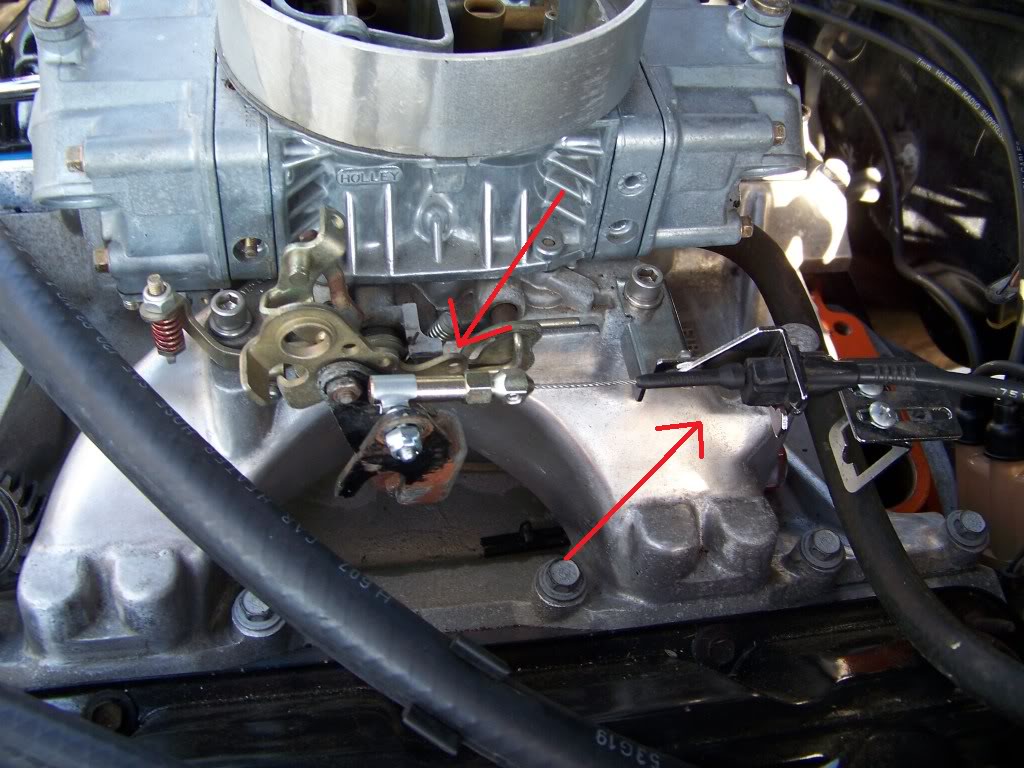
Throttle assembly bracket and cable adapter. I am reusing the original throttle cable, but the V6 transmission linkage does not work for this application.
This is the original acessory bracket with the a/c delete pulley installed.
The V6 ready to be removed: (driveshaft disengaged and stored in a dry area, transmission mounts removed to include crossbrace, wheels chocked and frame supported, engine mount bolts removed, exhaust disassembled, hoses removed, etc.)
I removed the engine with a hoist by myself, but I would recommend a helper if you have the option, if for nothing else, for safety. While it is not shown, I have a large plastic tub beneath the transmission for transmission fluid to leak out into. If you have not drained the fluids from the engine your behind.
Empty engine bay. This is a good time to degrease and repair anything that needs it. If your repainting then delay your install until after the paint. Servicing the suspension, steering or other subsystems at this time is very opportunistic. You can scrap the exhaust y-pipe as it will not clear the larger transmission.
Since I was by myself, I opted for a block install and build in chassis. However, you could assemble the engine and transmission outside of the bay and install at one time, which is the preferred way. Do not cut the plugs at the top of the picture. They go to the fuel system and rear lighting. The single channel water pump pulley is fine for this application unless your going to try to use a smog pump (lol). The four row pulley at the crank could be swapped to a 3 pulley system for the same reason.
Note the fuel lines at the bottom. They should be protected from fouling. The oil pan is from a Durango or Dakota V8 magnum engine. It is shaped a little different than the Ram pan, and fits fine. The engine mounts in this photo were replaced with V8 mounts which look a little different, but it is not necessary.
Underside of oil pan.
The clearance of the waterpump to radiator is very restricted in the pre 91' Dakota since the front is built differently in the 91-95 Dakota's. As you can see, the stock radiator does not clear.
You can reuse the timing chain cover, fuel pump block off plate, and the front accessory brackets from the V6. All will bolt to the engine just fine. I recommend a new timing chain and waterpump before the engine is installed. You can also use the V6 engine mounts since they are indexed correctly.
With the intake on and carburetor, you must purchase a bracket that will allow your pedal and transmission to access the carburetor. The Chrysler specific throttle adapter bracket can be seen here. The bracket is designed to keep proper geometry between the TV cable and accelerator cable. The throttle cable attaches to this extra bracket.
This picture shows a ignition setup for chryslers. There are different methods to provide ignition from a standalone distributor, to an all out custom EFI setup. Prices vary so attention to budget is critical.
Prewiring for ignition.
Throttle assembly bracket and cable adapter. I am reusing the original throttle cable, but the V6 transmission linkage does not work for this application.
This is the original acessory bracket with the a/c delete pulley installed.
Last edited by siggie30; 04-15-2011 at 11:25 PM.