When you click on links to various merchants on this site and make a purchase, this can result in this site earning a commission. Affiliate programs and affiliations include, but are not limited to, the eBay Partner Network.
I didnt like the fact that I have no tow points in the front. And on top of that, it would be cool to be able to move trailers around from the front instead of the back.
So I had an old hitch laying around for scrap metal. I don't know what it fit. Anyway, I cut it up and made a fully removable, but heavy duty, bolt on hitch.
I reused the original frame brackets to mount it, and I reused the 2" ID receiver tube. Other than that, it's all 2" OD 1.5" ID square tubing. Oh and the original brackets are 1/4" thick. I used the thickest metal I thought I could work with.
Parts and Hardware:
Original hitch
9 Grade 8, 1/2" bolts with grade 8 washers and nuts
2" OD 1/4" square tubing
1 can of primer
2 cans of rust preventative black semi gloss paint
So, here we go.
This is just taking the bumper off. Not a lot of room to get it as high as I wanted due to where the condenser is.
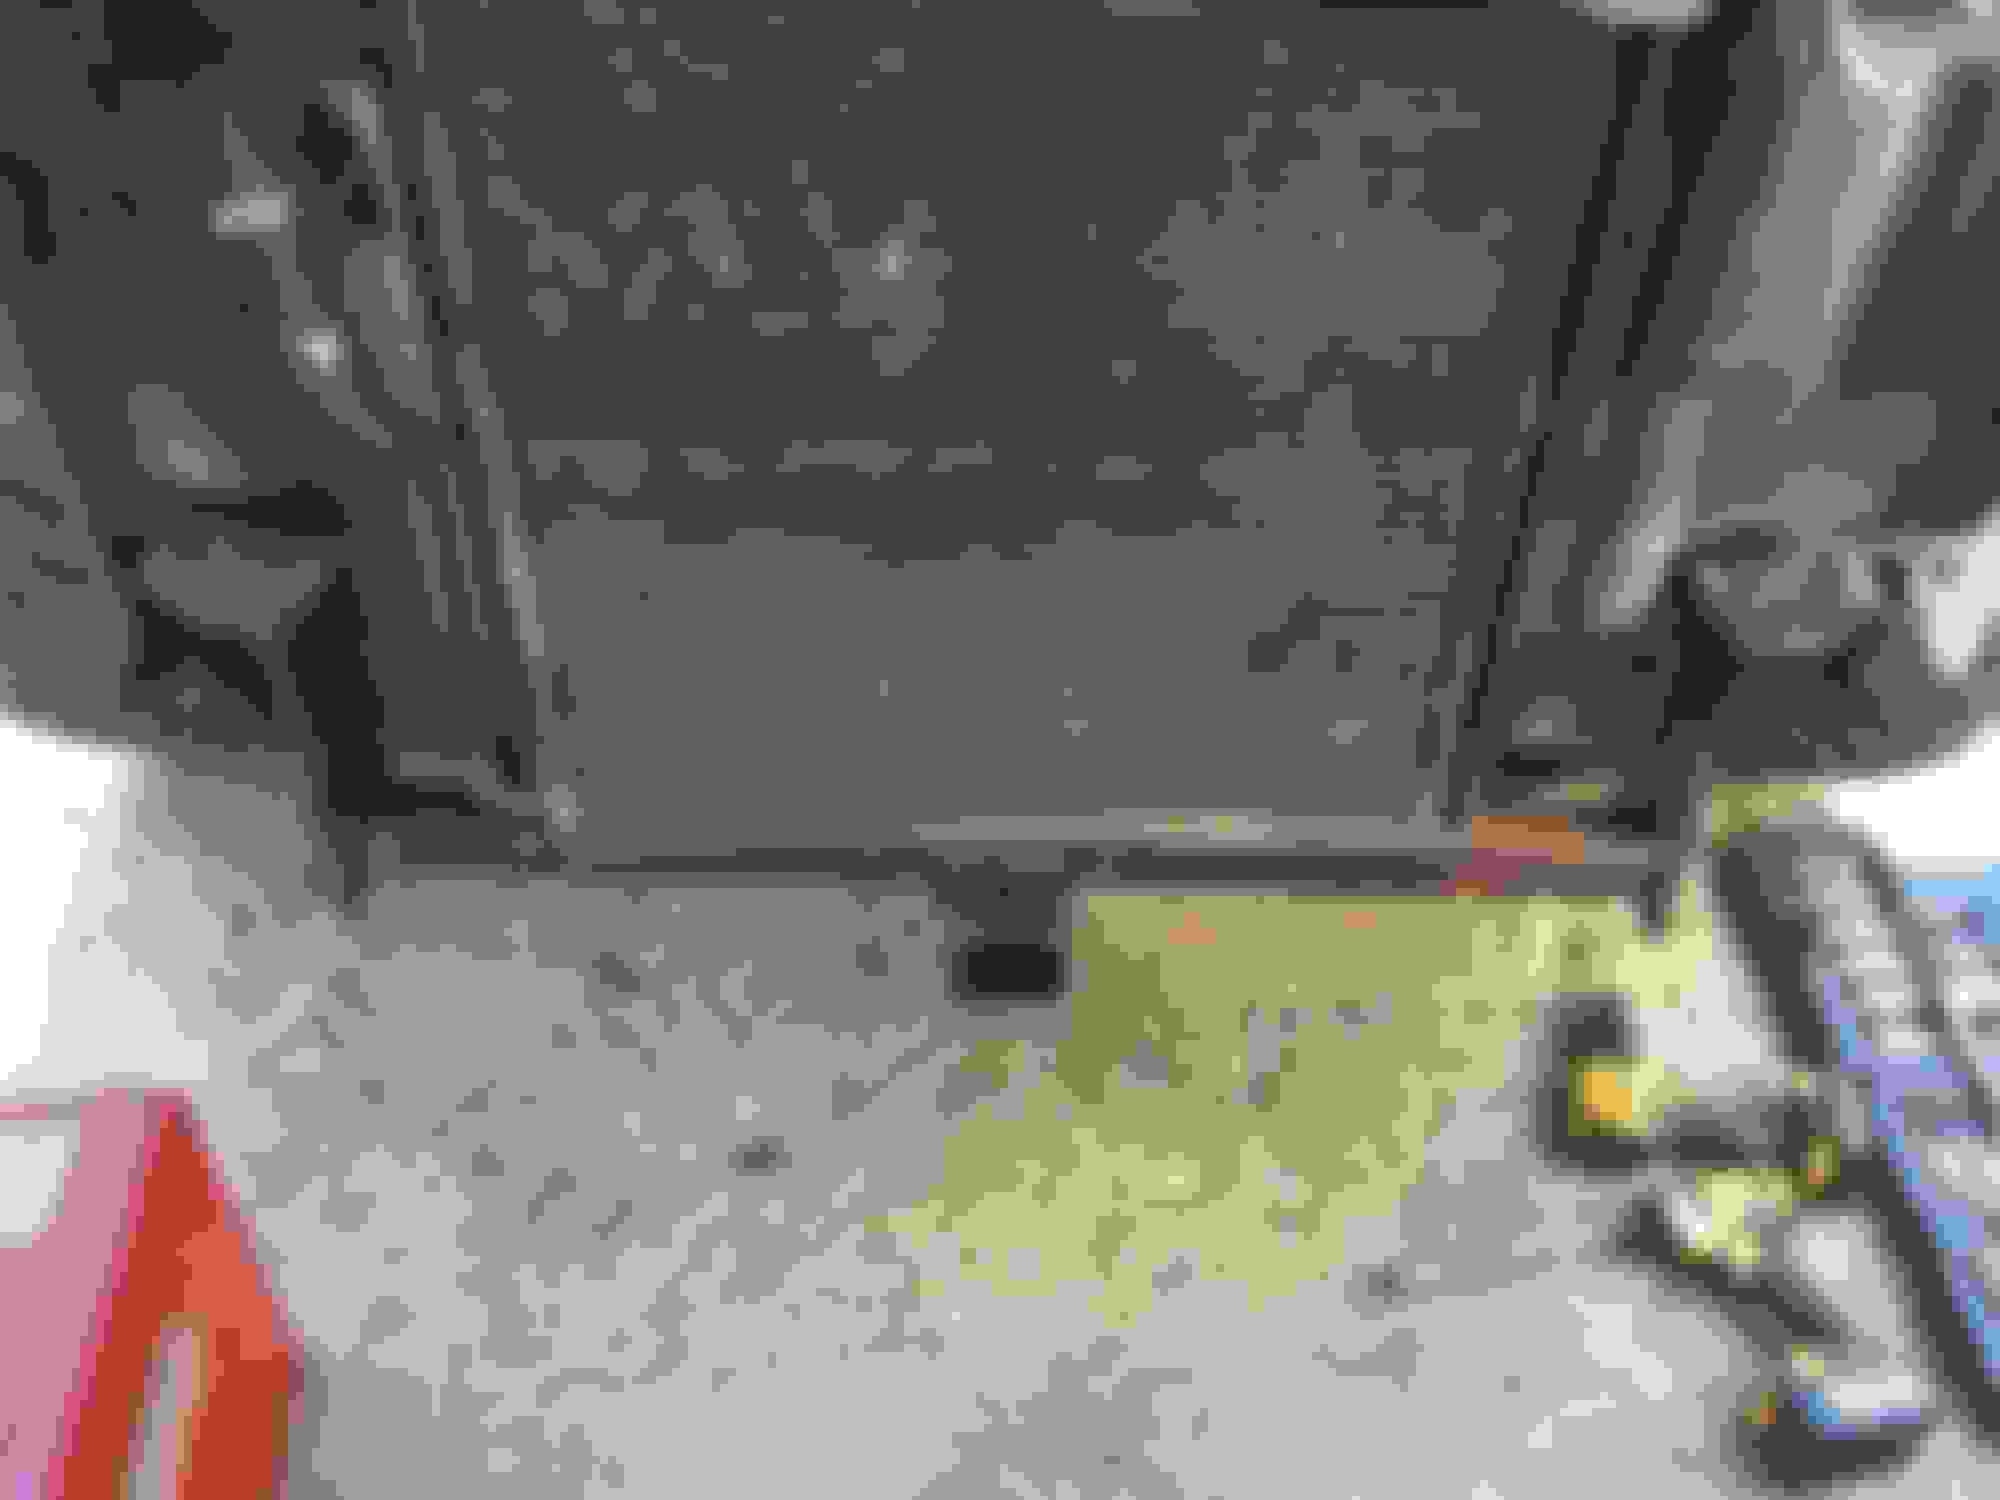
I cut a notch in each frame rail to allow the hitch bracket to sit flush everywhere. I only took pictures of the passenger side of a lot of this stuff.
The picture below is with the bracket bolted to the frame using the original bumper bolts and placements.
The three below are with the brackets mounted to the frame rails on both sides. Then I cut and welded the 2" OD square tubing to the brackets. then I found the center and measured 1 1/4" out from center on both sides and cut the square tubing to fit the receiver tube (2.5" OD) in the middle and welded it all up level and even.
The underside brace. Probably the weakest, most poorly designed part of this entire build. It's welded to the hitch frame and bolted to the Durango's front cross member. Probably should have welded to the crossmember and made a two bolt system to bolt to the hitch. But oh well.
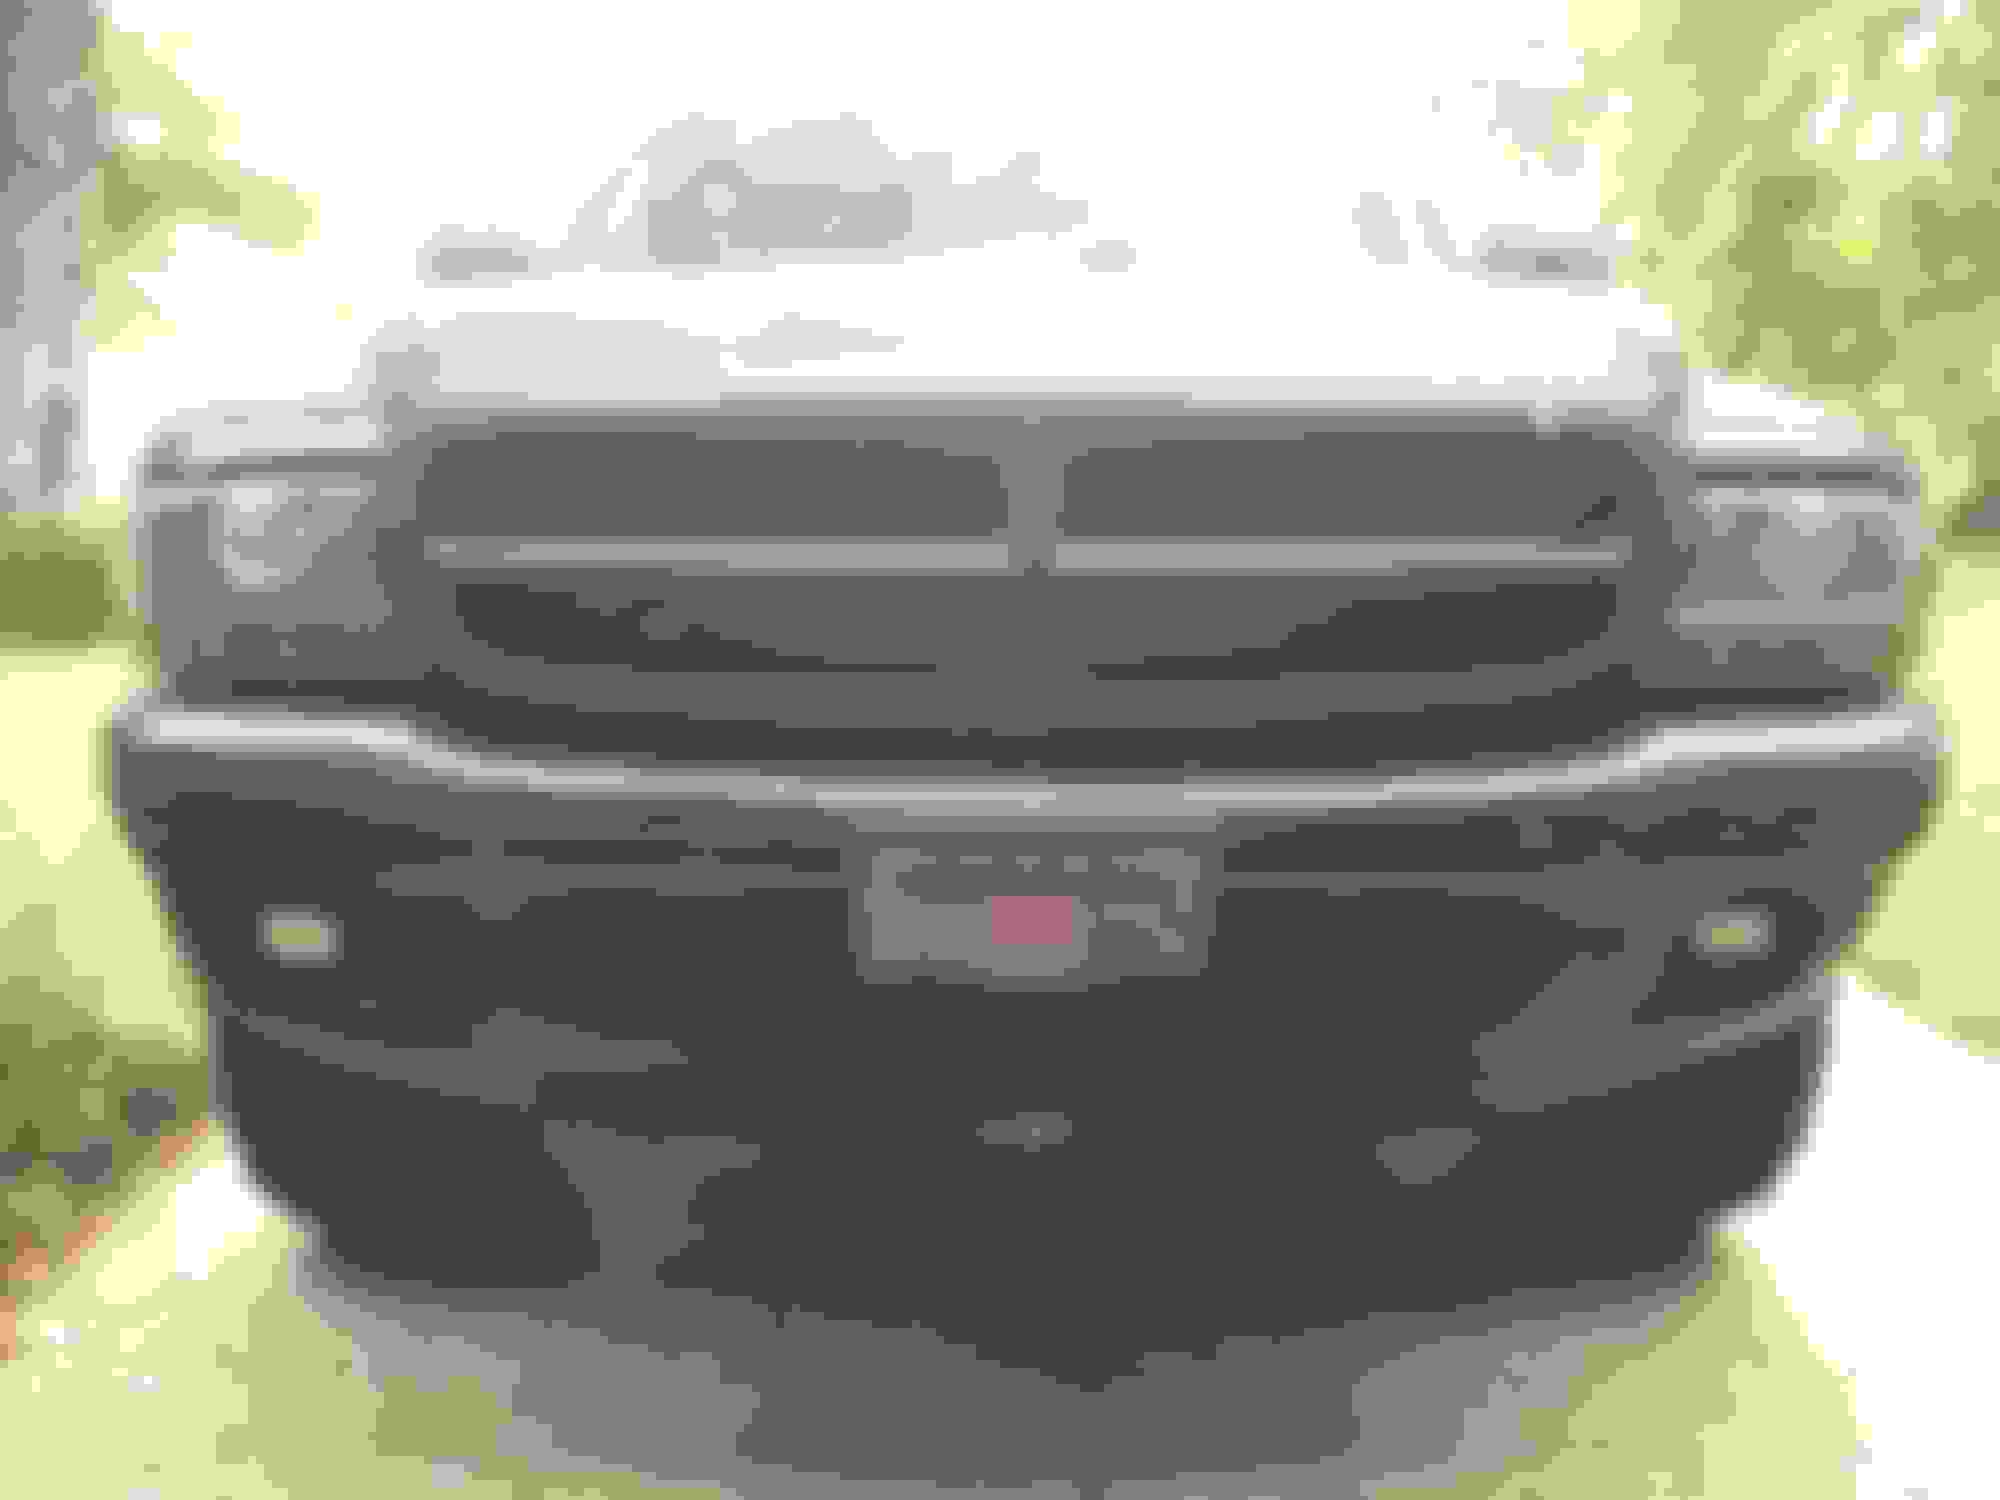
Now at this point, its not done but I wanted to put the bumper on and see how it looked. It looks okay. Kinda deforms the bumper a little. But its more for function, not looks
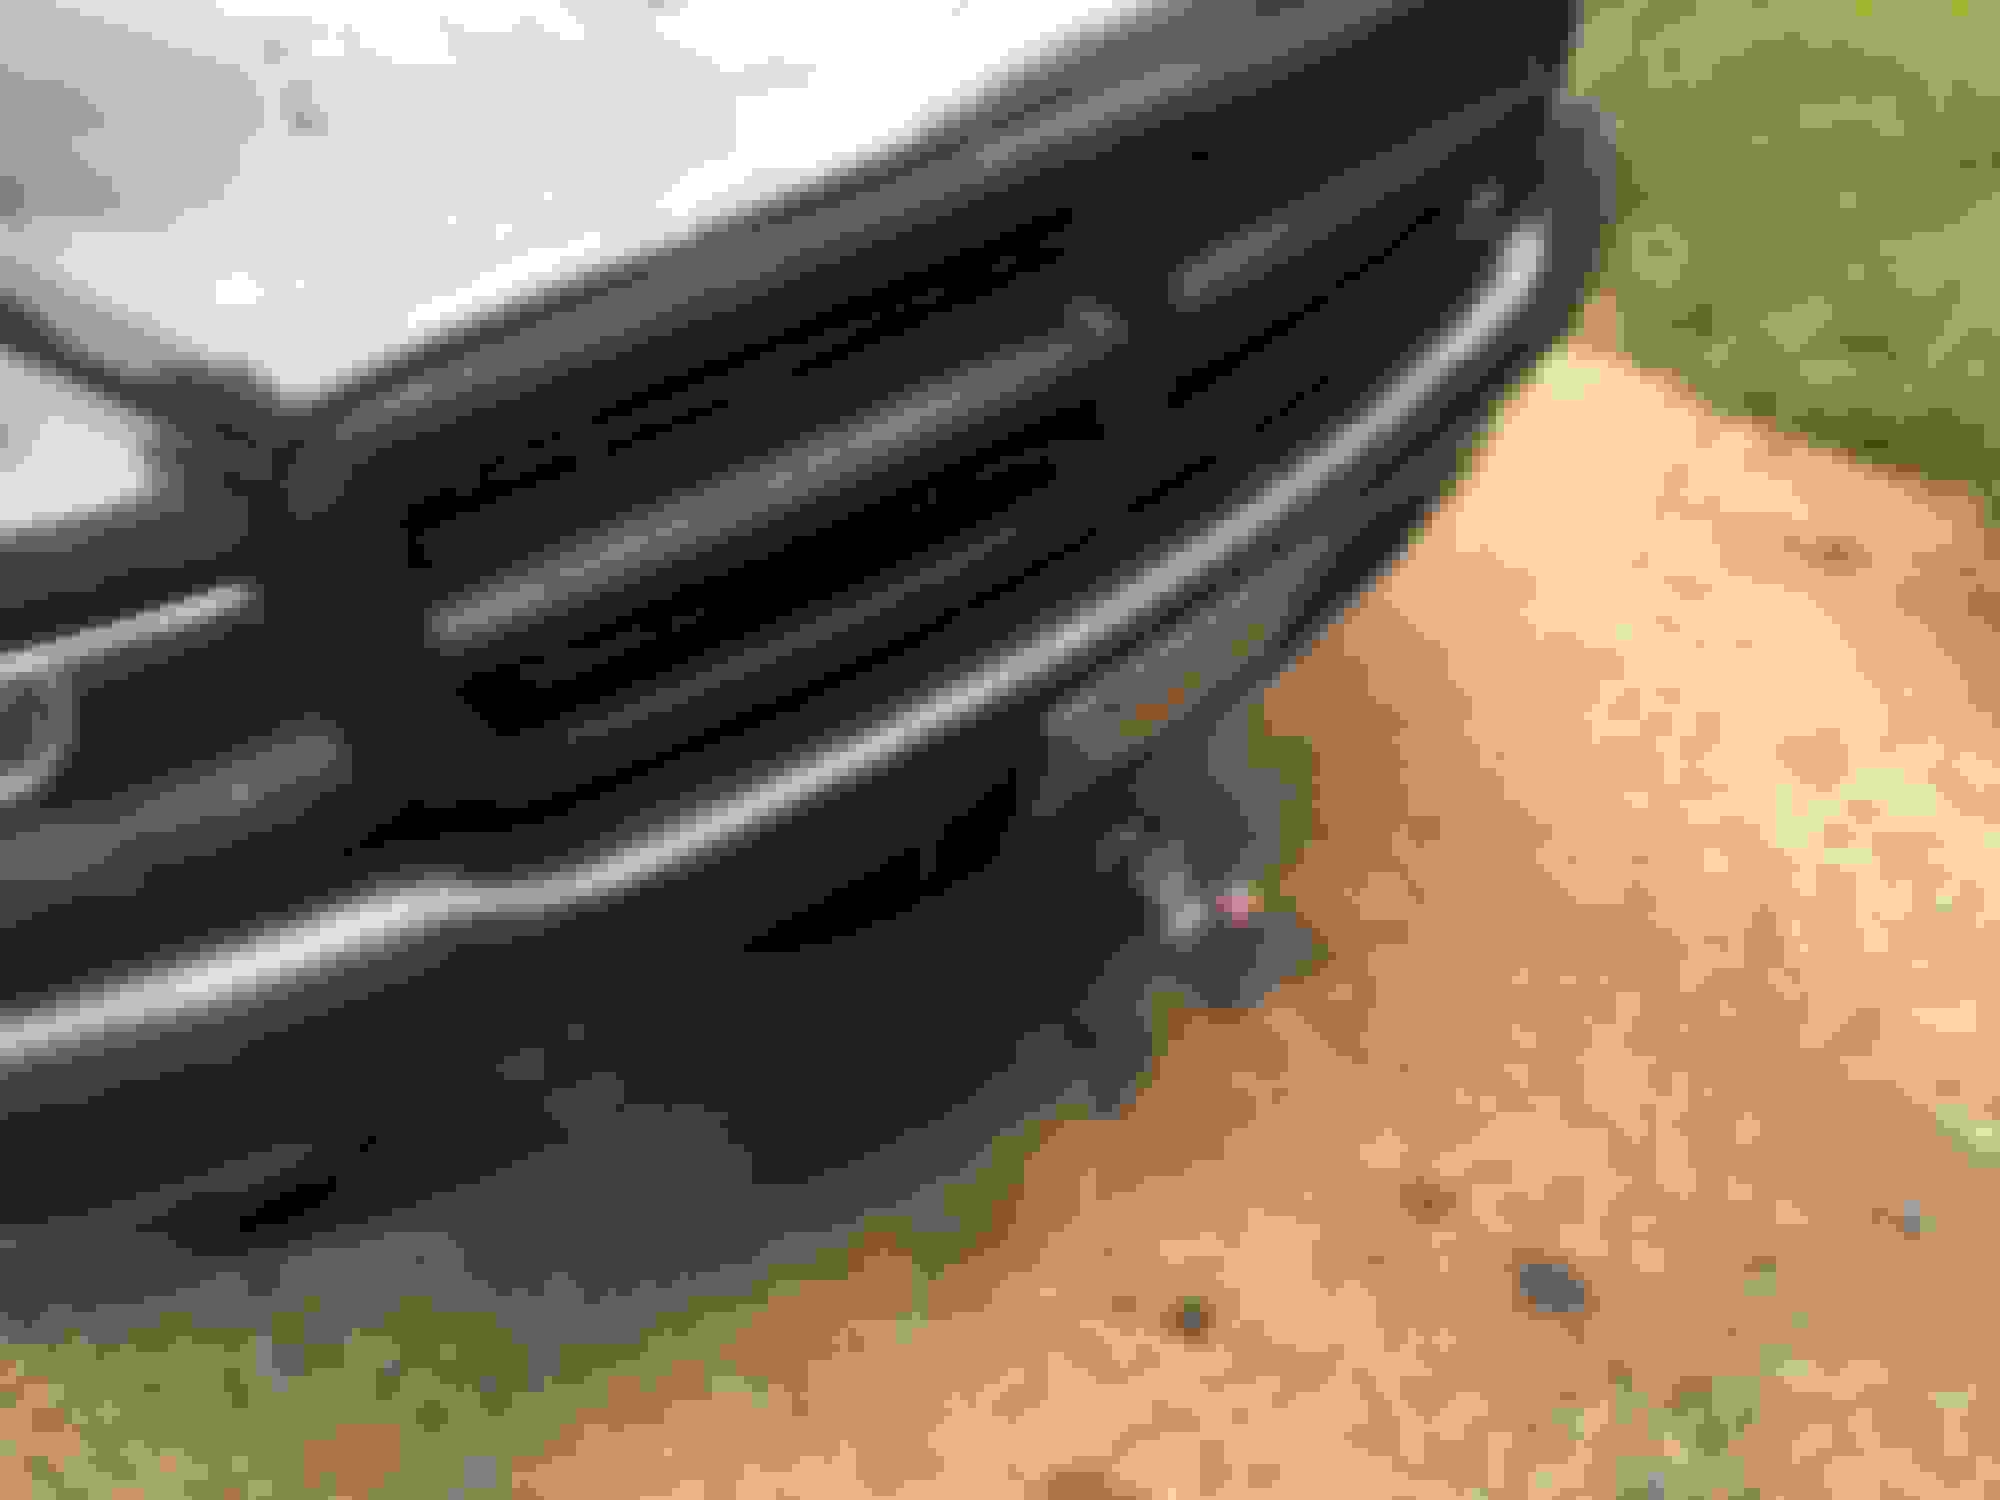
I took the bumper back off when I had some time to work on it again. It would have moved some trailers around the yard just fine how it was, but if I bury it in a mud hole somewhere and need to be pulled out of it, There's no way on earth I would trust it to move the 5000 LB ++ Durango out of a hole without tweaking the skinny little frame rails it was attached to. So after thinking about it for a while, this is what I came up with.
I ground down where the old round tubing had attached to the brackets to make room for my forward facing braces. They are once again made of 2" OD square tubing. They're welded to the outsides of the crossmember with 2 bolts into the mounting brackets on each side. These 4 bolts will be upgraded to either 5/8 or 3/4 bolts because this is where all of the real strength and support comes from.
Now I took all of the paint and rust off so that I could prime and paint. It all dried overnight, and is back on the truck today. So these are the final pictures of it all painted and mounted up.
I will put the bumper back on later and post another picture or two once that's done.
But that's all for now, Hope you guys liked it. It wasn't too hard to do.
I would have designed it so the plastic bumper fit right. It makes the whole thing look buggered.
For a first attempt at one on this forum though its appreciated. I'm going to build one into the bumper when I fix my red durango now that the shelby is almost done.
For a first attempt at one on this forum though its appreciated. I'm going to build one into the bumper when I fix my red durango now that the shelby is almost done.
Thanks. I could've done a better job of it I'm sure as jeeperdon pointed out. But this the first actual metal project I've ever done so I didn't think it was too bad. It serves it's purpose


 09-18-2016, 01:00 PM