

Rear Axel Speed Sensor / Rear ABS Sensor DIY
#1
 11-10-2009, 12:08 PM

This will cover the instructions on how to replace the Speed Sensor/ABS Sensor located on the top of the rear differential. Most common side effect of no Speedometer and ABS illuminated light in the instrument cluster on the dash board. This is a very easy repair.
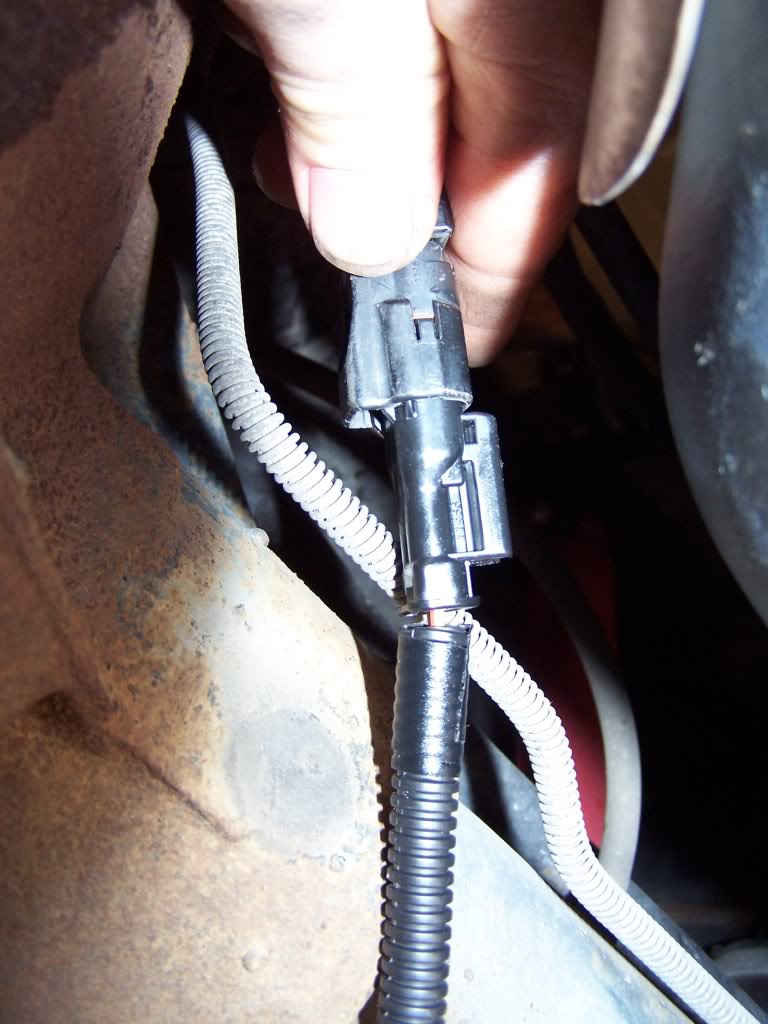
Disconnect the upper electrical harness if the new sensor comes with a new extension. If the sensor did not come with on (as mine did) then disconnect the harness at the sensor.


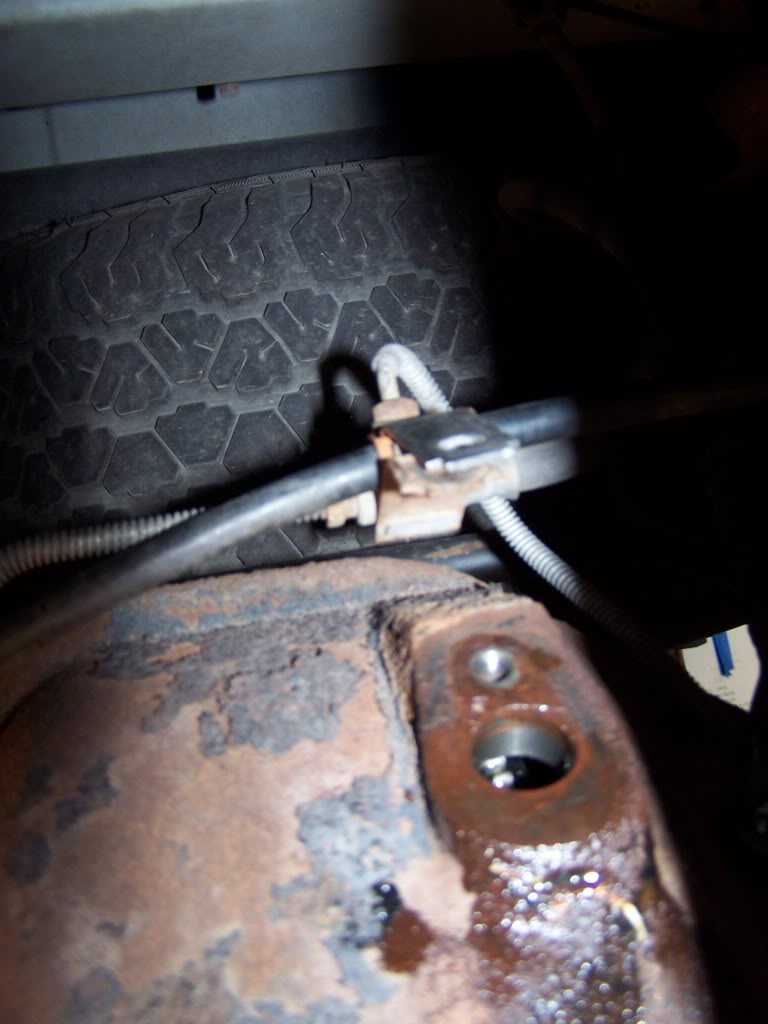
2. Using a 1/2" deep socket remove the nut holding the sensor in.
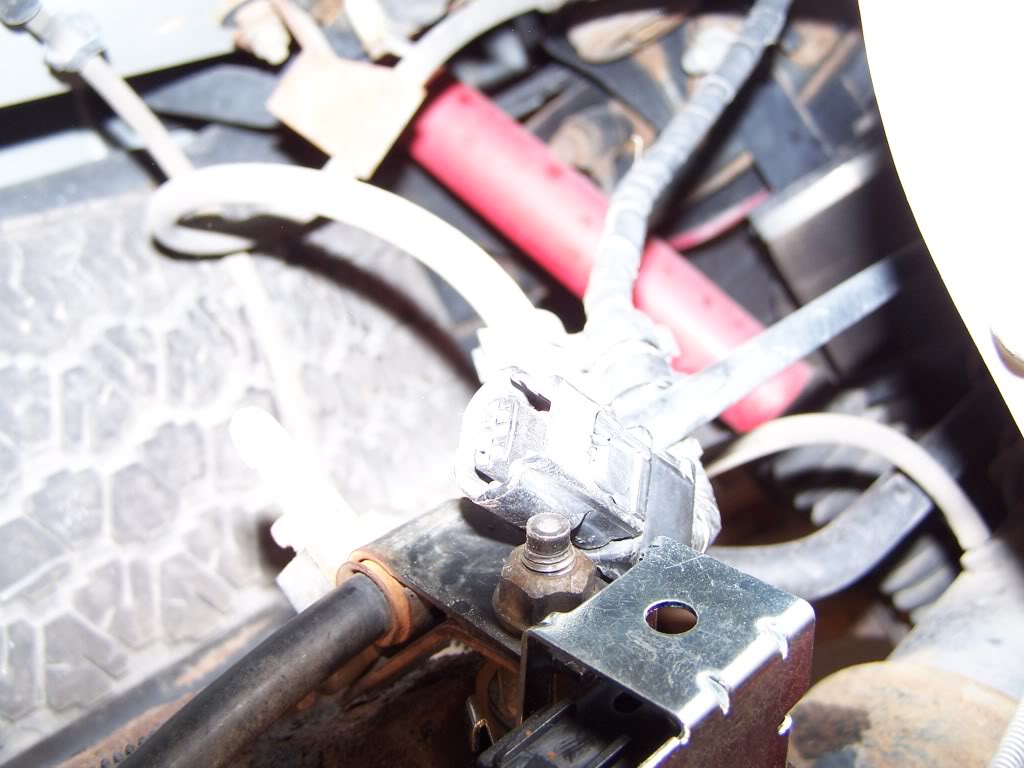

3. Next pull out the emergency brake cable clasp and brake line clasp out of the sensor cover. These are tabbed so grasp the back side of them and pull up slightly then pull the front side out. Tip the clasps out of the way (straight up).
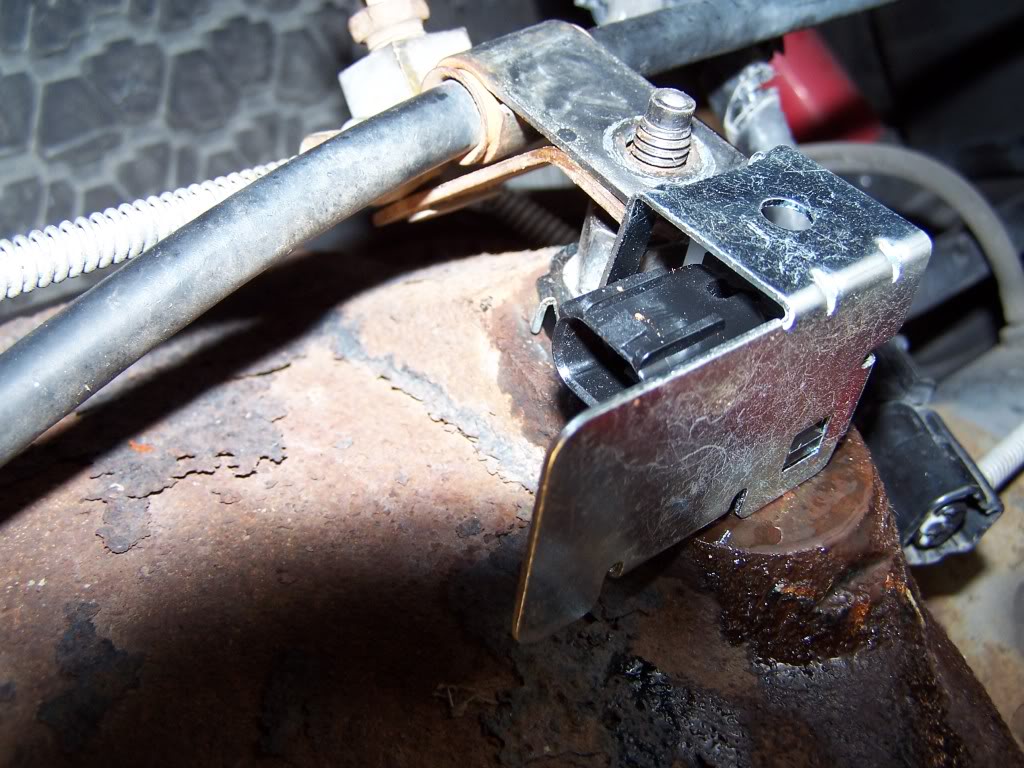

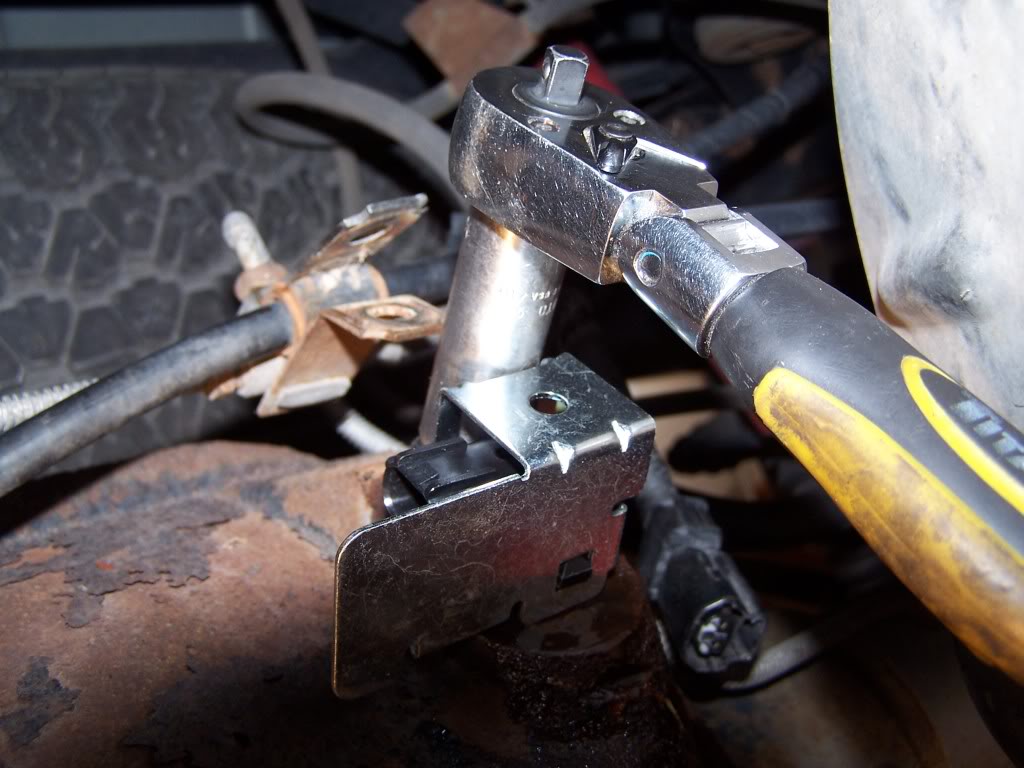
4. Place a 9/16" deep socket down the bolt shaft to contact the 2 sided bolt nut at the bottom. Remove this bolt.
5. Pull the sensor cover off the sensor. On the front of the sensor there is a little tab so pull slightly while removing.


6. Clean loose dirt and rust off area before removing the sensor so nothing falls into the differential contaminating the fluid.
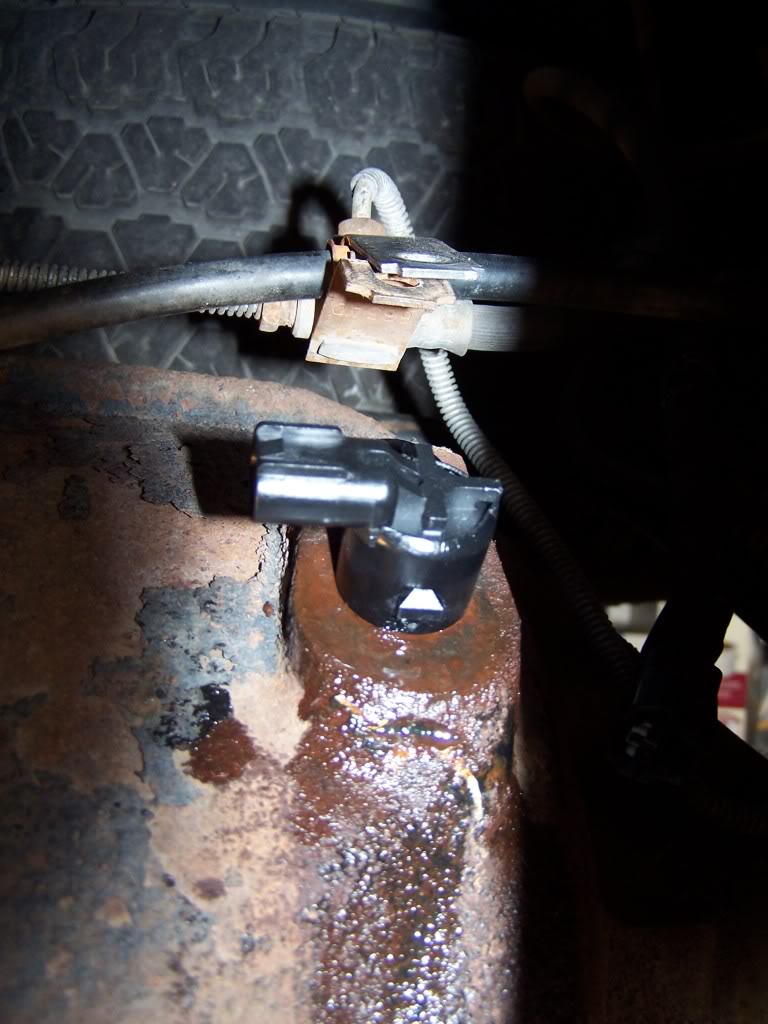
7. Twist the sensor and then wiggle it back and forth while pulling it straight up.
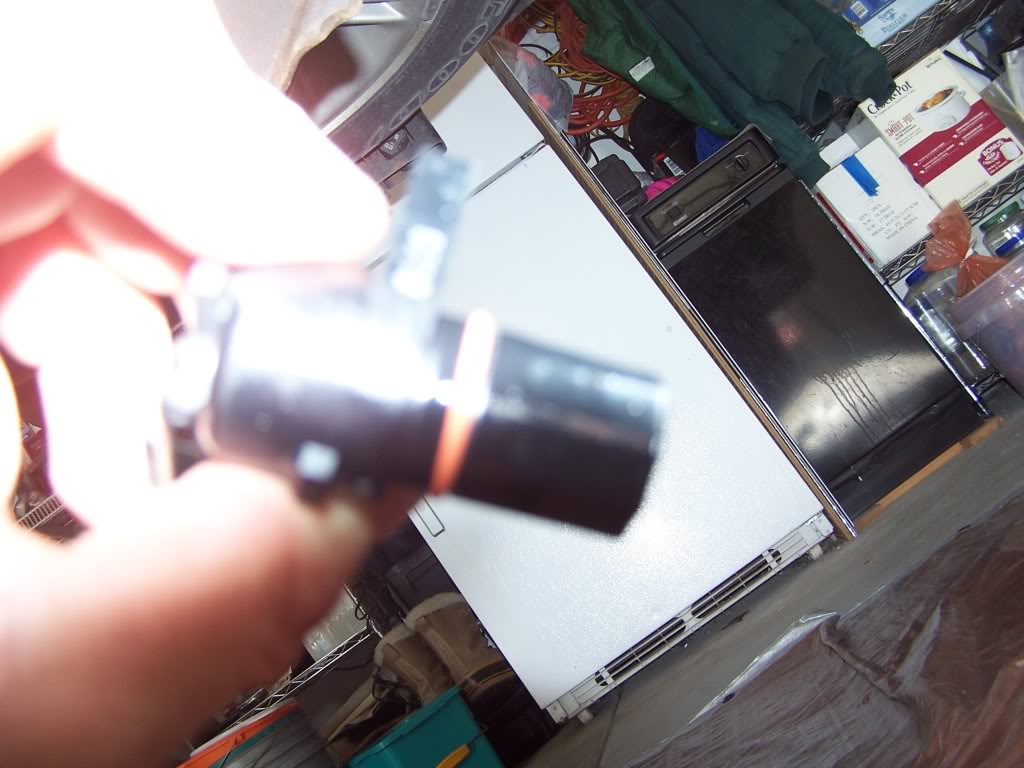
Now it's reinstall time. Remember to lubricate the seal on the new sensor with fresh gear oil and lubricate the whole in the top of the differential before installation.
Installation is in reverse order and just snug the bolt to about 35 lbs and nut to about 25 lbs.
Disconnect the upper electrical harness if the new sensor comes with a new extension. If the sensor did not come with on (as mine did) then disconnect the harness at the sensor.
2. Using a 1/2" deep socket remove the nut holding the sensor in.
3. Next pull out the emergency brake cable clasp and brake line clasp out of the sensor cover. These are tabbed so grasp the back side of them and pull up slightly then pull the front side out. Tip the clasps out of the way (straight up).
4. Place a 9/16" deep socket down the bolt shaft to contact the 2 sided bolt nut at the bottom. Remove this bolt.
5. Pull the sensor cover off the sensor. On the front of the sensor there is a little tab so pull slightly while removing.
6. Clean loose dirt and rust off area before removing the sensor so nothing falls into the differential contaminating the fluid.
7. Twist the sensor and then wiggle it back and forth while pulling it straight up.
Now it's reinstall time. Remember to lubricate the seal on the new sensor with fresh gear oil and lubricate the whole in the top of the differential before installation.
Installation is in reverse order and just snug the bolt to about 35 lbs and nut to about 25 lbs.
Last edited by hydrashocker; 11-10-2009 at 12:47 PM.
#2
03-24-2010, 09:04 PM

#6
03-25-2010, 11:49 AM
Professional
Join Date: May 2009
Location: Sheboygan, WI
Posts: 105
Likes: 0
Received 0 Likes
on
0 Posts
#7
03-25-2010, 04:45 PM
Trending Topics
#10
03-25-2010, 10:53 PM
Champion