

 08-05-2015, 01:05 PM
Last edit by: IB Advertising
See related guides and technical advice from our community experts:
Browse all: Brakes
- Dodge Ram 2nd How to Replace Master Cylinder
Step by step instructions for the do-it-yourself repairs.
Browse all: Brakes

DIY Power Brake Booster Replacement
#1
11-22-2012, 12:15 PM

Join Date: Sep 2012
Location: Wade NC
Posts: 231
Likes: 0
Received 0 Likes
on
0 Posts
This is a DIY Power Brake Booster (PBB) Replacement on a 97 Ram 1500. Mine was hissing under the dash, and needed to be replaced. What is nice on this one is there is no need for complete disassemble of the master cylinder.
Tools needed,
15 mm socket
3/8 drive ratchet
2" & 8" extension
Flat screw driver
Pliers
Time: A leisure hour.
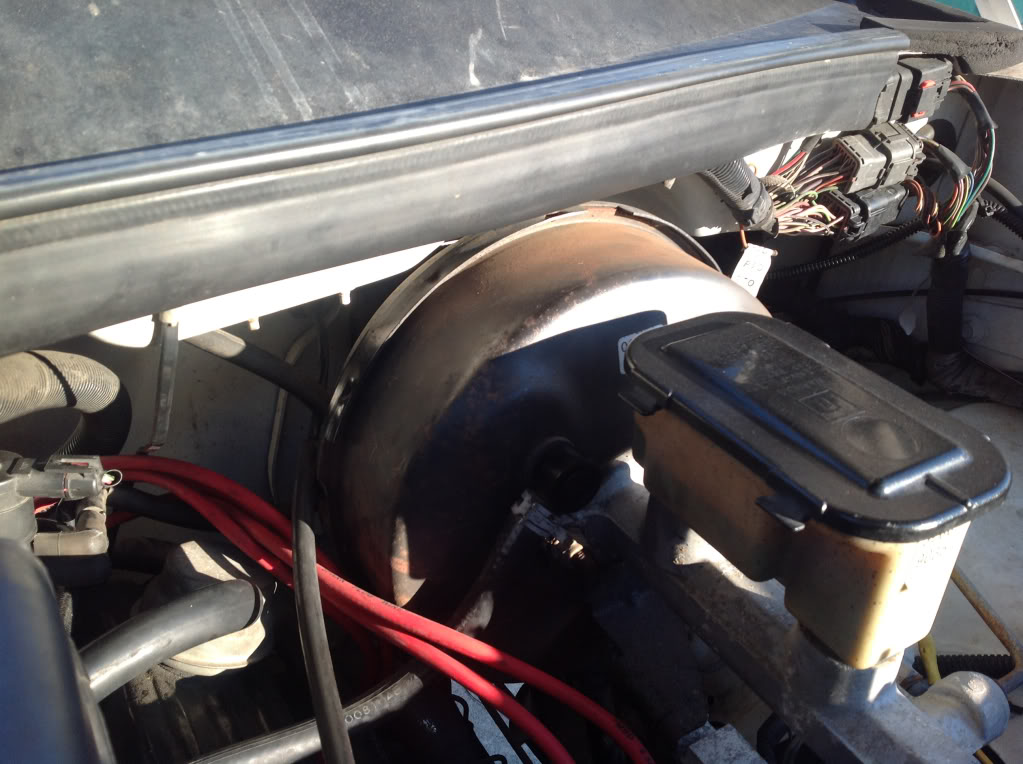
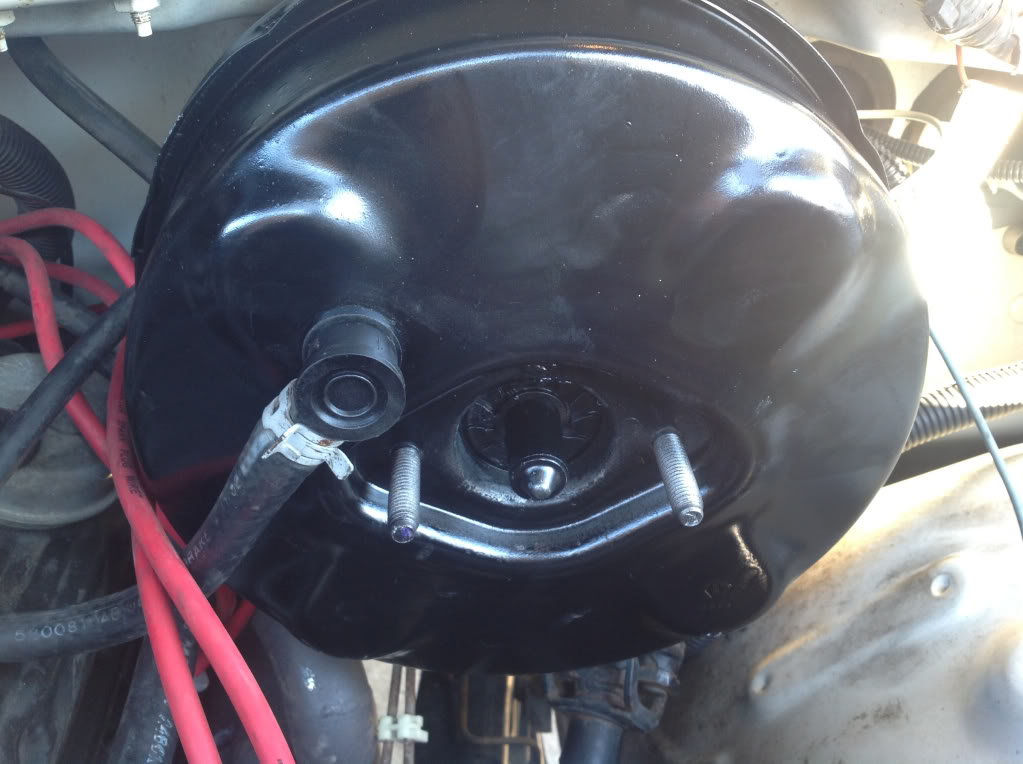
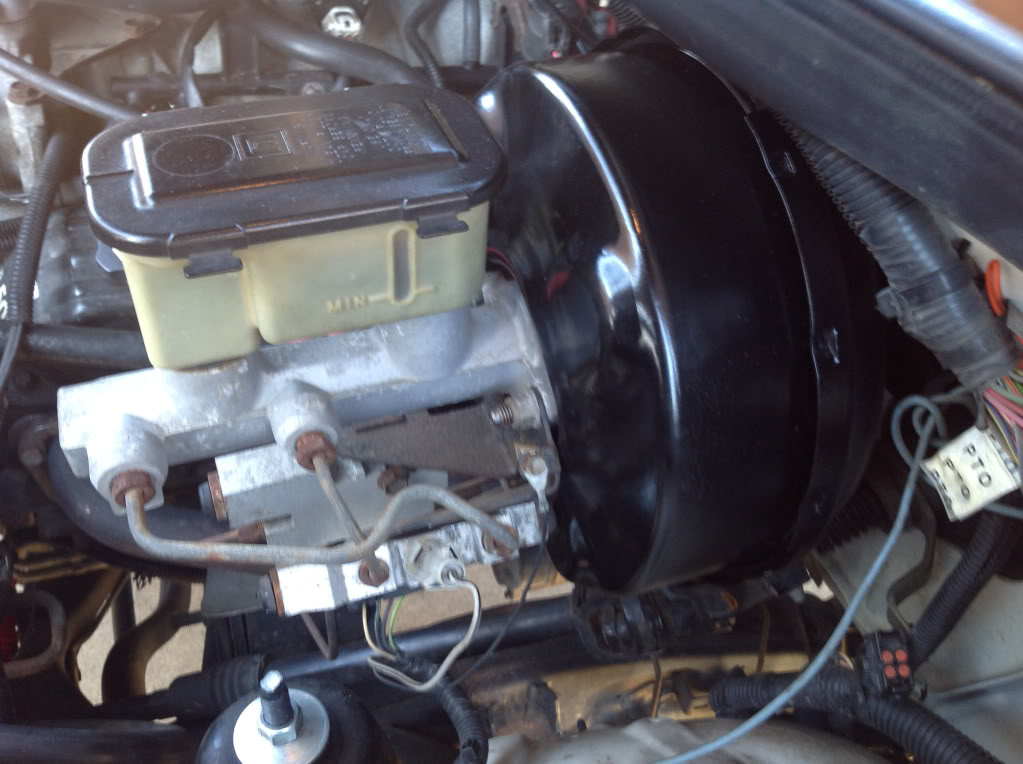
The PBB it the large drum like contraption directly behind the brake fluid reservoir and master cylinder. It bolts through the firewall with 4 studs. A rod attached to it goes through the firewall and is attached to the brake pedal. As with everything....disconnect the negative battery terminal.
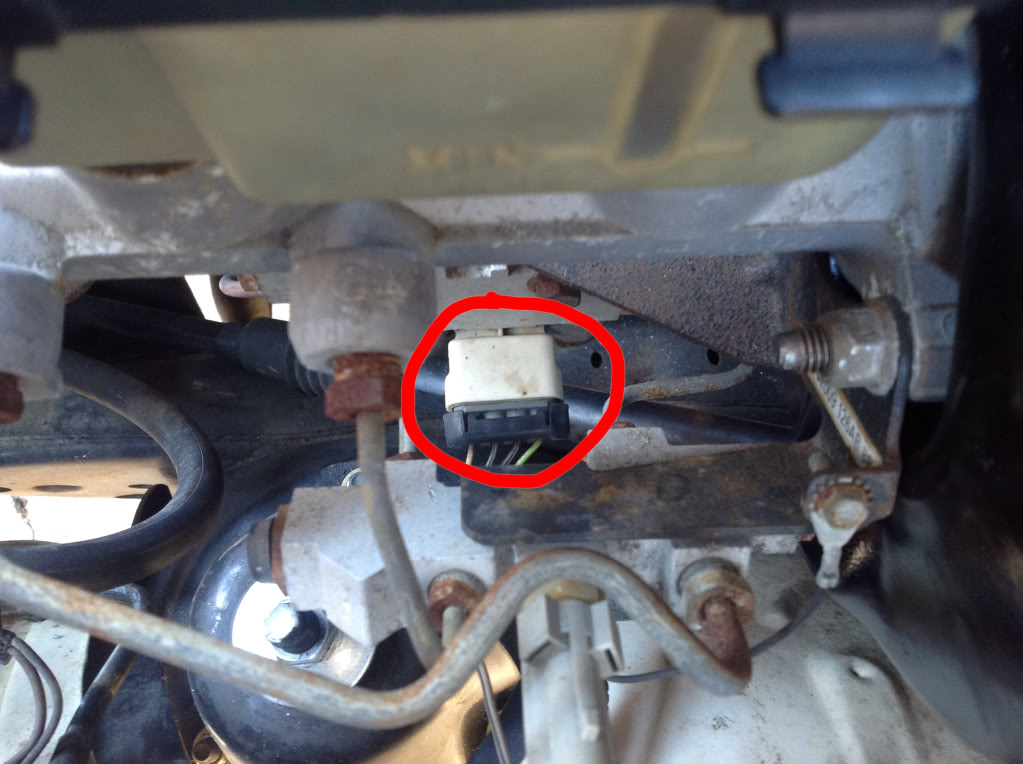
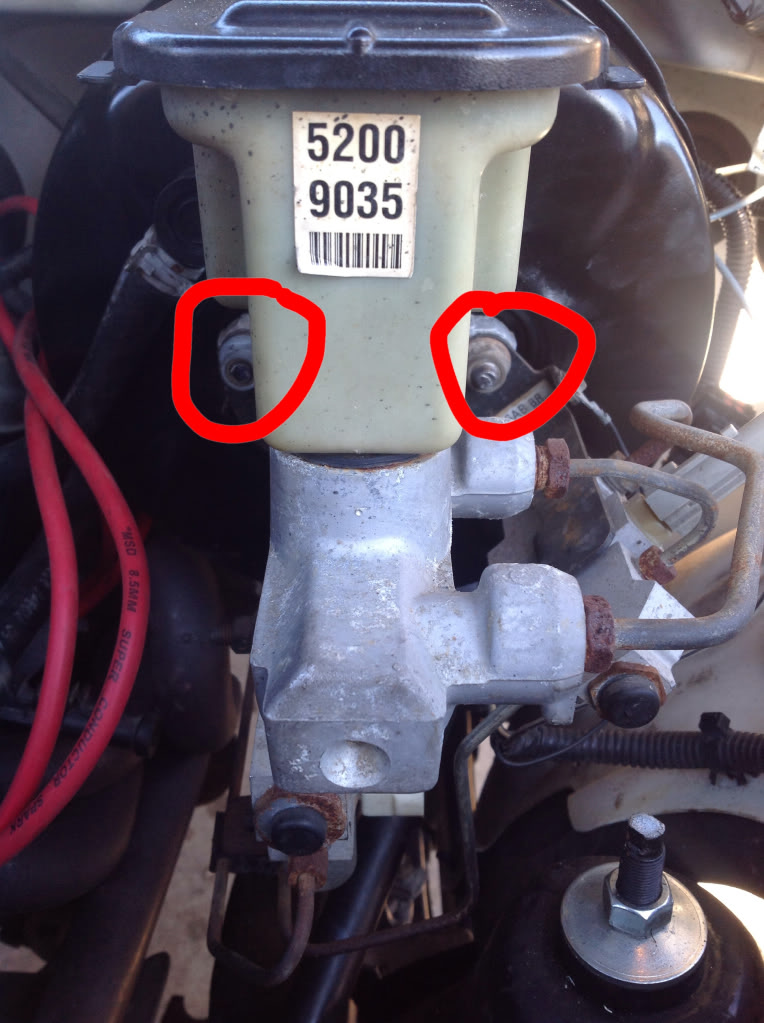
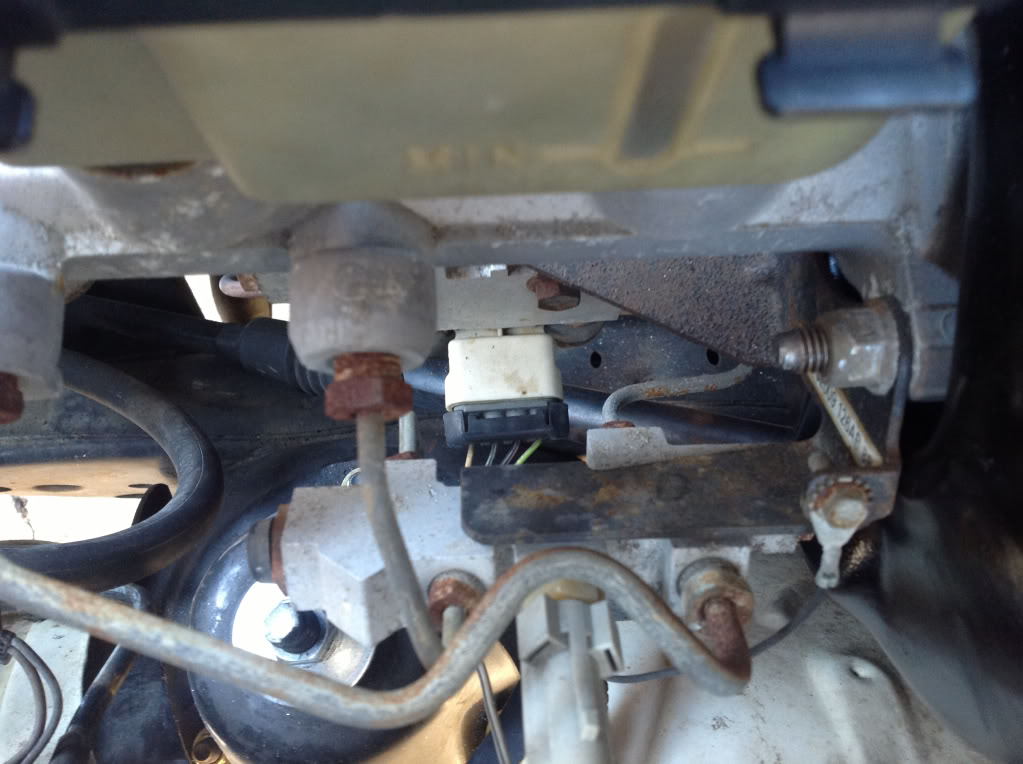
Start by disconnecting the electrical connection depicted then proceed to remove the 2 nuts that hold the brake fluid reservoir and master cylinder
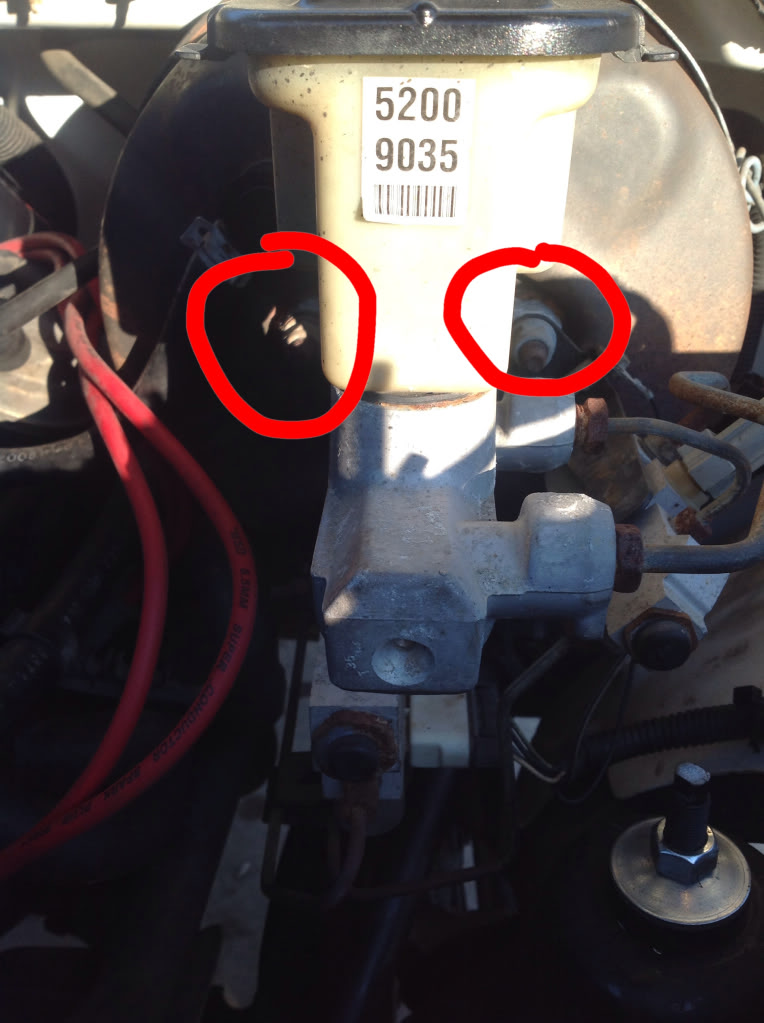
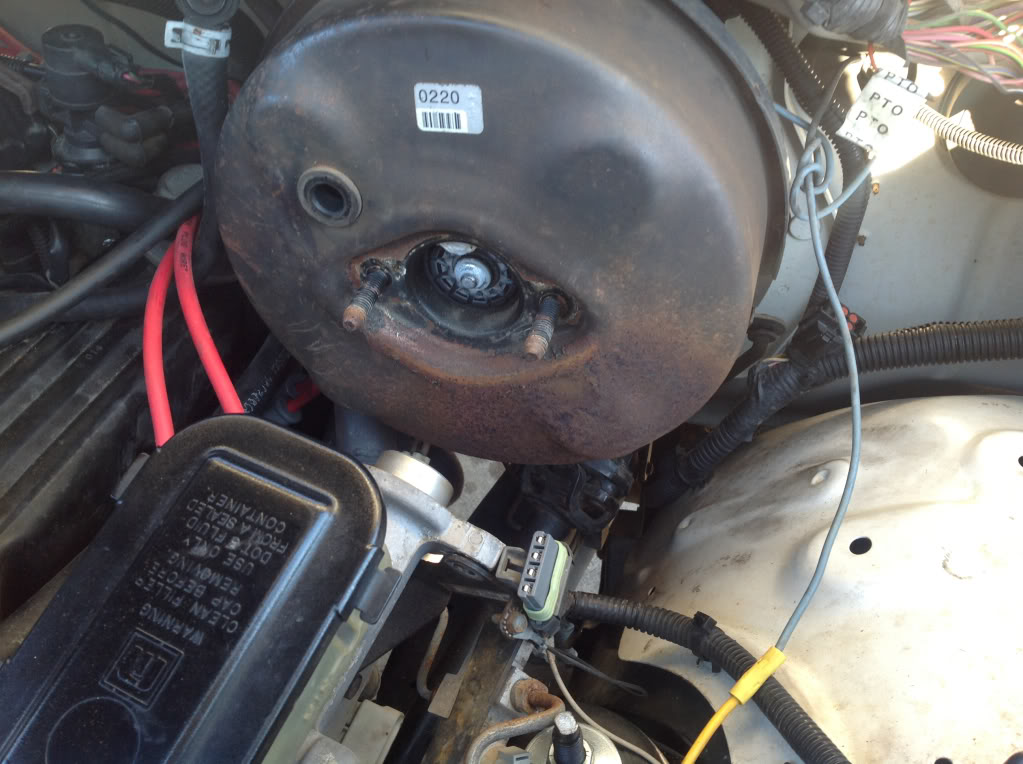
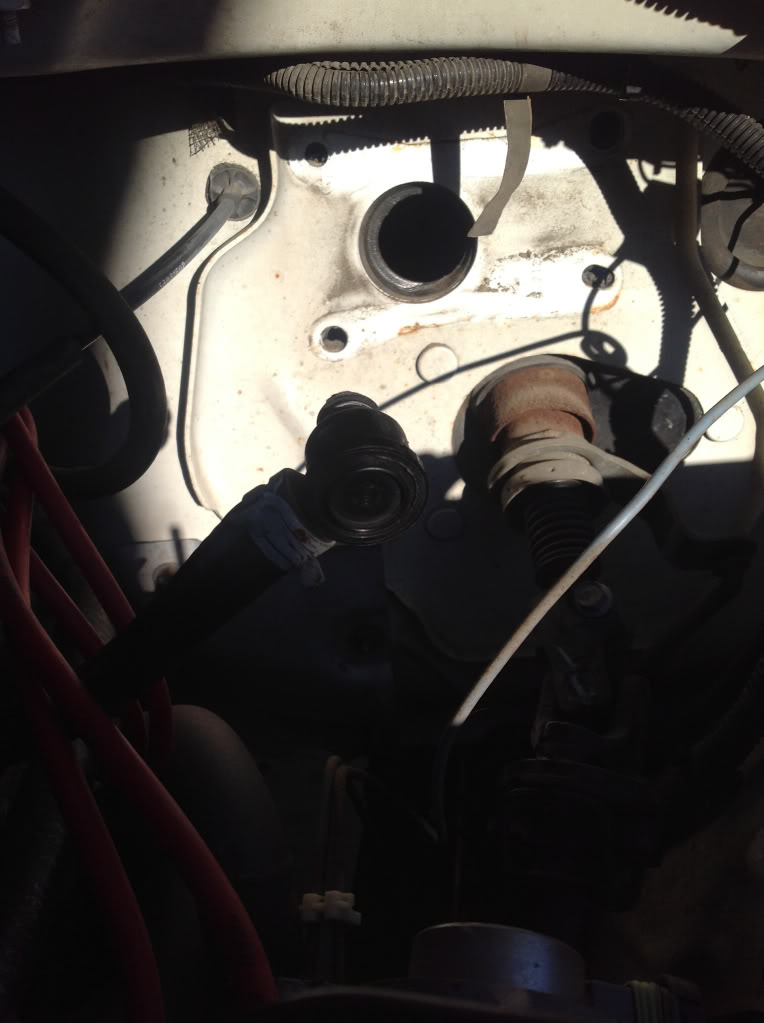
The brake reservoir and master cylinder can now be carefully pull forward to clear the mounting studs, allow it to hang down out of the way, without crimping any of the brake lines. Remove the vacuum valve.
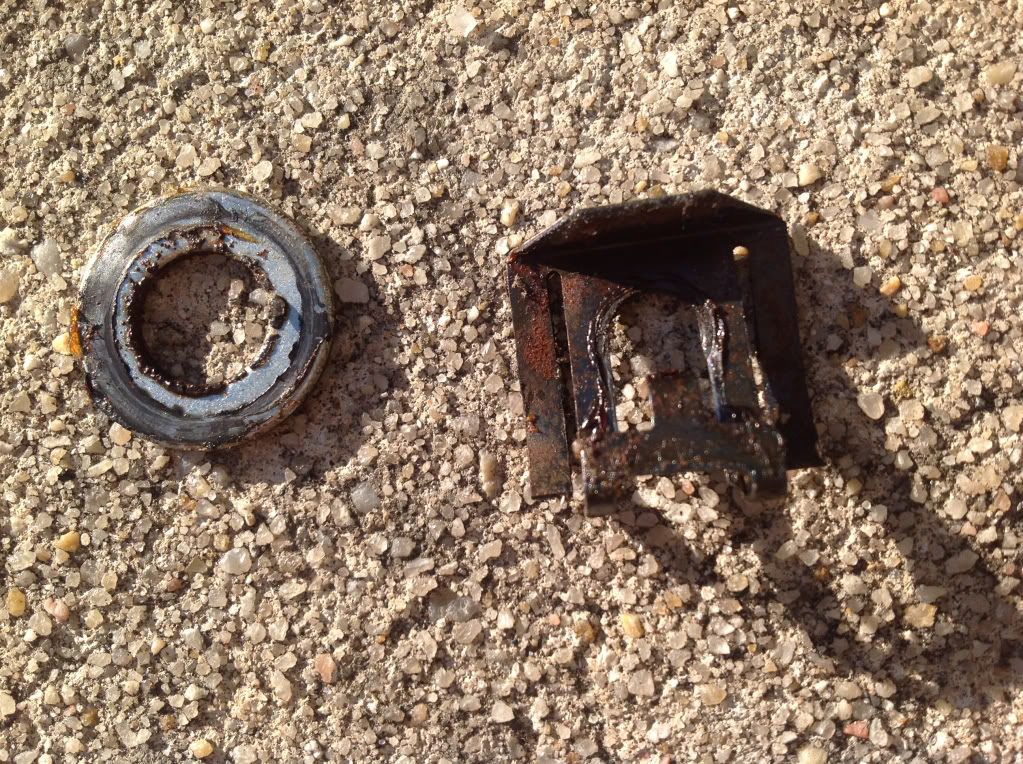
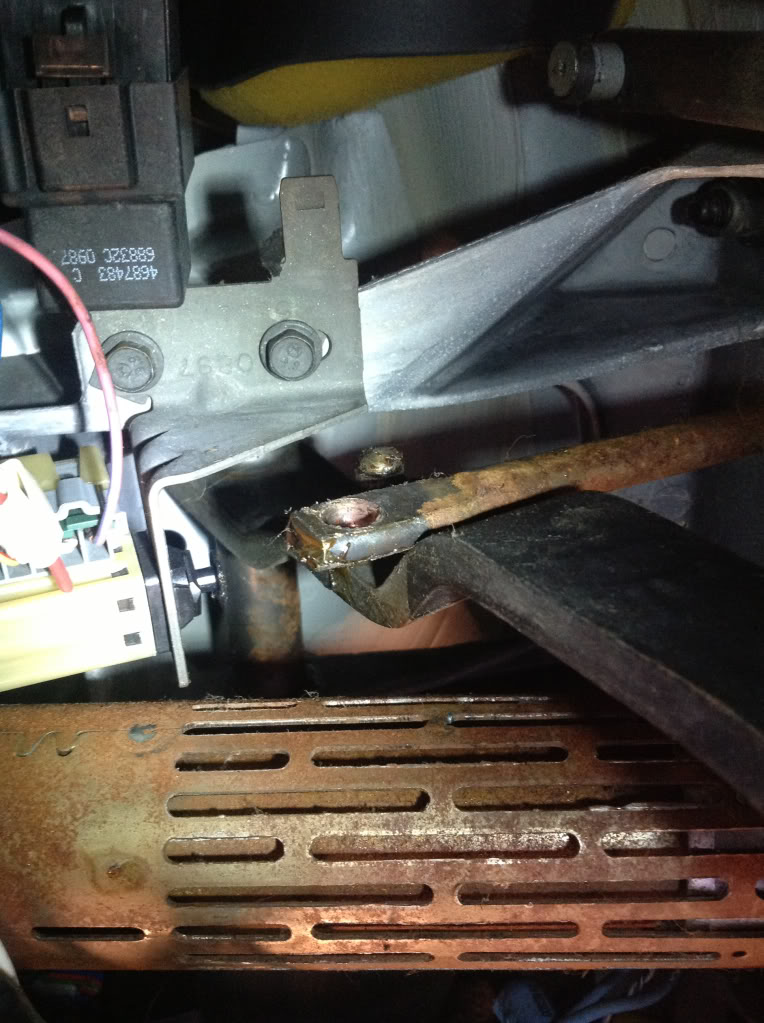
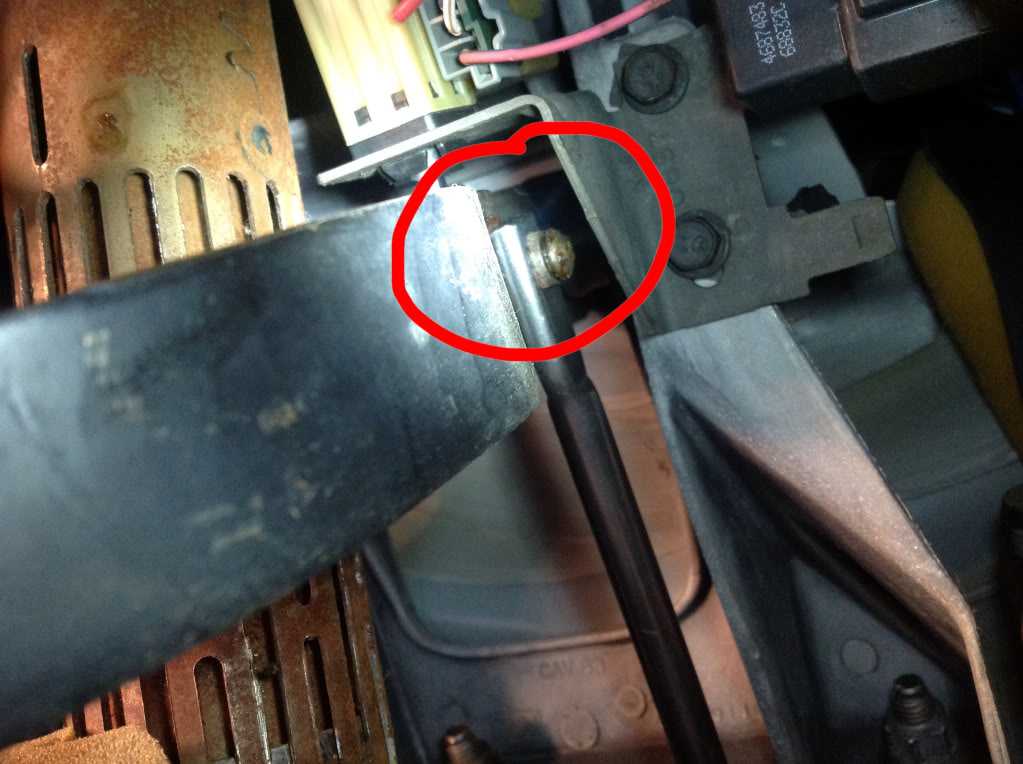
Now from the inside of the cab under the dash, by the steering column. Locate the rod that comes through the firewall and attaches to the brake pedal. At the point of attachment is a metal clip and washer, that will need to be removed to remove the rod.
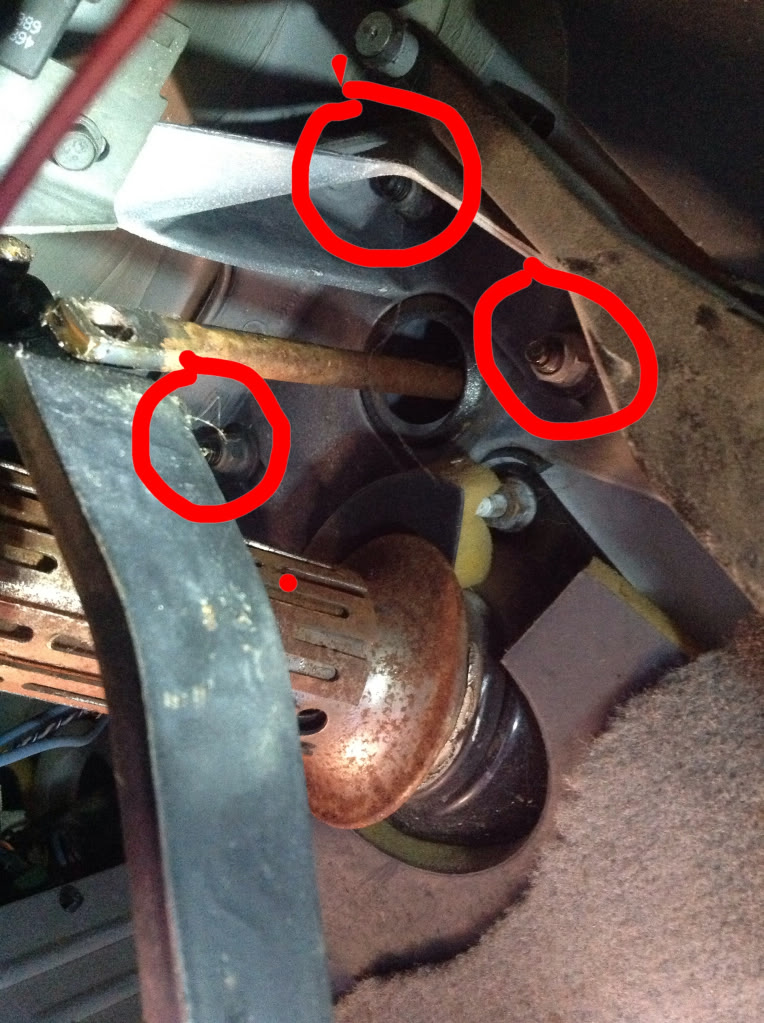
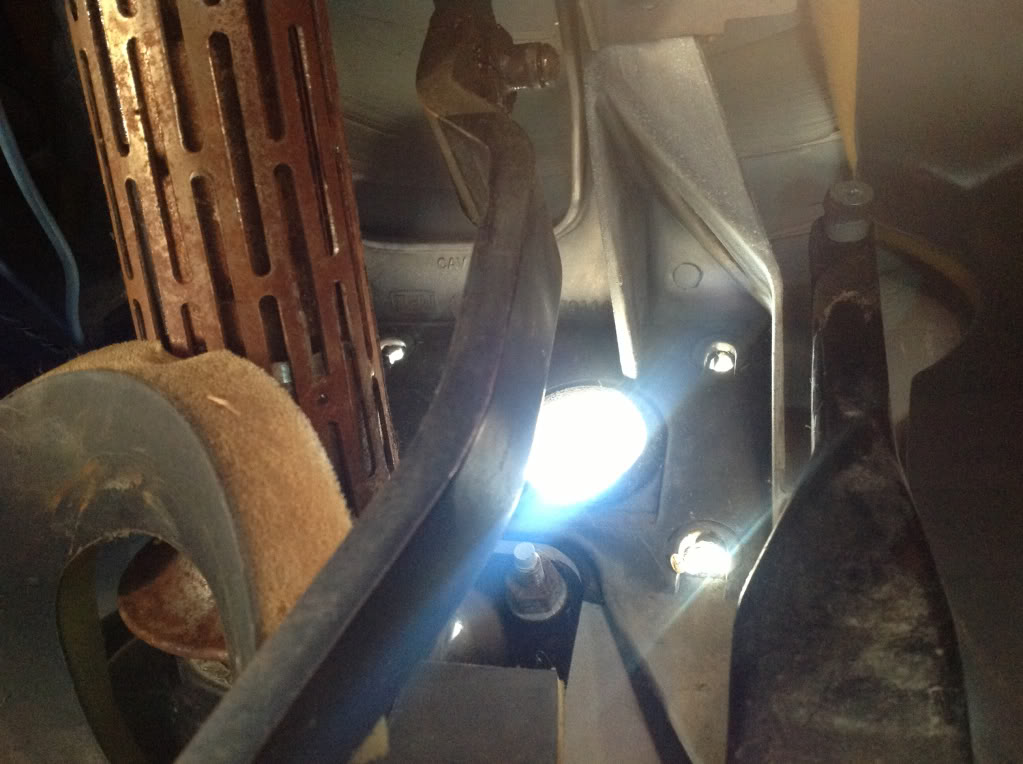
Now locate the 4 nuts inside the cab, on the firewall above the steering column. Here's 3 of the 4, the forth is where the dot is behind steering column. Remove these nuts.
Now carefully pull the PBB away from the firewall, you may need to manipulate the brake reservoir to clear it.
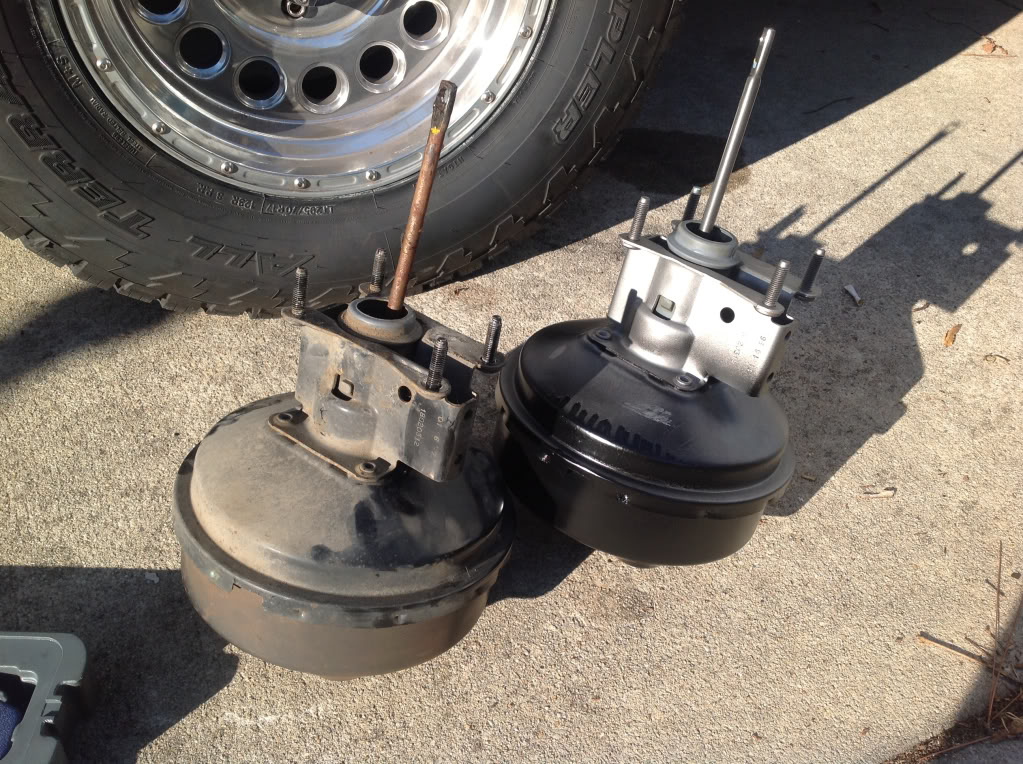
I compared part numbers to insure I had the right one, most new ones are remanufactured, so dates will differ, this one was from, 96 originally.
Put the new one in the same way you took the old one out. Connect the rod to the brake pedal, and install the 4 nuts to the studs, tighten until tight.
My Reman new one came with a new vacuum valve, so install the line to that.

Now carefully pull the brake fluid reservoir, back in place on reinstall the nuts, while holding it in place, there will be slight spring tension. Tighten nuts until tight.
Reconnect the electrical connector. Check brake fluid level. Reconnect battery, start vehicle and check brake pedal for correct firmness. Test drive.
Tools needed,
15 mm socket
3/8 drive ratchet
2" & 8" extension
Flat screw driver
Pliers
Time: A leisure hour.
The PBB it the large drum like contraption directly behind the brake fluid reservoir and master cylinder. It bolts through the firewall with 4 studs. A rod attached to it goes through the firewall and is attached to the brake pedal. As with everything....disconnect the negative battery terminal.
Start by disconnecting the electrical connection depicted then proceed to remove the 2 nuts that hold the brake fluid reservoir and master cylinder
The brake reservoir and master cylinder can now be carefully pull forward to clear the mounting studs, allow it to hang down out of the way, without crimping any of the brake lines. Remove the vacuum valve.
Now from the inside of the cab under the dash, by the steering column. Locate the rod that comes through the firewall and attaches to the brake pedal. At the point of attachment is a metal clip and washer, that will need to be removed to remove the rod.
Now locate the 4 nuts inside the cab, on the firewall above the steering column. Here's 3 of the 4, the forth is where the dot is behind steering column. Remove these nuts.
Now carefully pull the PBB away from the firewall, you may need to manipulate the brake reservoir to clear it.
I compared part numbers to insure I had the right one, most new ones are remanufactured, so dates will differ, this one was from, 96 originally.
Put the new one in the same way you took the old one out. Connect the rod to the brake pedal, and install the 4 nuts to the studs, tighten until tight.
My Reman new one came with a new vacuum valve, so install the line to that.
Now carefully pull the brake fluid reservoir, back in place on reinstall the nuts, while holding it in place, there will be slight spring tension. Tighten nuts until tight.
Reconnect the electrical connector. Check brake fluid level. Reconnect battery, start vehicle and check brake pedal for correct firmness. Test drive.
Last edited by Halojm; 11-22-2012 at 12:18 PM.