
How To Change a Camshaft Position Sensor
#1
 04-16-2012, 07:20 PM

Join Date: Feb 2011
Posts: 409
Likes: 0
Received 0 Likes
on
0 Posts
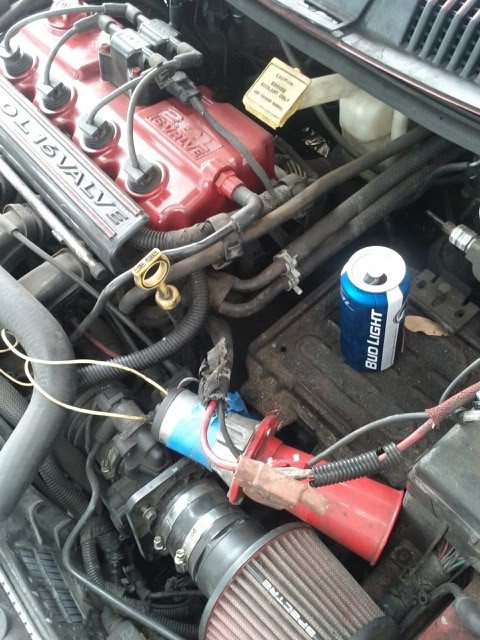
My Cam Position Sensor took a dump on me this morning on the way to work so I towed it home and put in a new sensor. Since this seems to be a common issue I figured I'd post up a how to. I will also include the part number from Autozone, Advance, and Napa. All will be for the 2.0 SOHC.
Time to complete: Between 30 and 60 minutes depending on the car and you.
Tools needed:
10mm socket- Battery tray
13mm socket- Battery tray
8mm socket- Cam sensor
1/4" ratchet and extensions- Cam sensor removal
3/8" ratchet and extensions- Battery tray removal
Pliers- Hose clamps if stock or stock style
Flat head screwdriver- Removing the connector
Part Numbers:
Napa:
2000- MPE CSS702SB or ECH CSS702
2001- MPE CSS705SB or ECH CSS705
2002- MPE CSS705SB or ECH CSS705
2003- MPE CSS705SB or ECH CSS705
2004- MPE CSS705SB or ECH CSS705
2005- MPE CSS705SB or ECH CSS705
Autozone:
2000- SU3020
2001- SU3020
2002- SU3020
2003- SU3020
2004- SU3020
2005- SU3020
Advance:
2000- CSS34
2001- CSS34
2002- CSS34
2003- CSS34
2004- CSS34
2005- CSS34
First step is to remove the battery. Beer is optional but preferred, even at 9:30 in the morning.
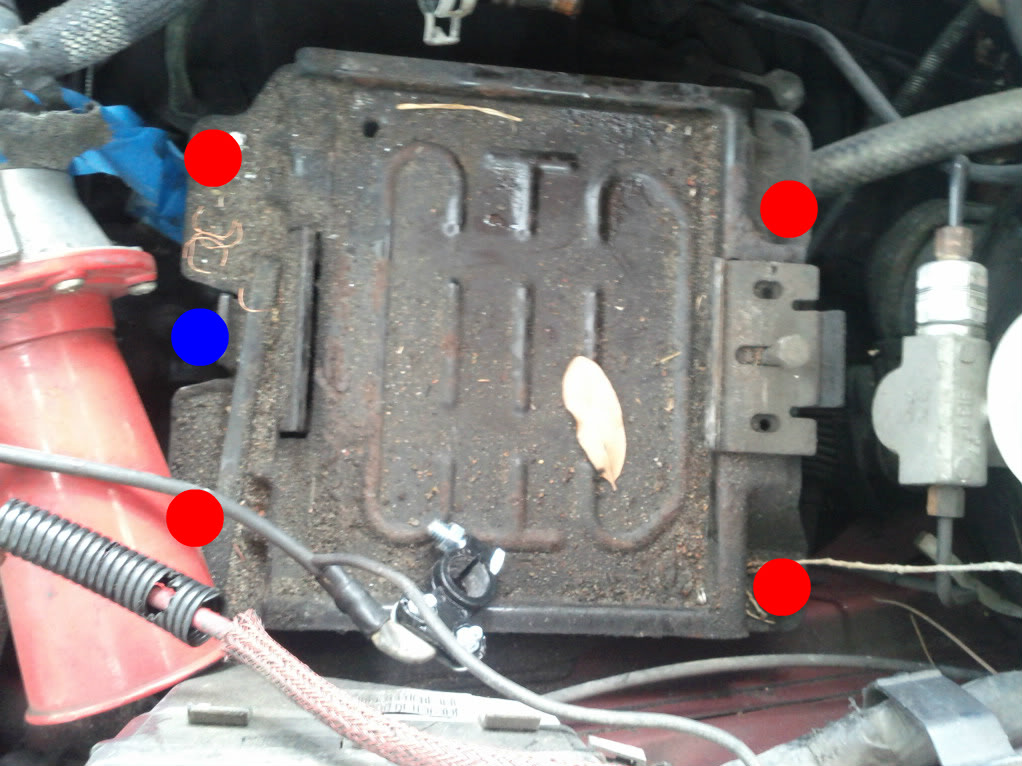
Next thing to do that will help tremendously is to take off the battery tray. The red dots are 10mm and the blue dot at the front is a 13mm.
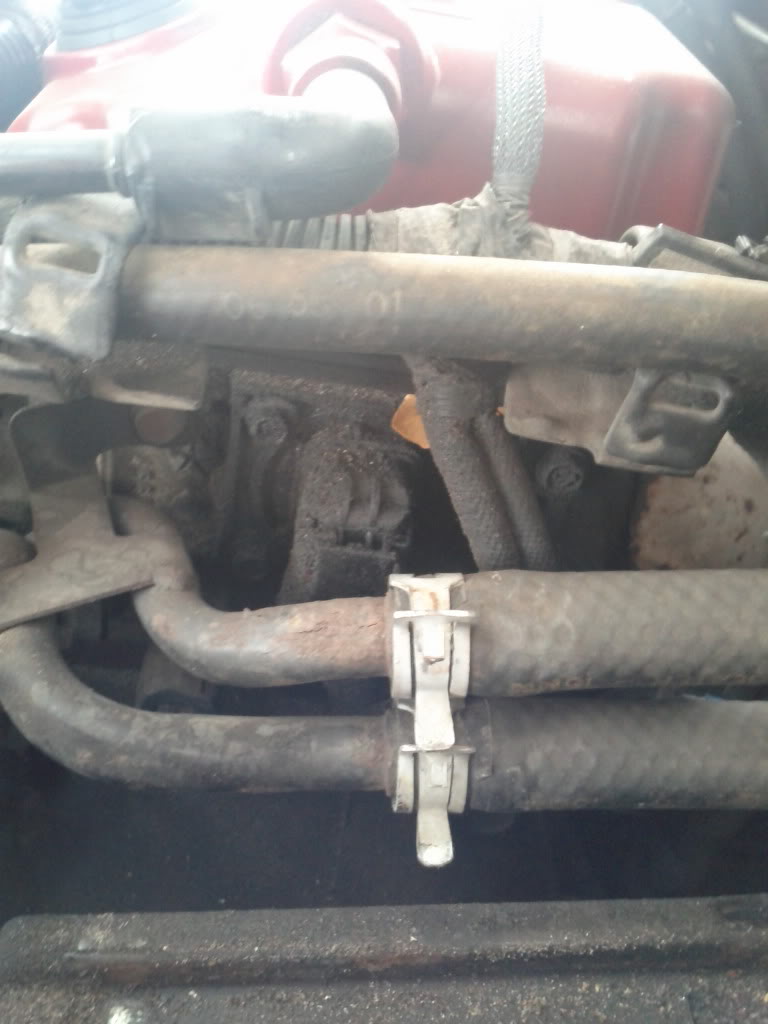
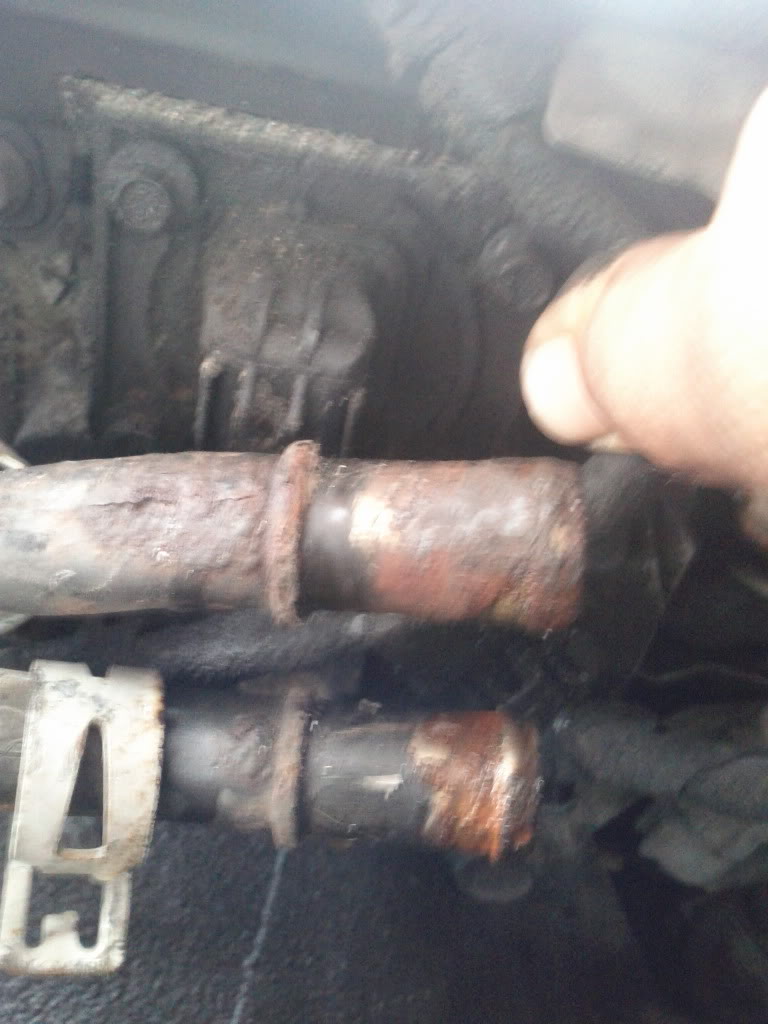
After that remove the 2 heater hoses. As you can see they're in the way. I took this pic with the battery tray still attached so you can see how little space there is to work with.
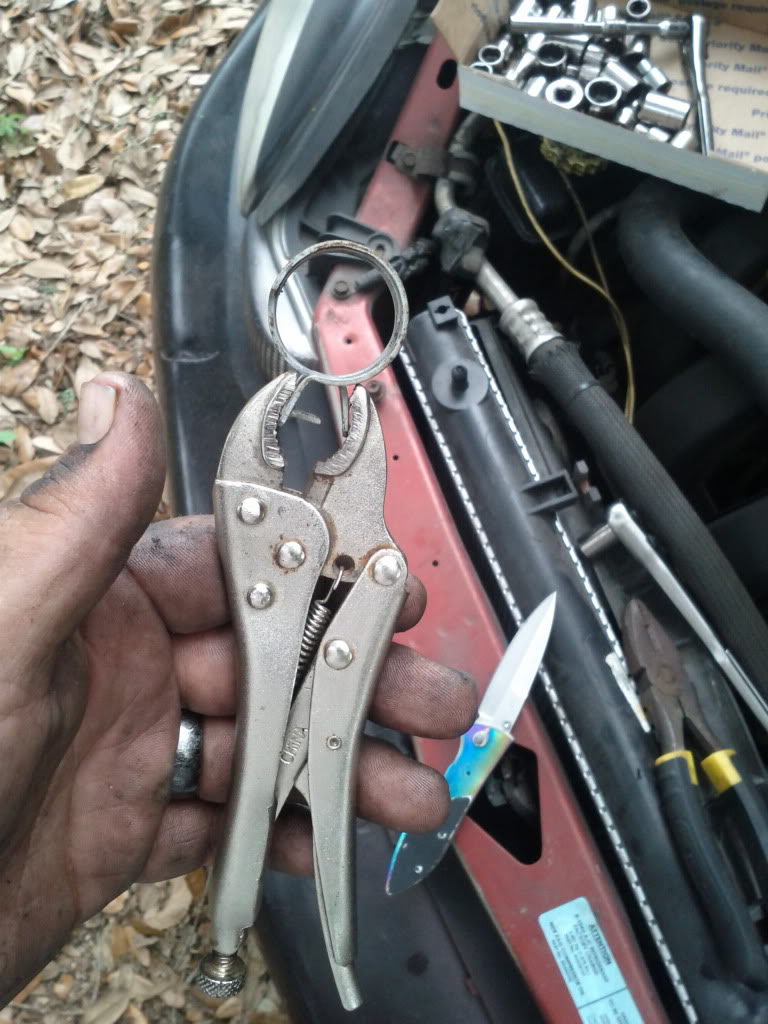
Vise-grips work awesome for getting those pesky clamps off and holding them open for you:
As you can see, without the hoses and tray there's a little more room to work with.
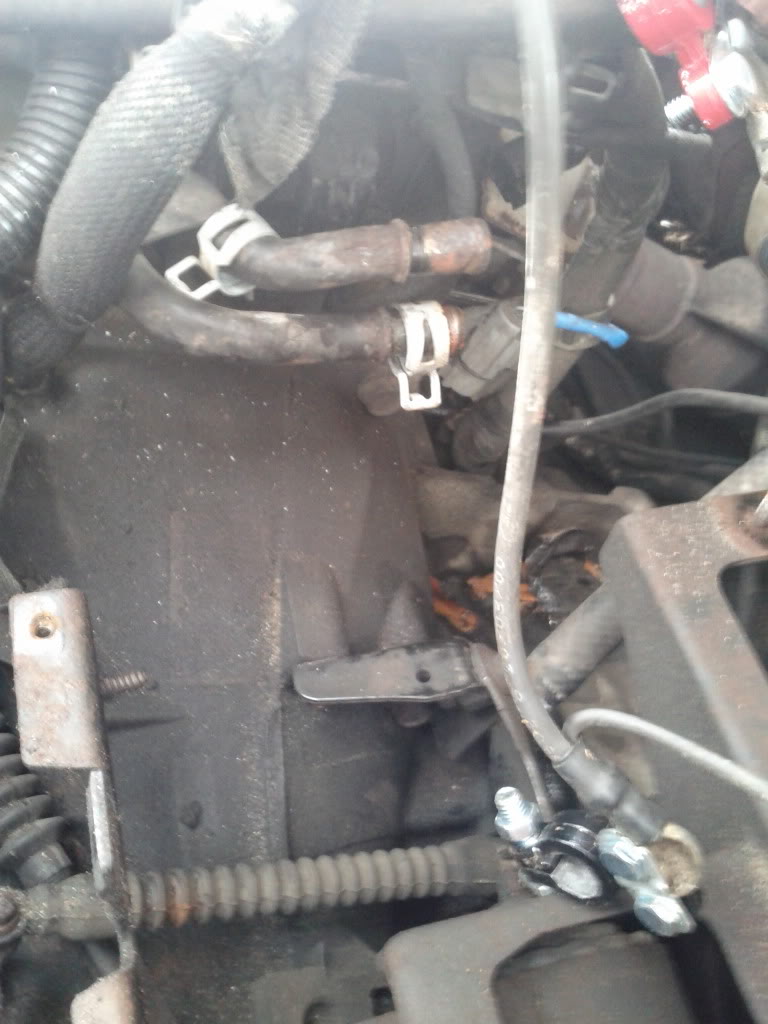
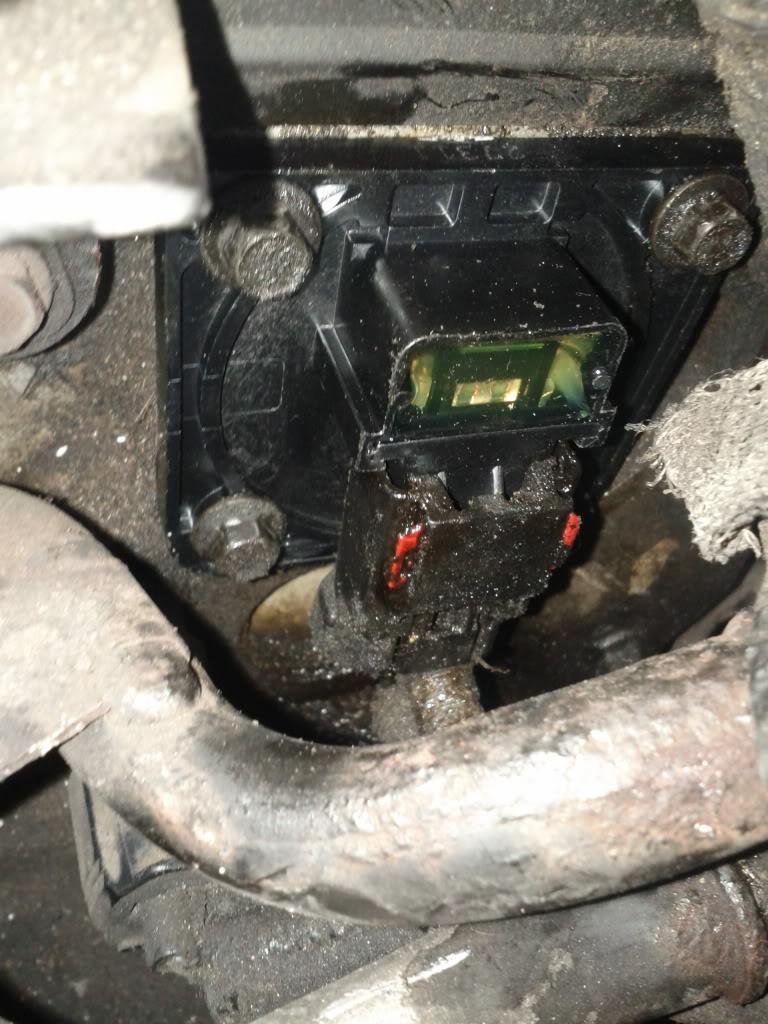
I took the connector off before taking off the hoses and battery tray but looking back it's smarter to do the connector after so coolant doesn't splash in there. You may have to wipe off some grease to see a little red piece in the connector. With your flat head screwdriver, push the front end(facing front of car) in until the other side pops out like in the picture. Then slide the connector off the sensor.
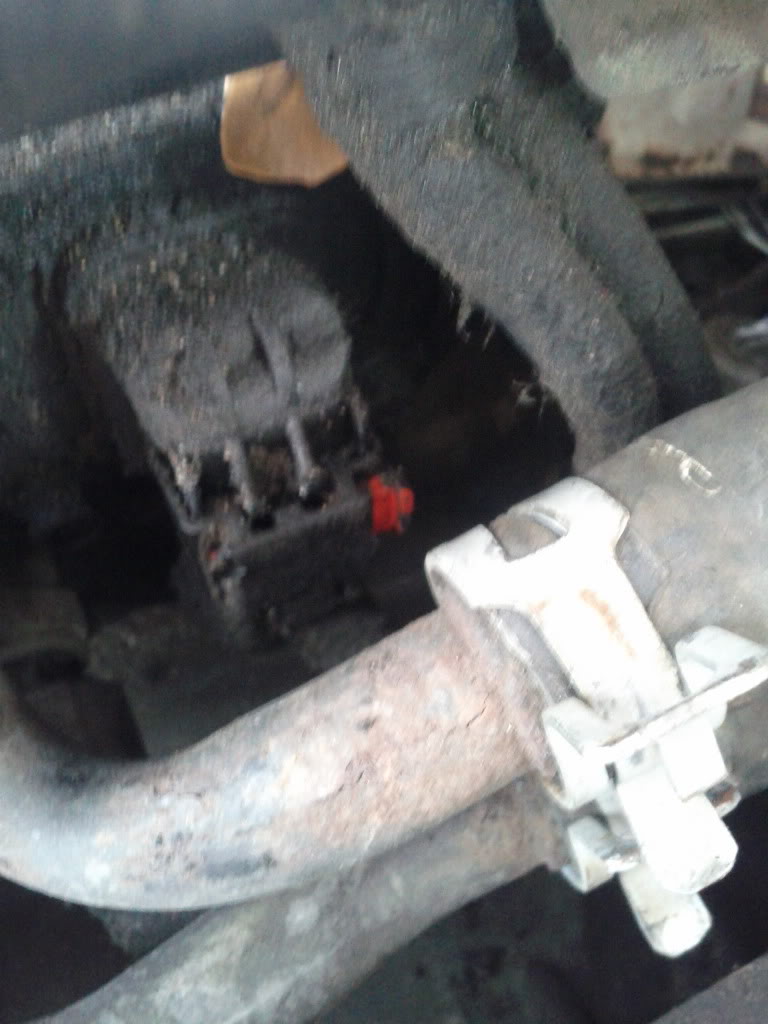
Remove the 4 bolts from the sensor with the 8mm socket. It gets kind of tricky because or how things are positioned. I used my extensions for the top ones and used a short socket with my 1/4" ratchet and got the bottom bolts from underneath. You'll be glad you took out the battery tray for this part.
After you pull the old sensor off, this is what you should see.
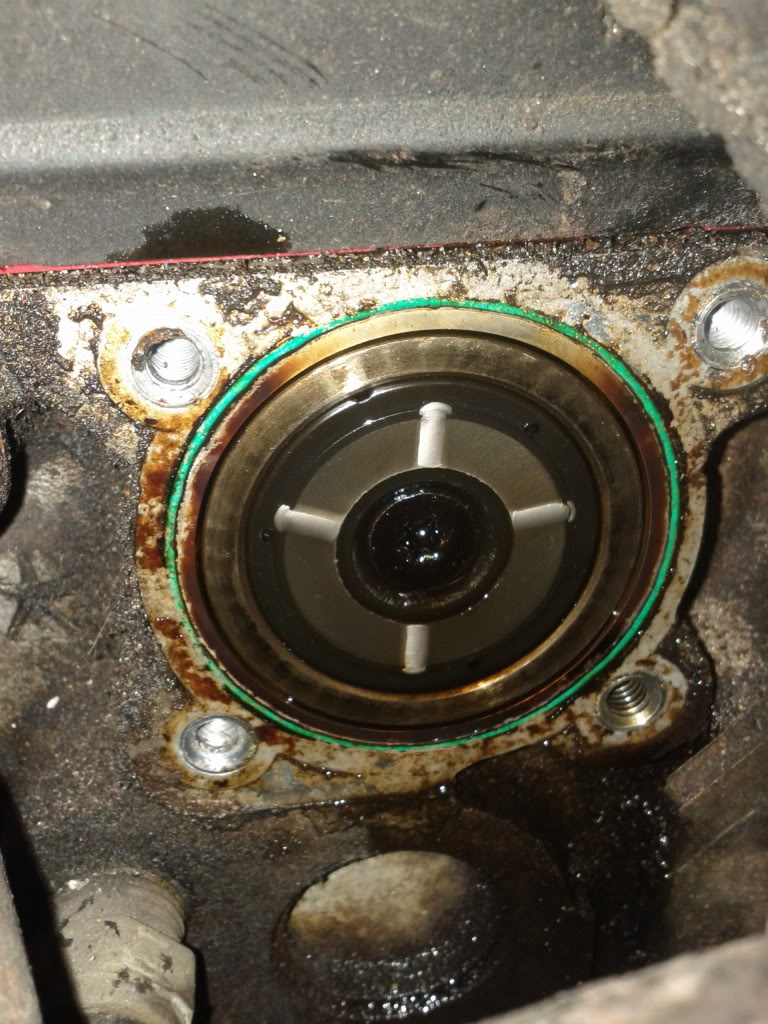
Put the new sensor on and put everything back together.
Time to complete: Between 30 and 60 minutes depending on the car and you.
Tools needed:
10mm socket- Battery tray
13mm socket- Battery tray
8mm socket- Cam sensor
1/4" ratchet and extensions- Cam sensor removal
3/8" ratchet and extensions- Battery tray removal
Pliers- Hose clamps if stock or stock style
Flat head screwdriver- Removing the connector
Part Numbers:
Napa:
2000- MPE CSS702SB or ECH CSS702
2001- MPE CSS705SB or ECH CSS705
2002- MPE CSS705SB or ECH CSS705
2003- MPE CSS705SB or ECH CSS705
2004- MPE CSS705SB or ECH CSS705
2005- MPE CSS705SB or ECH CSS705
Autozone:
2000- SU3020
2001- SU3020
2002- SU3020
2003- SU3020
2004- SU3020
2005- SU3020
Advance:
2000- CSS34
2001- CSS34
2002- CSS34
2003- CSS34
2004- CSS34
2005- CSS34
First step is to remove the battery. Beer is optional but preferred, even at 9:30 in the morning.
Next thing to do that will help tremendously is to take off the battery tray. The red dots are 10mm and the blue dot at the front is a 13mm.
After that remove the 2 heater hoses. As you can see they're in the way. I took this pic with the battery tray still attached so you can see how little space there is to work with.
Vise-grips work awesome for getting those pesky clamps off and holding them open for you:
As you can see, without the hoses and tray there's a little more room to work with.
I took the connector off before taking off the hoses and battery tray but looking back it's smarter to do the connector after so coolant doesn't splash in there. You may have to wipe off some grease to see a little red piece in the connector. With your flat head screwdriver, push the front end(facing front of car) in until the other side pops out like in the picture. Then slide the connector off the sensor.
Remove the 4 bolts from the sensor with the 8mm socket. It gets kind of tricky because or how things are positioned. I used my extensions for the top ones and used a short socket with my 1/4" ratchet and got the bottom bolts from underneath. You'll be glad you took out the battery tray for this part.
After you pull the old sensor off, this is what you should see.
Put the new sensor on and put everything back together.
Last edited by buddhaman; 04-16-2012 at 07:23 PM.

#5
04-17-2012, 02:32 AM
#6
04-17-2012, 04:43 PM
Join Date: Feb 2011
Posts: 409
Likes: 0
Received 0 Likes
on
0 Posts
#7
04-20-2012, 06:42 PM
Professional
Join Date: Feb 2011
Location: Clermont, Fl
Posts: 160
Likes: 0
Received 0 Likes
on
0 Posts
Trending Topics
#8
05-07-2012, 03:33 PM

Registered User
Join Date: Mar 2012
Location: Wilmington, NC
Posts: 8
Likes: 0
Received 0 Likes
on
0 Posts
#9
06-06-2012, 09:20 PM
All Star
Join Date: Sep 2006
Location: Westland, Michigan
Posts: 763
Likes: 0
Received 0 Likes
on
0 Posts
I have also had to replace mine twice.. since I have owned my 2004 (since 2006)
I have also done it just removing the battery
I have looked at this part, what is it about this part that goes bad?.. doesn't seem to have any moving parts to it... and why is it this is the only car I've owned that I have had to replace it?... bad design?
I have also done it just removing the battery
I have looked at this part, what is it about this part that goes bad?.. doesn't seem to have any moving parts to it... and why is it this is the only car I've owned that I have had to replace it?... bad design?


