
The Official 2nd Gen FAQ and Performance Thread
#1
 01-08-2007, 12:27 AM


Join Date: Nov 2005
Location: Charleston, SC
Posts: 6,258
Likes: 0
Received 0 Likes
on
0 Posts
The Ultimate (well sort of) Dodge Neon SOHC Build-Up Guide
The first question you need to ask is what direction do I want to go? Turbo, All Motor, Nitrous, Turbo w/ nitrous, etc...
What level do you want to take the car to. Do you want to maintain streetability and reliability or go for all out power? Once that question is answered, that narrows down the field of what parts you want to run, that won’t be detrimental down the road, and also will let you select parts that you won’t have to remove down the road once you get further into your build. The best rule to remember is do you want your car/project to be: Cheap, Reliable, or Fast...your can only have TWO!
All Motor:
Most people think all motor is the cheapest way to build a Neon, which, to a point, is true. For bolt-ons it is by far the cheapest up front, however, as time goes on and you want more and more power, you can invest enough to buy a second, and in some cases a third car. This IS however the best options for the daily driver/strip/autox car, as it’s much easier to stage upgrades, and keep power output to a manageable level.
The big things to focus on in an all motor buildup are:
Compression: You will need higher compression to be competitive from 10.5:1 to custom pistons as high as 13.5:1 or even higher depending on how much you want to spend and if you plan on keeping it on the street or not. It should also be noted that any compression higher than 12:1 WILL require 100+ octane race fuel...
Other options for increasing compression are milling/decking (AKA "shaving") the cylinder head by as much as 0.060" (beyond this you will experience valve clearance issues with the pistons) or removng the middle layer of the MLS head gasket. By removing the middle layer of the head gasket, you will see a .5-1.0 increase in your comporession ratio.
Cam: The cam choices we have are severely limited due to the construction of our heads. Instead of the traditional cam cap setup, we have solid cam journals machined into the bulkheads on the head, and they are pretty restrictive on cam lobe sizing. There are ways around this, such as lowered lobe centers and lash caps which is used effectively on only the largest SOHC cam (crane 15, haven't heard of the official designation for it, but its .400/.400 lift, and 232duration@.050 lift on both sides). Some other methods have been tried with limited results, and the results usually were not real reliable for street cars. An average cam used are the Comp 400 and Crane 14 which give moderate power gains throughout the entire power band. The Comp 400 was designd around te Magnum Cylinder head, and utilizes the computer controlled 6750 rev limiter by keeping all the increase within the stock Magnum power band. The Crane 14 on the other hand, cannot be fully utilized unless the PCM rev limiter is removed or raised since the Crane 14's power band exceeds 7200 RPM's.
Port and Polish: Along with the cam, a good port and polish job is essential. There is a plethora of companies that will do port work and I leave the decision up to you. Howell Automotives, NRGY heads, and Protuning.com, however, Howell’s work is done by the best in the business of custom Neon work. The most power will be found from a port and polished Magnum Cylinder head, which bone stock flows as much air as a race ported non-Magnum SOHC head. Also consider thermal coatings on the valves, and ports as this will again, increase power, reduce heat retention in the engine, and increase overall engine life. A good porting job will include at minimum, port matching services, casting flash removal, and balancing the ports. An extreme porting job will go as far as 5angle valve jobs, complete bowl and chamber reshaping, unshrouding the valves along the fire deck, removing valve guide protrusions into the ports, and numerous other services that will pretty much depend on where you go for your headwork. This is one of those things; I strongly recommend that you have this professionally done, as it is incredibly easy to destroy a head. The goal in porting a head is to remove the absolute minimum amount of material to achieve maximum flow and velocity, while maintaining pressure. Without flow the car doesn’t run, without velocity you will have horrid power, and without pressure, you will not maintain much of a mixture. A good intake port will have a rough finish promoting swirl, but not so rough that it promotes pooling, and a good exhaust port will be like a mirror.
Now you’re probably thinking great, the head is flowing like the Suez Canal, how do I get all that air to the head? The Intake side leaves us SOHC guys with a few options. The Magnum intake manfiold (01+ S4RE Magnum Motor) is a very good active intake, using a dual runner design making for a very broad and useable power band. To install this manifold on a non magnum car, there is some wiring that needs to be done to allow the butterflies to function, or there is the option of removing them all together, this does however require a good bit of fabrication and is not for the weekend mechanic. The other option is the Indy Intake manifold, which is also an awesome piece, netting gains of 25hp on a dohc with minimal bolt ons(intake, header, computer) and around 19 lb ft of torque on the same DOHC. SOHC gains are similar and also as impressive. There are also many custom intake manifolds available, such as Lonewolf, R/T Ernie, the "Ghetto Blaster", and several others available to bebuilt to almost any specification you wish. You should also look into an aftermarket Throttle Body (TB). For an "unmodded" 2.0 SOHC motor a 55mm TB is optimal for both air density and power. However, the TB's that are most readily available are 60mm TB's made by Lorenzo and MPx (the extra 5mm WILL NOT hurt performance). Another route you could take is by using a 60mm, 65mm, 70mm, or even 75mm Mustang TB and modding it to work on our cars. Even with some significant modding I wouldnt suggest going beyond 60mm for a TB however.
The other option, which is the most expensive, would be Individual Throttle Bodies (ITB's), which can run anywhere from $600-$3500 depending on how it is set up, and will net the most power, unless you have a very application specific plenum manifold built, and when I say specific, I mean purpose built specifically for your car, based on flow from your head, compression, fuel maps etc. Either of these options will be very expensive, and very worth the power you will see from them. These options are also, NOT, and I cannot emphasize this enough, NOT any where close to street friendly. They can be driven on the street, but it is not for the faint of heart. At this stage on the intake side, your throttle is an on/off switch or damn close to it.
The exhaust side is just as critical as the intake, if not more so. There is allot of controversy over which header is the best, so let me put it like this.
For maximum power, a stepped long tube design will net the most gains. Collectors will be something to be discussed with the person building the header if it is a custom header as the collector is critical to header performance. For off the shelf units, Pacesetter and Mopar both have very good short tube designs, TTI makes a very innovative medium tube design with AF/x, and Kirk making non vaporware long tube designs. The Kirk is the mildest of the long tubes, using the smallest primaries and the smallest outlet of the three, netting impressive gains over stock, but not the maximum gains to be had. Long tubes are where the ***** out power comes from. As the stockbase Neon SOHC manifold breathes like an emphysemas chain smoker trying to suck a golf ball through a garden hose, ANYTHING is an improvement over it. The Magnum stock manifold is an excellentheader since it is identical to the now discontinued Borla afrermarket short tube header.
The rest of the exhaust is pretty straight forward, 2.5" piping has proven to be the best overall for the 2.0L platform with moderate to heavy modding, with a straight through muffler and solid 2.5" catalytic converter. 3" is simply too much for a naturally aspirated motor, until you are pushing the limits of what the engine is capable of producing. Dynatech makes a very high quality bullet style catalytic converter in stainless that will tuck into the tunnel on the end of a long tube without any tunnel/cat modification. Random Technologies also makes cats that will fit, however, they are extremely expensive. With lowered cars, you can get a Catco to fit, however, ground clearance is a serious problem. Basically keep in mind your cars ride height and make adequate provisions to clear the cat. For short tube headers Dynomax makes a very good unit, as do Magnaflow, Catco, and numerous other companies.
Basically put, all motor’s main expense along from the specialized nature of the parts at the higher power levels comes from extreme maintenance and regular catastrophic failures, but if stuff isn’t breaking, you’re not pushing the envelope hard enough.
Turbo:
Turbo Setups will benefit from porting and polishing as well, however, the big gains with a turbo are going to be seen in the turbo itself, and in building a motor to handle the increased cylinder pressures associated with turbocharged motors. Stock compression or less is the norm, with increased compression being possible, but requiring a bit more than most people are willing to spend.
Cam selection again is very important, as the right cam can cut turbo lag in half, and the wrong cam can double it, or worse. Another big thing to think about is fuel. Too much fuel, while still detrimental, is much more desirable than a lack of fuel. On a turbo motor, a lack of fuel means broken parts, too much fuel, means a puddle on the ground under the tail pipe.
The Hahn Racecraft turbo kits are very complete, and the Chill Factory is releasing upgrade parts for the HRC kits at a surprisingly fast rate, as well as their own turbo kits which are absolutely phenomenal. Having seen a few of these parts in person, they are top of the line parts. Other options are the custom SRT-4 turbo build, which you can gert more information on through the turbo thread at the op of the 2nd Gen page.
Ignition will be a concern as you will want to retard timing with a turbo kit, to prevent detonation under boost. The Crane Hi6-Di2 is a very solid unit, as is the MSD DIS2. The crane IMO is a stronger unit, but it is a bit more expensive, but does offer greater flexibility using cranes modular system. Another very popular, and much better system in my opinion is the Megasquirt standalone system which can control both fuel and spark timing, among other things with proper modification. On a base Neon, controlling spark timing is not as big an issue as on the R/T and ACR, but it is still VERY important. The R/T and ACR PCM's will pull TONS of timing under boost and idle which will give for below average performance.
The exhaust side of a turbo can make worlds of difference in how well the turbo works. A large downpipe, such as the chill factory 3" piece, makes for a huge gain, and a complete 3" exhaust should be considered standard equipment for a turbo car pushing a lot of boost and power. For a moderate turbo setup on a stock botom end, I would highly suggesta full 2.5" exhaust such as the Borla/Mopar unit available at Modern Performance.The harder the turbo has to work to overcome exhaust backpressure, the less boost you have available and the less power you have. Too much backpressure will also cause the air in the turbine section of the turbo to cavitate, causing all kinds of nasty things, compressor surge being the worst as this spikes boost and causes internal engine components to break, lack of boost would be the other end of the spectrum where you just get minimal boost out of the turbo. This is also detrimental to the turbo as the bearings take allot of abuse from cavitation.
Water-cooling the turbocharger is another way to get a descent amount of power, but more importantly reliability out of the unit. This simply takes the engines cooling system and routes it to the turbo charger for increased cooling, extending the life of the turbo. A turbo timer is also something that should be considered mandatory as when you shut the car down, this leaves the engine running to allow the turbo to spin down, and allows the turbo to cool off a bit before it shuts down.
Boost controllers are nice to have, I prefer mechanical units, with the Greddy ProfecB being the only electronic boost controller I have not had any problems with on the electronic side. Mechanical will always be cheaper and generally speaking more reliable as well.
Nitrous:
Nitrous acts as an air quality aid basically. It increases the oxygen content of the ambient air, allowing for more heat to be generated and as a result, more power. Nitrous however is not a magic bottle that will make you run 10's. It deserves the highest amount of respect out of anything you can do to your car because an improper nitrous setup can literally destroy your engine in a matter of seconds. You NEED allot of fuel being injected with nitrous for it to function properly.
All in all, nitrous does have a bad reputation for little reason. Set up properly nitrous will be just as safe as any other modification you make, I can not stress enough, that using nitrous on the street is suicide. It is for use in a controlled environment ONLY and is not something to be taken lightly. (sorry, had a major nitrous malfunction damn near kill me at the strip, I’m a little **** about the responsible side of it hehe)
Things to consider with nitrous are compression. You can run more timing and less compression, less timing and less compression, or a small shot with more compression and more timing. There are variations of this, and type of system will have a large effect in how you run it. I believe in one of the other lounges there is a very good nitrous FAQ which should answer most of your questions on it.
Other things to consider are items like purge kits, bottle heaters and a nitrous pressure gauge. These will let you keep your bottle pressure consistent and the lines full of nitrous which will increase your consistency. Along those lines, a nitrous controller will also be a huge help in keeping consistently, but a controller is an expensive piece of hardware.
Final Notes:
There are plenty of ways to run with your SOHC project. Nitrous and turbo combinations can be ruthless at the track, but pretty much kills reliability and engine durability.
All in all, Durability is determined by the quality of the build. If the engine is built properly, and is maintained properly, it will last for a very long time. Things like turbo timers, water injection, increased cooling capacity for both antifreeze AND motor oil will add thousands of miles to a motor, and will also net a few more horses, along with things like using high quality oils and lubricants, spark plugs, filters etc are simple things that will greatly extend the life of the engine, however, I am VERY against oil and fuel additives for a few reasons. Oil is developed with certain additive packages which are designed to squeeze the maximum performance out of the oil...
My personal recommendations for plugs and fluids are:
-Redline 0w30 Motor Oil, Penzoil Platinum 5w30,or Mobil1 5w30 motor oil.
-K&Nor Mobile1 Oil Filters
-MoparTransmission Fluid(ATF+4 or equivalent)
-Prestone Antifreeze w/ Redline Water Wetter, and ALWAYS use distilled water for your cooling system.
-NGK, Champion, or DensoSpark Plugs (I currently use Denso Iridium Spark Plugs with MSD wires)
Things to avoid:
-Flag or other store brand anti freezes...Radiator "stop leak" substancesare also bad bad. If you have a leak, fix it. Bars Leaks is going to create more problems down the road.
-Miracle fuel/oil additives: There are some good ones out there for running every 50-100k miles, such as BG44k, and Mopar Combustion Chamber Cleaner, and Sea Foam, which areall excellent products when used in moderation, however, they can do more harm than good when used to excess or incorrectly.
-Designer spark plugs: Bosch +2/+4, the Zex 3 electrode plugs etc, are not going to up your power, in fact they will probably hurt it. When running a motor with a denser mixture and when you need more firing power, platinum/silver/iridium plugs become quire useful.
**Original walkthroughby "infil", expanded and updated by "03neonRT"**
Miscellaneous 2nd Gen Information
Q: What are the differences between the 2000-2005 Neon's?
A: Several things changed during the life of the 2nd Generation Neon...first of all, the front fascia was changed in 2001 (and also in 2002 for the R/T), and again in 2003. Other changes in 2003 were the "unibody" headlight design which combined the turn signal and headlight into one unit. The rear bumper was also changed in 2003 along with redesigned tailight housings. This change means that the front and rear fascias (including headlights and taillights) are incompatible from the 00-02 and 03-05 2nd Generation Neons.
One of the biggest changes in 2003 was the implimentation of the Next Generation Controller (NGC) which took the place of the older SBECII Powertrain Control Module (PCM) system. The NGC was used on almost all Dodge/Chrysler products from 2003-2005 and is still widely controversial to its affects on the Neon. The NGC has the limited capability of balancing Air/Fuel ratios in order to keep power levels at stock levels so emissions and relative gas mileage would stay constant. It is still disputed how much control NGC has on regulating power output, but it is still safe to say that any modification done to an NGC Neon will result in a gain of power relative to what a non-NGC Neon would see...
Q: What are the differences between the ES/SE/SXT Neon's and the R/T (and ACR)?
A:
Performance Difference:
1. Magnum Cam (equivalent to a Crane 12) w/ stronger valve springs.
2. Aluminum Dual-Runner Intake Manifold with functioning butterfly actuators.
3. 2.25" Dual Outlet Exhaust (MUCH more free flowing then the standard exhaust)
4. Magnum Exhaust Manifold (Same as the aftermarket Borla header).
5. Magnum Head (larger intake/exhaust ports, much better flowing).
6. No top speed limiter...same rev limiter though.
7. Four-wheel disc brakes with ABS (rear discs are the same as on SRT-4's).
8. Tokico Struts, stiffer spring rates, and front/rear sway bars.
9. Dynamic Suspensions Double Adjustable Inverted Struts (ACR ONLY).
10. "Firm Feel" Power Steering.
11. Different PCM programming...along with different fuel maps and better spark timing.
12. 9.8:1 Compression Ratio.
13. 3.94 Final Drive Transmission
Body Difference:
1. Side skirts
2. Rear Bumper w/ Dual Outlet Exhaust Cutouts.
3. Different front seats
4. Leather steering wheel/shift ****/shift boot/optional leather seats.
5. 16" Aluminum Alloy Wheels
2nd Generation Dodge Neon General Maintenance and Information
Q: What type of spark plugs should I use and what gap?
A: Use either stock Champion or NGK Iridium and gap them to 0.035”-0.040”. The Neon’s waste spark ignition system sees neither benefit nor gain from Platinum or “Split-fire” plugs. In some cases, misfire and premature spark plug deterioration can result when Platinum plugs are used on the 2.0L SOHC engine.
Q: What type of fluid should I use in my transmission, auto or manual?
A: For both an automatic and manual transmission Neon you should use Mopar ATF+4 or an equivalent such as Redline MTL, Valvoline ATF+4, or Royal Purple Synchromesh. Mopar MTF can be used in MTx Neon’s (factory fill from 00-02) but it will be more expensive.
Q: What oil should I use?
A: From 00-04 DCx recommends 5w-30 while the 2005 has 5w-20 as the recommended oil viscosity. However, this change is irrelevant and either can be used in ALL 2nd Gen Neon’s.
Q: What is the rev and speed limiter?
A: The rev limiter for all non-Magnum (R/T) 2nd Gen Neon’s is 6,750 while the R/T limiter is slightly raised at 6,815 RPM. On 00-02 models an aftermarket PCM can be purchased that will raise the limiter to 8000 rpm’s and eliminate the speed limiter. On 03-05 Neon’s Megasquirt must be used in order to eliminate both the RPM and speed limiter. The speed limiter for the SE and SXT trim levels is roughly 120mph, while the R/T and ACR do not have a speed limiter.
Q: My Check Engine Light (CEL) is on, what do I do?
A: Turn the ignition key all the way forward - not to the point where the car starts, just to the point where all the lights come on. Do it in this sequence: ON-OFF-ON-OFF- ON…keep a close eye on your odometer. You will see a series of codes display, followed by the word "donE"...these codes will tell you why the "Check Engine Light" is coming on. Follow this link and you’re done: https://dodgeforum.com/m_409789/tm.htm
Q: I got my error codes and fixed the problem, how do I turn off the CEL?
A: Disconnect the negative terminal on your battery for 5-10 minutes and pump the brakes to eliminate any residual charge. You can also pull the fuel pump relay fuse for 5-10 minutes.
Q: I changed my spark plugs and one or all were full of oil, what’s wrong?
A: Your spark plug tube seals need to be changed. It’s an easy job and the seals can be bought from any auto parts store or the dealer. You will need to remove and replace your valve cover gasket as well.
Q: What are the engine specs for the neon?
A: The SOHC is rated at 132HP @ 5600 RPM and 130 ft/lbs of torque @ 4600 RPM. The R/T and ACR’s “Magnum High Output” engine is rated at 150HP @ 6600 RPM and 135 ft/lbs of torque at 4800 RPM.
Q: What Octane should I use in my neon?
A: Standard SOHC engines are recommended to use 87 octane gasoline while the “Magnum High Output” SOHC is recommended to use 91 octane premium fuel and higher.
Q: What do these abbreviations or acronyms mean?
A: MTX = Manual Transaxle (transmission)
ATX = Automatic Transaxle (transmission)
CAI =Cold Air Intake
UDP = Underdrive Pulley
CEL =Check Engine Light
PCM = Powertrain Control Module or ECU=Engine Control Unit
MM = Motor Mount
FSM = Factory Service Manual
OBD =On Board Diagnostics
PCV = Positive Crankcase Ventilation Valve
TB =Throttle Body
TSB = Technical Service Bulletin
WOT = Wide Open Throttle
N/A = Naturally Aspirated
F/I = Forced Induction
MS = Megasquirt
STH = Short Tube Header
LTH = Long Tube Header
STS = Short Throw Shifter
LSD = Limited Slip Differential
ACR = American Club Racer
R/T = Road/Track
SRT = Street and Racing Technology (the number that follows denounces how many cylinders the vehicle has I.E. SRT-4, SRT-6, SRT-8, SRT-10)
OEM = Original Equipment Manufacturer
VC = Valve Cover
WGA = Wastegate Actuator
WHP = Wheel Horse Power
WTQ= Wheel Torque
TPS = Throttle Position Sensor
SOHC = Single Overhead Cam
MAP = Manifold Air Pressure Sensor or Manifold Absolute Pressure
MBC = Manual Boost Controller
FMIC = Front Mount Intercooler
FPR = Fuel Pressure Regulator
DCX = Daimler Chrysler
DOHC = Dual Overhead Cam
BOV = Blow-off Valve
A/F = Air/Fuel Ratio
A/C = Air Conditioning
ABS = Anti-Lock Braking System
HID= HighIntensity Discharge
Performance Questions and Interchangeability
Q: My neon didn't come with a tach, can I get one with a tach and put it in?
A: Yes, you can get a cluster with a tach and swap it in. The only Neon’s that did not come with a tach are the “SE” trim, so all you should have to do is locate a cluster from an SXT, R/T, or SRT-4 and do the swap. They are totally plug and play, however, you will lose your current mileage and there is no way to swap over your current mileage to a used cluster.
Q: What is MegaSquirt?
A: MegaSquirt is a grassroots standalone engine control system with an open source code and universal application to control anything from fuel injectors, to spark timing, all the way to boost control and even nitrous. Follow this link for more details: https://dodgeforum.com/m_677291/tm.htm
Q: Can I use the factory SRT-4 turbocharger on my 2.0L Neon?
A:Yes, you can use the SRT-4's factory TD04 turbocharger, manifold, and many other parts found on the SRT-4. Please follow this link for more specific details about this process: https://dodgeforum.com/m_540330/tm.htm
Q: What other engines can swap into the 2nd Gen neon?
A: A 2.4 turbo engine from a 03-05 SRT-4 (or PT GT) can be swapped in or the N/A 2.4 from any year PT Cruiser. Most engine/transmission combinations can be found on ebay.com or at local junk yards. Average prices vary from $2,000-$3,500 and up to $5,500 if you choose the "donor car" method.
Q: What do I need to get the SRT-4 engine in my 2nd Gen?
A: For the SRT-4 turbo engine, you will need the following parts:
Engine and Tranny
Complete Engine Wiring Harness
Complete Engine Bay Wiring Harness
Power Steering Pump, lines, and cooler
Clutch master and slave cylinder
Clutch/Brake Pedal assembly
Intercooler Piping
Intercooler
Radiator Hoses
Tranny, Upper and Lower Motor Mounts (the holes are larger on the the upper and lower mounts for larger bolts and the tranny mount is completely different)
SRT PCM (wont' need the bracket with 03+)
Axles (and half shaft if it isn't on the engine)
Coolant Bottle
Fuel Line (from tank to engine bay)
Fuel Pump
Flex Fuel Line (from solid fuel line to fuel rail)
Short evap hose that comes from the purge valve
All vacuum lines and the 3 selonids
o2 Sensors
Turbo Housing + O2 Housing
Lower Control Arms (they're stronger yet the same in shape)
Sentry Key Module + Key that matches the PCM VIN number.
Radiator
Some options parts would include:
SRT Power steering rack (it's shorter)
Knuckles
Flexiable Brake Lines
Calipers
Rotors
Q: What transmission do I use with the swap?
A: You can use either the standard SRT-4 T-850 transmission or the stock Neon 3.55 or 3.94 tranny (the 3.55 came with the SE/SXT and the 3.94 came with the R/T and ACR). I would highly suggest using the T-850 for ease of install and its “proven” record with the 2.4L engine. You can also use an automatic transmission out of the Neon or PT Cruiser with some modification.
Q: Can I swap my rear drums to disc brakes?
A: Yes, you can either use the rear brakes from an SRT-4 or an R/T-ACR. You will need the following for the swap: Knuckle/hub assembly, rotors, calipers, brake lines and e-brake cables.
Q: Can I swap in a manual transmission into my automatic Neon?
A: Yes, you can and will need the following: transmission (3.55 or 3.94), modular clutch, passenger side axle, clutch master and slave cylinder, shifter cables and clips, tranny side motor mount from a manual transmission 2nd gen, MTX PCM from your year car, shifter and shifter base, clutch and brake pedal assembly from a 2nd gen.
Q: What engine upgrades should I do to my neon for more power?
A: Just check out below this FAQ for more details!!
Q: Do those intake modules on eBay work? What about the electric supercharger or tornado?
A: No, there is no cheap HP out there. Think about this, if they worked, the fastest neons in the world be using them!
Will SRT-4 seats fit in my 2nd Gen Neon?
A: Yes, all the Neon seats are interchangeable and bolt right in without modifications.
Handling Questions
Q: Will SRT-4 OEM struts and/or aftermarket suspension products work on my Neon?
A: Yes, any suspension products made for the SRT-4 will fit on any year 2nd Gen Neon.
Q: How can I make my car handle better?
A: Add sway bars, better struts, Koni’s are the best, and some stiffer springs. Mopar used to sell Mopar high rates but are now discontinued. Strut bars don’t help as much as people think they do, but do look nice.
Q: What are the best struts for my neon?
A: Koni’s inserts are the best, but you can also choose from the many brands of coilover suspension or Tokico HP Blues struts.
Q: How do I lower my neon without losing comfort?
A: You really can’t. Lowering your neon requires shorter, stiffer springs. The Neon has very little jounce travel to begin with, so reducing it will make the ride more harsh.
Q: OK, I want to lower or better handling on my neon, what springs should I use?
A: There are many brands available, you can choose from Progress, Goldline, Eibach, Mopar, TEIN, and the various cheap knock-off E-Bay brands. Eibach is the closest thing to stock ride “comfort” while delivering a descent drop with their “Pro-Kit”. An average drop is roughly 1.5” front and back.
Q: What about sway bars?
A: You can choose from Mopar, Hotchkis, Progress, or Eibach. All of these sway bars are an improvement over stock, but even stock PT Cruiser GT, SRT-4, or R/T-ACR sway bars will give better handling over stock. Hotchkis has the largest sway bars available (29mm front/27mm rear) and is arguably the best out of all the brands.
Tires and Related Information
Q: What is the bolt pattern on the neon and offset?
A: All Neons (including SRT-4) have a 5x100 with a 40mm offset.
Q: Will the SRT rims fit on my 2nd Gen?
A: Yes they will, but the SRT-4's stock tires will rub. You will need to run 205/40-17, 205/45-17, or 215/40-17's size tires if you still have stock struts.
Q: What size tire should I use if I am getting bigger rims and still have stock struts?
A: 205/45-16, 205/50-16, 215/45-16, 205/40-17, 205/45-17, and 215/40-17 are some common tire specifications.
#2
01-08-2007, 12:29 AM
Join Date: Nov 2005
Location: Charleston, SC
Posts: 6,258
Likes: 0
Received 0 Likes
on
0 Posts
Modification: Cold Air Intake (CAI)
Manufacturers: K&N, AEM, "Ebay Brand".
Price Range w/ Filter: $100-$220
Where to Buy: ModernPerformance.Com, Ebay.Com, HowellAutomotive.Com
Difficulty of Installation (1 as easiest 10 as most difficult): 1
Time For Installation: 30 minutes - 1 Hour
Expected Gains (in WHP): 1-3whp
Explanation of Mod: A Cold Air Intake (aka CAI) is designed to relocate the vehicles intake filter closer to a cool air source (more dense air) such as outside the engine compartment to increase engine performance.
[IMG]local://upfiles/24091/3ADB51233462497691A50889B95F62A5.jpg[/IMG]
[IMG]local://upfiles/24091/7E5DC2E788B04D32ABE407124757C286.jpg[/IMG]
Installation Instructions:
1.) Disconnect the negative battery cable.
2.) Remove the air temperature sensor from the stock intake tube.
3.) Remove the wire loom from the retaining clips on the side of the stock air box.
4.) Loosen and remove the five airbox retaining bolts then remove the airbox lid.
5.) Remove stock air filter.
6.) Remove intake tube from fender well.
7.) Remove the four throttle body retaining bolts from airbox (these bolts will be re-used).
8.) Remove the crankcase vent hose from the air box.
9.) Remove the bolt and nut that secures the airbox to the vehicle then remove the airbox (this bolt and nut will be reused).
10.) Break lug nuts loose, then jack up the drivers side of the vehicle (remember to support with jackstands).
11.) Using a T-20 wrench, remove the two screws that retain the inner fender valance to the fender. Then remove the two push pins and move fender valance away to allow access into the fender well.
12.) Remove the two bolts that retain the resonator to the fender well then remove the resonator.
13.) Remove thebattery tray mounting bolt (this will be reused).
14.) Using the four bolts that were removed in Step #7, secure the two provided throttle body brackets to the throttle body.
15.) Using the battery tray mounting bolt that was removed in step #13, mount the throttle body bracket to the battery tray.
16.) Using the stock bolt removed instep #9, secure the throttle body bracket to the stock airbox mount.
17.) Install the supplied silicone hose and hose clamps to the throttle body and tighten throttle body hose clamp. Then, install the supplied edge trim to the resonator fender well hole. Finaly, install the larger grommet into the intake tube bracket and the smaller grommet into the intake tube.
18.) Slide the intake tube down the resonator hole then insert the other end into the throttle body silicone clamp.
19.) Align the intake tube braket to the stock airbox mount. Using the supplied nut, tighten the intake bracket to the stock mounting stud.
20.) Install the air temp sensor into the rubber grommet on the intake tube.
21.) Using the supplied silicone hose, attach one end to the intake tube and the other end to the crankcase vent tube.
22.) Install the hose calmp onto the air filter and attach to the intake tube inside the fender well.
*Note* Make sure everything is tight!
23.) Remount inner fender well valance, tire, and reconnect negative batter cable in reverse order.
**These instructions were writen for the K&N Typhoon Cold Air Intake and may vary depending on CAI brand**
[hr]
[hr]
Modification: 60mm Throttle Body
Manufacturers: Lorenzo, Modern Performance, Howell Automotive.
Price Range: $259.99 - $269.99
Where to Buy: ModernPerformance, HowellAutomotive.Com, LFSRacing.Com.
Difficulty of Installation (1 as easiest 10 as most difficult): 2
Time For Installation: 30 minutes - 1 Hour
Expected Gains (in WHP): Depends on current modifications. With little modifications maybe 1-2 WHP, however, much increased throttle response over stock should be expected.
Explanation of Mod: Stock throttle bodies are sized around 49mm. This is highly restrictive and can be a bottle neck for airflow if you have done appropriate mods such as a full exhaust and intake system. A 60mm Throttle Body will increase the amount of air let into the engine, adding horsepower.
**Installation Instructions Below Pictures**

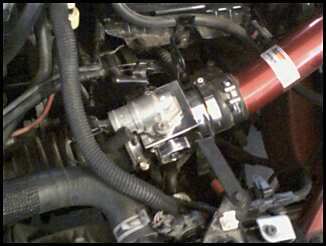
First of all you can or dont have to disconnect the negative battery connector.
1.) Disconnect the clamps on both sides of the throttle body. One is to the intake manifold, and the other to the intake.
2.) Unbolt the hanger arms attatched to the throttle body. One is attatched on the front, the other to the battery tray. They simply unbolt with no unnecassary disconnections.
3.) Disconnect the MAP sensor on top of the throttle body. Your new one comes with hex screws so you dont have to worry if you have bad heads on the screws. As well remove the mechanicle lines and all peices attatched to the throttle body.
4.) Install is the reverse of taking it off.
I had some problems with the rubber connecting peices not fitting. I used a little hand soap to grease the inside slightly of the rubber parts so the slid on. Using the clamps to tighten them on as tight as possible. I let it sit for a while before turning the car over, listening for anything peculiar.
OPTIONAL and TIME CONSUMING
The throttle body comes with no bracing at all. When I installed mine I didn't feel happy with it simply bouncing around in my engine bay!
I when down to Autozone and picked up a 3" exhaust gasket with three wholes. I got home and measured the distance from the FRONT original mount, that kept the stock throttle body in place, to a whole that was pre-drilled into my 60mm throttle body. I cut the exhaust gasket leaving 2 wholes, matching it up I smoothed out the cut and made sure it fit. I then proceded to thread the whole with a similar sized screw thread. So, i then put a washer on both sides of the cut exhaust gasket and attatched the throttle body. This SOLVED the problem of no support!!!
Manufacturers: K&N, AEM, "Ebay Brand".
Price Range w/ Filter: $100-$220
Where to Buy: ModernPerformance.Com, Ebay.Com, HowellAutomotive.Com
Difficulty of Installation (1 as easiest 10 as most difficult): 1
Time For Installation: 30 minutes - 1 Hour
Expected Gains (in WHP): 1-3whp
Explanation of Mod: A Cold Air Intake (aka CAI) is designed to relocate the vehicles intake filter closer to a cool air source (more dense air) such as outside the engine compartment to increase engine performance.
[IMG]local://upfiles/24091/3ADB51233462497691A50889B95F62A5.jpg[/IMG]
[IMG]local://upfiles/24091/7E5DC2E788B04D32ABE407124757C286.jpg[/IMG]
Installation Instructions:
1.) Disconnect the negative battery cable.
2.) Remove the air temperature sensor from the stock intake tube.
3.) Remove the wire loom from the retaining clips on the side of the stock air box.
4.) Loosen and remove the five airbox retaining bolts then remove the airbox lid.
5.) Remove stock air filter.
6.) Remove intake tube from fender well.
7.) Remove the four throttle body retaining bolts from airbox (these bolts will be re-used).
8.) Remove the crankcase vent hose from the air box.
9.) Remove the bolt and nut that secures the airbox to the vehicle then remove the airbox (this bolt and nut will be reused).
10.) Break lug nuts loose, then jack up the drivers side of the vehicle (remember to support with jackstands).
11.) Using a T-20 wrench, remove the two screws that retain the inner fender valance to the fender. Then remove the two push pins and move fender valance away to allow access into the fender well.
12.) Remove the two bolts that retain the resonator to the fender well then remove the resonator.
13.) Remove thebattery tray mounting bolt (this will be reused).
14.) Using the four bolts that were removed in Step #7, secure the two provided throttle body brackets to the throttle body.
15.) Using the battery tray mounting bolt that was removed in step #13, mount the throttle body bracket to the battery tray.
16.) Using the stock bolt removed instep #9, secure the throttle body bracket to the stock airbox mount.
17.) Install the supplied silicone hose and hose clamps to the throttle body and tighten throttle body hose clamp. Then, install the supplied edge trim to the resonator fender well hole. Finaly, install the larger grommet into the intake tube bracket and the smaller grommet into the intake tube.
18.) Slide the intake tube down the resonator hole then insert the other end into the throttle body silicone clamp.
19.) Align the intake tube braket to the stock airbox mount. Using the supplied nut, tighten the intake bracket to the stock mounting stud.
20.) Install the air temp sensor into the rubber grommet on the intake tube.
21.) Using the supplied silicone hose, attach one end to the intake tube and the other end to the crankcase vent tube.
22.) Install the hose calmp onto the air filter and attach to the intake tube inside the fender well.
*Note* Make sure everything is tight!
23.) Remount inner fender well valance, tire, and reconnect negative batter cable in reverse order.
**These instructions were writen for the K&N Typhoon Cold Air Intake and may vary depending on CAI brand**
[hr]
[hr]
Modification: 60mm Throttle Body
Manufacturers: Lorenzo, Modern Performance, Howell Automotive.
Price Range: $259.99 - $269.99
Where to Buy: ModernPerformance, HowellAutomotive.Com, LFSRacing.Com.
Difficulty of Installation (1 as easiest 10 as most difficult): 2
Time For Installation: 30 minutes - 1 Hour
Expected Gains (in WHP): Depends on current modifications. With little modifications maybe 1-2 WHP, however, much increased throttle response over stock should be expected.
Explanation of Mod: Stock throttle bodies are sized around 49mm. This is highly restrictive and can be a bottle neck for airflow if you have done appropriate mods such as a full exhaust and intake system. A 60mm Throttle Body will increase the amount of air let into the engine, adding horsepower.
**Installation Instructions Below Pictures**
First of all you can or dont have to disconnect the negative battery connector.
1.) Disconnect the clamps on both sides of the throttle body. One is to the intake manifold, and the other to the intake.
2.) Unbolt the hanger arms attatched to the throttle body. One is attatched on the front, the other to the battery tray. They simply unbolt with no unnecassary disconnections.
3.) Disconnect the MAP sensor on top of the throttle body. Your new one comes with hex screws so you dont have to worry if you have bad heads on the screws. As well remove the mechanicle lines and all peices attatched to the throttle body.
4.) Install is the reverse of taking it off.
I had some problems with the rubber connecting peices not fitting. I used a little hand soap to grease the inside slightly of the rubber parts so the slid on. Using the clamps to tighten them on as tight as possible. I let it sit for a while before turning the car over, listening for anything peculiar.
OPTIONAL and TIME CONSUMING
The throttle body comes with no bracing at all. When I installed mine I didn't feel happy with it simply bouncing around in my engine bay!
I when down to Autozone and picked up a 3" exhaust gasket with three wholes. I got home and measured the distance from the FRONT original mount, that kept the stock throttle body in place, to a whole that was pre-drilled into my 60mm throttle body. I cut the exhaust gasket leaving 2 wholes, matching it up I smoothed out the cut and made sure it fit. I then proceded to thread the whole with a similar sized screw thread. So, i then put a washer on both sides of the cut exhaust gasket and attatched the throttle body. This SOLVED the problem of no support!!!
#3
01-08-2007, 12:29 AM
Join Date: Nov 2005
Location: Charleston, SC
Posts: 6,258
Likes: 0
Received 0 Likes
on
0 Posts
Modification: Lightweight Crankshaft Damper Pulley/Underdrive Pulley (UDP)
Manufacturers: MPx, Unorthodox Racing, Megan, “Ebay”
Price Range: $60.00-$220.00
Where to Buy: ModernPerformance.com, HowellAutomotive.Com, Ebay.com.
Difficulty of Installation (1 as easiest 10 as most difficult): 4
Time For Installation: 1 hour-2 hours
Expected Gains (in WHP): 3-5whp
Explanation of Mod: The lightweight UDP is designed to reduce the amount of energy taken from the accessories and alternator. With a smaller diameter and lighter weight, the UDP reduces the loss of power accompanied with the much heavier and larger stock pulley.
[IMG]local://upfiles/24091/B2C140C997C04862969F9B9697E296AD.jpg[/IMG]
Removal/Installation of Harmonic Balancer (AKA UnderdrivePulley)
REMOVAL
1. Raise vehicle on a hoist and remove right inner splash shield.
2. Remove accessory drive belts.
3. Remove crankshaft vibration damper bolt. Remove damper using the large side of Special Tool 1026 and insert 6827-A (Fig. 93).
INSTALLATION
1. Place pulley in 400 degree oven for 15-25 minutes. Remove with oven safe gloves to avoid burning, BE VERY CAREFUL! The hot pulley will slide most of the way onto the crankshaft...if the pulley does not slide on all the way, use crank bolt to tighten pulley down completely.
2. Install vibration damper bolt and tighten to136 Nm (100 ft. lbs.)
3. Install accessory drive belts.
4. Install the right inner splash shield and lower vehicle.
#4
01-08-2007, 12:29 AM
Join Date: Nov 2005
Location: Charleston, SC
Posts: 6,258
Likes: 0
Received 0 Likes
on
0 Posts
Modification: Motor Mount Inserts (MM Insers)
Manufacturers: Prothane
Price Range: 25.00
Where to Buy: ModernPerformance.Com, HowellAutomotive.Com.
Difficulty of Installation (1 as easiest 10 as most difficult): 1
Time For Installation: 30 minutes- 1 hour
Expected Gains (in WHP): N/A Explanation of Mod: This modification is designed to help reduce or eliminate wheel hop. Wheel hop is a common cause for loss of traction during launch and harder motor mounts reduces wheel hop and its affects on traction.
**Installation Instructions**
Ok, simply follows these instructions and you will have a new set of motor mounts in a jiff!!
1.) Grab a jack and using a piece of wood (or anything to disperse weight… I used like 5 magazines ), put the jack below the oil pan. Jack it up to where it will support the weight of the engine. BE CAREFUL NOT TO JACK IT UP TOO FAR!! The goal is to allow for easy installation, and it gets a bit tedious when your having to match the wholes for the bolts… After Jacking and securing your engine, you are free to start anywhere you wish.
2.) I started up top with the upper engine mount. Simply unbolt the bolt holding the engine mount in place. It is firmly in there so a bit of muscle is needed.
3.) You need to cut away some of the old rubber to make it fit. For this, you simply need to place the insert in and see where it is being stopped and cut it away.
4.) After you have the insert in, and using some loctite, place the engine bolt back in and tighten it back in.
5.) The Lower mount is a bit of a PAIN! The only thing that’s different, and a PAIN is the plastic fender wells. You need to take it off, bolts being up underneath the vehicle with some plastic tabs every here and there. Do not try the installation without trying to take the plastic fender wells off, you will fail miserably. That’s IT!! Good Luck!
(Installation instructions by Freerider)
Manufacturers: Prothane
Price Range: 25.00
Where to Buy: ModernPerformance.Com, HowellAutomotive.Com.
Difficulty of Installation (1 as easiest 10 as most difficult): 1
Time For Installation: 30 minutes- 1 hour
Expected Gains (in WHP): N/A Explanation of Mod: This modification is designed to help reduce or eliminate wheel hop. Wheel hop is a common cause for loss of traction during launch and harder motor mounts reduces wheel hop and its affects on traction.
**Installation Instructions**
Ok, simply follows these instructions and you will have a new set of motor mounts in a jiff!!
1.) Grab a jack and using a piece of wood (or anything to disperse weight… I used like 5 magazines
), put the jack below the oil pan. Jack it up to where it will support the weight of the engine. BE CAREFUL NOT TO JACK IT UP TOO FAR!! The goal is to allow for easy installation, and it gets a bit tedious when your having to match the wholes for the bolts… After Jacking and securing your engine, you are free to start anywhere you wish. 2.) I started up top with the upper engine mount. Simply unbolt the bolt holding the engine mount in place. It is firmly in there so a bit of muscle is needed.
3.) You need to cut away some of the old rubber to make it fit. For this, you simply need to place the insert in and see where it is being stopped and cut it away.
4.) After you have the insert in, and using some loctite, place the engine bolt back in and tighten it back in.
5.) The Lower mount is a bit of a PAIN! The only thing that’s different, and a PAIN is the plastic fender wells. You need to take it off, bolts being up underneath the vehicle with some plastic tabs every here and there. Do not try the installation without trying to take the plastic fender wells off, you will fail miserably. That’s IT!! Good Luck!
(Installation instructions by Freerider)
#5
01-08-2007, 12:29 AM
Join Date: Nov 2005
Location: Charleston, SC
Posts: 6,258
Likes: 0
Received 0 Likes
on
0 Posts
Modification: Spark Plug Wires
Manufacturers: MSD, Magnecore, Crane.
Price Range: $40.00-$60.00
Where to Buy: ModernPerformance.com, HowellAutomotive.Com, Ebay.com.
Difficulty of Installation (1 as easiest 10 as most difficult): 1
Time For Installation: 10 minutes- 30 minutes
Expected Gains (in WHP): N/A Explanation of Mod: Aftermarket spark plug wires are designed to transfer more energy and deliver much smoother idle and acceleration. They are also a engine dress-up item.
#6
01-08-2007, 12:31 AM
Join Date: Nov 2005
Location: Charleston, SC
Posts: 6,258
Likes: 0
Received 0 Likes
on
0 Posts
Modification: Vibrant Dual Exhaust
Manufacturers: Vibrant.
Price Range: $269.99 - $300.00
Where to Buy: ModernPerformance, HowellAutomotive.Com, Ebay.com
Difficulty of Installation (1 as easiest 10 as most difficult): 2
Time For Installation: 1 Hour
Expected Gains (in WHP): 1-4 WHP
Explanation of Mod: Stock Exhaust Systems on neons run a full 2.25 inch tubing until the Muffler. The Vibrant exhaust replaces the stock muffler and is a full 2.25 cat back dual muffler. It simply attatches to the old stock hangers and piping.
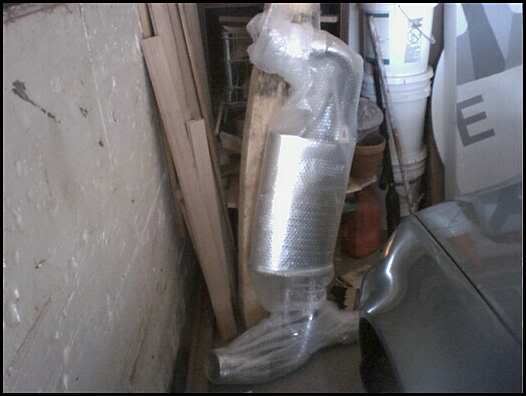
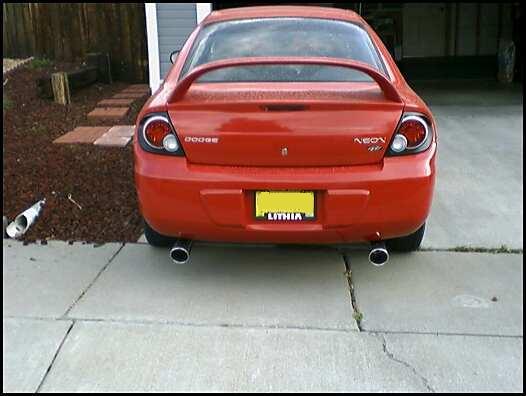
[hr]
[hr]
Modification: Magnaflow Cat (catalytic converter) Back Exhaust System
Manufacturers: Magnaflow Performance Exhausts
Price Range: $350.00-620.00
Where to Buy: Magnaflow.com http://www.magnaflow.com/02product/s...ort&id=357
*Ebay.com - http://motors.search.ebay.com/15801_W0QQfromZR40
(*suggest try there, got my exhaust system for $350 shipped, made a best offer bid, look for a whole seller who has a lot of kits for sell)
Difficulty of Installation: (1 as easiest 10 as most difficult): 2.5
Time For Installation: 1-2 hours, more like 2 for 1st time
Expected hp Gains: 5-10 hp, about 3-5 fwhp (front wheel horse power)
Explanation of Mod: This modification is designed to help with the flow of air through the exhaust system. Lingo for this would be “breathe better” but removing the baffles in a stock muffler to create better air direction is what is really happening. With this cat back system that is what you’re accomplishing.
Rating: (1-10, 10 being the best) 7.25 out of 10
Pro’s
• All stainless steel
• Resonator to enhance the sound
• Polished tips and main body of muffler
• Is three individual pieces for easy install
• Mandrel bent, w/ guaranteed fit
• Limited lifetime warranty
• Deeper more aggressive sound
• No baffles so it will never “blow out” so to speak like my stock exhaust system did.
Con’s
• Bolt’s that come with kit are of low quality and strip easily. Highly recommended that you buy better bolt before install. (All mine striped)
• Piping is same stock 2.25inches in diameter, which will limit power gains with heavily built motors
• Takes time to find a well priced system off ebay.com.
Review: The kit overall is of very high quality. The piping is not as thick as stock piping but still of very high strength. Fit and finish is what really set this kit apart from just buying a muffler or bolt on exhaust. More pieces allow for an easier install and the look is what really gets your blood going when you first mock it up and see the nice polished dual exhaust outlets. This kit, if gotten around the 400 hundred dollar mark, is well worth it because it is right up there in quality with the Borla (as seen as the best) cat back exhaust system. Sound wise is really a HUGE change from stock and takes a little while to get use to. The sound of the system with the stock catalytic converter on is very refined and deep. The main difference between this set up and Borla is the resonator, which sits almost right under the front middle arm rest. The resonator actually brings more sound in to the interior, which some people might not like (This is the really the only warning I have, if you don’t like any interior sound don’t get this setup, not to loud by any means but it depends on what you like). The resonator which brings in sound actually to me is very appealing and I really like the kit for including it. Also the resonator REALLY cleans up the sound and makes it a higher quality sound. The muffler looks awesome and sits about an inch wider than the stock R/T style exhaust that come factory equipped. Not too wide but not too close together for the tips, its “just right”. The last thing to mention with the muffler also has to do with sound, if you plan on running a “test pipe” or “flex pipe” for turbo or more hp gains out of your exhaust the sound gets pretty raspy in high RPM’s so be warned, still not as bad as so called “fart cans” or straight throw single can mufflers but not timid either. Overall this is a really good kit and if your looking for a replacement for an old exhaust system or just as an upgrade. Either way this kit IS well worth the money.
Review done by: 04 mo neon
Sound clip:
Idle and reves to 4500 rpm Coming shortly
*My apologies for not getting a clip when I had a flex pipe on the exhaust.
**Installation Instructions**
From Magnaflow’s site: http://www.magnaflow.com/07techtips/pdfs/15801.pdf
Pictures:
Manufacturers: Vibrant.
Price Range: $269.99 - $300.00
Where to Buy: ModernPerformance, HowellAutomotive.Com, Ebay.com
Difficulty of Installation (1 as easiest 10 as most difficult): 2
Time For Installation: 1 Hour
Expected Gains (in WHP): 1-4 WHP
Explanation of Mod: Stock Exhaust Systems on neons run a full 2.25 inch tubing until the Muffler. The Vibrant exhaust replaces the stock muffler and is a full 2.25 cat back dual muffler. It simply attatches to the old stock hangers and piping.
[hr]
[hr]
Modification: Magnaflow Cat (catalytic converter) Back Exhaust System
Manufacturers: Magnaflow Performance Exhausts
Price Range: $350.00-620.00
Where to Buy: Magnaflow.com http://www.magnaflow.com/02product/s...ort&id=357
*Ebay.com - http://motors.search.ebay.com/15801_W0QQfromZR40
(*suggest try there, got my exhaust system for $350 shipped, made a best offer bid, look for a whole seller who has a lot of kits for sell)
Difficulty of Installation: (1 as easiest 10 as most difficult): 2.5
Time For Installation: 1-2 hours, more like 2 for 1st time
Expected hp Gains: 5-10 hp, about 3-5 fwhp (front wheel horse power)
Explanation of Mod: This modification is designed to help with the flow of air through the exhaust system. Lingo for this would be “breathe better” but removing the baffles in a stock muffler to create better air direction is what is really happening. With this cat back system that is what you’re accomplishing.
Rating: (1-10, 10 being the best) 7.25 out of 10
Pro’s
• All stainless steel
• Resonator to enhance the sound
• Polished tips and main body of muffler
• Is three individual pieces for easy install
• Mandrel bent, w/ guaranteed fit
• Limited lifetime warranty
• Deeper more aggressive sound
• No baffles so it will never “blow out” so to speak like my stock exhaust system did.
Con’s
• Bolt’s that come with kit are of low quality and strip easily. Highly recommended that you buy better bolt before install. (All mine striped)
• Piping is same stock 2.25inches in diameter, which will limit power gains with heavily built motors
• Takes time to find a well priced system off ebay.com.
Review: The kit overall is of very high quality. The piping is not as thick as stock piping but still of very high strength. Fit and finish is what really set this kit apart from just buying a muffler or bolt on exhaust. More pieces allow for an easier install and the look is what really gets your blood going when you first mock it up and see the nice polished dual exhaust outlets. This kit, if gotten around the 400 hundred dollar mark, is well worth it because it is right up there in quality with the Borla (as seen as the best) cat back exhaust system. Sound wise is really a HUGE change from stock and takes a little while to get use to. The sound of the system with the stock catalytic converter on is very refined and deep. The main difference between this set up and Borla is the resonator, which sits almost right under the front middle arm rest. The resonator actually brings more sound in to the interior, which some people might not like (This is the really the only warning I have, if you don’t like any interior sound don’t get this setup, not to loud by any means but it depends on what you like). The resonator which brings in sound actually to me is very appealing and I really like the kit for including it. Also the resonator REALLY cleans up the sound and makes it a higher quality sound. The muffler looks awesome and sits about an inch wider than the stock R/T style exhaust that come factory equipped. Not too wide but not too close together for the tips, its “just right”. The last thing to mention with the muffler also has to do with sound, if you plan on running a “test pipe” or “flex pipe” for turbo or more hp gains out of your exhaust the sound gets pretty raspy in high RPM’s so be warned, still not as bad as so called “fart cans” or straight throw single can mufflers but not timid either. Overall this is a really good kit and if your looking for a replacement for an old exhaust system or just as an upgrade. Either way this kit IS well worth the money.
Review done by: 04 mo neon
Sound clip:
Idle and reves to 4500 rpm Coming shortly
*My apologies for not getting a clip when I had a flex pipe on the exhaust.
**Installation Instructions**
From Magnaflow’s site: http://www.magnaflow.com/07techtips/pdfs/15801.pdf
Pictures:
#7
01-08-2007, 12:48 AM
Join Date: Nov 2005
Location: Charleston, SC
Posts: 6,258
Likes: 0
Received 0 Likes
on
0 Posts
Modification: Ignition Coil
Manufacturers: MSD, Screamin Demon.
Price Range: $74.95-$80
Where to Buy: ModernPerformance.com, HowellAutomotive.Com, Ebay.com.
Difficulty of Installation (1 as easiest 10 as most difficult): 1
Time For Installation: 10 minutes - 20 minutes
Expected Gains (in WHP): N/A
Explanation of Mod: The Stock OEM ignition coil is sufficient for almost any level of Neon modding up until you get into needing better fuel and ignition delivery. By getting a better ingition coil, you will give your spark plugs a hotter spark, however, an upgraded ignition coil will only give an aesthetic value to your engine bay unless your 2.0 is heavily modded. The MSD coil should be consdiered an OEM replacement and the Screamin Demon gives a slightly higher output but cannot be utilized unless highly modified.
Trending Topics
#8
01-08-2007, 01:00 AM
Join Date: Nov 2005
Location: Charleston, SC
Posts: 6,258
Likes: 0
Received 0 Likes
on
0 Posts
Modification: Comp 400 Camshaft
Manufacturers: Comp Cams
Price Range: $180.00-$260.00
Where to Buy: SummitRacing.Com, CompCams.Com, Ebay.Com.
Difficulty of Installation (1 as easiest 10 as most difficult): 8
Time For Installation: 2-6 hours
Expected Gains (in WHP): 9-12whp
Explanation of Mod: The Comp 400 camshaft is designed specifically for the Magnum 2.0 “High Output” engine with much increased lift and duration. While most aftermarket camshafts will exceed the computer controlled 6750 rev limiter, the Comp 400 has been designed to create its increased power throughout the entire RPM band but more specifically from 5,000-6750rpm’s. Stock Magnum valve springs are sufficient, however, a limited amount of valve float could be present and upgrading to titanium valve springs is recommended but not necessary.
#9
01-08-2007, 01:21 AM
Join Date: Nov 2005
Location: Charleston, SC
Posts: 6,258
Likes: 0
Received 0 Likes
on
0 Posts
Modification: Short Tube Exhaust Header
Manufacturers: Borla, Mopar, Pacesetter, OBX.
Price Range: $50.00-$300.00
Where to Buy: ModernPerformance.Com, HowellAutomotive.Com, Ebay.Com
Difficulty of Installation (1 as easiest 10 as most difficult): 2
Time For Installation: 1 hour-2 hours
Expected Gains (in WHP): 1-2whp
Explanation of Mod: Basically a standard SOHC replacement part allowing slightly more airflow out of the cylinder head. The “Magnum” exhaust header is equivalent in performance and build quality to the Borla header while the Pacesetter and OBX are of lesser quality in both areas.
**Installation/Removal Instructions**
REMOVAL
1. Disconnect negative cable from battery.
2. Raise vehicle on hoist.
3. Remove bolt attaching the wire harness heat shield to the exhaust manifold support bracket.
4. Remove exhaust manifold support bracket.
5. Remove fasteners attaching exhaust system flex joint to exhaust manifold flange. Move exhaust system rearward to clear flange studs.
6. Lower vehicle.
7. Disconnect make-up air hose from rear of cylinder head cover.
8. Disconnect oxygen sensor connector and harness clip.
9. Remove heat shield attaching bolts.
10. Remove upper heat shield for access to manifold bolts.
11. Remove exhaust manifold bolts.
12. Remove exhaust manifold from top of vehicle, between the cylinder head and cowl.
INSTALLATION
1. Position exhaust manifold and gasket in place.
2. Install exhaust manifold bolts and tighten in sequence shown to 200 in. lbs..
3. Position lower and upper heat shield on exhaust manifold. Install heat shield bolts and tighten to 11 Nm (95 in. lbs.).
4. Connect oxygen sensor electrical connector and harness clip.
5. Connect make-up air hose on cylinder head cover port.
6. Raise vehicle.
7. Install new flex joint to manifold flange gasket.
8. Attach exhaust system to manifold flange and tighten fasteners to 250 in. lbs..
9. Install exhaust manifold support bracket and tighten fasteners.
10. Install bolt attaching wire harness heat shield to support bracket.
11. Lower vehicle.
12. Connect negative cable to battery.
#10
01-08-2007, 01:21 AM
Join Date: Nov 2005
Location: Charleston, SC
Posts: 6,258
Likes: 0
Received 0 Likes
on
0 Posts
Modification: Longtube Exhaust Header
Manufacturers: Kirk, MPx, AF/x, FastFabs.
Price Range: $200.00-300.00
Where to Buy: ModernPerformance.Com, HowellAutomotive.Com, Ebay.Com, "For-Sale" Forums.
Difficulty of Installation (1 as easiest 10 as most difficult): 3
Time For Installation: 1.5 hours-3 hours.
Expected Gains (in WHP): 5-6whp
Explanation of Mod: A long tube header is designed to increase airflow out of the cylinder head increasing engine performance. It also deletes the cat unless otherwise modified. A long tube header will have a significantly higher “raspy” volume over stock. Placing a high-flow cat (would require modification to the midpipe) or glasspack past the header is recommended to reduce the “raspy” characteristics of the header.
Follow the following link for detailed instructions on how to fool yourPCM so you dont throw a CEL: https://dodgeforum.com/m_727544/mpag.../tm.htm#728767

