

DIY - Harland Sharp Roller Rockers


Thread Starter
|
Record Breaker
Joined: Jun 2008
Posts: 1,669
Likes: 4
From: The Buckeye State... OHIO
Tools: Deep well sockets, hex bits, torque wrench, Extensions/Universal socket, Needle nose pliers, screw driver, Shop Vac/blow gun
Shop supplies: Assembly lube, Rags, Zip ties, Light
1. Start by removing the keys, or disconnect the battery.
2. Clean the area directly around the Valve covers with a shop vac or air gun. It will be easier to clean if you crawl up on the fender and "sit" in the motor.
NOTE: There are plenty of wires to get in your way while doing this DIY, so I used zip ties to hold them out of the way while I worked.
3. After you're done cleaning, start on the passenger's side as this will be the "easy" side of the project. Remove the clips that hold the heater hose and spark plug wires in place. They are suppose to slip off the studs, but I ended up breaking a couple. There will be one located in the center, by the fire wall, and 2 on the top side by the fuel rail. Be VERY careful not to cut,slice,fray,or rip and of the wires.
4. After you've cleaned, and cleared the area around the covers, remove the bolts and studs. I used a 3/8" ratchet along with several different extensions. There are 10 fasteners to remove in total. There will be a ground wire attached to the stud on top of the covers closest to the fire-wall. It's very difficult to reach, and even harder to see.
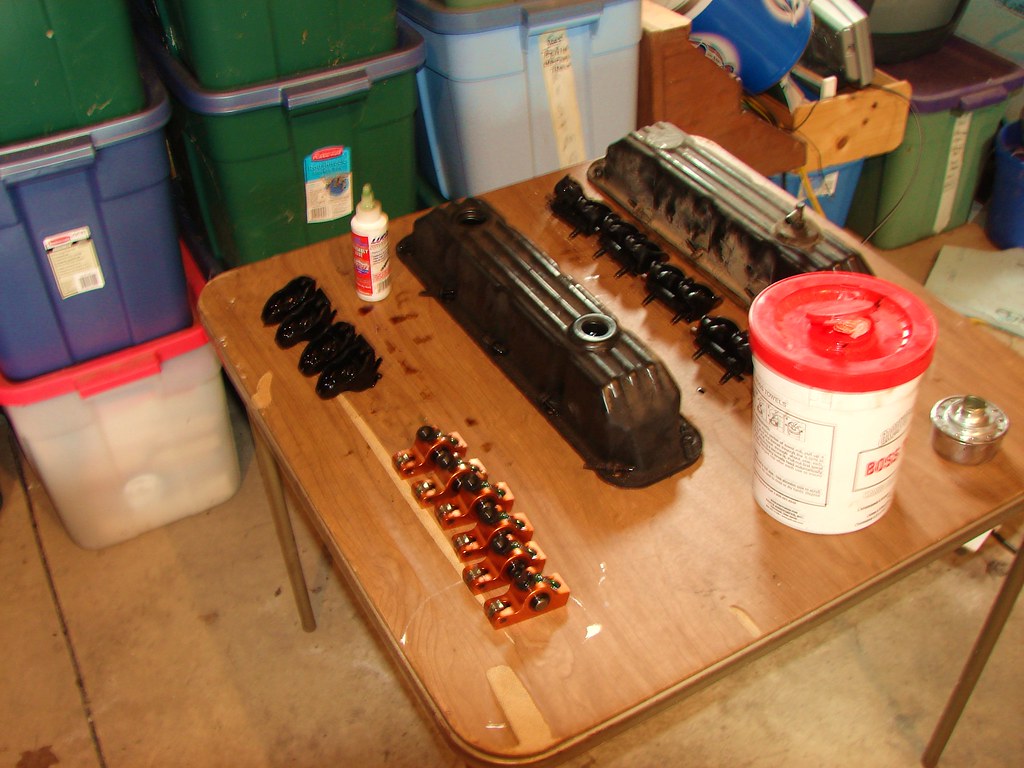
NOTE: Removing the valve covers is the hardest part of this project. Just take your time and don't rush through it. be sure to keep track of each bolt location as you take the covers off. I laid mine out like so.
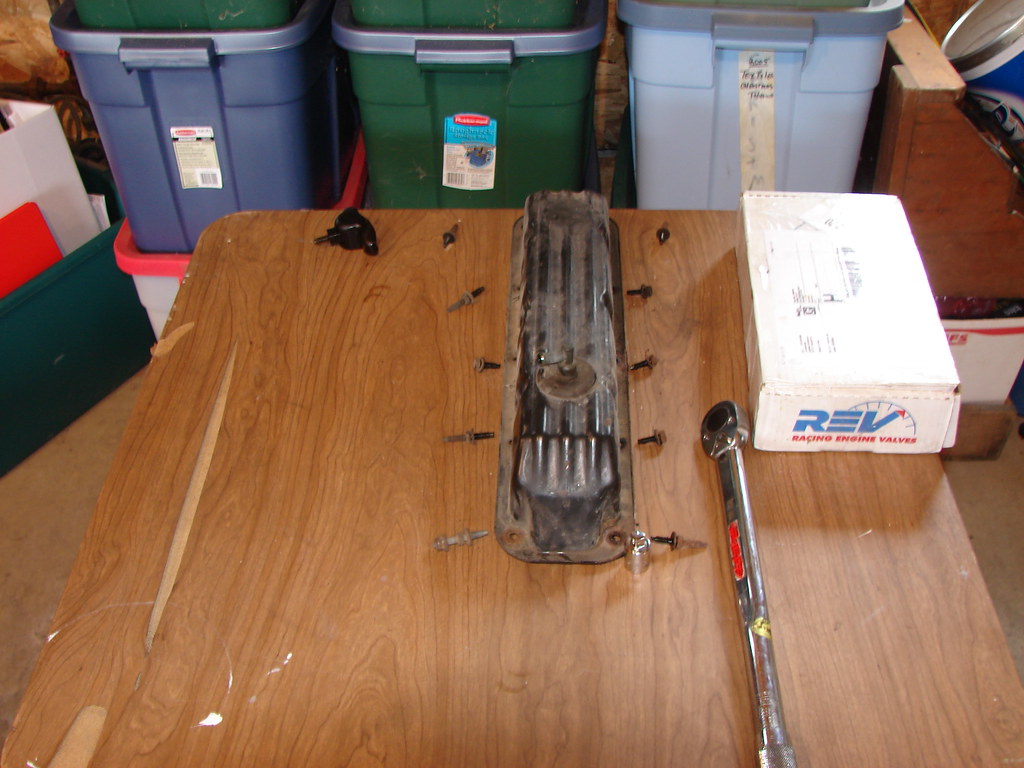
5. After all bolts/ studs are removed, gentle tap the valve cover with your hand to remove them. Be careful not to tear the gasket. They are re-usable!
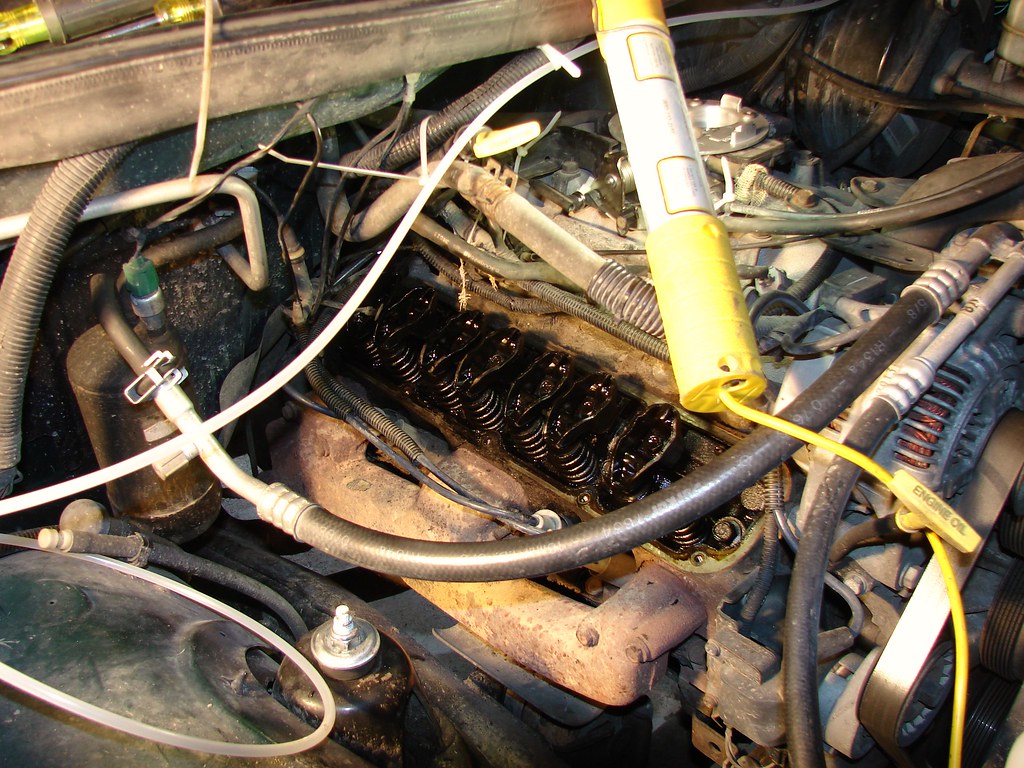
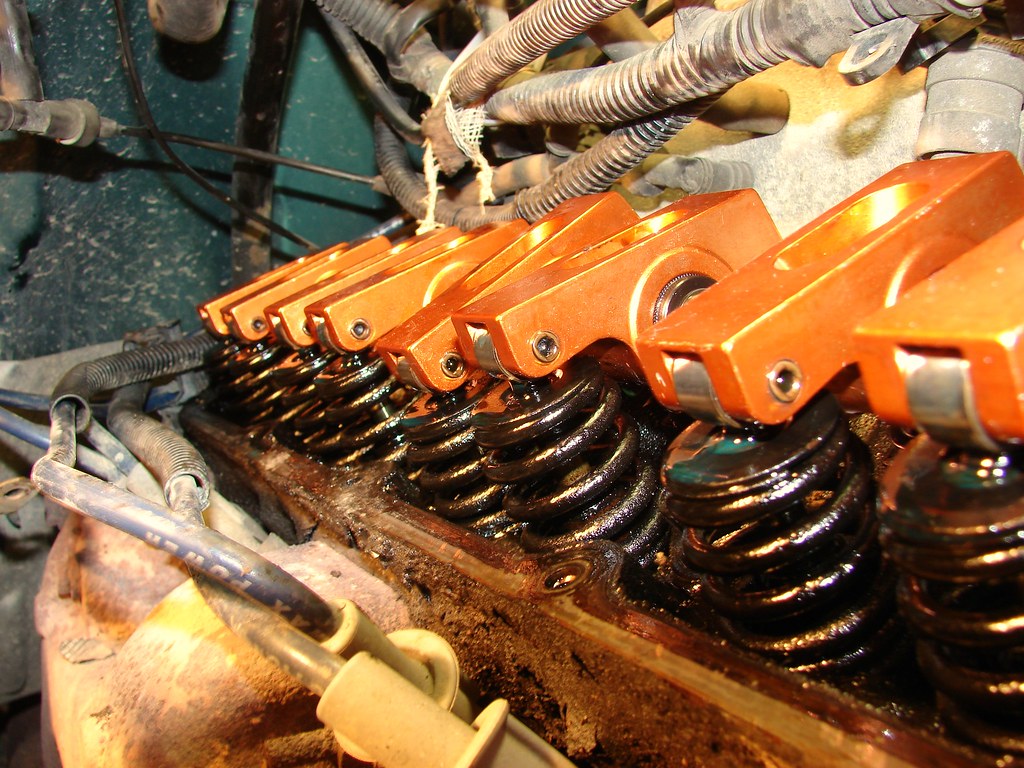
6. Using a 1/2" deep well. Remove the stock rocker arms, and rod retainer. Work on one cylinder at a time. Be very careful not to touch the rods, as you can knock them loose and they will be very difficult to find.
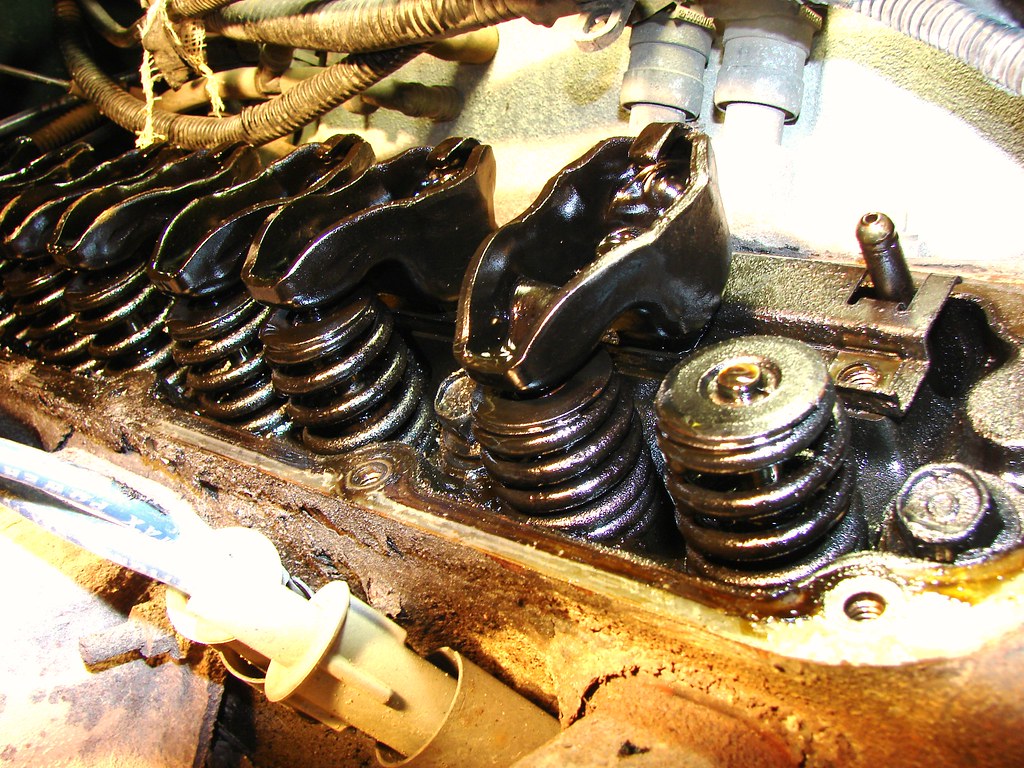
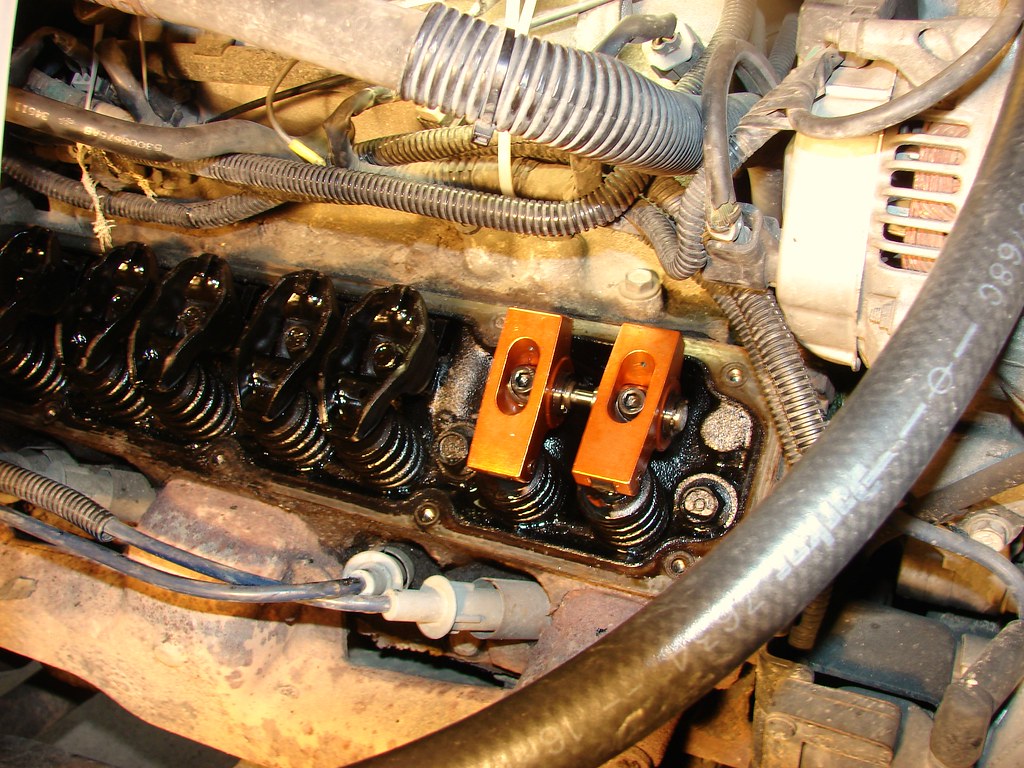
7. Use some assembly lube and coat the roller, rod cup, and pivot arm of your new rocker arms. This will ensure you don't have a dry start. Then carefully place the new rocker arm in place a tighten the bolts until the spacer is seated.
NOTE: You will need to take the pressure off the springs in order to torque the new bolts. Therefore, you will need to rotate the engine by either turning it over with a wrench, or un-plugging the coil and hit the key for a split second.
8. When you've released the pressure from the rocker arms, torque them down to 21 ft. lbs. Take your time!! This will be the last time you see these rockers, so ensure you do it right. After you torque it once, wait 5 minutes and re-torque. This will allow the valves to "seat" properly.
9. Repeat steps: 6,7,8 for the rest of the cylinders. Turn the engine as often as needed to torque the rockers.

10. The driver side is the same as the passenger's side, only hard due to the master cylinders' location. Follow all the steps as the passenger's side. There will be no ground wire on the driver's side.

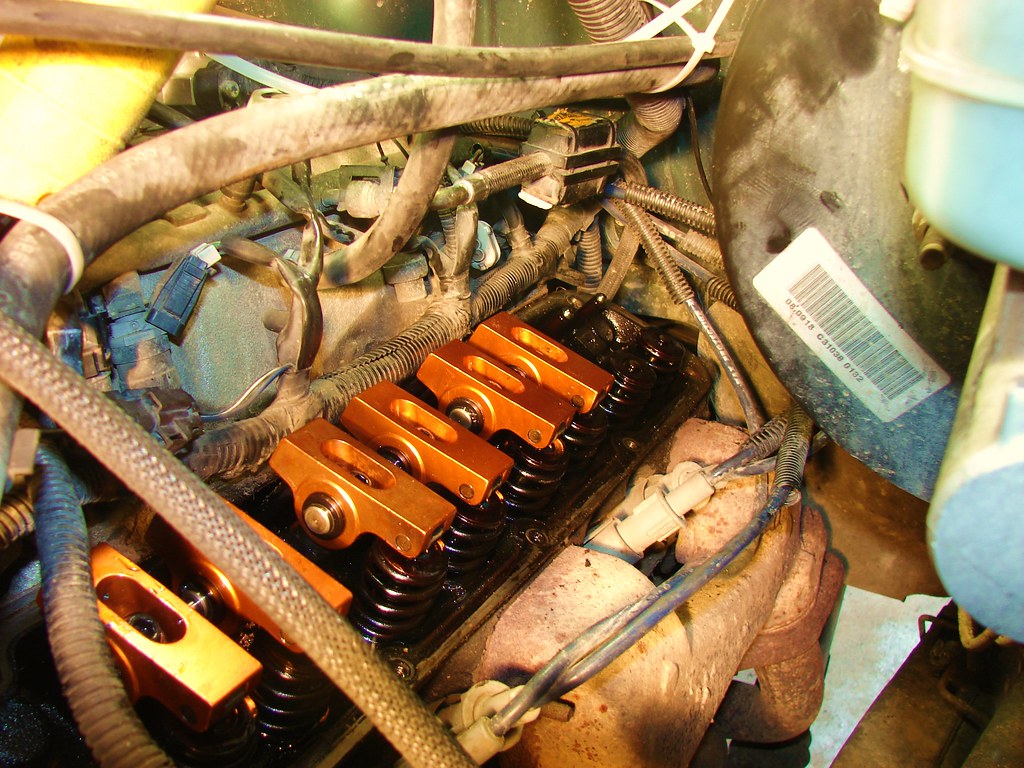

11. After all parts are installed and you are happy with the torque, re-connect the coil and start her up JUST FOR A SECOND OR TWO. It will start spitting oil everywhere. This is just top ensure everything is lined up and secure.
12. Replace the gasket, covers, all ground wires and C clips. The valve covers only need to be snugged 95 inch pounds!
The hardest part about this install was removing the valve covers. It is important to take your time and ensure everything is right before re-installing the covers. I'm going to drive mine a couple hundred miles and then re-torque everything. I'm doing this because I'm very very picky.
I would recommend changing your oil after about 40 miles. Dirt from the covers will get into the engine no matter how hard you try to avoid it. This would also be a good time to Sea Foam as well.
DISCLAIMER: Don't work on your truck unless you know what you're doing, or have a friend that knows what they're doing. I'm not taking responsibility for your broken truck. These are simply the steps I took during my install and they are only a quick reference for the dodge forum communit
Shop supplies: Assembly lube, Rags, Zip ties, Light
1. Start by removing the keys, or disconnect the battery.
2. Clean the area directly around the Valve covers with a shop vac or air gun. It will be easier to clean if you crawl up on the fender and "sit" in the motor.
NOTE: There are plenty of wires to get in your way while doing this DIY, so I used zip ties to hold them out of the way while I worked.
3. After you're done cleaning, start on the passenger's side as this will be the "easy" side of the project. Remove the clips that hold the heater hose and spark plug wires in place. They are suppose to slip off the studs, but I ended up breaking a couple. There will be one located in the center, by the fire wall, and 2 on the top side by the fuel rail. Be VERY careful not to cut,slice,fray,or rip and of the wires.
4. After you've cleaned, and cleared the area around the covers, remove the bolts and studs. I used a 3/8" ratchet along with several different extensions. There are 10 fasteners to remove in total. There will be a ground wire attached to the stud on top of the covers closest to the fire-wall. It's very difficult to reach, and even harder to see.
NOTE: Removing the valve covers is the hardest part of this project. Just take your time and don't rush through it. be sure to keep track of each bolt location as you take the covers off. I laid mine out like so.
5. After all bolts/ studs are removed, gentle tap the valve cover with your hand to remove them. Be careful not to tear the gasket. They are re-usable!
6. Using a 1/2" deep well. Remove the stock rocker arms, and rod retainer. Work on one cylinder at a time. Be very careful not to touch the rods, as you can knock them loose and they will be very difficult to find.
7. Use some assembly lube and coat the roller, rod cup, and pivot arm of your new rocker arms. This will ensure you don't have a dry start. Then carefully place the new rocker arm in place a tighten the bolts until the spacer is seated.
NOTE: You will need to take the pressure off the springs in order to torque the new bolts. Therefore, you will need to rotate the engine by either turning it over with a wrench, or un-plugging the coil and hit the key for a split second.
8. When you've released the pressure from the rocker arms, torque them down to 21 ft. lbs. Take your time!! This will be the last time you see these rockers, so ensure you do it right. After you torque it once, wait 5 minutes and re-torque. This will allow the valves to "seat" properly.
9. Repeat steps: 6,7,8 for the rest of the cylinders. Turn the engine as often as needed to torque the rockers.
10. The driver side is the same as the passenger's side, only hard due to the master cylinders' location. Follow all the steps as the passenger's side. There will be no ground wire on the driver's side.
11. After all parts are installed and you are happy with the torque, re-connect the coil and start her up JUST FOR A SECOND OR TWO. It will start spitting oil everywhere. This is just top ensure everything is lined up and secure.
12. Replace the gasket, covers, all ground wires and C clips. The valve covers only need to be snugged 95 inch pounds!
The hardest part about this install was removing the valve covers. It is important to take your time and ensure everything is right before re-installing the covers. I'm going to drive mine a couple hundred miles and then re-torque everything. I'm doing this because I'm very very picky.
I would recommend changing your oil after about 40 miles. Dirt from the covers will get into the engine no matter how hard you try to avoid it. This would also be a good time to Sea Foam as well.
DISCLAIMER: Don't work on your truck unless you know what you're doing, or have a friend that knows what they're doing. I'm not taking responsibility for your broken truck. These are simply the steps I took during my install and they are only a quick reference for the dodge forum communit
Last edited by iwhitne; Mar 28, 2009 at 10:33 PM.