

 08-05-2015, 01:01 PM
Last edit by: IB Advertising
See related guides and technical advice from our community experts:
Browse all: Brakes
- Dodge Ram 2nd, 3rd, 4th Brake Pad Reviews
Review and comparison of top products.
Browse all: Brakes

DIY - 2500HD 4x4 Brake Pads
#1
08-23-2011, 01:30 PM

This DIY is for a 2500HD, 8800 gvwr, 2000 Dodge Ram
Please use your head and use safety first when performing this and any other procedure on any vehicle.
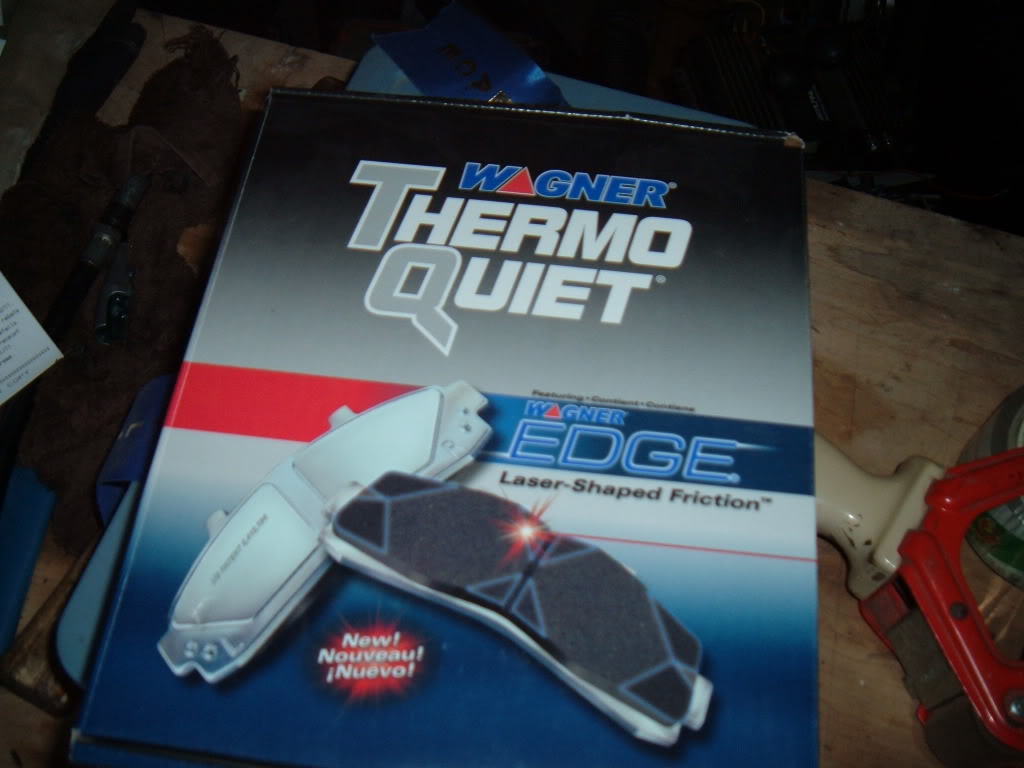
I use Wagner or Raybestos brake parts only. For the DIY I used Wagner pads , part # sx859. (severe duty, even though I just plow my own 800 ft driveway). mx859 are oem replacements and good also. Both are expensive, and less expensive pads are available. Depends on what you use the truck for obviously.
You need to check the condition of the rotors while you are doing this job. If they are not smooth and have heat checks (blue spots or cracks), you should have them turned or replace them.
Set parking brake and chock rear wheel(s).
Jack vehicle and use jack stands
Remove wheel, my lug nuts are 15/16"
Loosen master cylinder cap
Get a hose that will fit the bleeder screw, put the other end in a can or jar.
Loosen bleeder screw
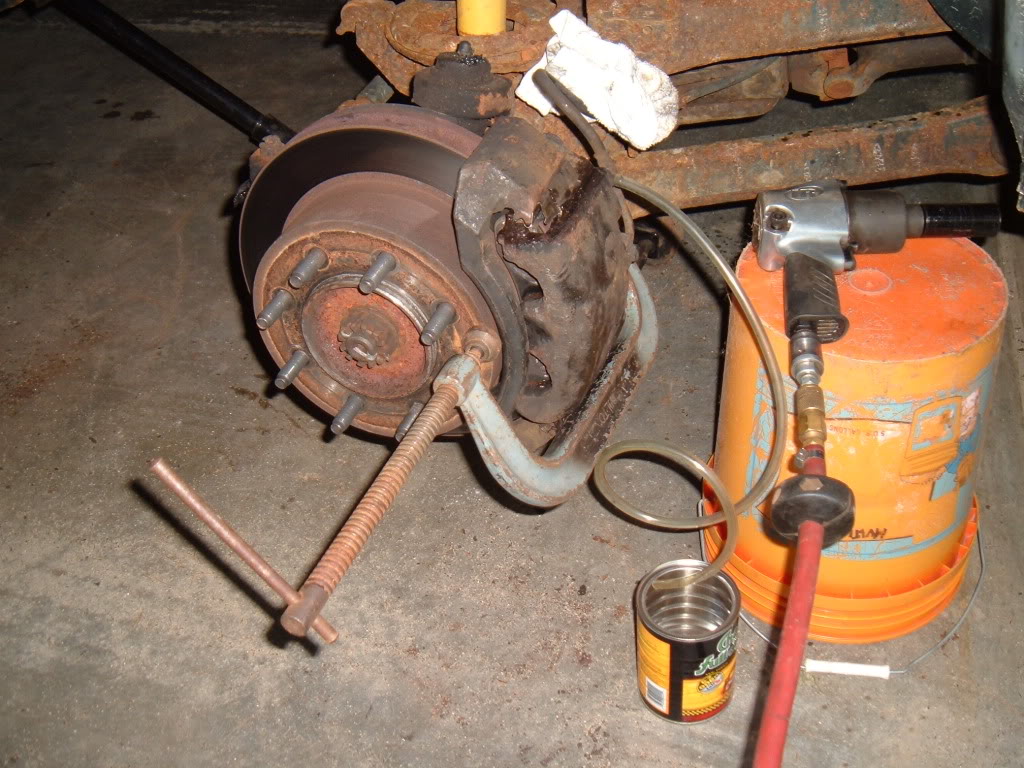
Use a large c clamp to compress the pistons about a half an inch.
Tighten bleeder screw
Bend upper anti rattle clip tabs up and out of the way.
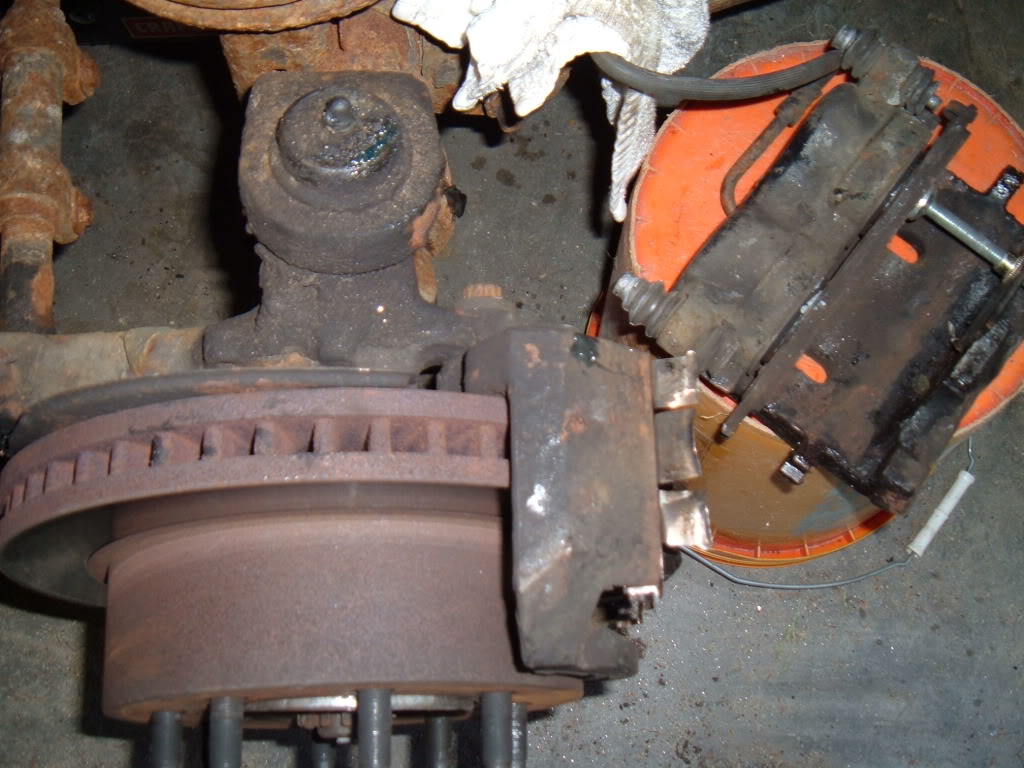
Remove caliper bolts(they are the 2 with the small rubber boots on them.
Mine are #47 torx
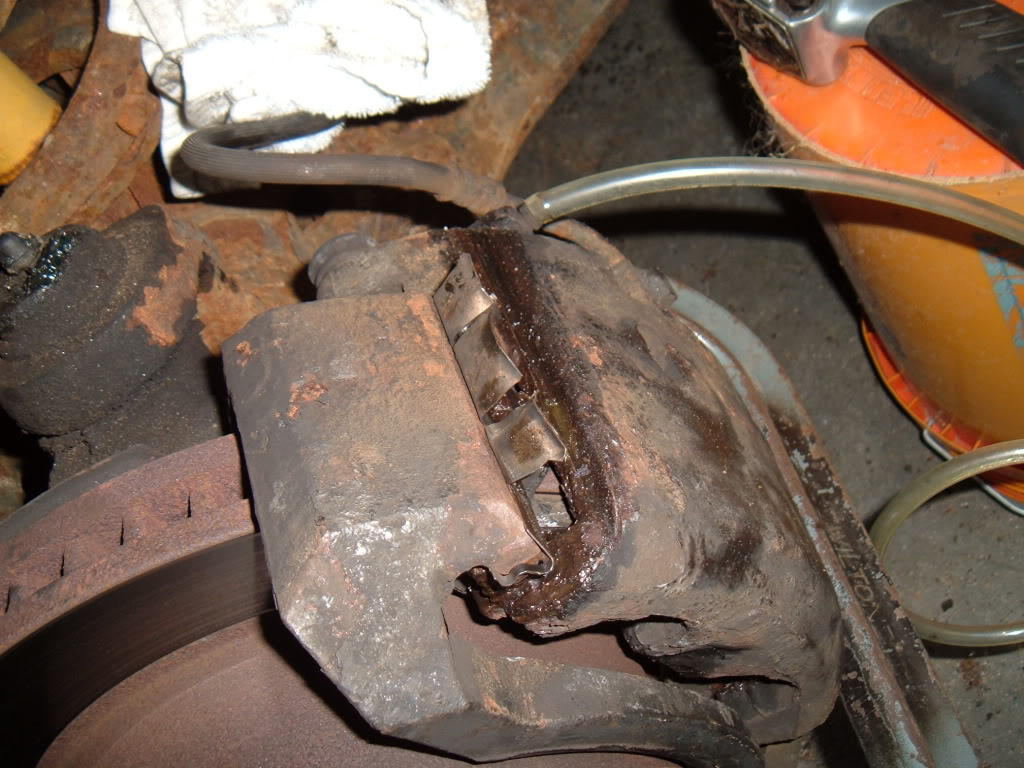
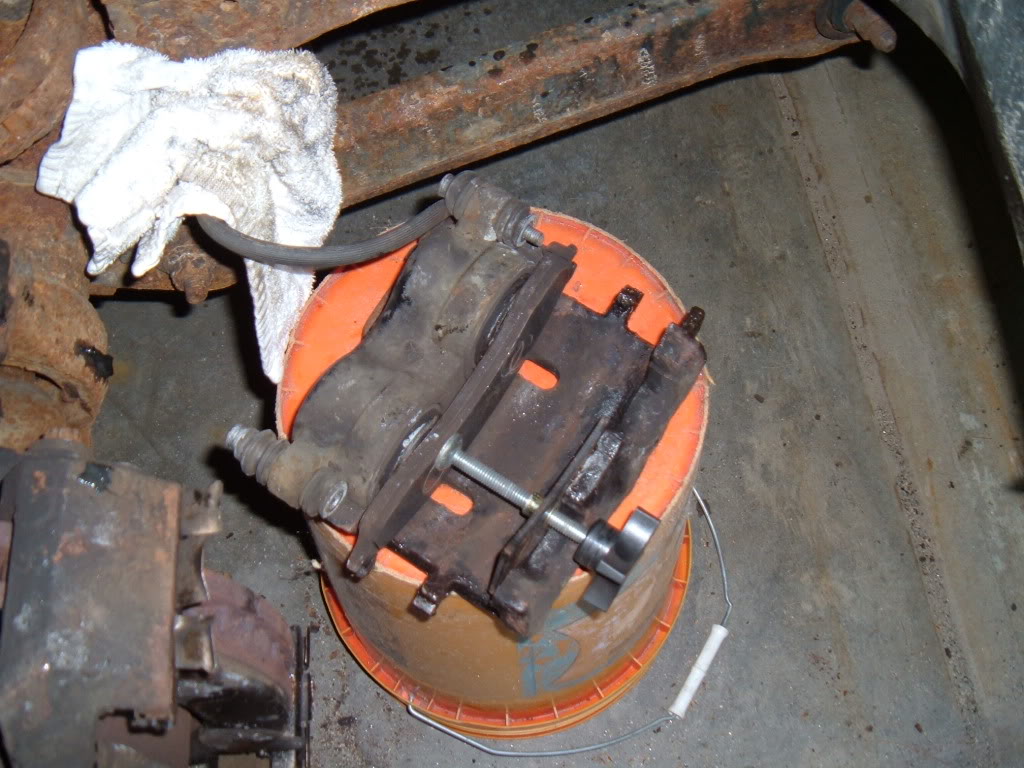
Remove the caliper from the caliper adapter.
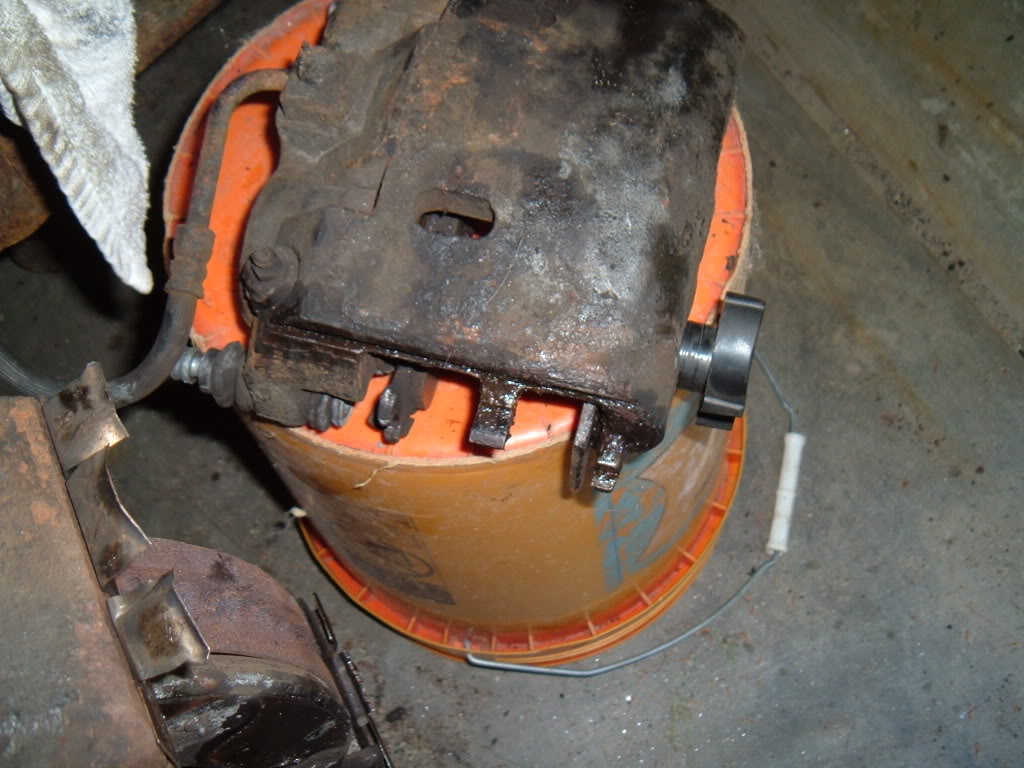
Place it upside down on a bucket. Remove the inner pad from the adapter and install it in the caliper against the pistons. Loosen bleeder screw with hose in can and using the c clamp or tool, compress the pistons in all the way. Alternate from one to the other. Tighten bleeder when done.
If you are replacing the rotor, remove the two bolts from the back of the adapter (mine are 16mm 12point). Move it out of the way and slide the rotor off. Wire brush all mating surfaces and the bolts. Apply a small amount of anti seize to those surfaces and the bolts. Slide new rotor on and reinstall adapter to 210 ft lbs.
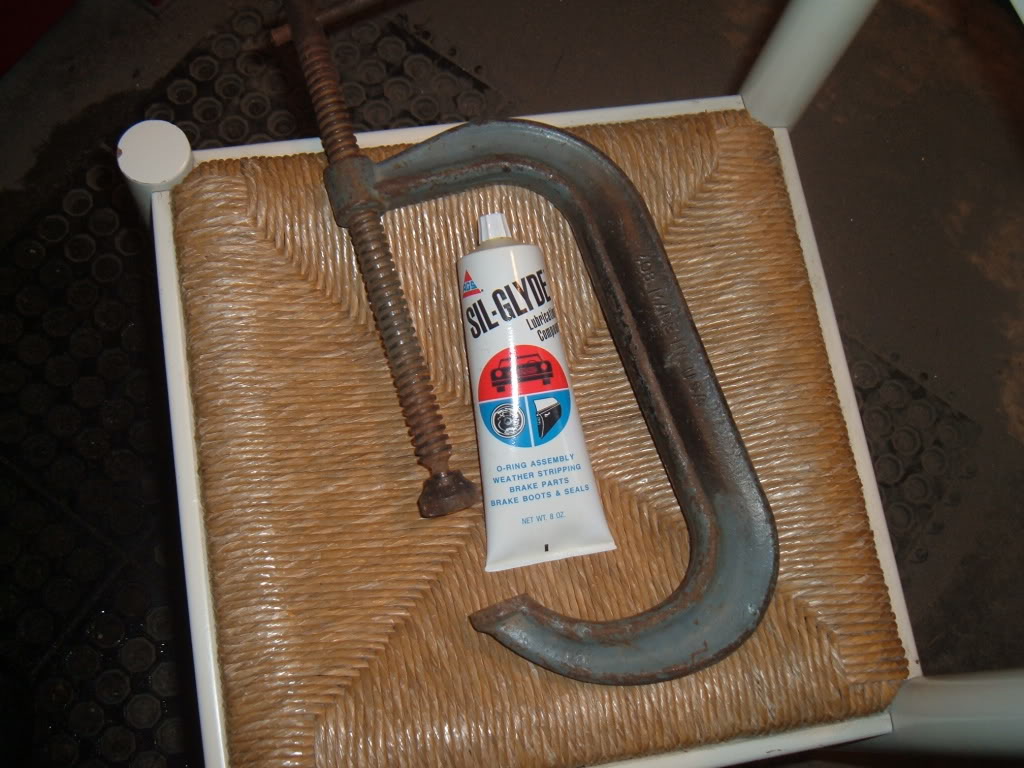
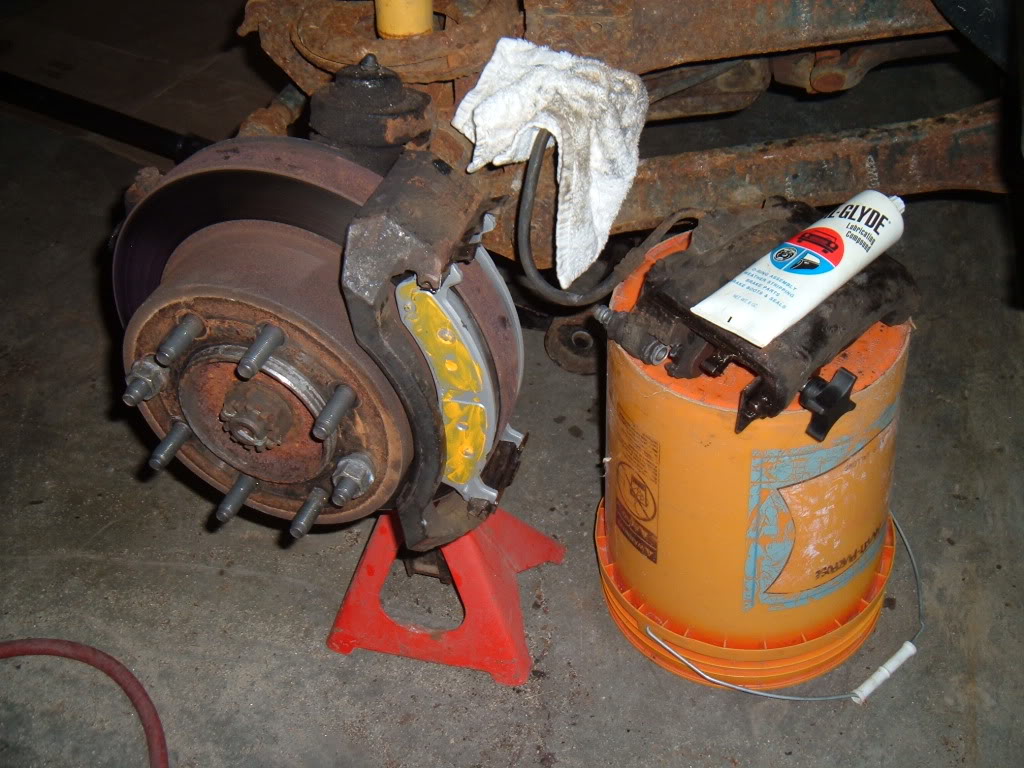
Back to the pads. Wire brush and clean ALL mating surfaces and the 2 bolts and slide pins. Including the anti rattle clips and the piston surfaces (do not damage the rubber boots on the pistons). Apply some grease to the anti rattle clips and install new pads onto the adapter. Also apply a generous amount onto the slide pins and bolts. I use Sil-Glide.
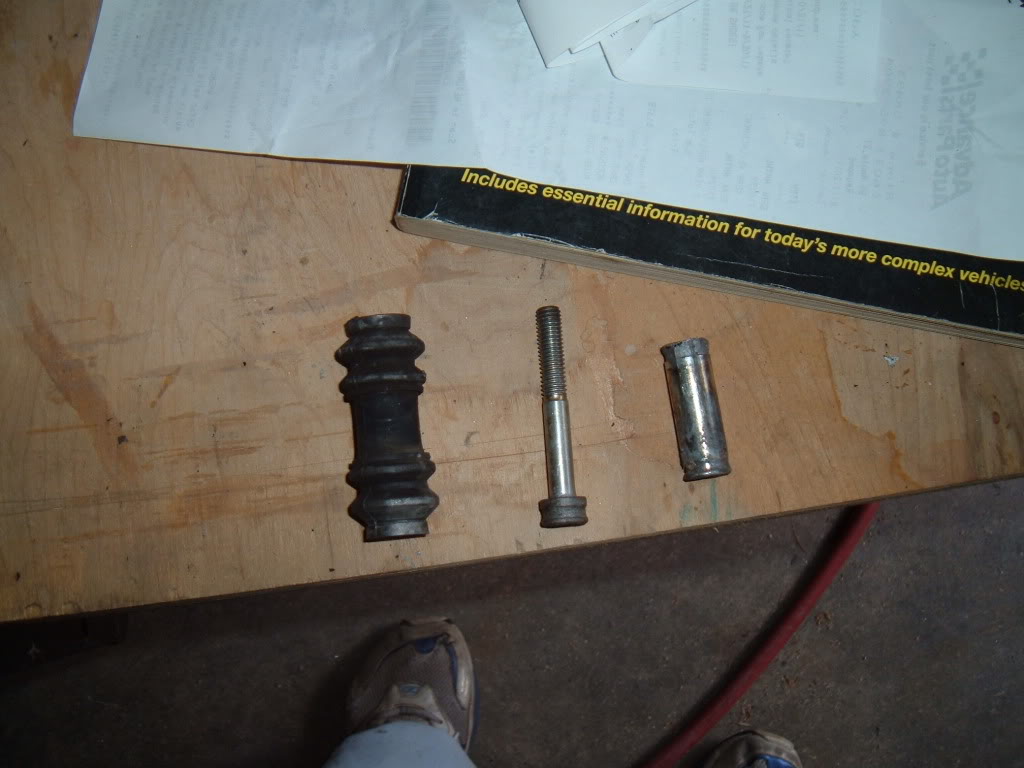
To remove the pins, push the rubber boot back and grab the very edge of the pin with V grips and twist and pull at the same time from the backside of the caliper(try pushing them out of the boot with your fingers first) . Clean and grease them also. When done, slide them back inside the rubber boot. The first pic is the bolt, slide pin and boot removed for cleaning. As you can see, the previous mechanic/owner applied some anti-seize compound to the bolts when that person did some work. Thank You and cudos to him.
Install 2 opposite lug nuts on the rotor to keep it straight. Apply some grease to the sliding surfaces of the caliper.
Apply a thin layer of anti squeal compound to the back of the pads(raised surface of pad) and let it set up for 10 minutes or so. Install calipers and tighten bolts to 24 ft lbs.
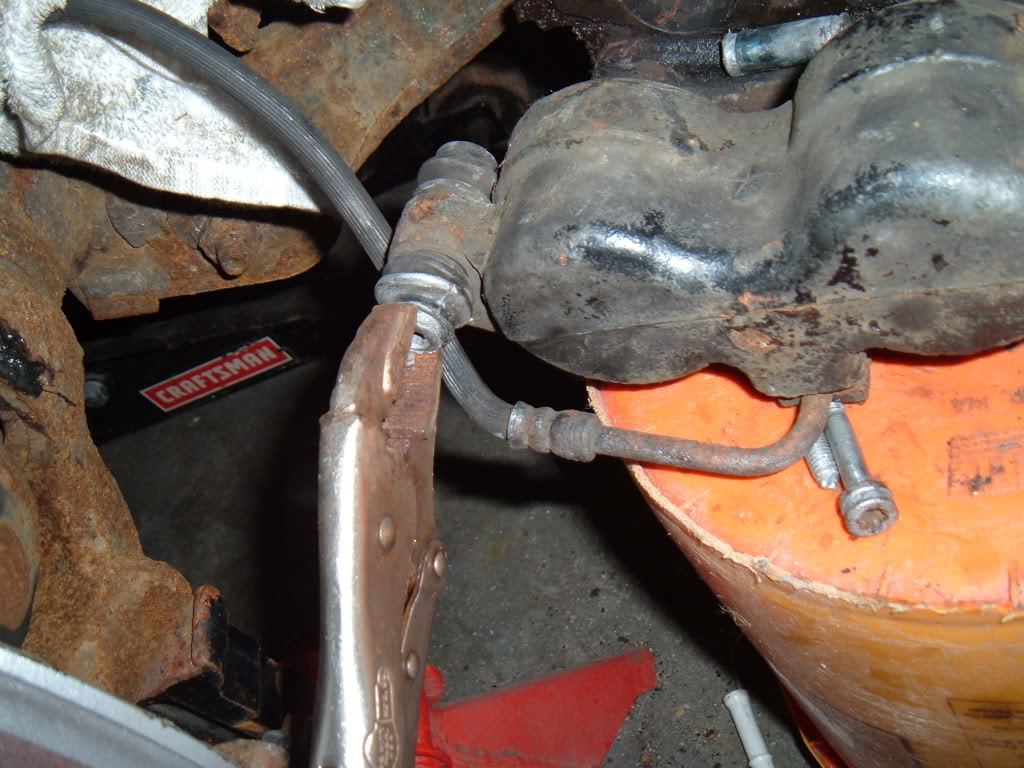
Now bleed the brakes. Get someone to help or use a power bleeder. I used my Mighty Vac Pump to do so(I had no helper today). Now would be a good time to completely flush the old fluid out. Just bleed them until the fluid comes out nice and clean. While the wheels are off and out of the way, get the grease gun and grease everything with a zerk fitting on it.
Lastly, remove the two previously installed lug nuts and install the wheel(clean the studs and nuts), tightening them in a crisscross pattern to 135 ft lbs. And your done.
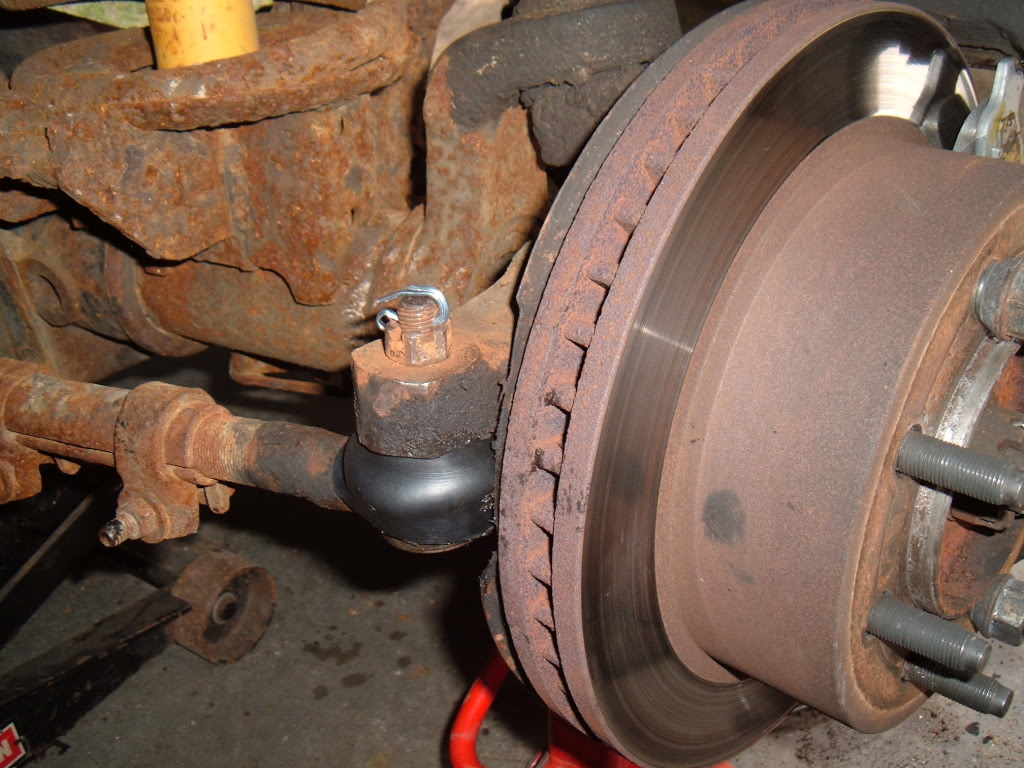
Except for replacing the torn boot on the tie rod end before it's too late! LOL
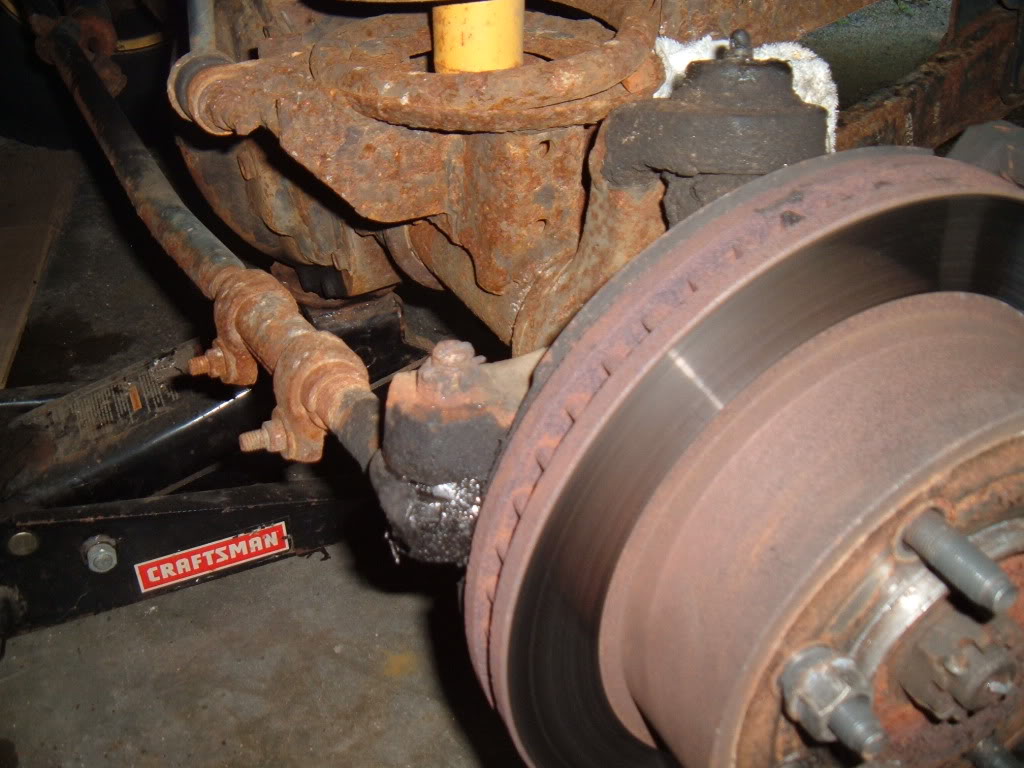
I used this and a new cotter pin to fix it temporarily, since the tie rod is fine,
Please use your head and use safety first when performing this and any other procedure on any vehicle.
I use Wagner or Raybestos brake parts only. For the DIY I used Wagner pads , part # sx859. (severe duty, even though I just plow my own 800 ft driveway). mx859 are oem replacements and good also. Both are expensive, and less expensive pads are available. Depends on what you use the truck for obviously.
You need to check the condition of the rotors while you are doing this job. If they are not smooth and have heat checks (blue spots or cracks), you should have them turned or replace them.
Set parking brake and chock rear wheel(s).
Jack vehicle and use jack stands
Remove wheel, my lug nuts are 15/16"
Loosen master cylinder cap
Get a hose that will fit the bleeder screw, put the other end in a can or jar.
Loosen bleeder screw
Use a large c clamp to compress the pistons about a half an inch.
Tighten bleeder screw
Bend upper anti rattle clip tabs up and out of the way.
Remove caliper bolts(they are the 2 with the small rubber boots on them.
Mine are #47 torx
Remove the caliper from the caliper adapter.
Place it upside down on a bucket. Remove the inner pad from the adapter and install it in the caliper against the pistons. Loosen bleeder screw with hose in can and using the c clamp or tool, compress the pistons in all the way. Alternate from one to the other. Tighten bleeder when done.
If you are replacing the rotor, remove the two bolts from the back of the adapter (mine are 16mm 12point). Move it out of the way and slide the rotor off. Wire brush all mating surfaces and the bolts. Apply a small amount of anti seize to those surfaces and the bolts. Slide new rotor on and reinstall adapter to 210 ft lbs.
Back to the pads. Wire brush and clean ALL mating surfaces and the 2 bolts and slide pins. Including the anti rattle clips and the piston surfaces (do not damage the rubber boots on the pistons). Apply some grease to the anti rattle clips and install new pads onto the adapter. Also apply a generous amount onto the slide pins and bolts. I use Sil-Glide.
To remove the pins, push the rubber boot back and grab the very edge of the pin with V grips and twist and pull at the same time from the backside of the caliper(try pushing them out of the boot with your fingers first) . Clean and grease them also. When done, slide them back inside the rubber boot. The first pic is the bolt, slide pin and boot removed for cleaning. As you can see, the previous mechanic/owner applied some anti-seize compound to the bolts when that person did some work. Thank You and cudos to him.
Install 2 opposite lug nuts on the rotor to keep it straight. Apply some grease to the sliding surfaces of the caliper.
Apply a thin layer of anti squeal compound to the back of the pads(raised surface of pad) and let it set up for 10 minutes or so. Install calipers and tighten bolts to 24 ft lbs.
Now bleed the brakes. Get someone to help or use a power bleeder. I used my Mighty Vac Pump to do so(I had no helper today). Now would be a good time to completely flush the old fluid out. Just bleed them until the fluid comes out nice and clean. While the wheels are off and out of the way, get the grease gun and grease everything with a zerk fitting on it.
Lastly, remove the two previously installed lug nuts and install the wheel(clean the studs and nuts), tightening them in a crisscross pattern to 135 ft lbs. And your done.
Except for replacing the torn boot on the tie rod end before it's too late! LOL
I used this and a new cotter pin to fix it temporarily, since the tie rod is fine,
Last edited by jasonw; 08-24-2011 at 05:00 PM. Reason: Revision 1.1