
DIY - Transfer Case Removal and Seal Replacement
#1
 11-05-2009, 03:45 AM

Join Date: Apr 2008
Location: Lee County, North Carolina
Posts: 7,055
Likes: 0
Received 5 Likes
on
5 Posts
I have the 231D transfer case (standard in all 2nd gen Ram 1500's).
Transfer case removal starts with the drive shafts.
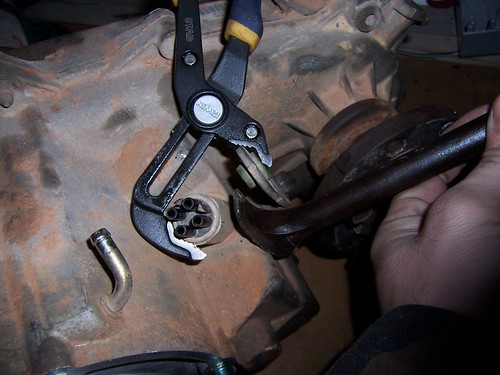
To get the front drive shaft off you need to stick a pry bar in the yoke and let it hit one of the control arms to break the bolts loose.
Next you want to drain the fluid.
Next, you will need to remove the vacuum and vent lines along with the shift lever. You can see where all three hook up in this picture. I used my channel-locks and a pry bar to get the shift lever out of its grommet. Gently squeeze the channel-locks so you can pry on the shift lever without bending the bar that it attaches to.
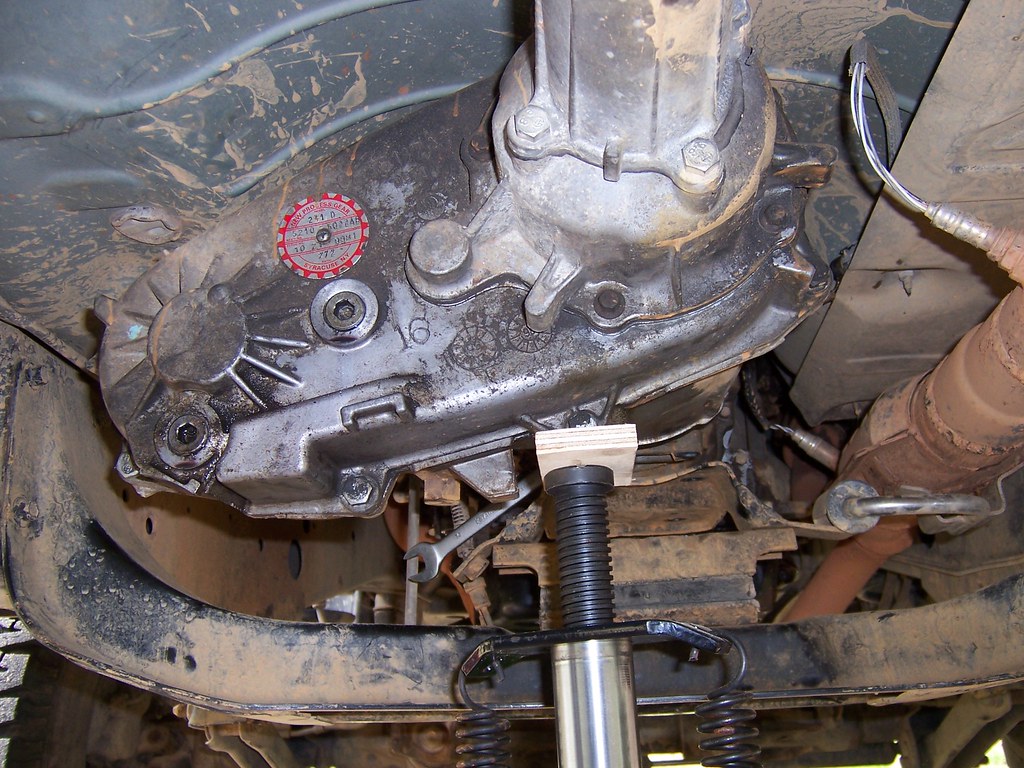
My downstream o2 sensor lays on top of the transfer case so you will want to make sure that it is out of the way also.
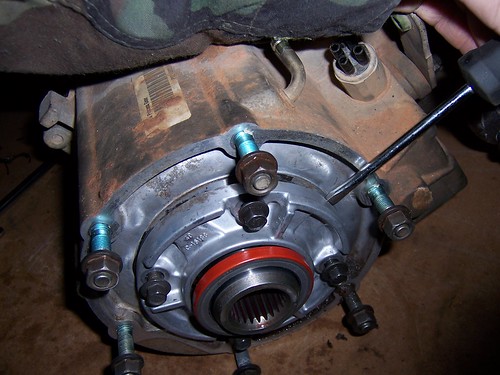
You need to put the jack on the bolt in the picture to have the weight centered enough to jack up the transfer case without it shifting side to side.
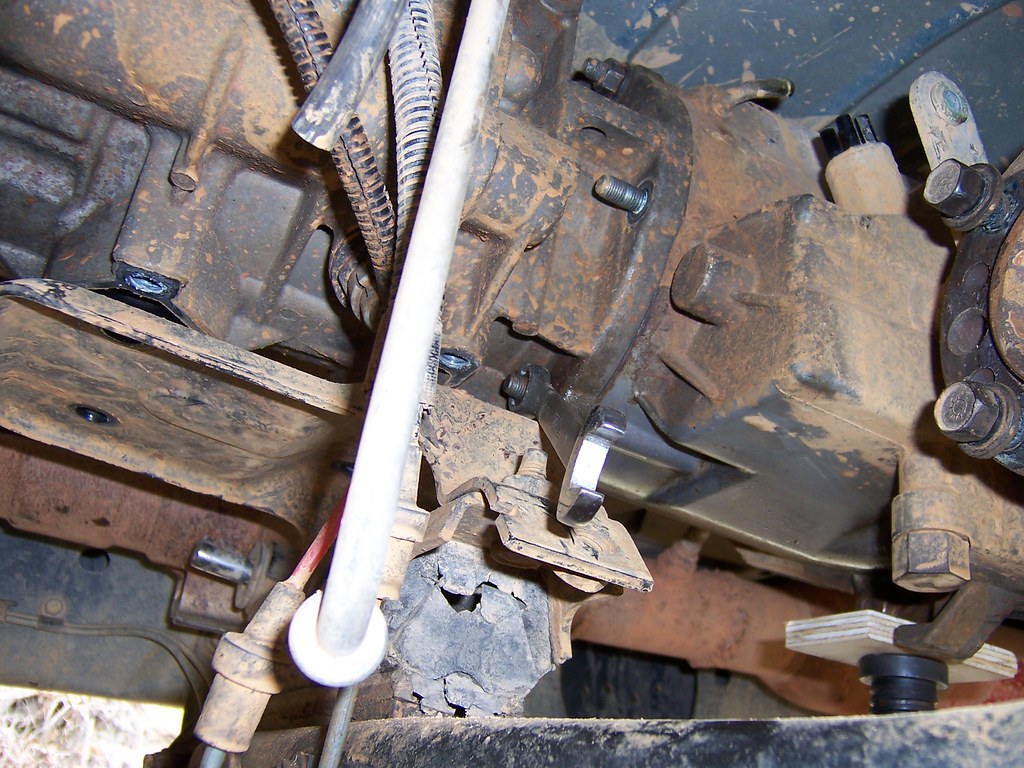
There is a lot going on in this picture.
-You need to take the four bolts out of the transmission mount that go into the transmission, an offset wrench makes it easy to get at the two bolts toward the rear of the transmission mount.
-After taking the bolts out you need to jack the transfer case up about an inch or so.
-With the transfer case jacked up you are able to get a wrench on the bottom two nuts that hold it onto the transmission.
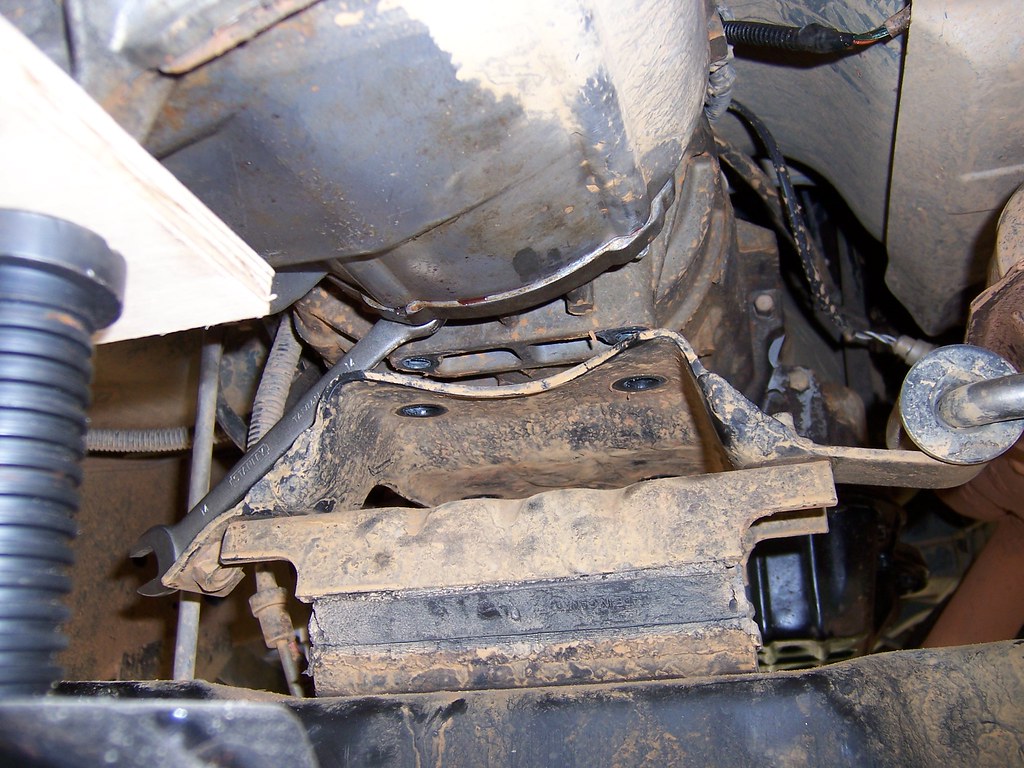
Here is another angle of the transfer case jacked up with a wrench on the bottom nut that is blocked with the transmission sitting on the transmission mount.
I put a knee on the extension housing and slid the transfer case back with my hands on the sides of it then lowered it to my chest then set it on the ground. If you aren't that strong, then you can use a jack and maybe some straps and a board to keep it steady because it isn't the same weight from side to side and can fall off a jack easily.

When you pull the transfer case back you will probably get a shower of ATF on your shoulder so be ready. I stuck a shopping bag under the transmission output shaft to stop the flow of fluid.
After taking the transfer case out you can change the transmission output seal. A seal puller is a good investment.

Use a piece of cardboard like I did because it is easy to gouge aluminum.
To change the transfer case input shaft seal you need to remove the retainer plate that it is in.
There is a small recess on each side where you can insert the tip of a flat head screwdriver to break the silicone seal under the retainer plate. Remember, that part is aluminum and gouges easily.
There are four bolts holding the retainer plate on.
You can knock the seal out from the inside with the seal driver or a big socket or you can clamp it to a wooden table with a wood block between the clamp and the retainer plate, then use the seal puller.
To drive the new seals into place, a finger full of ATF wiped on the painted edge of the seal will make it slide in easier.
To drive the new seals in I got a ball joint removal kit from Advance Auto Parts because it has a couple of cups that are the perfect size and they didn't have a seal driver kit.
Drive the new seal as far as the original, it was close to flush with the edge of the ring.

The retainer plate that the input shaft seal is in should be coated with Loctite 518 anaerobic sealant and bolted back on.
Do not block the fluid return cavity with the Loctite as that can cause the new seal to fail. The return cavity is the one hole that is not threaded and you need to match the retainer plate groove up with that hole so it will be able to drain.
Installation is reverse of removal.
Tips for installation:
The rear drive shafts bolt holes will line up easily if the transmission is put neutral so you can spin it after sliding it into the tail shaft of the transfer case (don't forget to set the e-brake first).
Use threadlocker blue on the drive shaft bolts, the transmission mount bolts and the transfer case nuts.
A drop of ATF on the end of the shift lever will make it slide into the grommet easier.
The transmission fluid will be a little low so check it after a short drive.
Bolt sizes and torque specs
Transmission mount bolts - 5/8" - Not sure on torque, I just got them good and tight. somewhere around 30-35 ft-lbs.
Retainer plate bolts -10mm - 16 ft-lbs.
Transfer case to transmission nuts - 14mm - 20 to 30 ft-lbs.
Rear drive shaft bolts - 15mm
Front drive shaft bolts - 5/8"
Front drive shaft bands - 8mm - 168 in-lbs
Tools that come in handy:
For the rear bolts on the transmission mount

For holding the front drive shaft still while removing/installing the bolts (any tool that will fit in the yoke and reach the control arm will work, this is what I used).

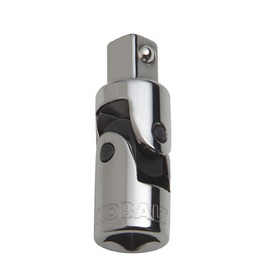
For the top nut on the passenger side of the transfer case.
Part Numbers
Transmission output shaft seal - Timken 710058
Transfer case input shaft seal - Timken 3173
Last edited by jasonw; 05-31-2010 at 05:22 PM.