

My 97 RAM Project
#11
 01-16-2017, 02:27 PM


Join Date: Sep 2015
Location: Texas
Posts: 106
Likes: 0
Received 0 Likes
on
0 Posts
Update:
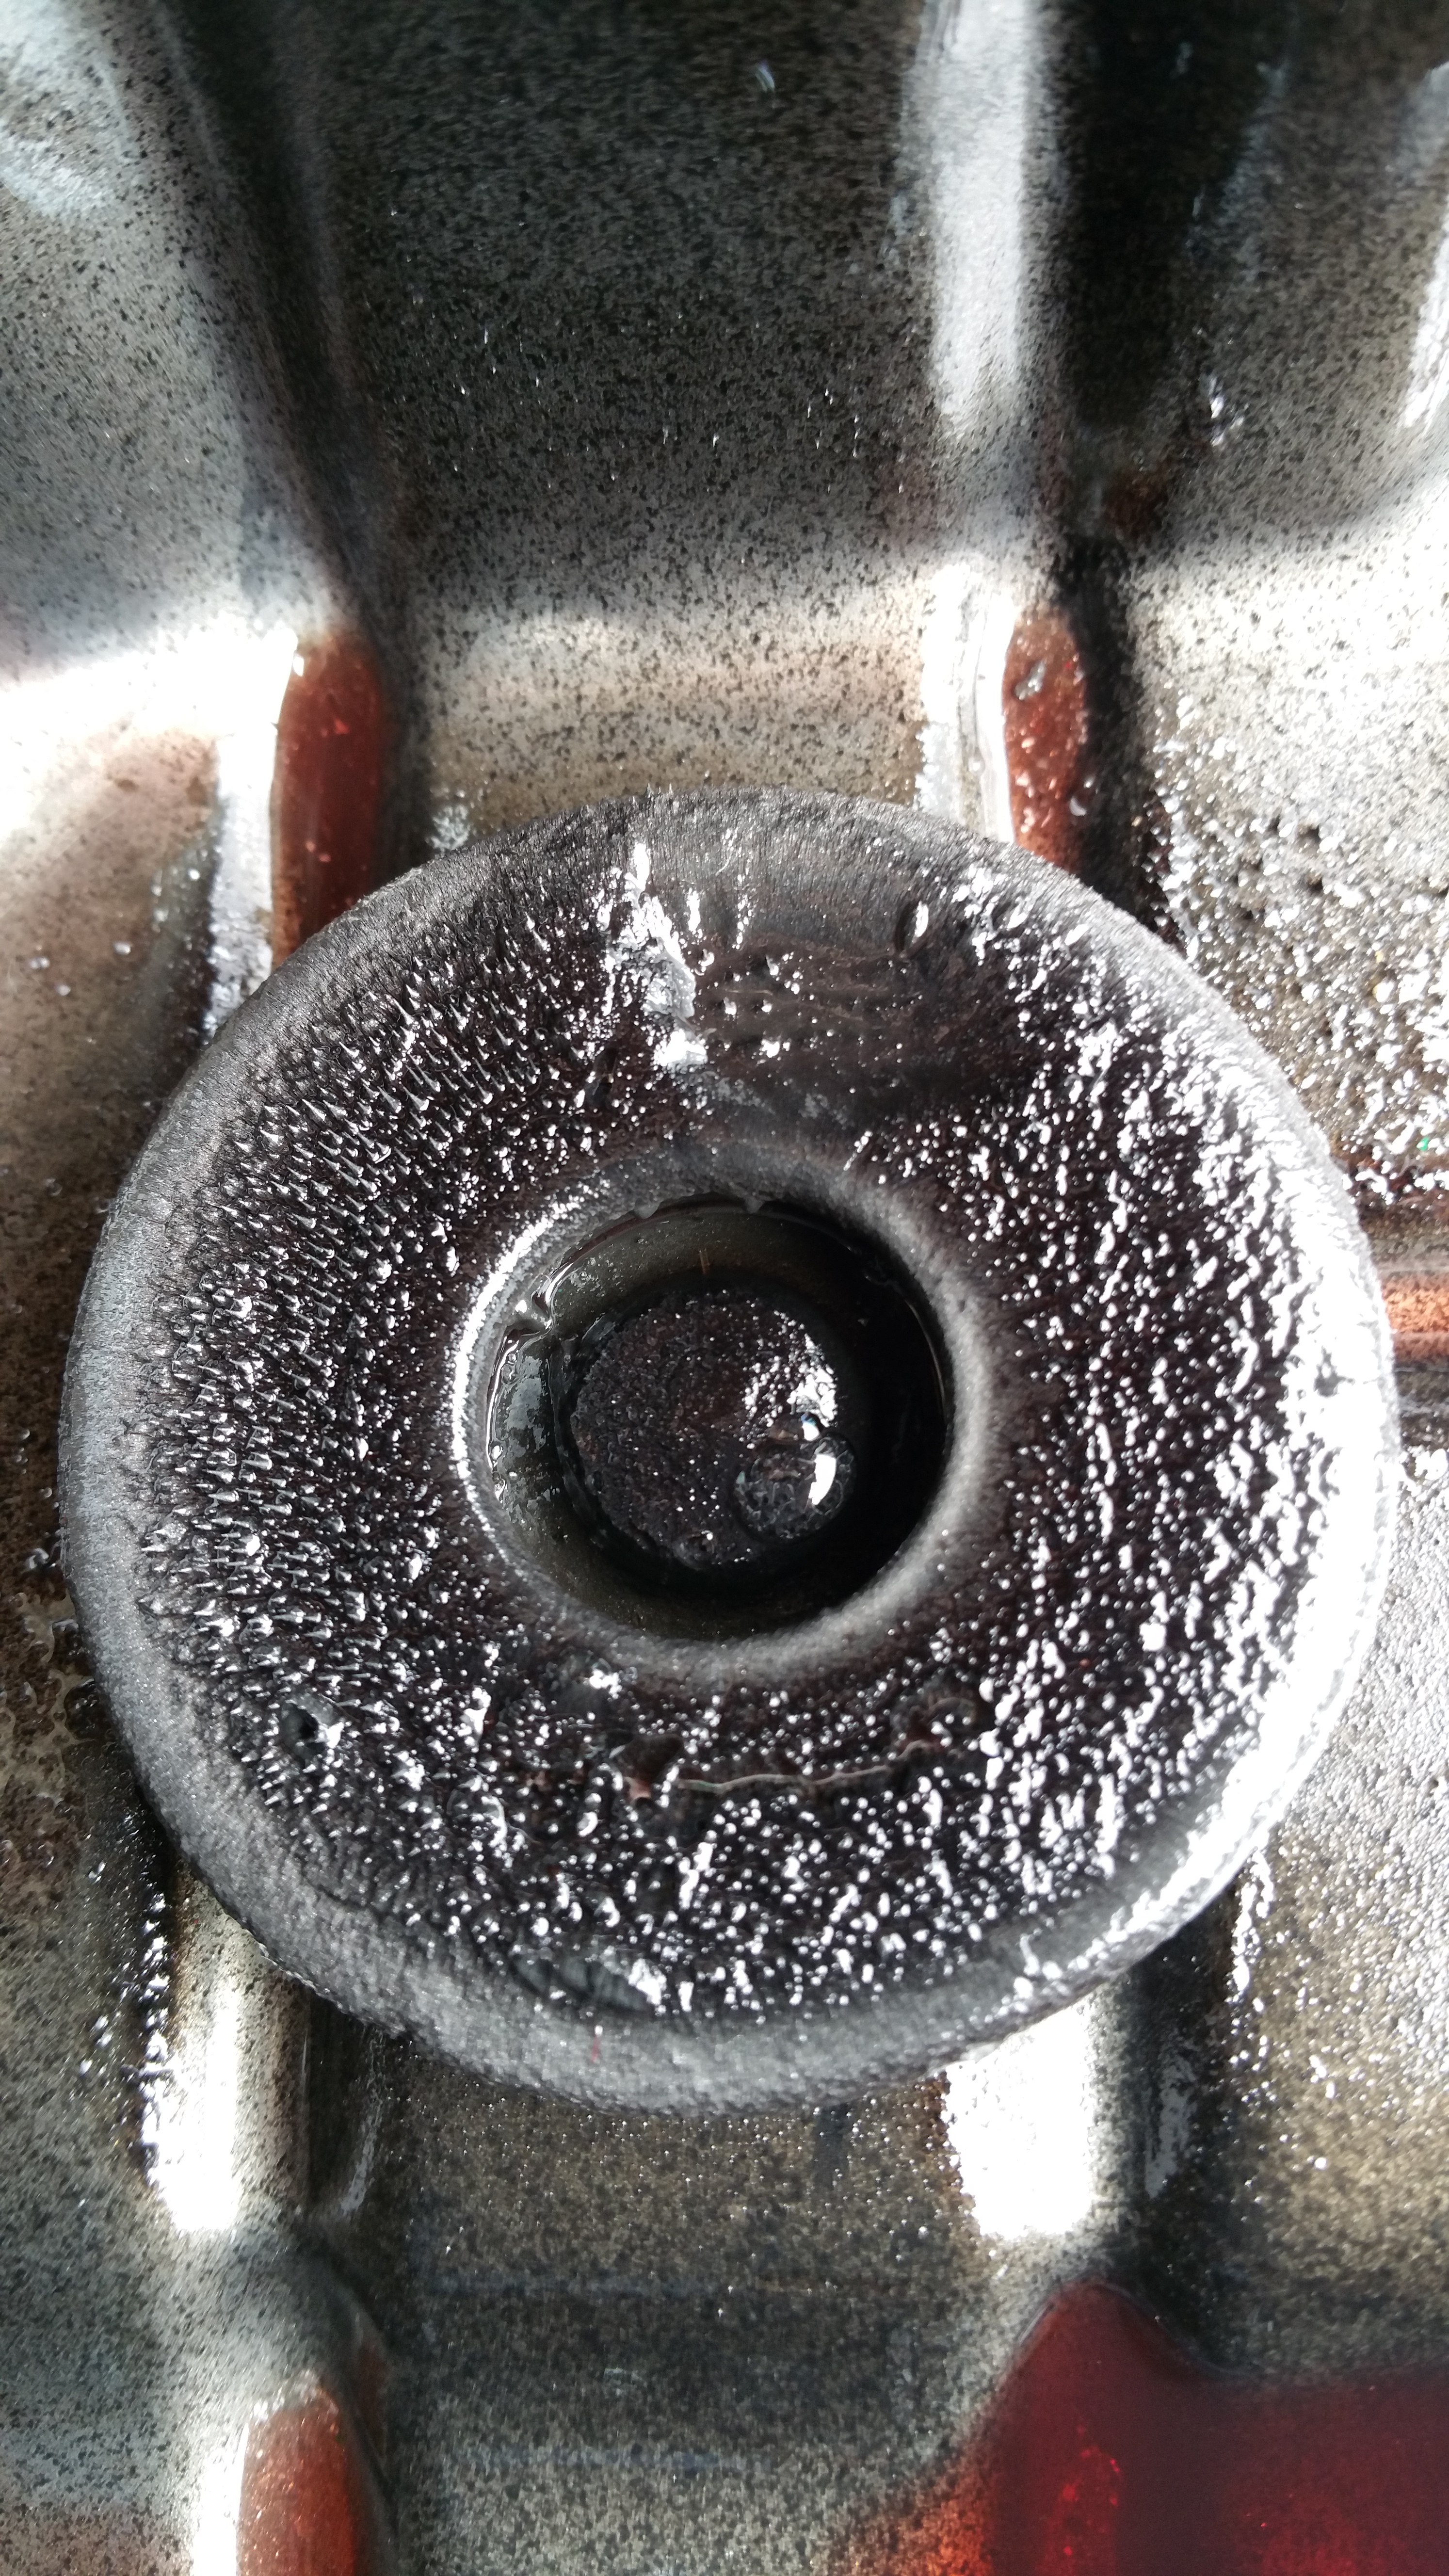
Here are some pics of when I pulled the trans pan to find out more about the tranny when I bought the truck. Looked real good in there is all I can say. The PO was kind enough to put a date on the filter so I knew when it was changed last. I bought the truck in DEC 2013.
The pan had normal wear shavings in it from what I could tell. I was really worried about it because after I bought it, it was shifting REALLY HARD when the truck was colder. As it warms up it got better. So I dropped the pan to check it out.
Wish I had more pics. I actually removed the valve body on accident(never worked on AOD before) but everything looked really good and I put it all back.
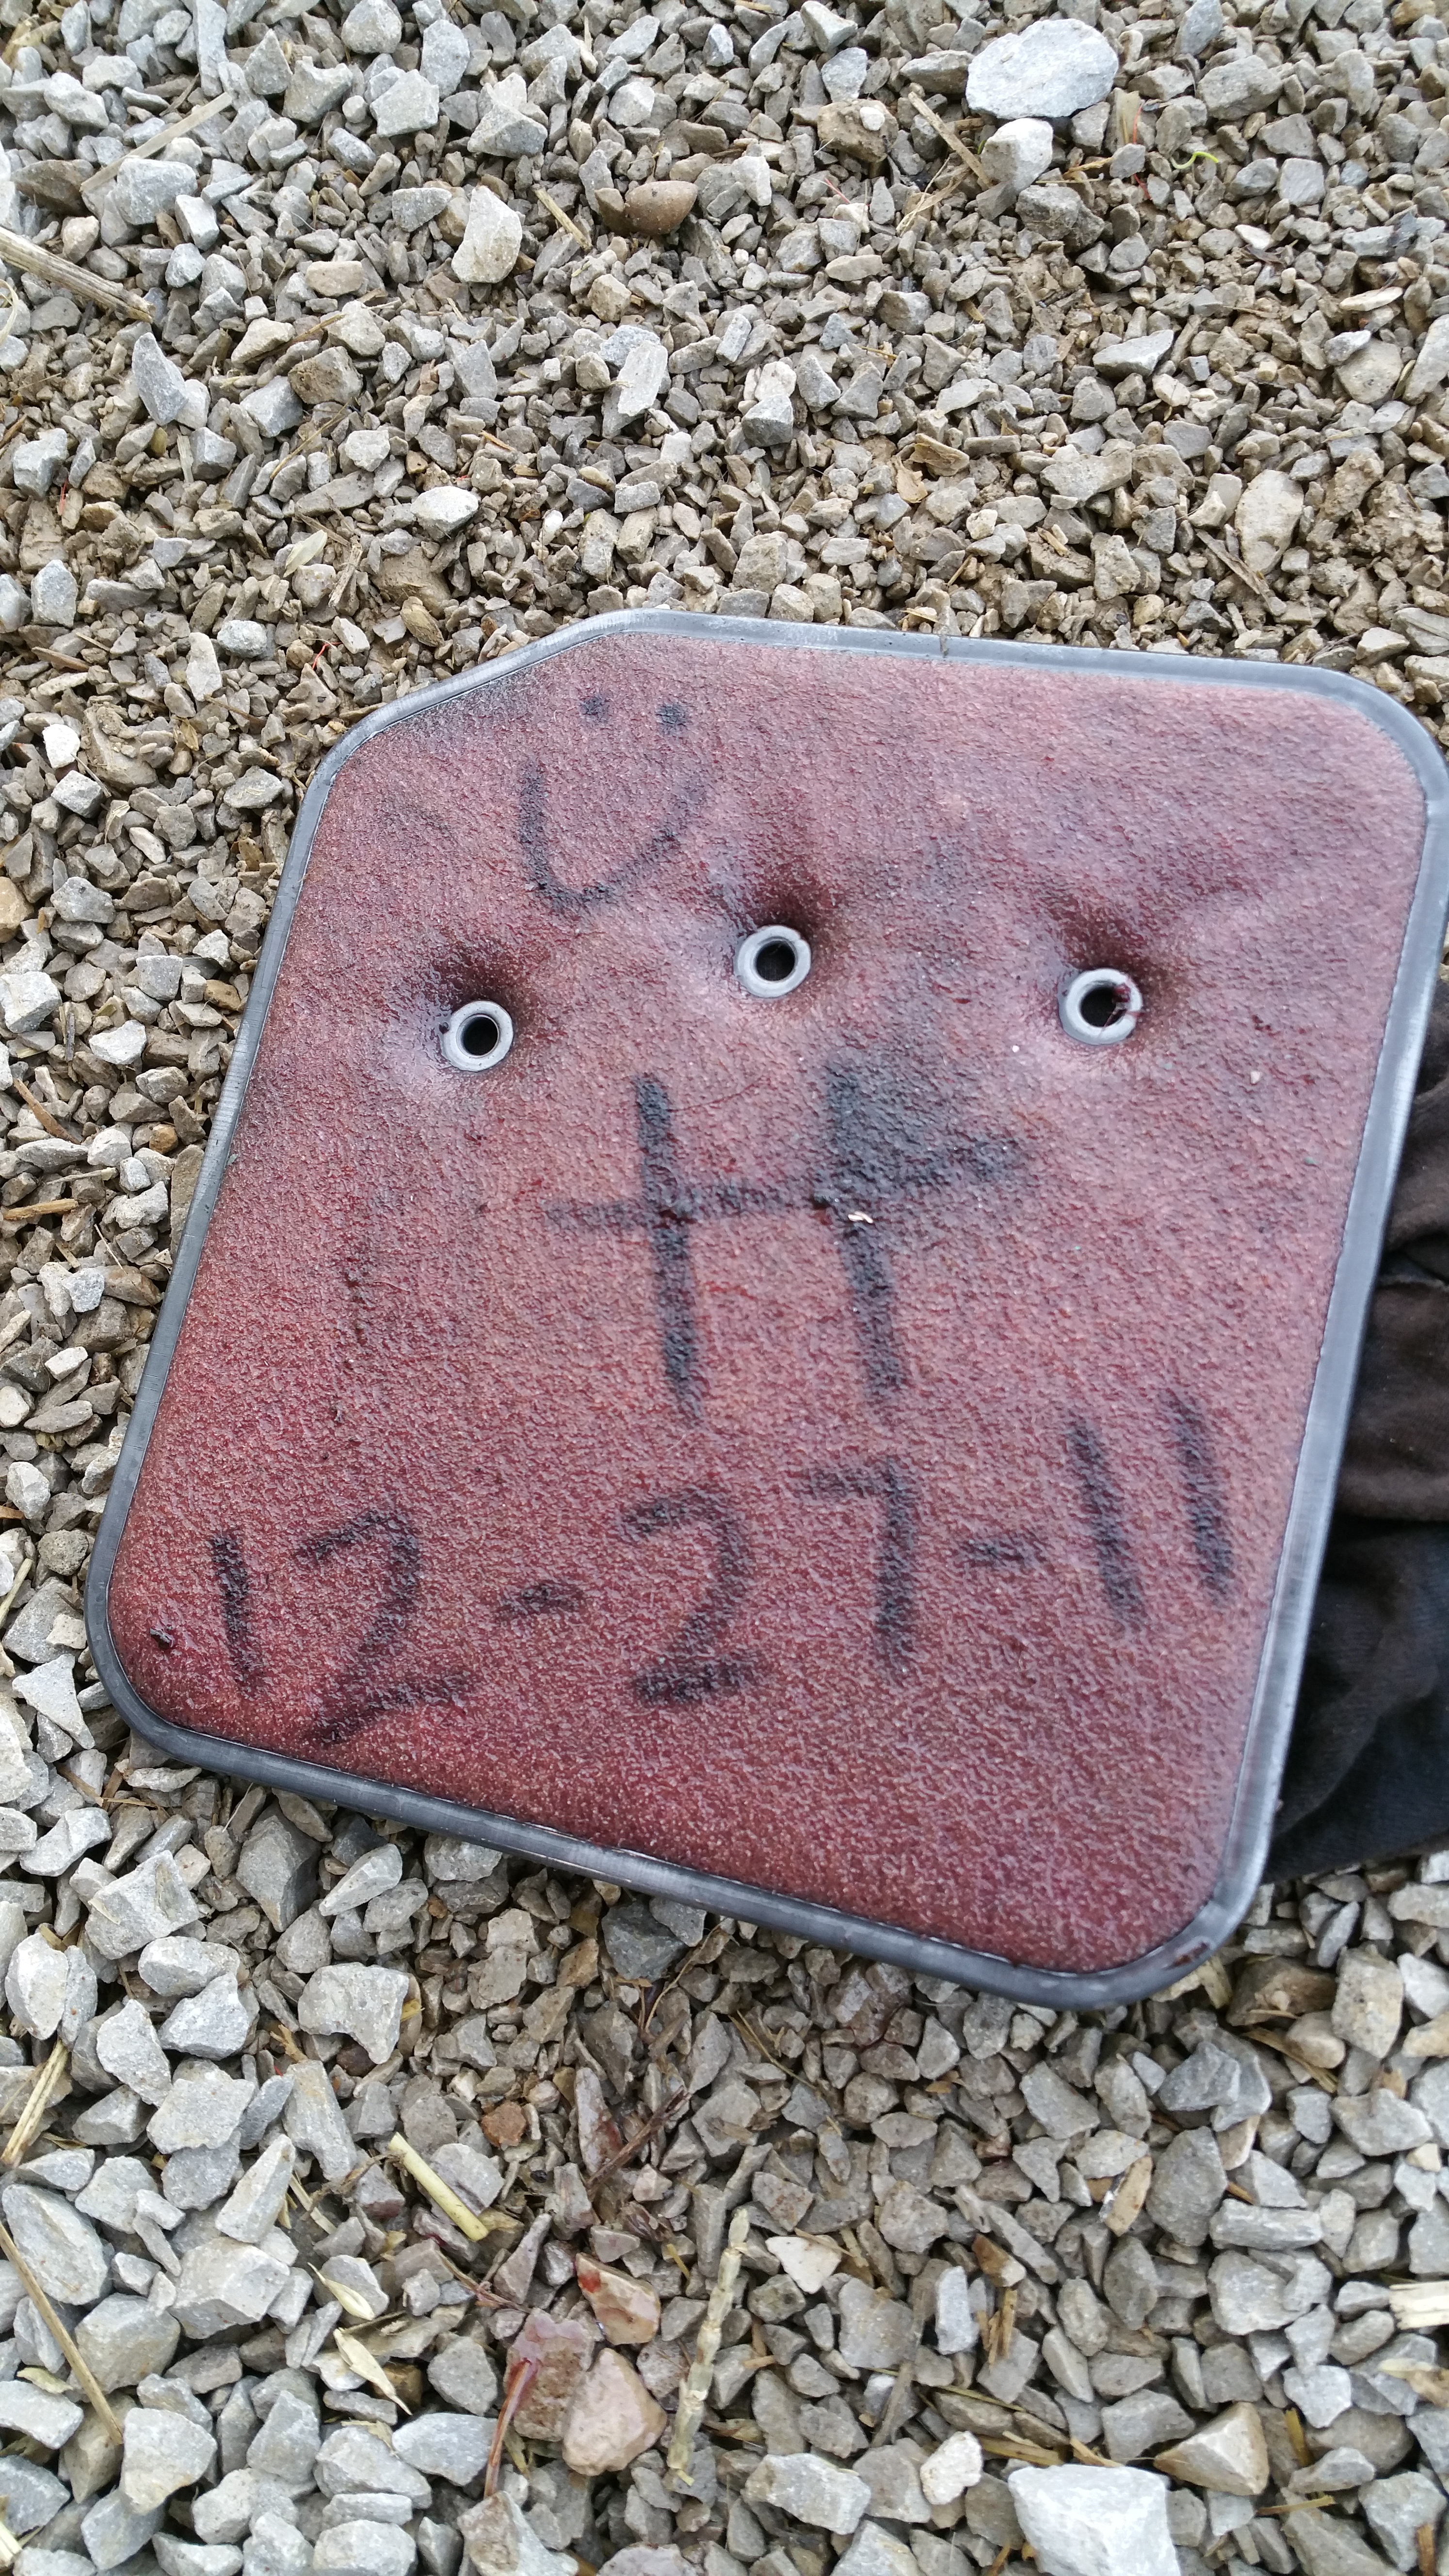
I changed the filter with new ATF+4 in March 2015.
Here are some pics of when I pulled the trans pan to find out more about the tranny when I bought the truck. Looked real good in there is all I can say. The PO was kind enough to put a date on the filter so I knew when it was changed last. I bought the truck in DEC 2013.
The pan had normal wear shavings in it from what I could tell. I was really worried about it because after I bought it, it was shifting REALLY HARD when the truck was colder. As it warms up it got better. So I dropped the pan to check it out.
Wish I had more pics. I actually removed the valve body on accident(never worked on AOD before) but everything looked really good and I put it all back.
I changed the filter with new ATF+4 in March 2015.


Last edited by ram-tuff; 02-06-2017 at 04:09 PM.
#12
01-17-2017, 06:56 PM
Couple of weeks ago I decided to tackle a rear main seal leak. I did some research and got everything I needed for the job. All from autozone again. Budget of course. But they sell the felpro's and those have always performed well for me.
Anyway I didn't get many pics of the job as its been beat to death on the internet but this thread is for tracking purposes anyway. I had to scrub the underneath of the engine all the way around the oil pan as there must have been a nasty leak from something else, the whole bottom of the engine was caked in oil/dirt from years ago. Now I did notice the pan gasket leaking from the driver side just under the motor mount. So not only was the rear main leaking but so was the pan gasket. The things PO's leave us with...
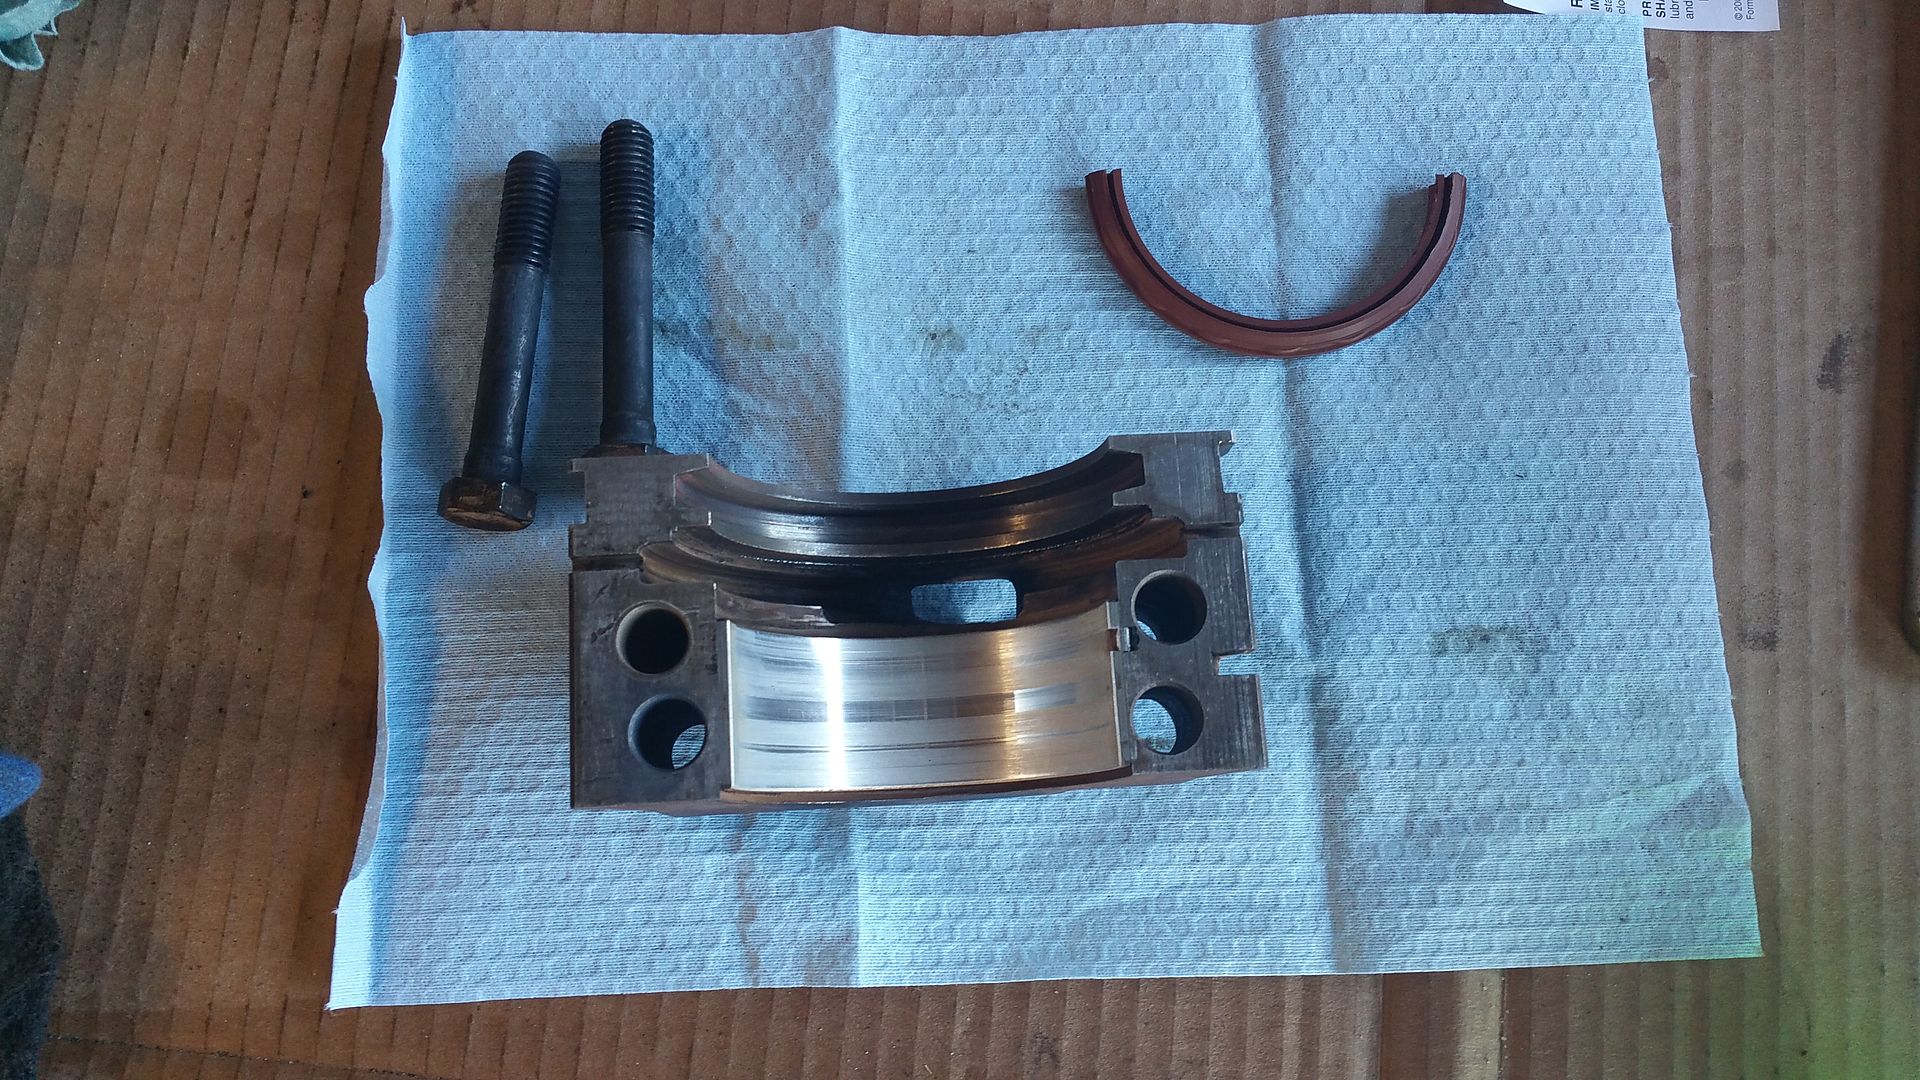
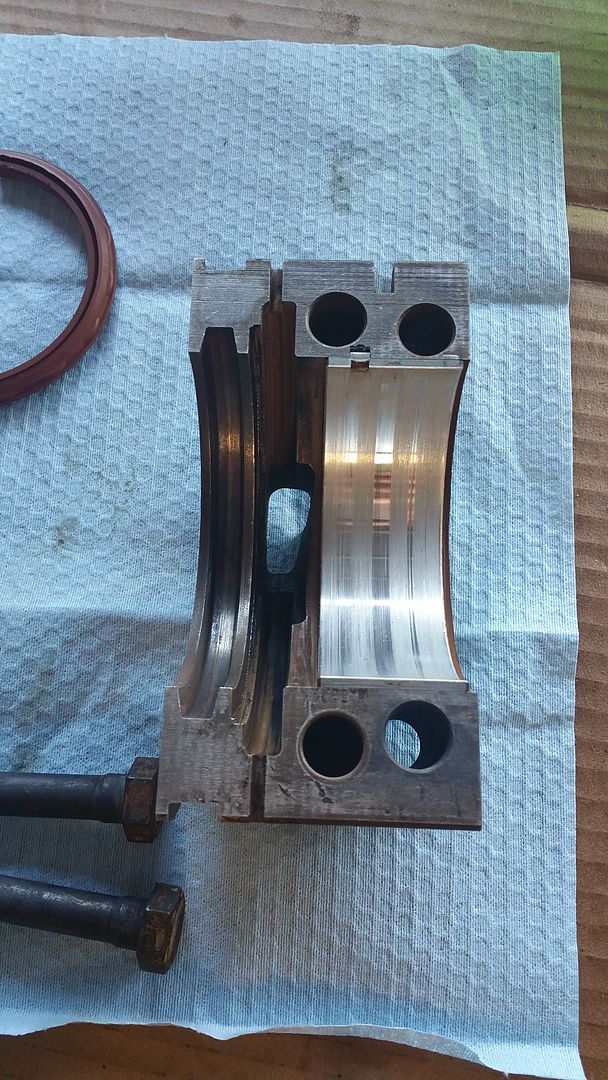
So this truck has 169,000 miles on it. Has some nice scoring on the crank bearings as you can see below. She will need a rebuild soon... She already burns oil some, or maybe it was all leaking from my rear main??!! Yeah I wish I could get that lucky...
Didn't take any pics of the new pump but I also replaced the oil pump while I was under there. I primed the new pump before installing and cleaned the heck out of the the pickup tube and screen.

Did I mention now my transmission pan is leaking again? Yeah its a rolling chain of events with this thing... I will get some juicy pics of that when I tackle that job soon.
Anyway I didn't get many pics of the job as its been beat to death on the internet but this thread is for tracking purposes anyway. I had to scrub the underneath of the engine all the way around the oil pan as there must have been a nasty leak from something else, the whole bottom of the engine was caked in oil/dirt from years ago. Now I did notice the pan gasket leaking from the driver side just under the motor mount. So not only was the rear main leaking but so was the pan gasket. The things PO's leave us with...
So this truck has 169,000 miles on it. Has some nice scoring on the crank bearings as you can see below. She will need a rebuild soon... She already burns oil some, or maybe it was all leaking from my rear main??!!
Yeah I wish I could get that lucky...

Didn't take any pics of the new pump but I also replaced the oil pump while I was under there. I primed the new pump before installing and cleaned the heck out of the the pickup tube and screen.

Did I mention now my transmission pan is leaking again? Yeah its a rolling chain of events with this thing... I will get some juicy pics of that when I tackle that job soon.
#13
01-17-2017, 08:31 PM
Join Date: Sep 2015
Location: Texas
Posts: 106
Likes: 0
Received 0 Likes
on
0 Posts
oh man, i am really glad to hear that sir! i call myself a gear head hot-rodder, or internet mechanic, i do both i guess. But that basically means i'm no expert but i have seen and experienced the differences in what you are saying about my bearings and their color. I get it. Sweet. Awesome. I think of the pressure plate on a clutch when its seen a ton of "clutching" or "burn outs man". Purple and other colors.
I am pretty happy to hear you confirm that. Now lets talk about the burning of oil in my engine lol. I burn through 2-3 quarts of oil on the highway doing 770 mile trip. Do you think I could just drop the oil pan, yank the cylinders, shoot on new rings, be done with it? Maybe I space the rings different than factory specs for the cylinder wear? Sorry, had to ask. Thanks.
Or maybe I have another problem I'm not thinking of? Dang thing runs great, has power, no signs of black or blue smoke coming from exhaust, at least at idle anyway in the driveway. It does smell a bit though. Not antifreeze sweet though. And my white bumper delete panel get pretty black after about 1 month of driving without a wash. I dig the dual exhaust that can't been seen from anywhere on the truck, I hid mine with down pipes just before the bumper.
Oil is always black as the ace of spades when I change it every 3000 miles. Don't forget, by 3000 miles I have usually added at least 2-4 quarts more of oil before it gets changed by 3000. Now, I will say I notice when I drive around town, it doesn't seem to use up the oil like it does on the highway.
Thoughts?
Last edited by ram-tuff; 01-17-2017 at 08:34 PM.
#14
01-17-2017, 08:51 PM
Join Date: Sep 2015
Location: Texas
Posts: 106
Likes: 0
Received 0 Likes
on
0 Posts
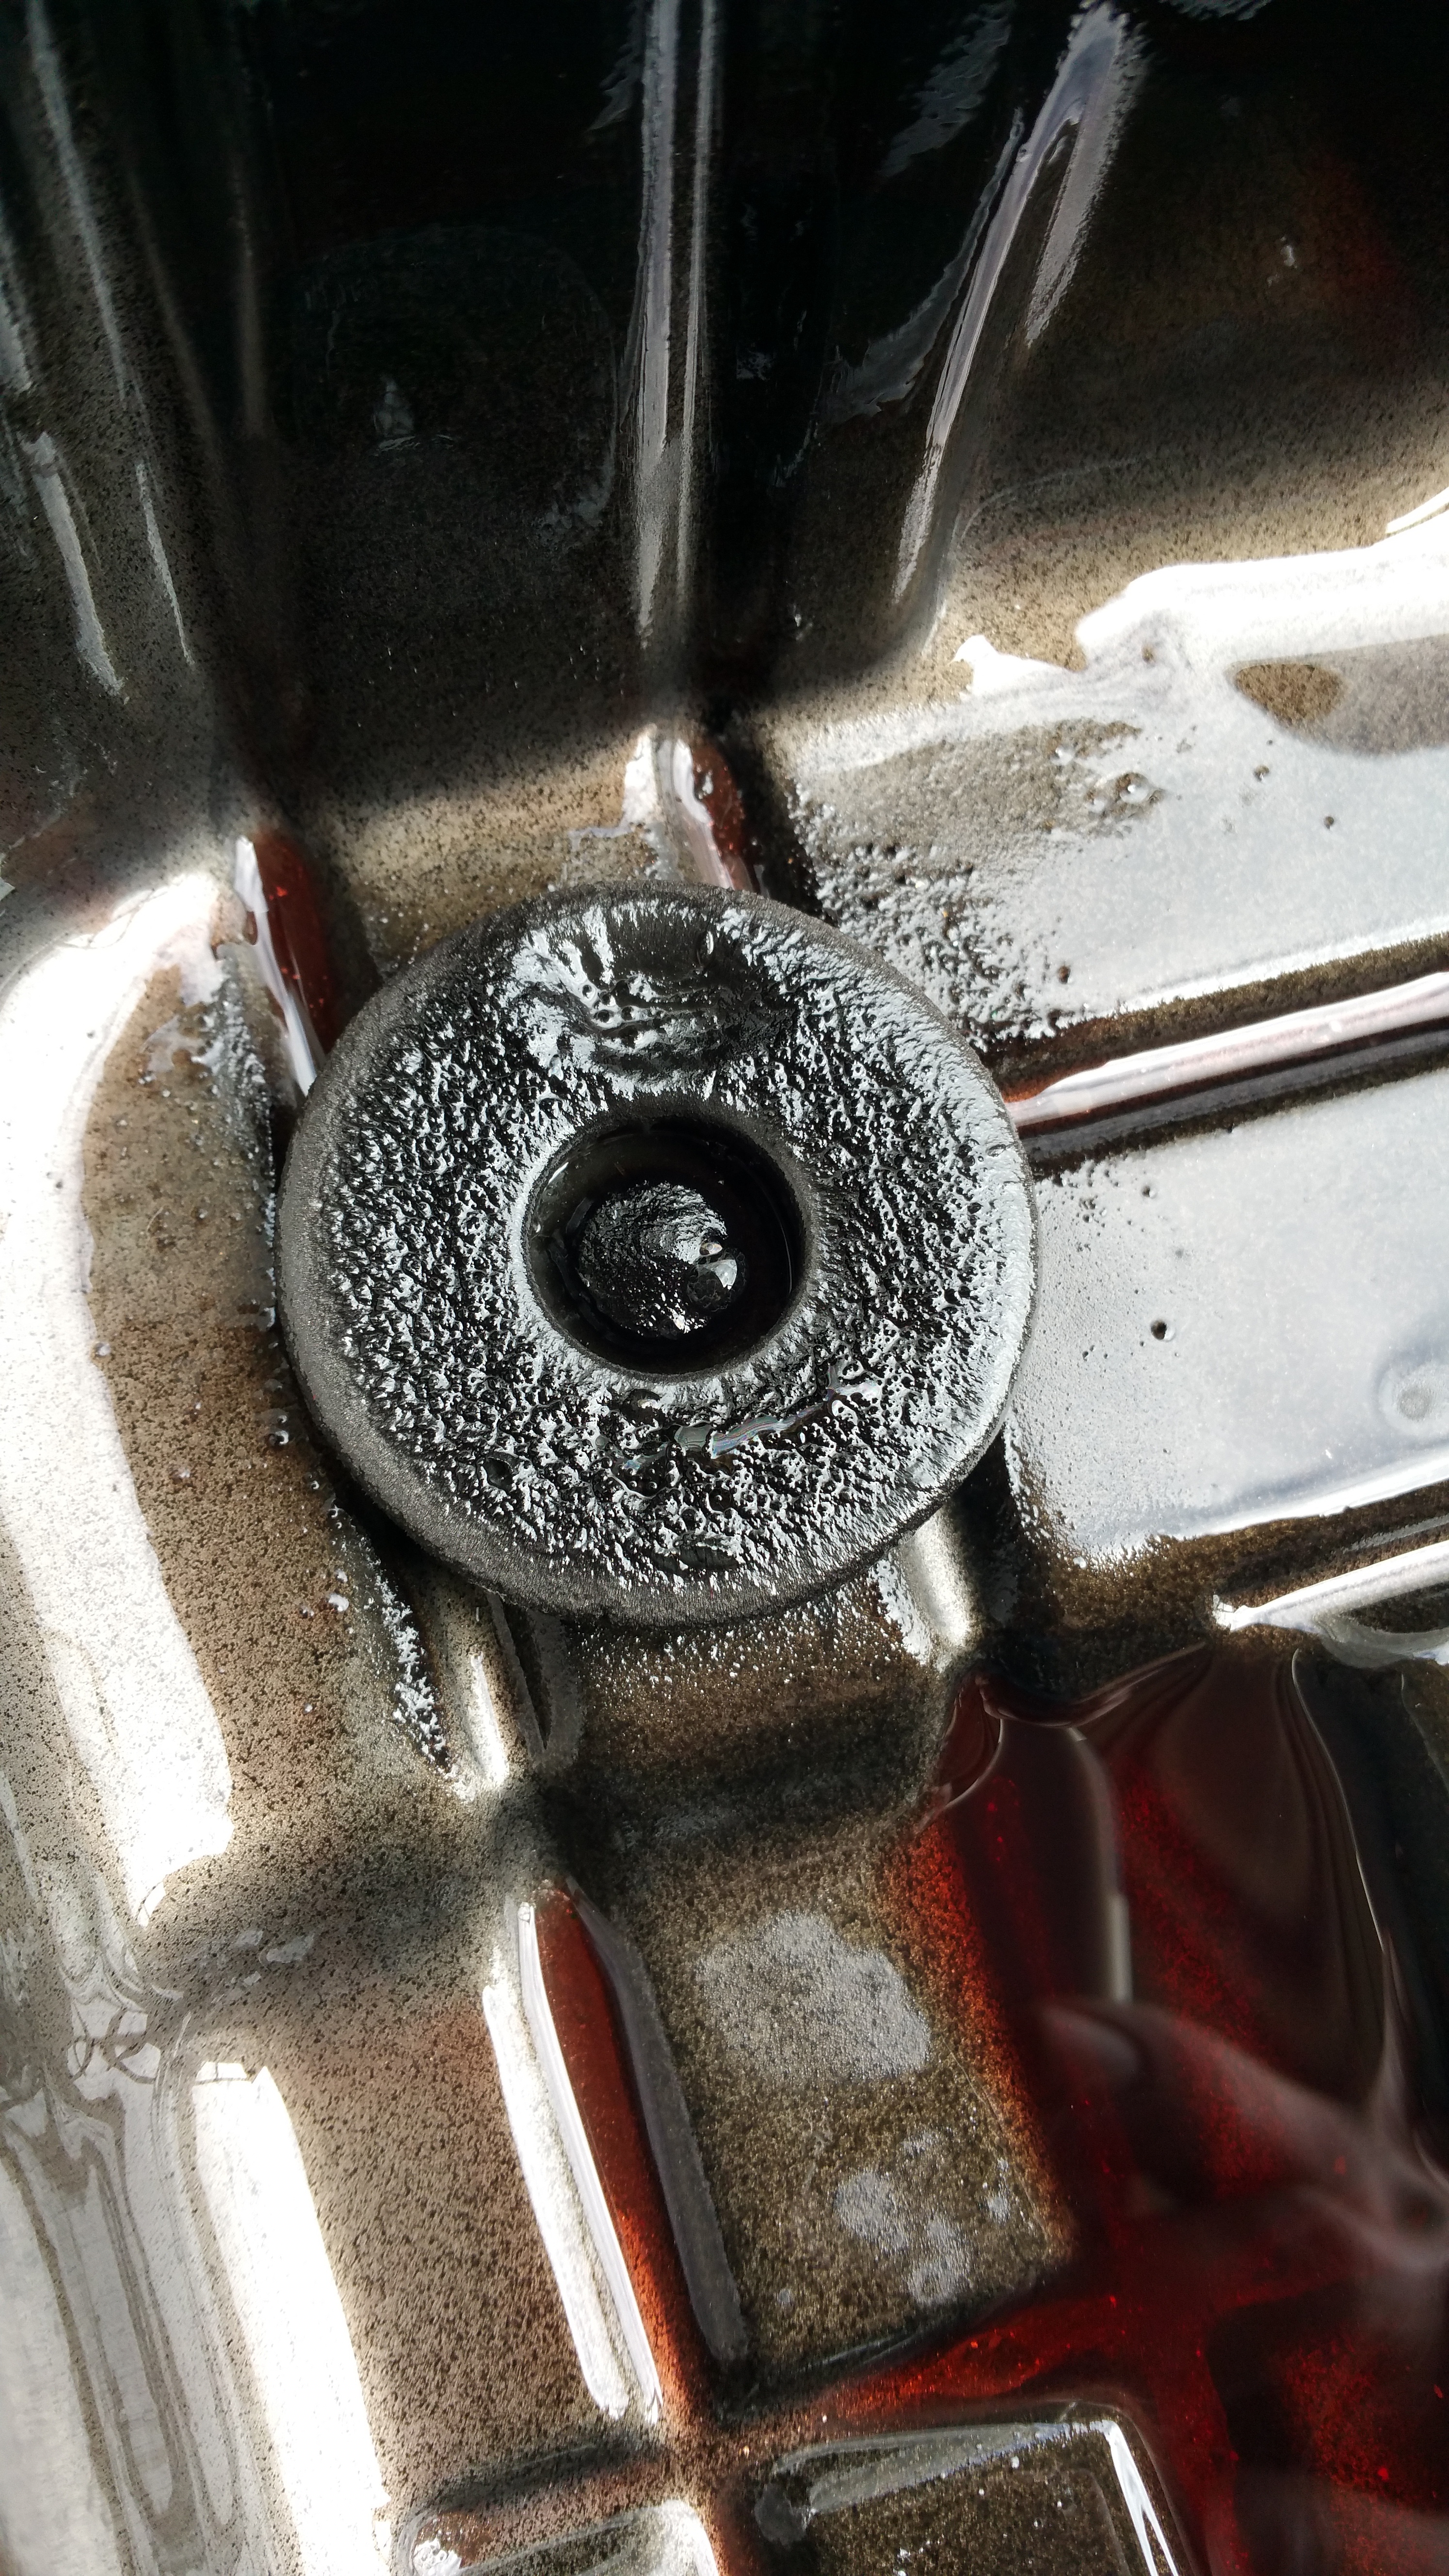
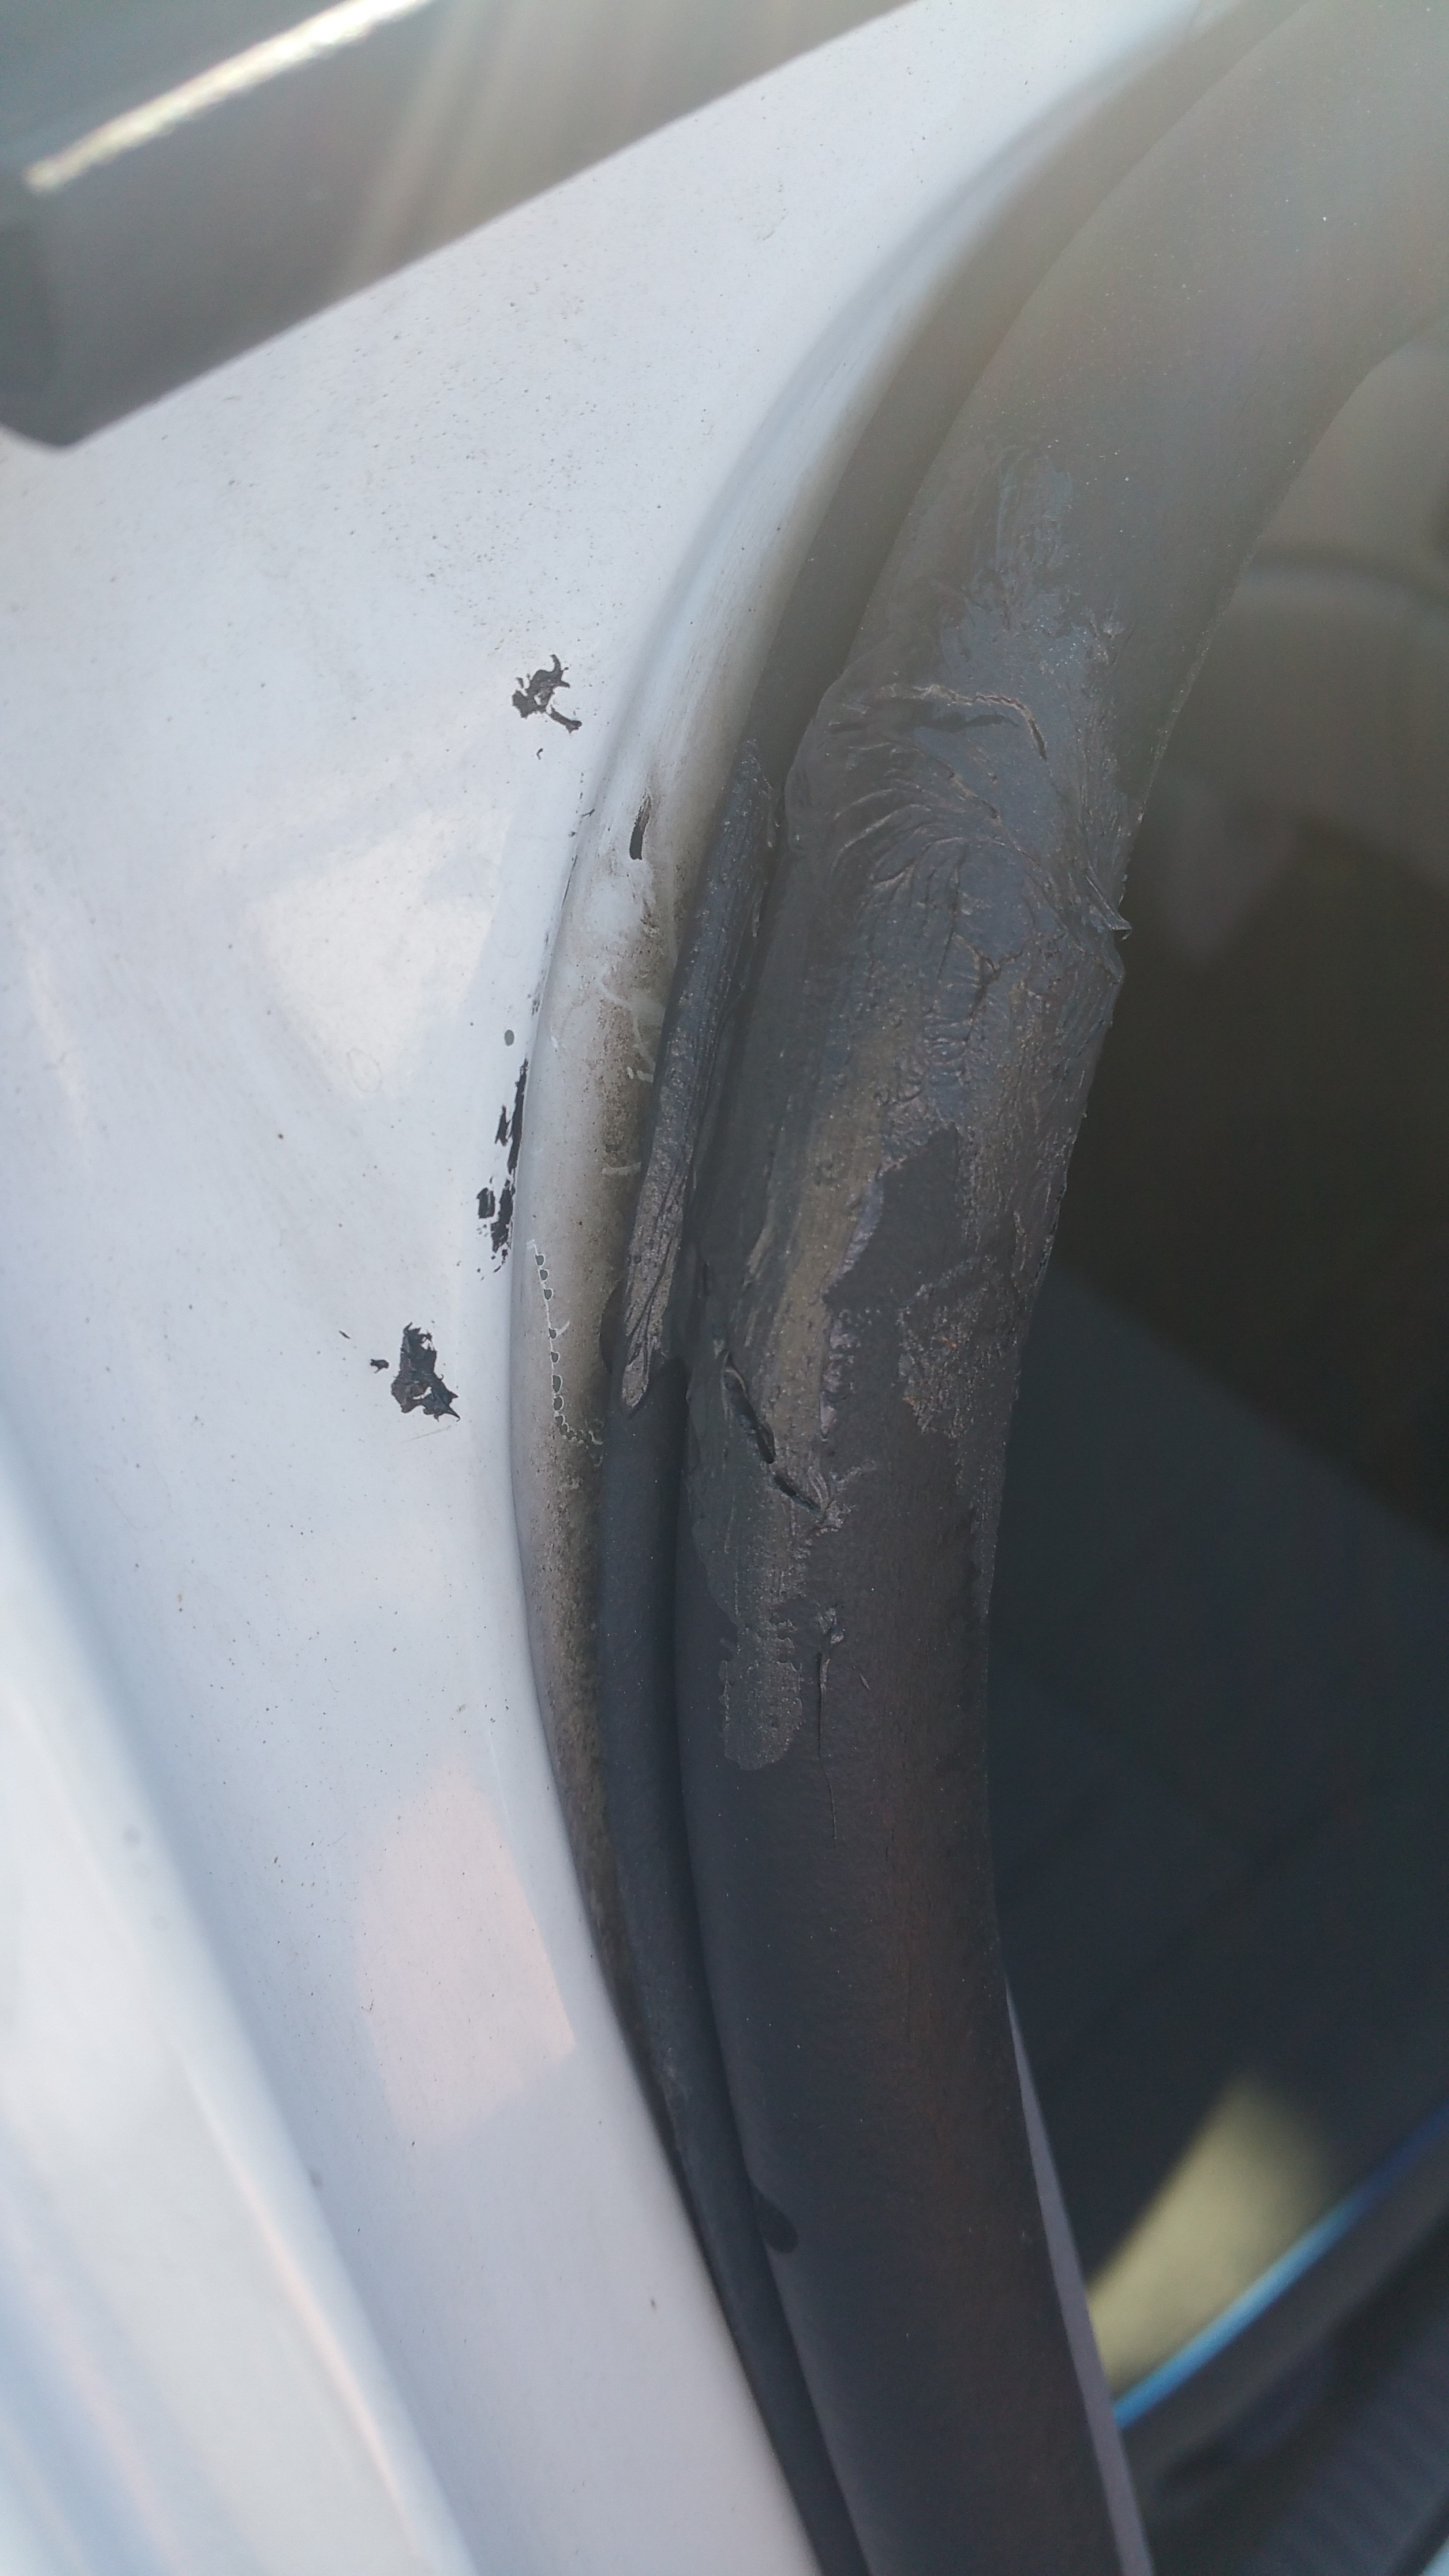
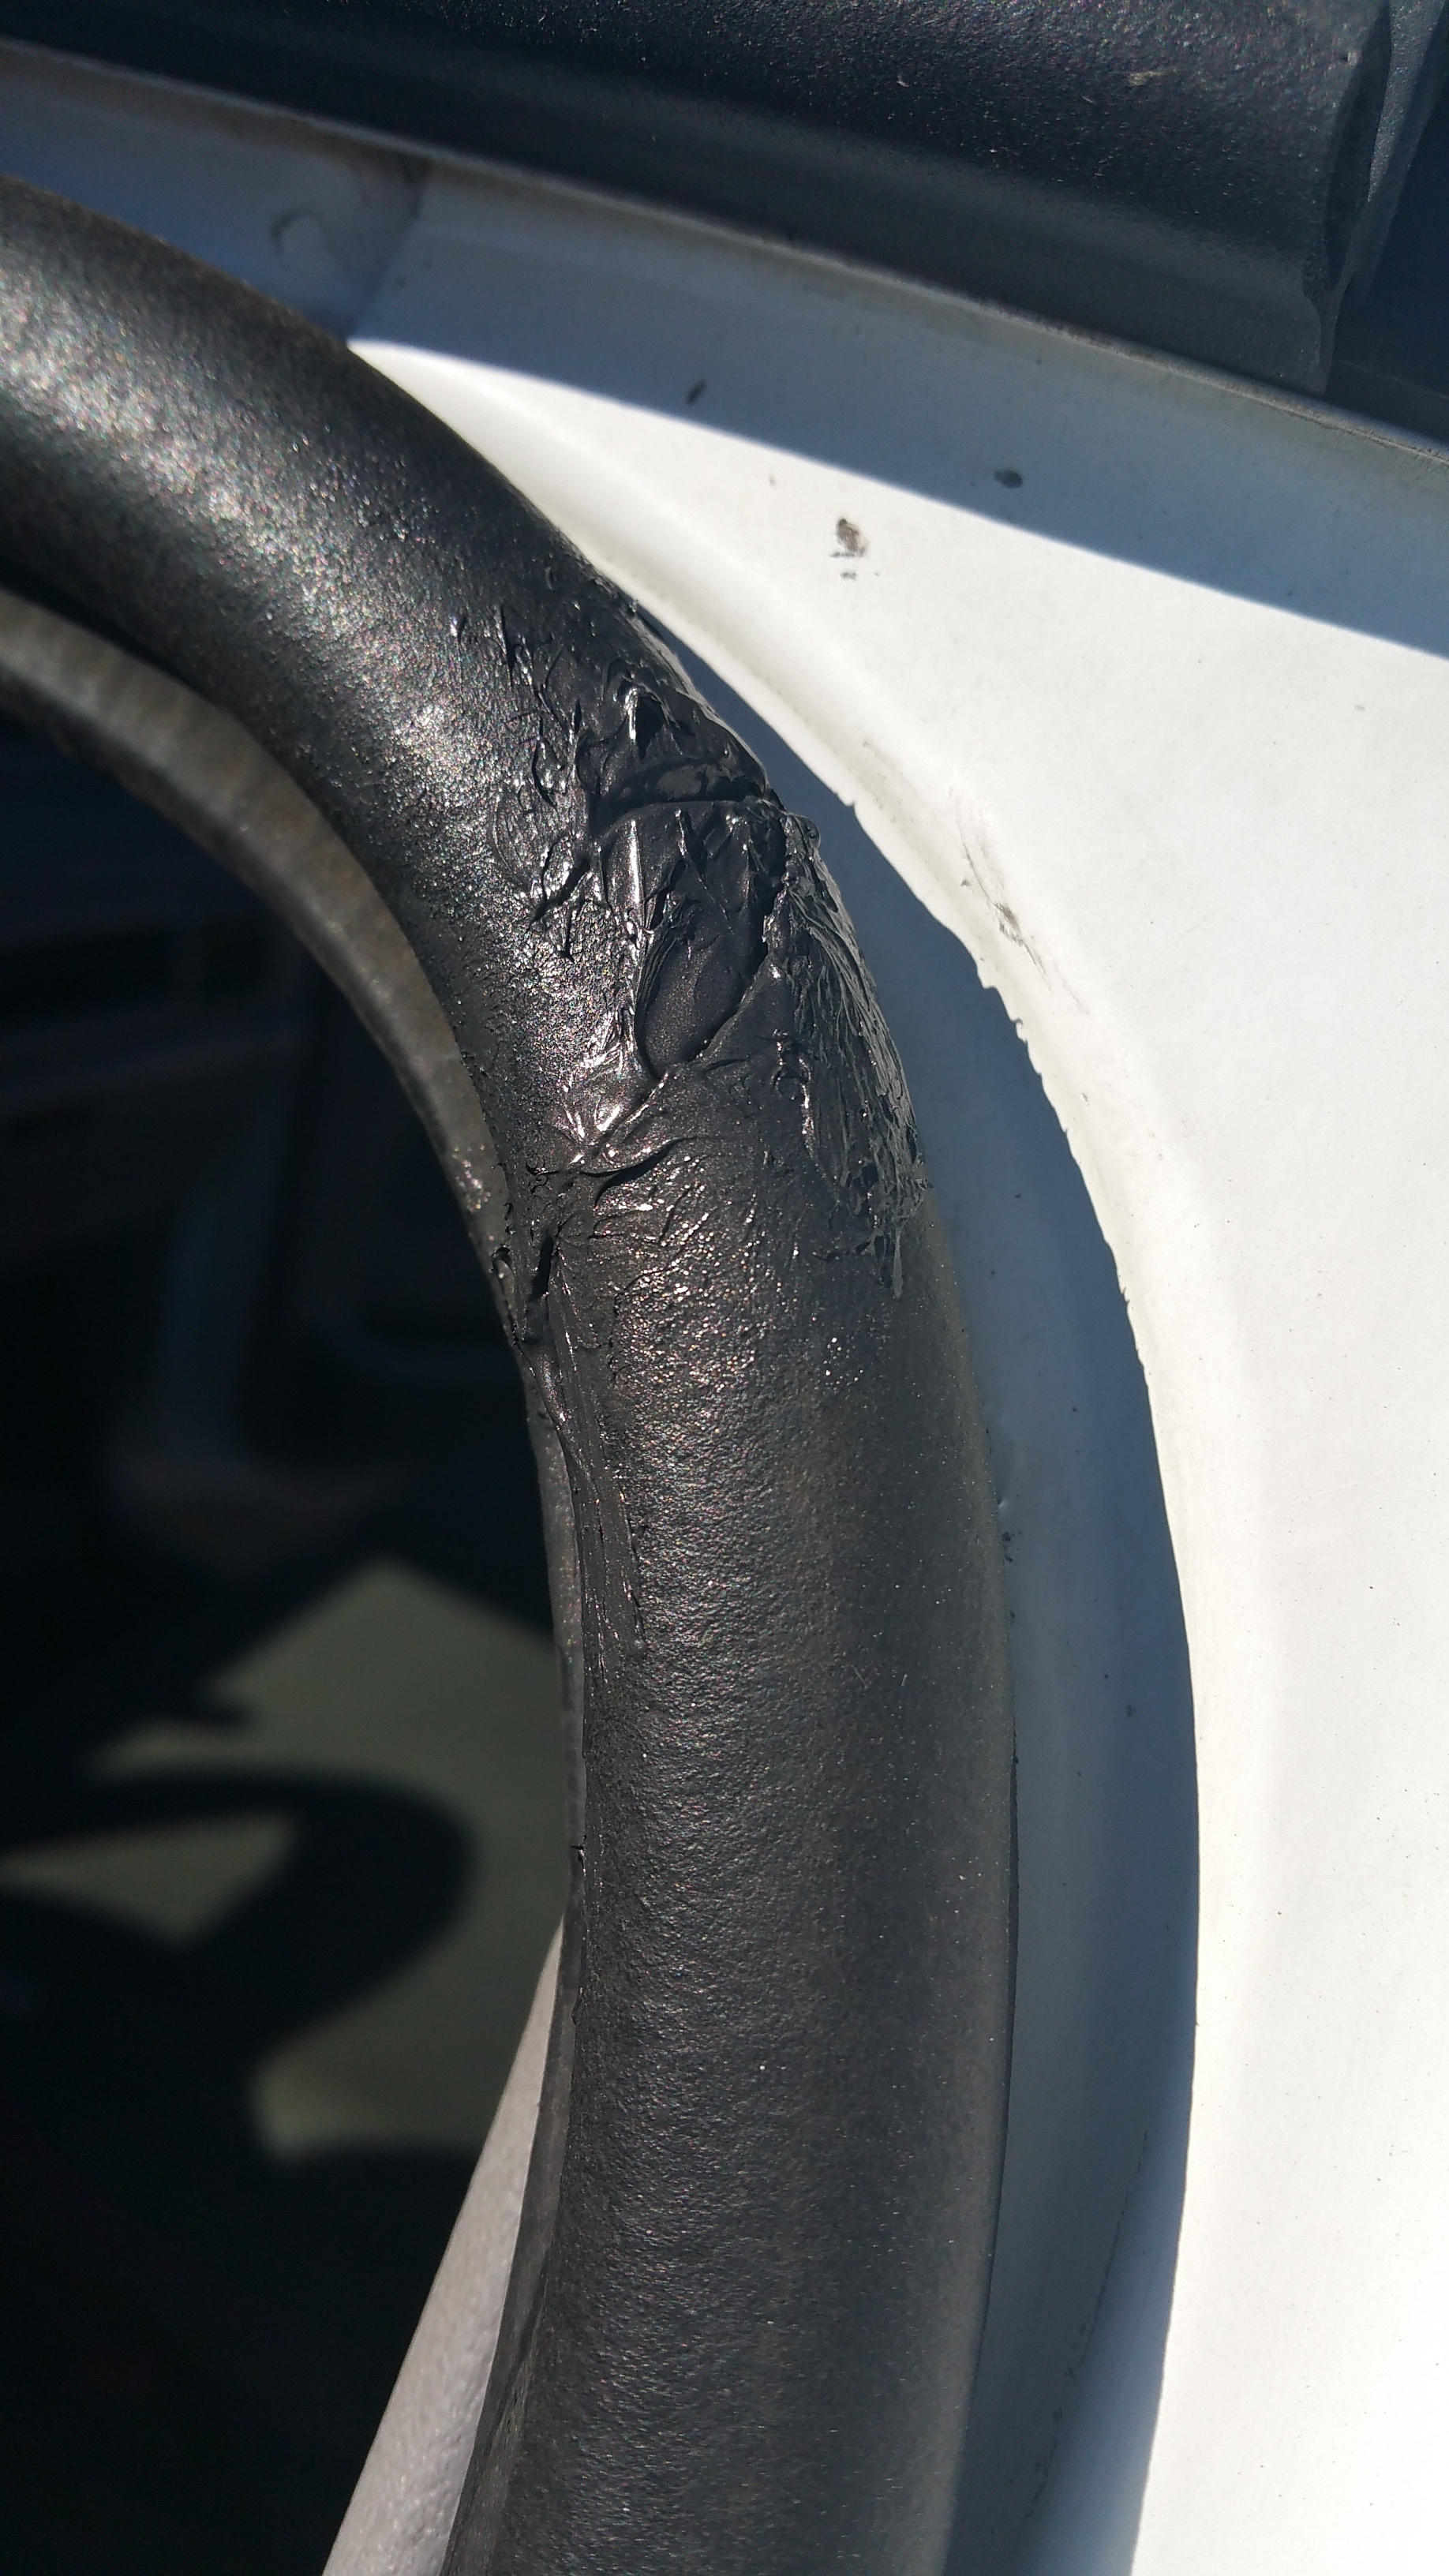
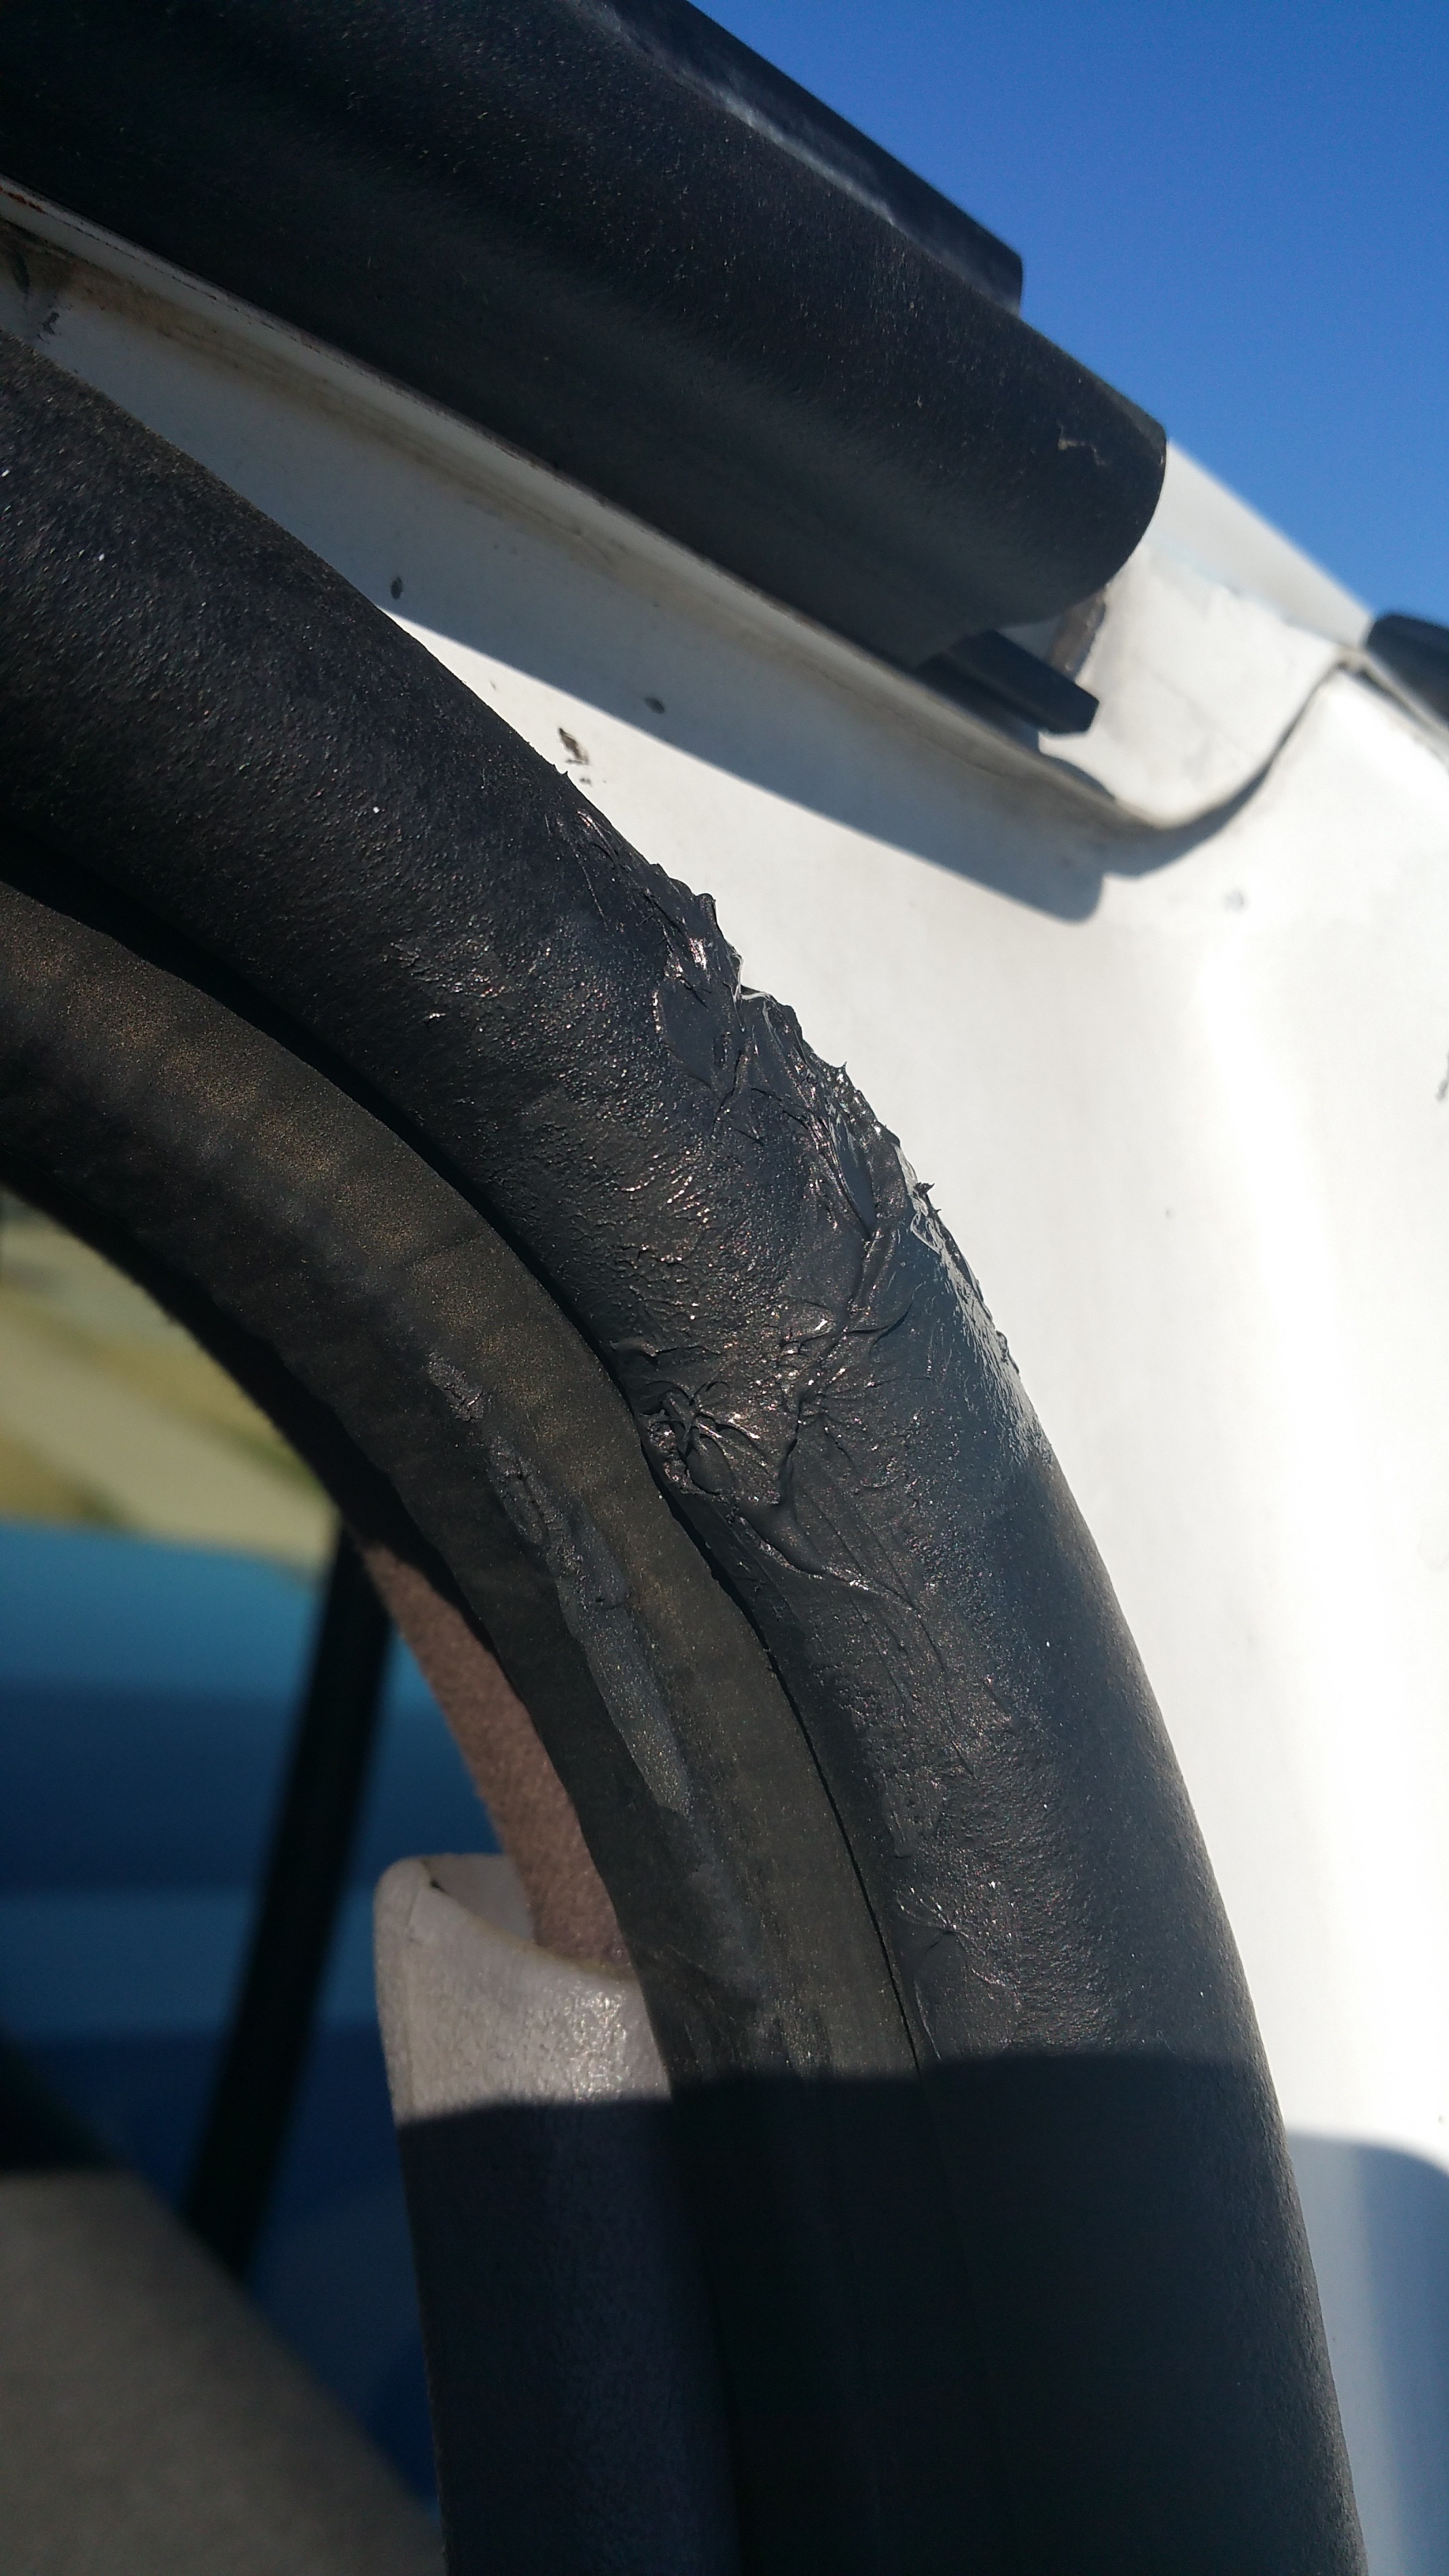
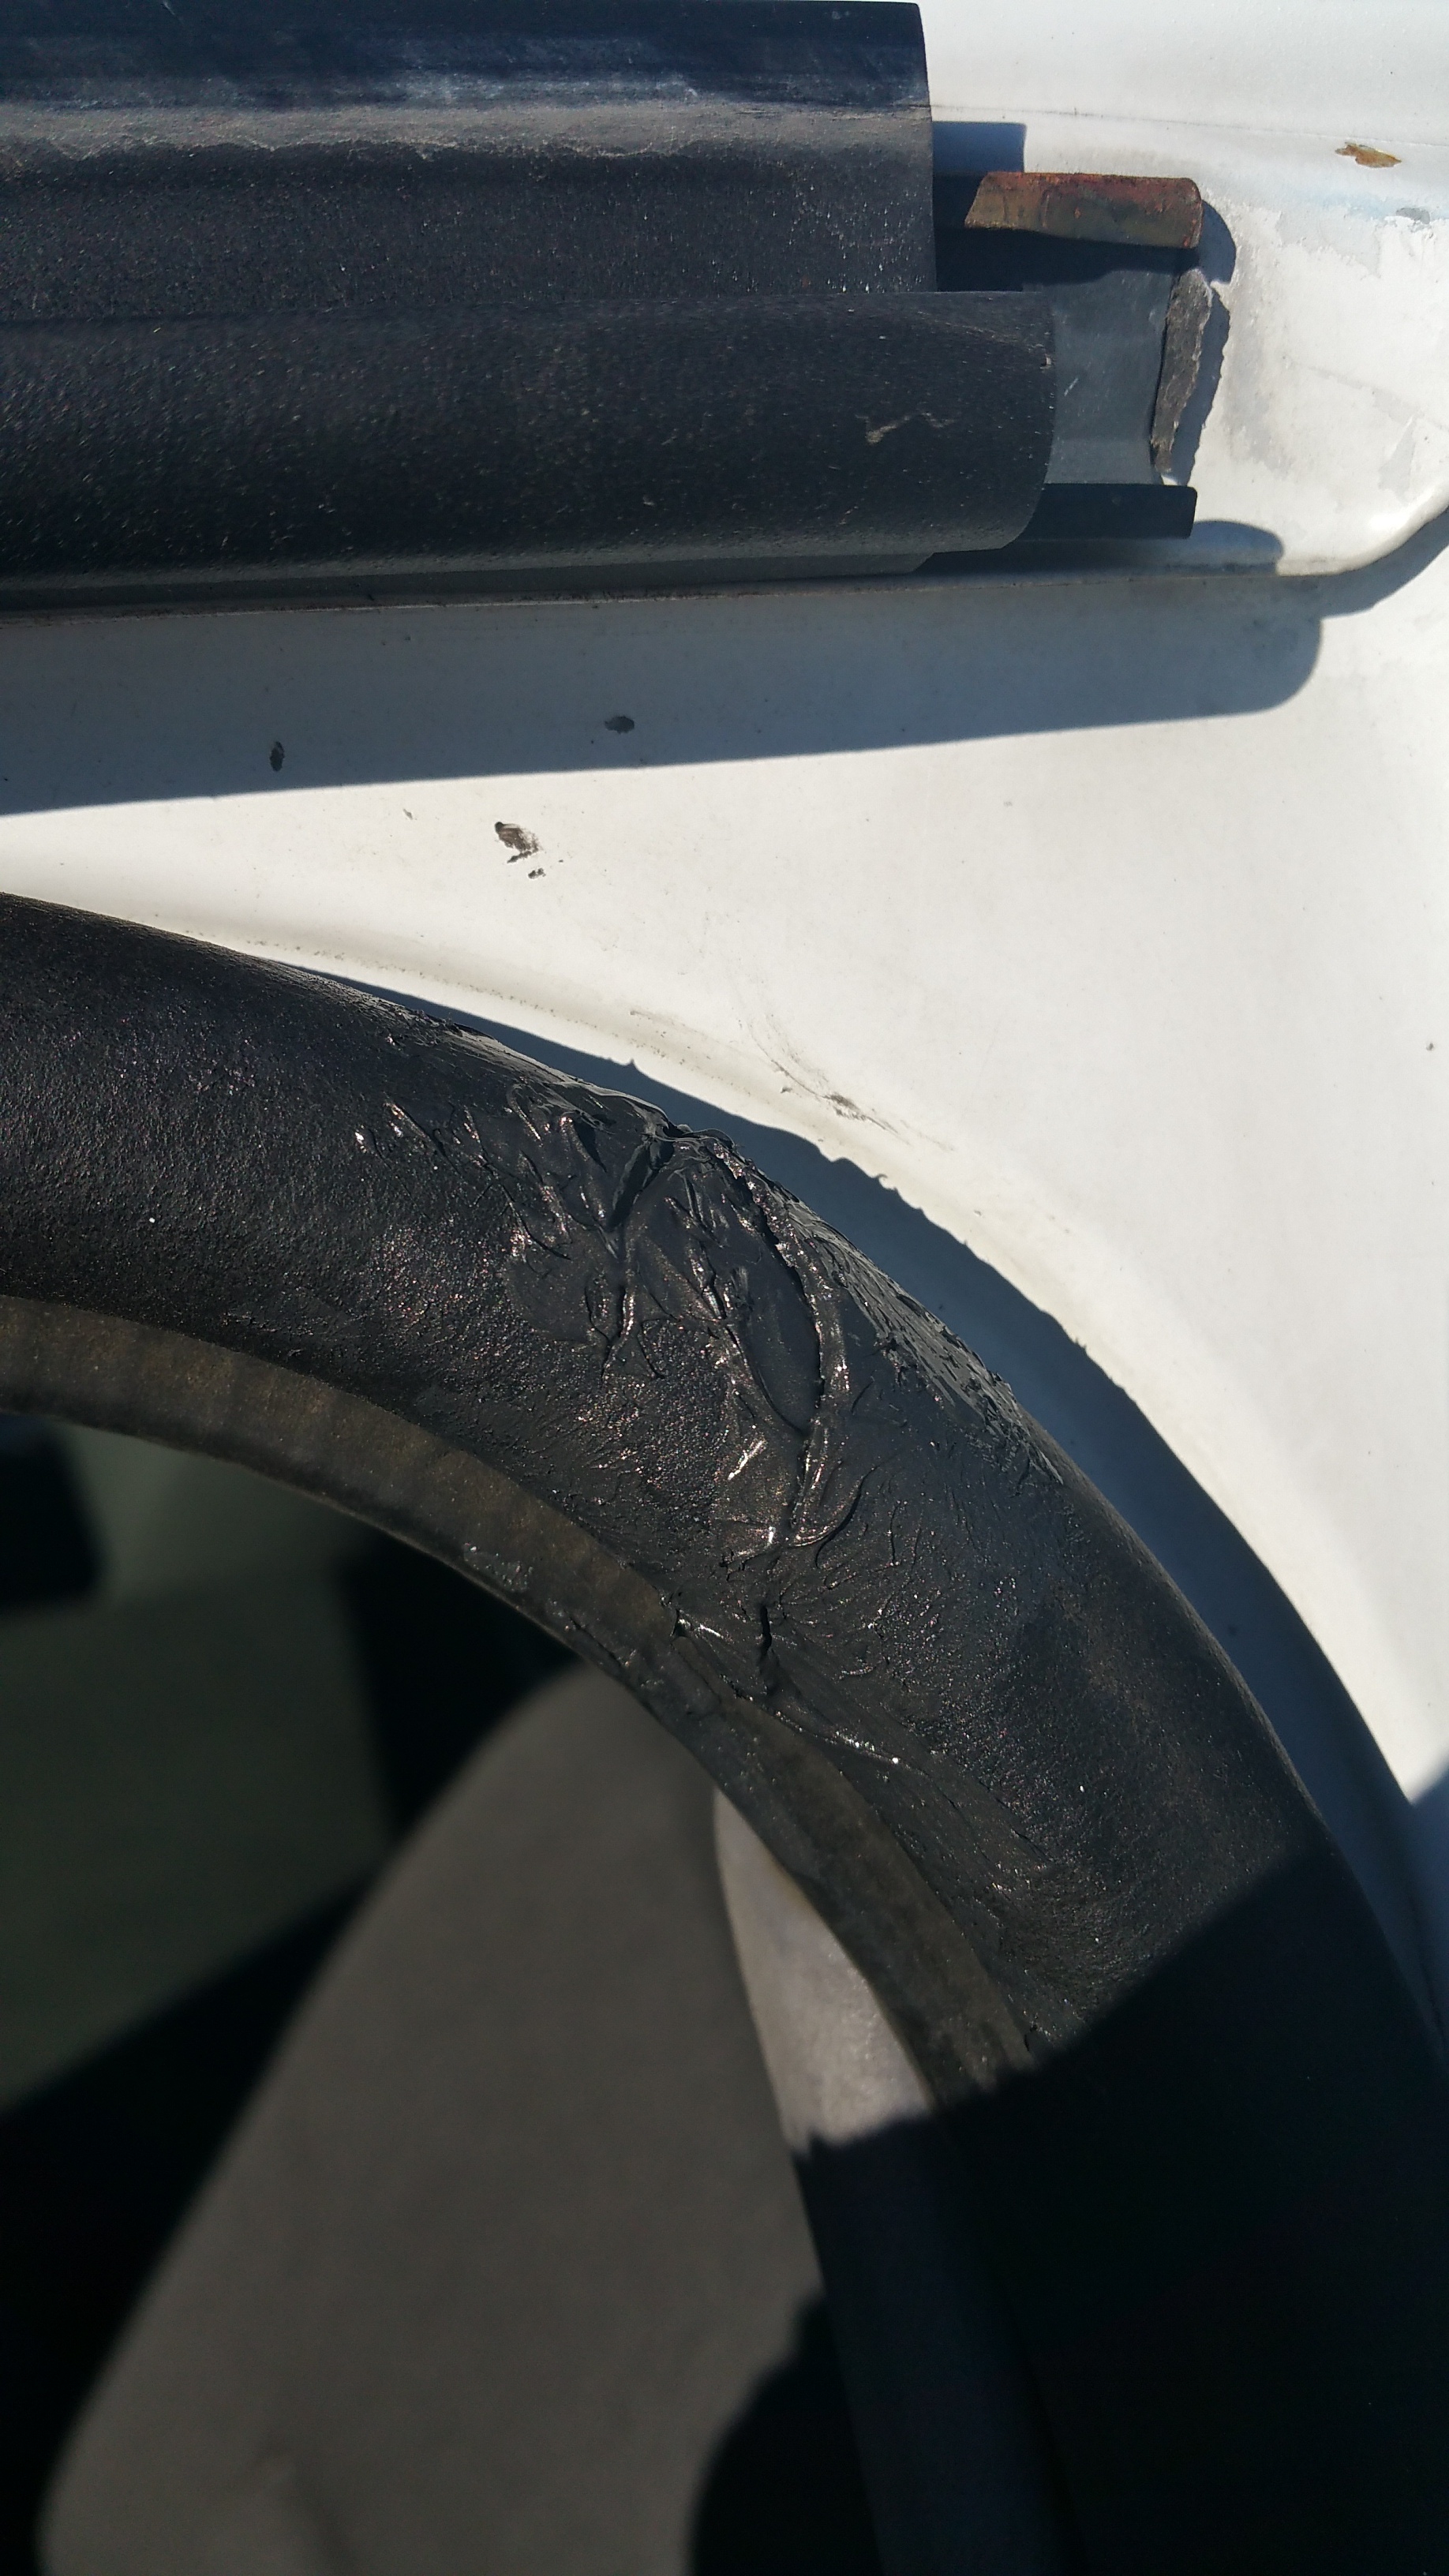
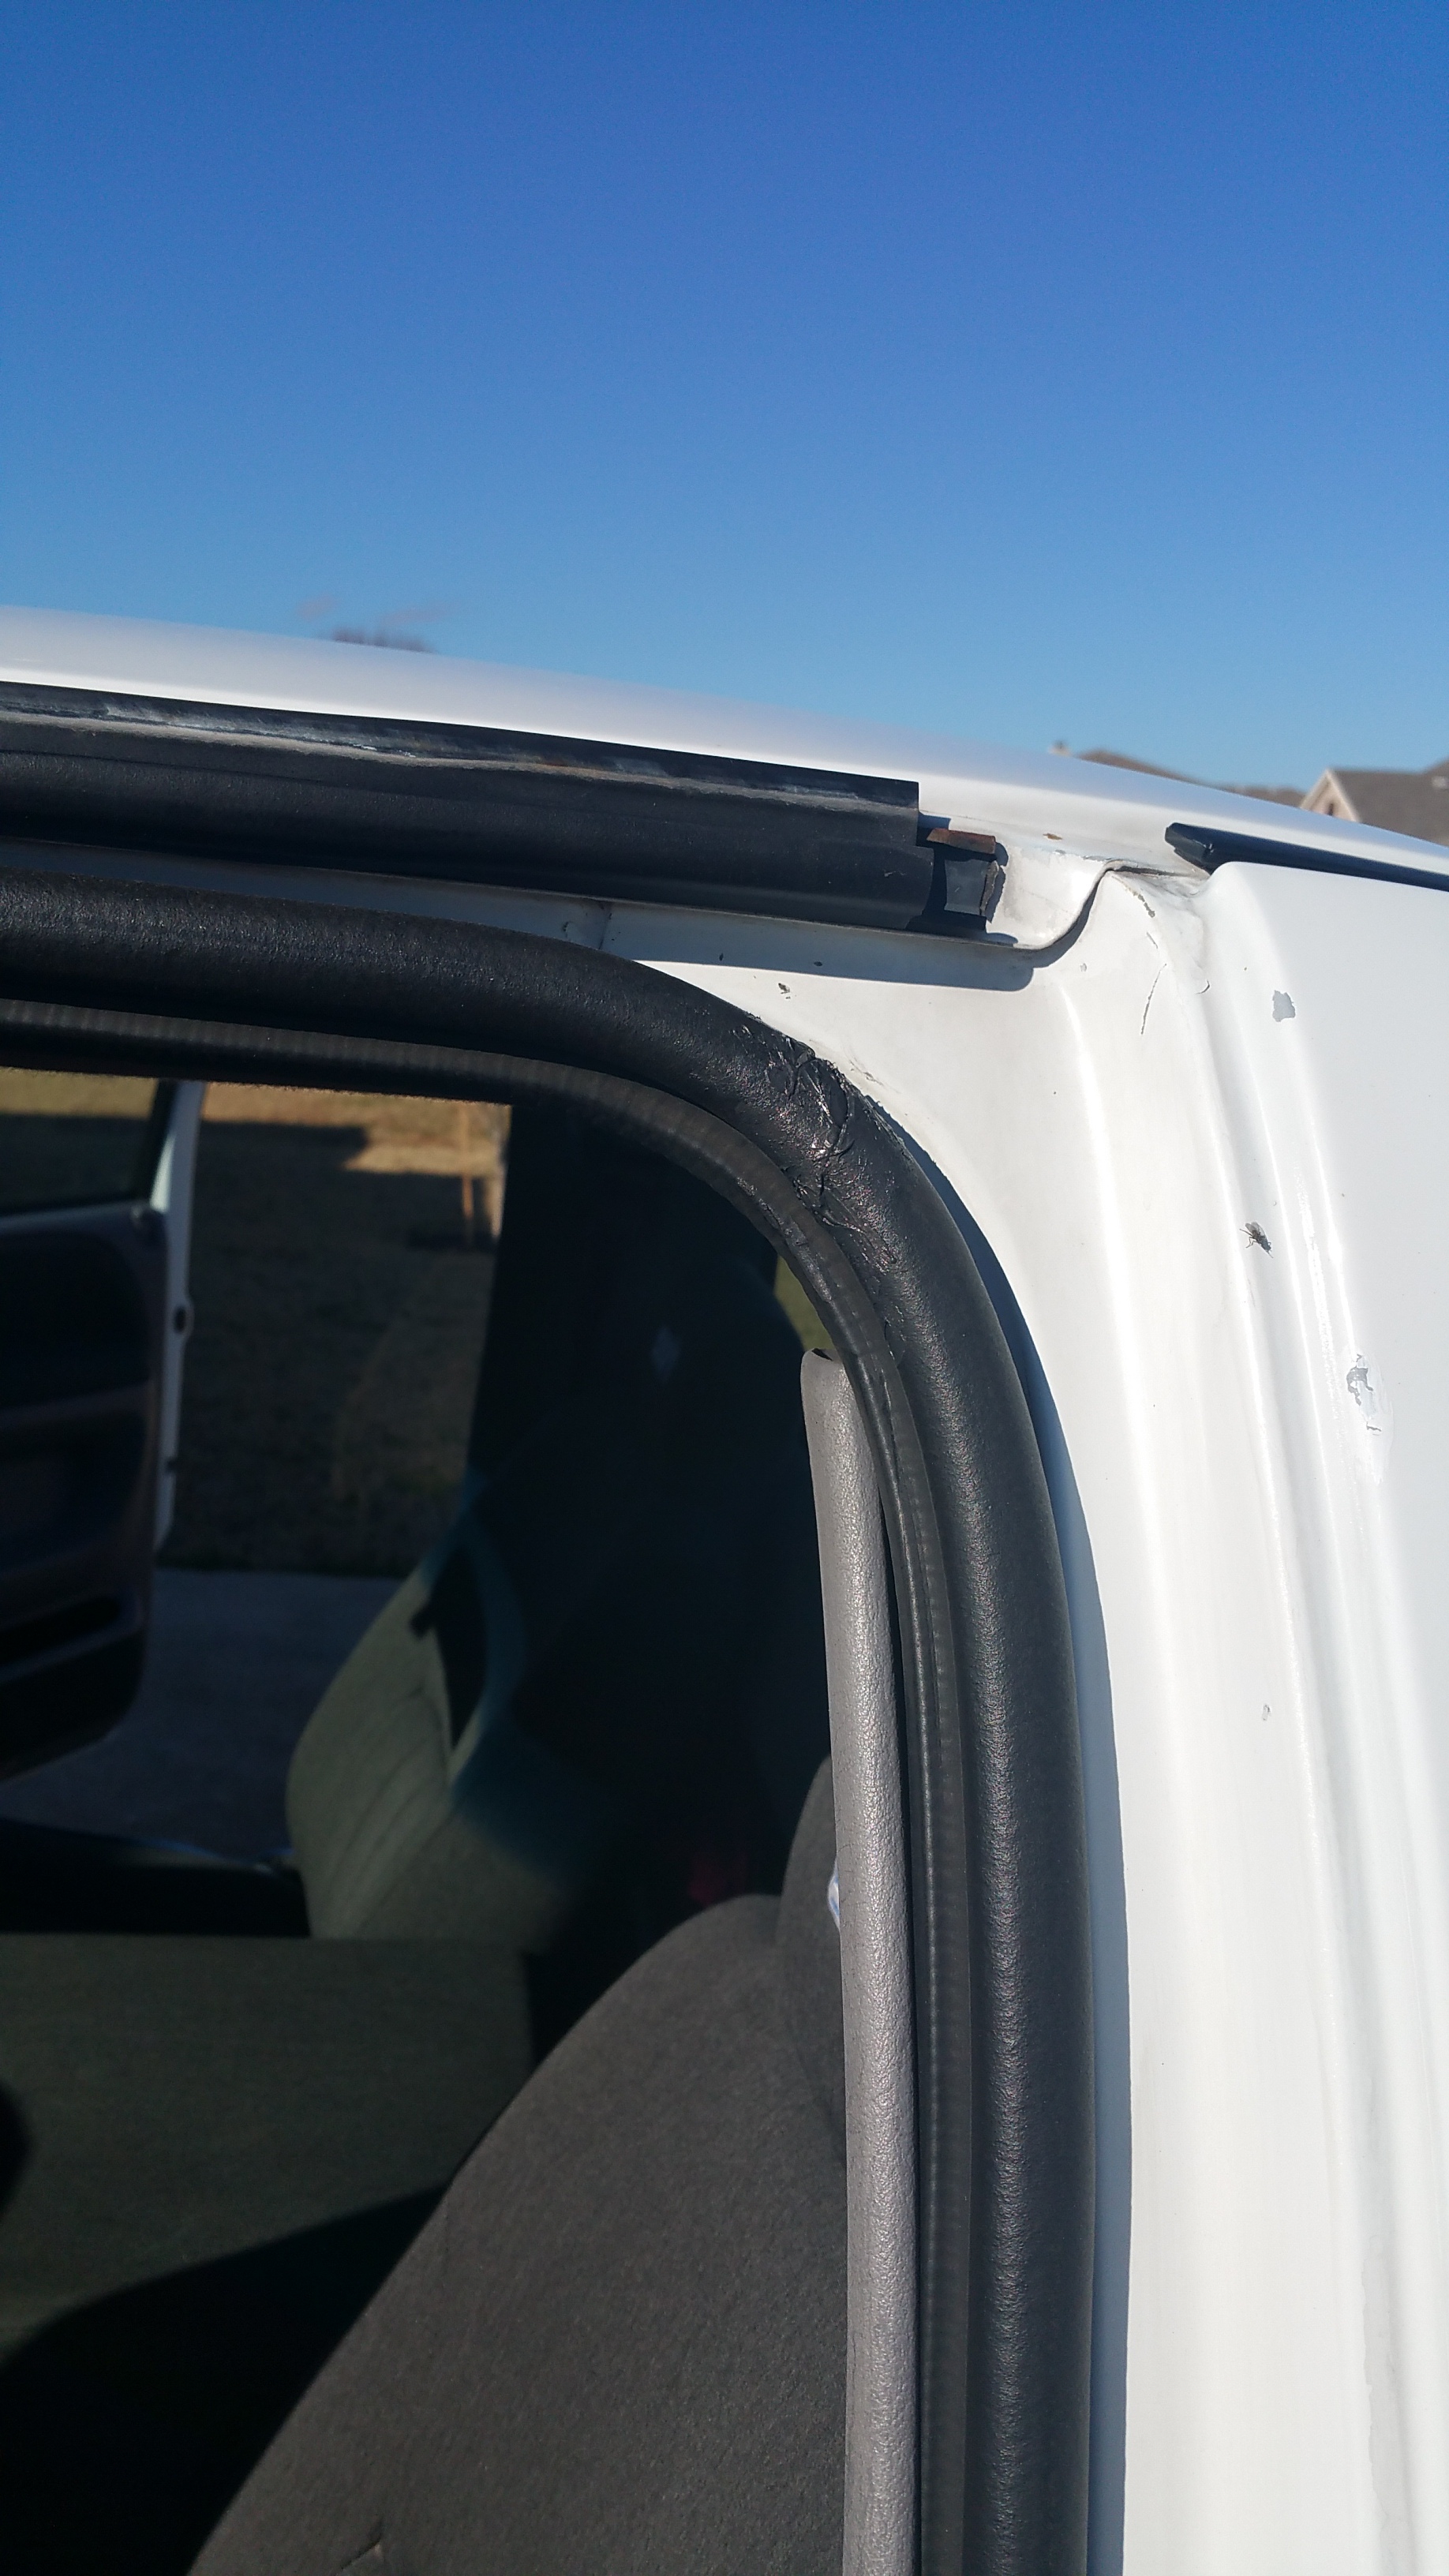
Want to see a DIY not so pretty fix on some door seals? Look no further. I filled the hole completely with peramatex black. Then I put extra on the cracks and smoothed them over. You can see here in the pictures it basically ate the silicone. I ended up putting more on and getting a much smoother surface but didn't get pics of that yet. It's actually raining today(the day after i did this fix) so we will see how well they work. This is just to get me by till I can afford some new seals on the "shop truck".
Backstory: These doors have been hit with wire hangars more than once to unlock the truck when the crap PO installed keyless remote system installed incorrectly.
passenger side
driver side:
Backstory: These doors have been hit with wire hangars more than once to unlock the truck when the crap PO installed keyless remote system installed incorrectly.
passenger side

driver side:


Last edited by ram-tuff; 02-06-2017 at 04:10 PM.
#15
01-18-2017, 07:42 AM
oh man, i am really glad to hear that sir! i call myself a gear head hot-rodder, or internet mechanic, i do both i guess. But that basically means i'm no expert but i have seen and experienced the differences in what you are saying about my bearings and their color. I get it. Sweet. Awesome. I think of the pressure plate on a clutch when its seen a ton of "clutching" or "burn outs man". Purple and other colors.
I am pretty happy to hear you confirm that. Now lets talk about the burning of oil in my engine lol. I burn through 2-3 quarts of oil on the highway doing 770 mile trip. Do you think I could just drop the oil pan, yank the cylinders, shoot on new rings, be done with it? Maybe I space the rings different than factory specs for the cylinder wear? Sorry, had to ask. Thanks.
Or maybe I have another problem I'm not thinking of? Dang thing runs great, has power, no signs of black or blue smoke coming from exhaust, at least at idle anyway in the driveway. It does smell a bit though. Not antifreeze sweet though. And my white bumper delete panel get pretty black after about 1 month of driving without a wash. I dig the dual exhaust that can't been seen from anywhere on the truck, I hid mine with down pipes just before the bumper.
Oil is always black as the ace of spades when I change it every 3000 miles. Don't forget, by 3000 miles I have usually added at least 2-4 quarts more of oil before it gets changed by 3000. Now, I will say I notice when I drive around town, it doesn't seem to use up the oil like it does on the highway.
Thoughts?
I am pretty happy to hear you confirm that. Now lets talk about the burning of oil in my engine lol. I burn through 2-3 quarts of oil on the highway doing 770 mile trip. Do you think I could just drop the oil pan, yank the cylinders, shoot on new rings, be done with it? Maybe I space the rings different than factory specs for the cylinder wear? Sorry, had to ask. Thanks.
Or maybe I have another problem I'm not thinking of? Dang thing runs great, has power, no signs of black or blue smoke coming from exhaust, at least at idle anyway in the driveway. It does smell a bit though. Not antifreeze sweet though. And my white bumper delete panel get pretty black after about 1 month of driving without a wash. I dig the dual exhaust that can't been seen from anywhere on the truck, I hid mine with down pipes just before the bumper.
Oil is always black as the ace of spades when I change it every 3000 miles. Don't forget, by 3000 miles I have usually added at least 2-4 quarts more of oil before it gets changed by 3000. Now, I will say I notice when I drive around town, it doesn't seem to use up the oil like it does on the highway.
Thoughts?

You may want to degrease the engine REALLY well, thru some dye in the oil, drive it for a few days, then hit it with a UV lamp, and see what shows up.
Can't drop the pistons out the bottom with the engine in the truck. I don't know if there is room to get 'em out, but, the crank would have to come out as well, and that is difficult to do when the engine is still bolted to the trans. I just picked up another motor, that when the budget permits, I'll go thru, and then just swap 'em out.
#16
01-18-2017, 10:01 AM
Join Date: Sep 2015
Location: Texas
Posts: 106
Likes: 0
Received 0 Likes
on
0 Posts
Yeah they have an excuse that's for sure
I'm voting for valve seals, makes the most sense. That probably also explains why when I bought this truck it had a TON of grit/oil buildup all around the engine. Probably slow leaks on the valve covers leaking down the engine then dirt catching.
I opened up the valve covers shortly after I bought it and everything was coverd in a black film. I was worried then, but since I have consistanly changed the oil every 3000 and ran a quart of mystery oil through it once.
My bet, since you reminded me of all that, is those valve seals are leaking, burning the leaking oil all in the valve covers which is why they are so black. some exhaust fumes burning in there are helping too to both break the valve cover seals over time and harden the burnt oil all over the rockers and such...
EDIT: New valve job on my mustang a few years back was like $150. Might be worth it to see if this engine will last another 100K
Last edited by ram-tuff; 01-18-2017 at 10:04 AM.

#18
01-18-2017, 11:35 AM
Join Date: Sep 2015
Location: Texas
Posts: 106
Likes: 0
Received 0 Likes
on
0 Posts
Please elaborate. Thanks.
#19
01-18-2017, 12:30 PM
Join Date: Sep 2015
Location: Texas
Posts: 106
Likes: 0
Received 0 Likes
on
0 Posts
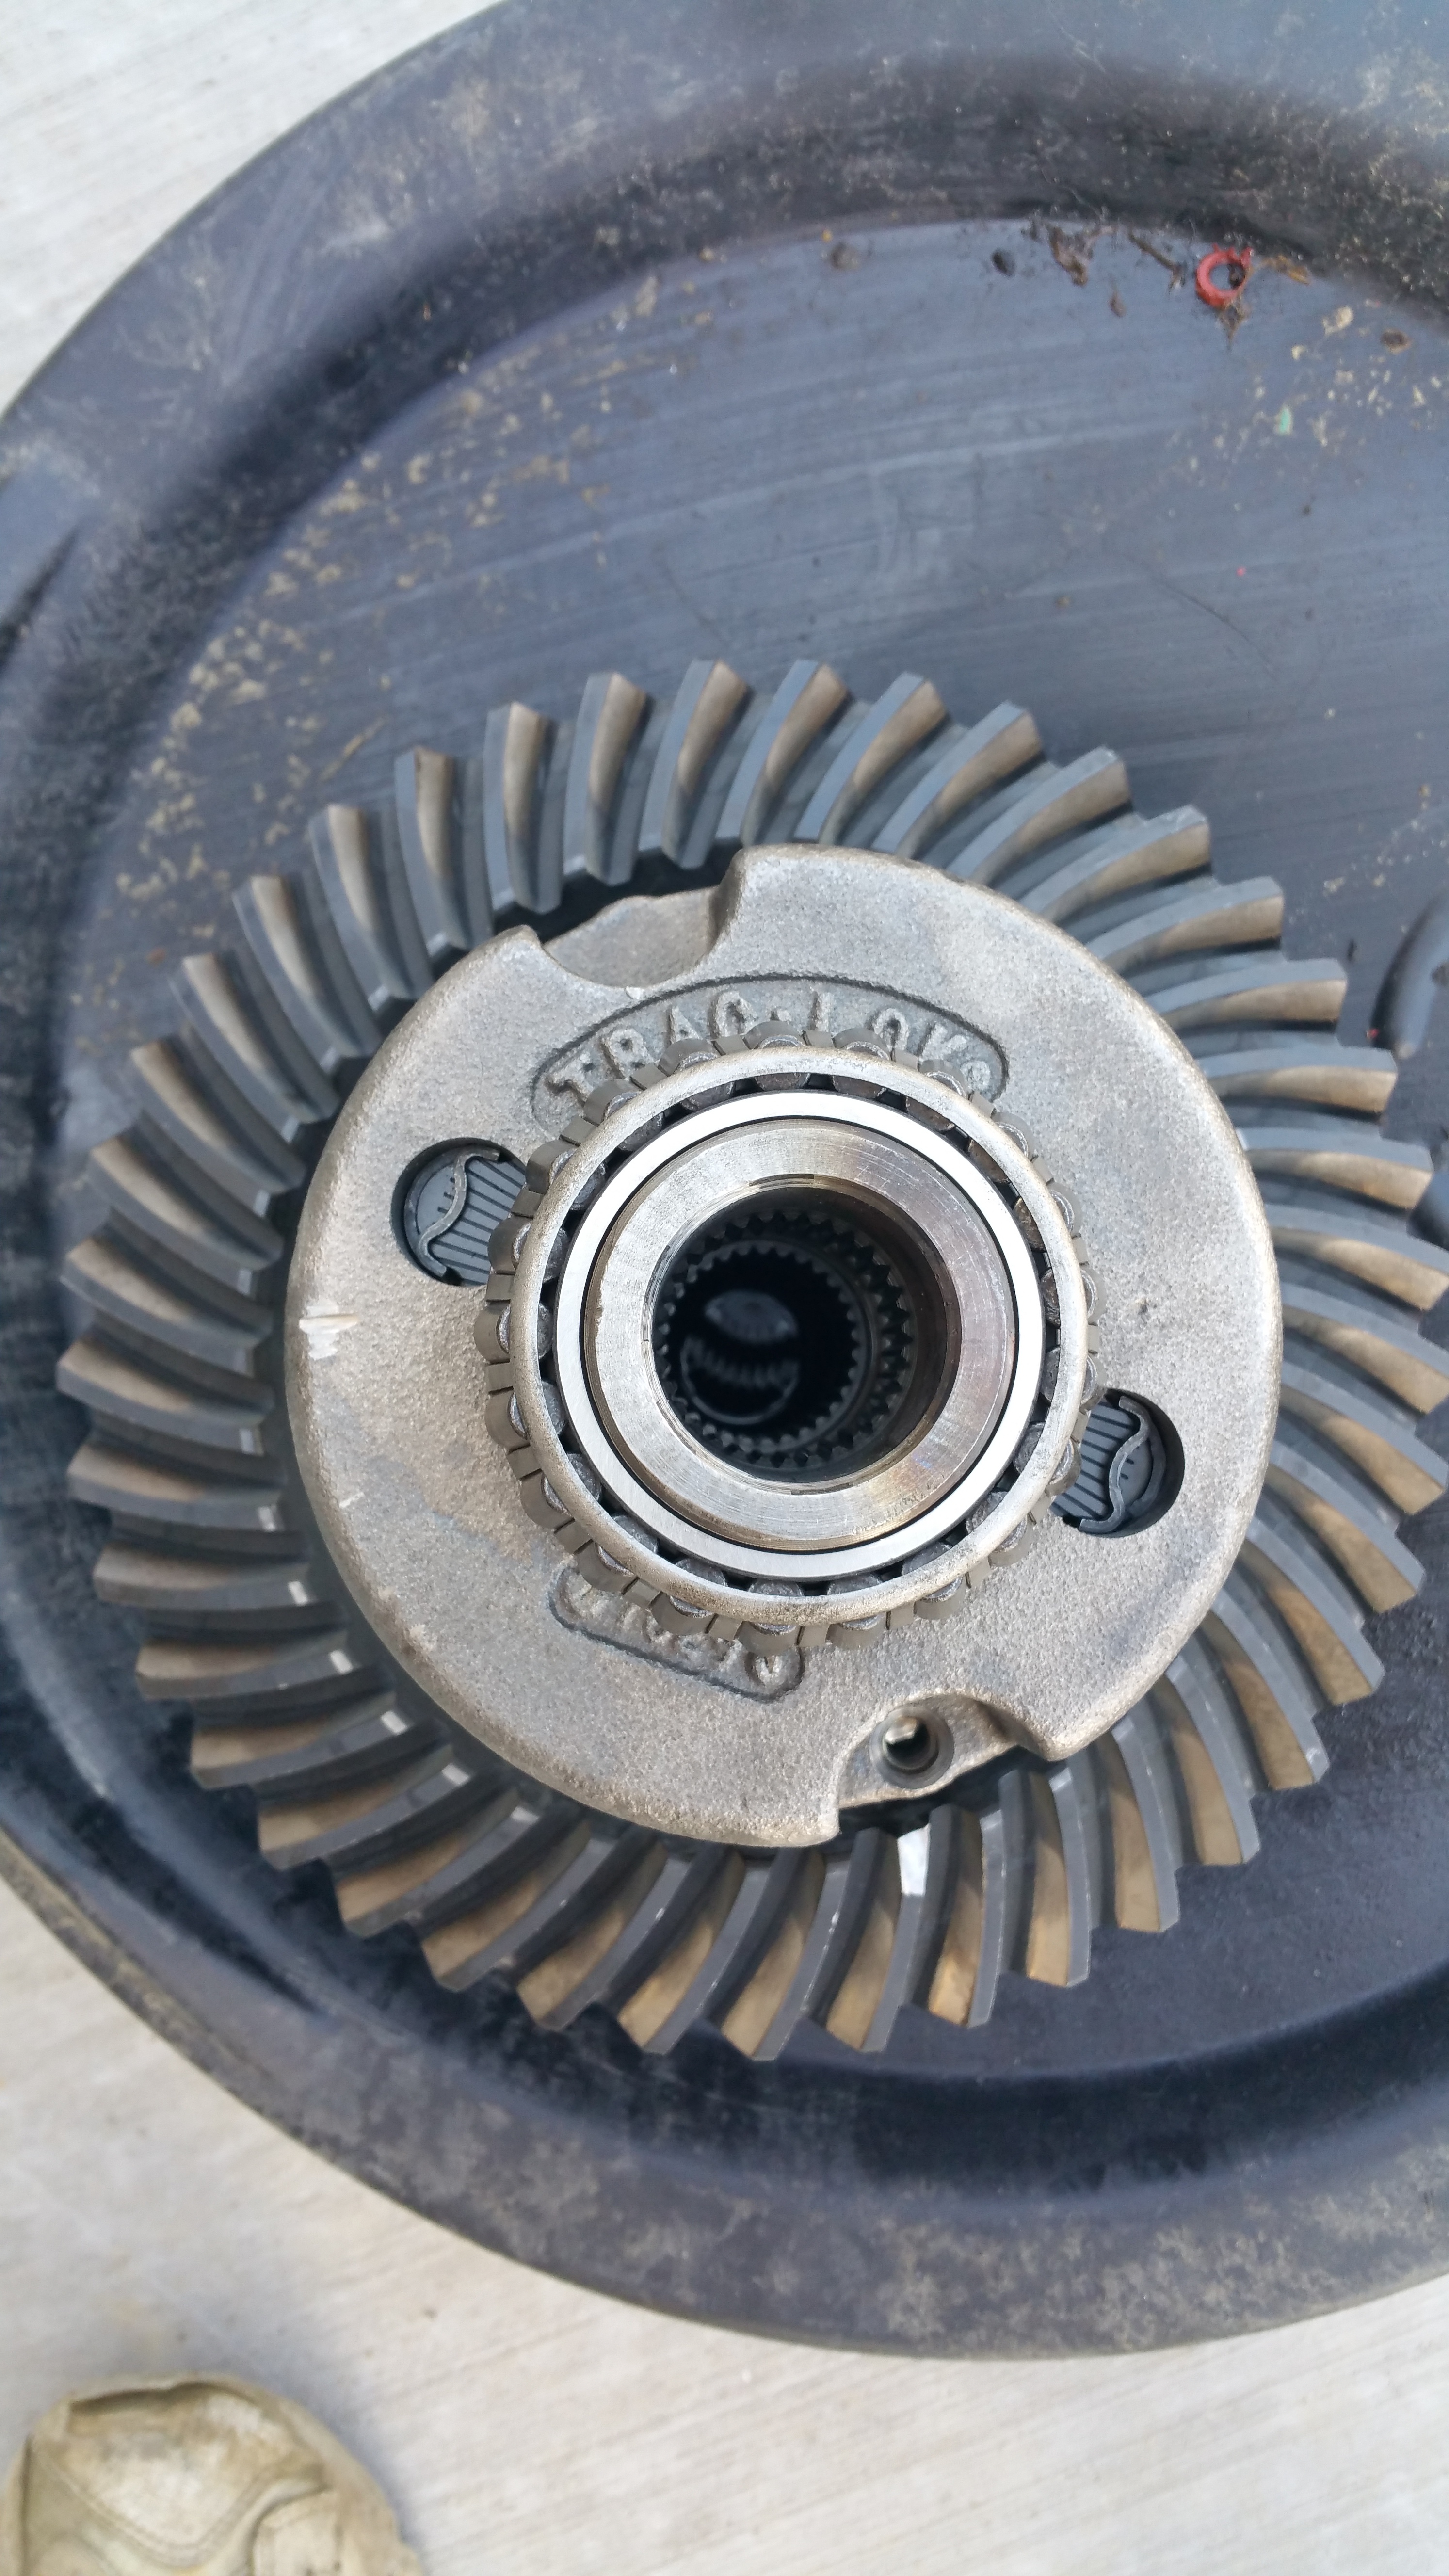
Update:
Rear Diff Rebuild. About a year after I bought the truck I decided to pop the rear diff and check it out. I noticed the RPM's were very high and I knew the gears had been swapped. When I popped the diff cover I found metal in the bottom of the housing attached to the magnet. No telling how long it was in there so I was like $h!t...
Got everything drained and this is what I found:
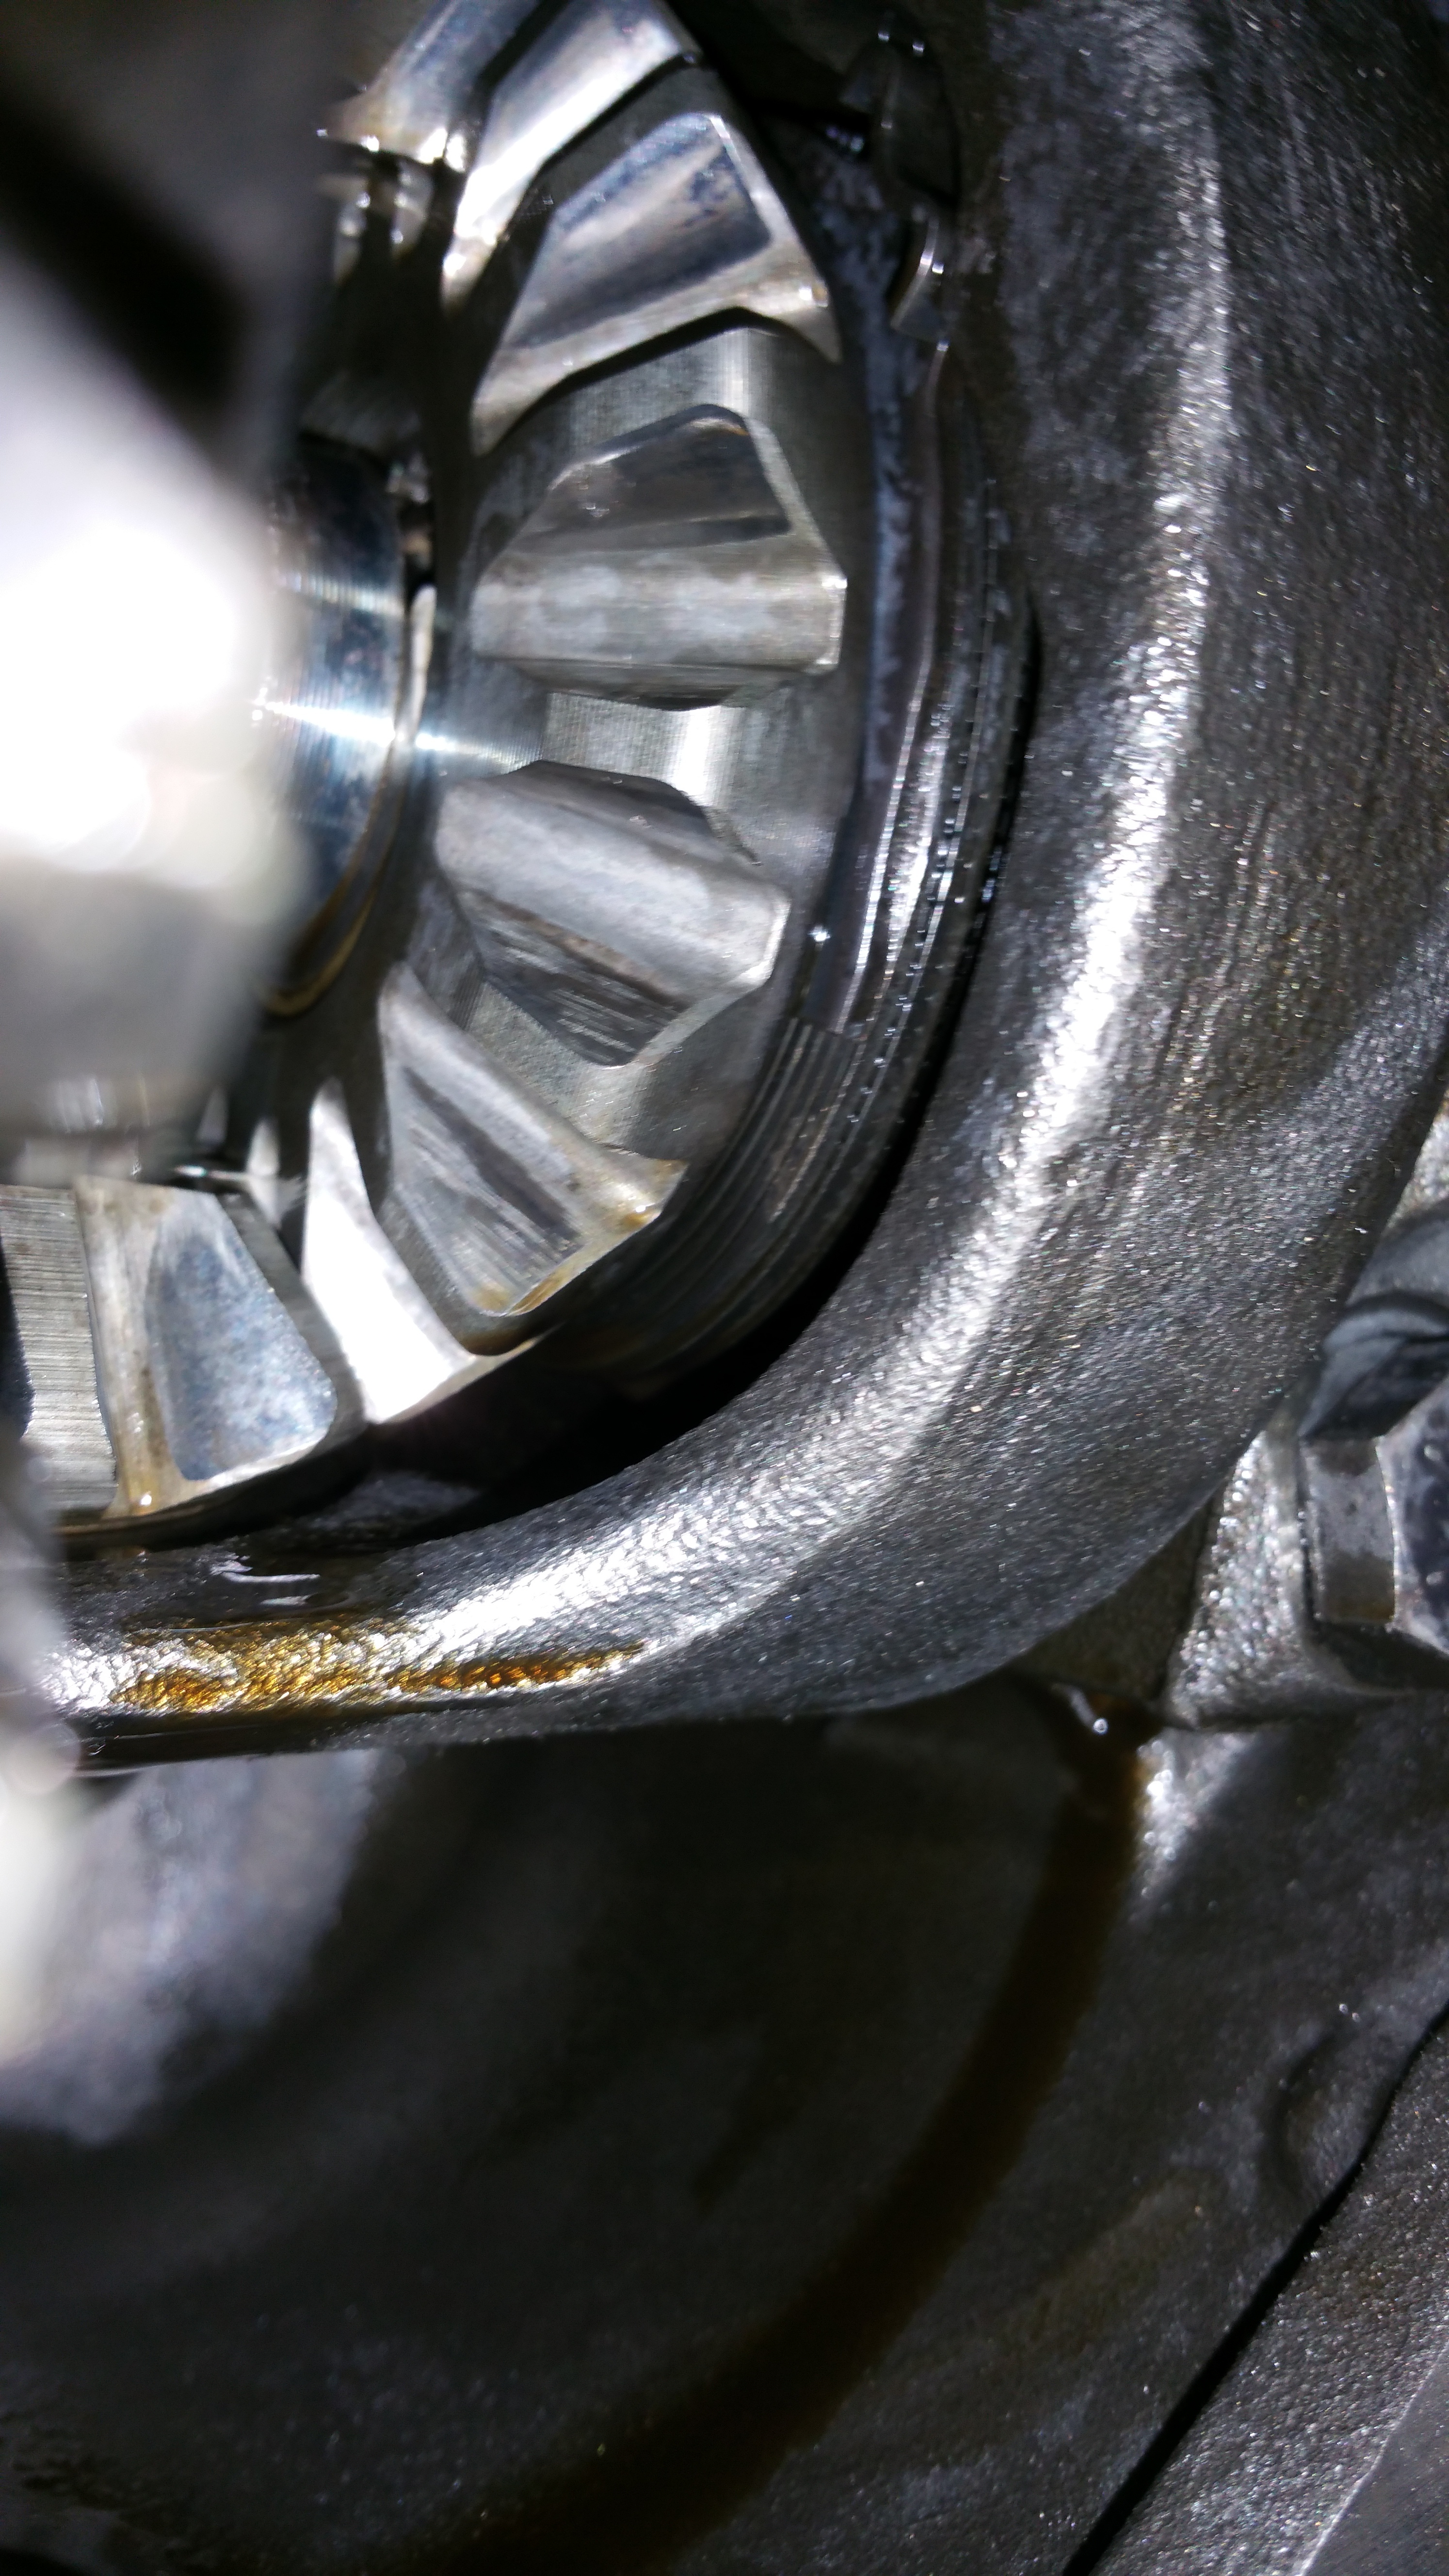
The clutch pack was falling apart. Crazy how it was still working though, half the outter disc on both sides was cracked and fell off. But posi was still alive, I knew because I had 2 rubber marks behind my burnouts
So I jacked her up and started looking around and found a tooth shaved. I didn't know what I was looking at at the time but stay tuned, I will explain that tooth later. At that time, I thought the gears were screwed and I needed new ones. So I bought new gears and had a shop do the clutch packs for me.

So I started tearing her down, and I did some research on this job and found a great article doing exactly this here - http://www.fourwheeler.com/how-to/10...dana-trac-lok/
I learned I needed a special tool for the female nuts in the axles to release the carrier guts. So I build one! My first time welding anything on my own. I was using an old lincoln stick welder. It sucked. The sticks kept sticking constantly while I tried to start the spark but after an hour or so I finally got er done.
I used a large nut on the end of a black iron gas pipe from lowes. Stuck a bolt in the other end to turn it with a wrench, but I never needed it, the nuts in the axles were loose enough i could turn them by hand. If I remember correctly....
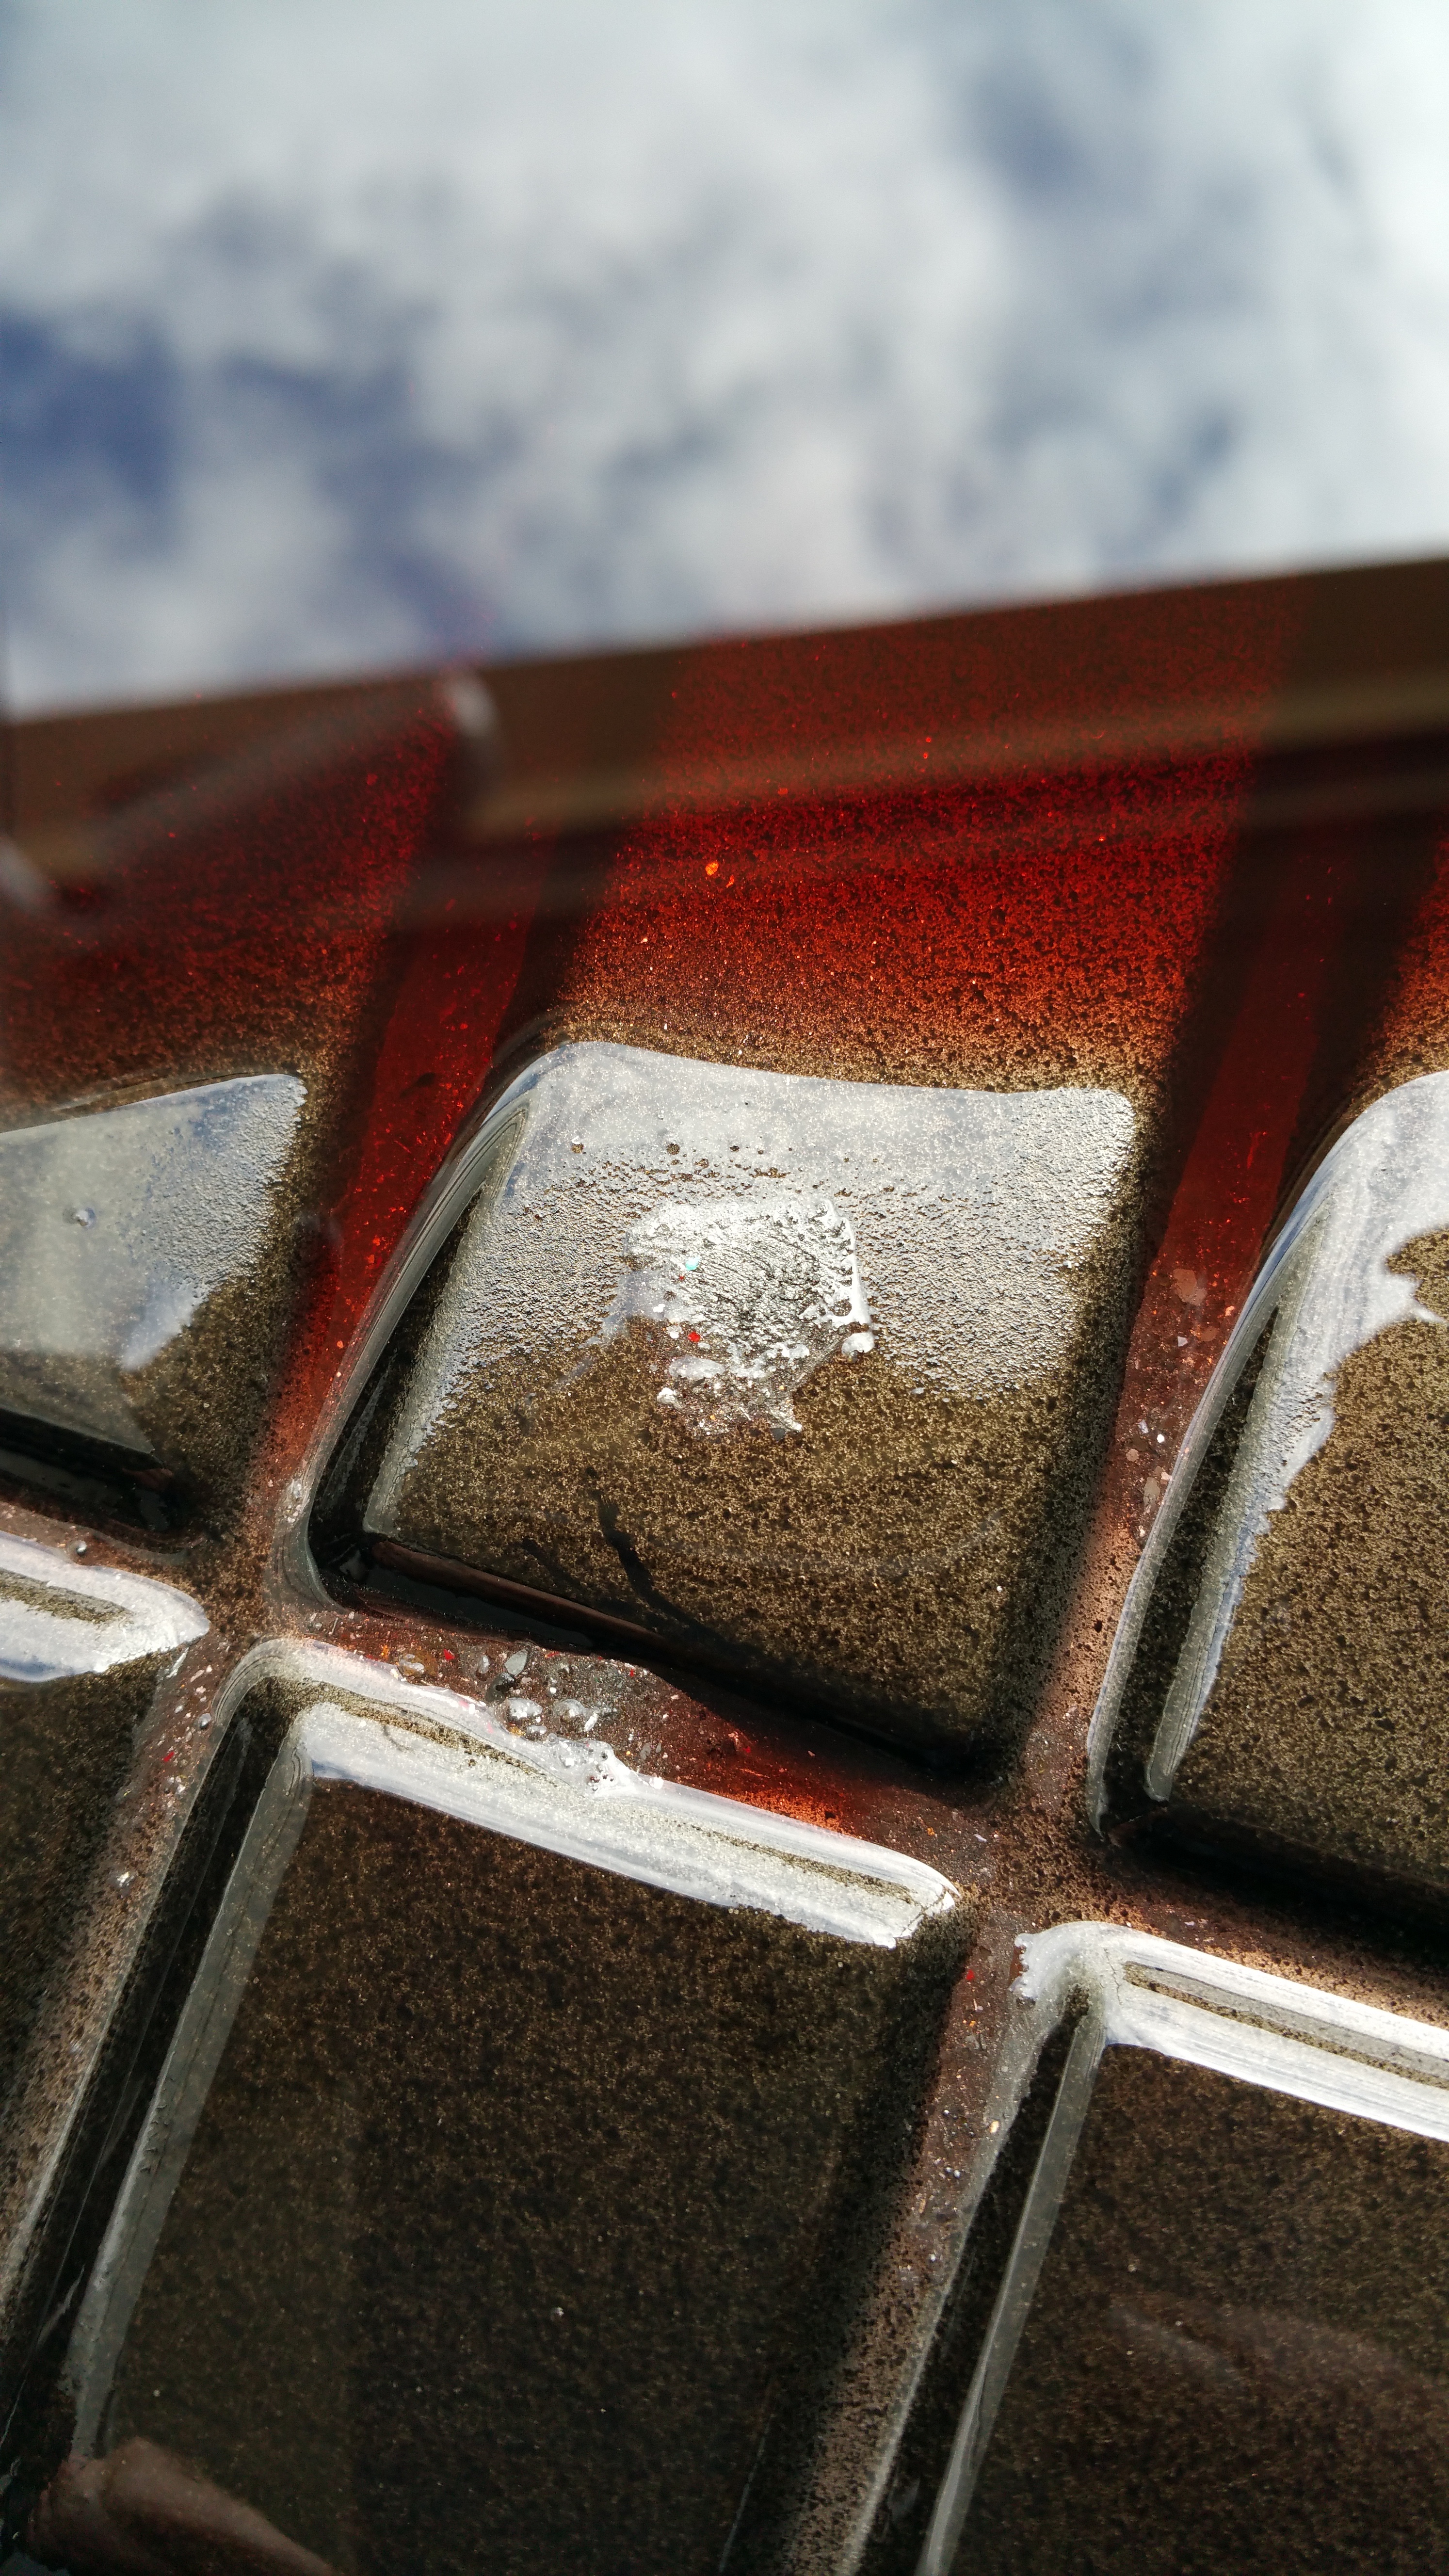
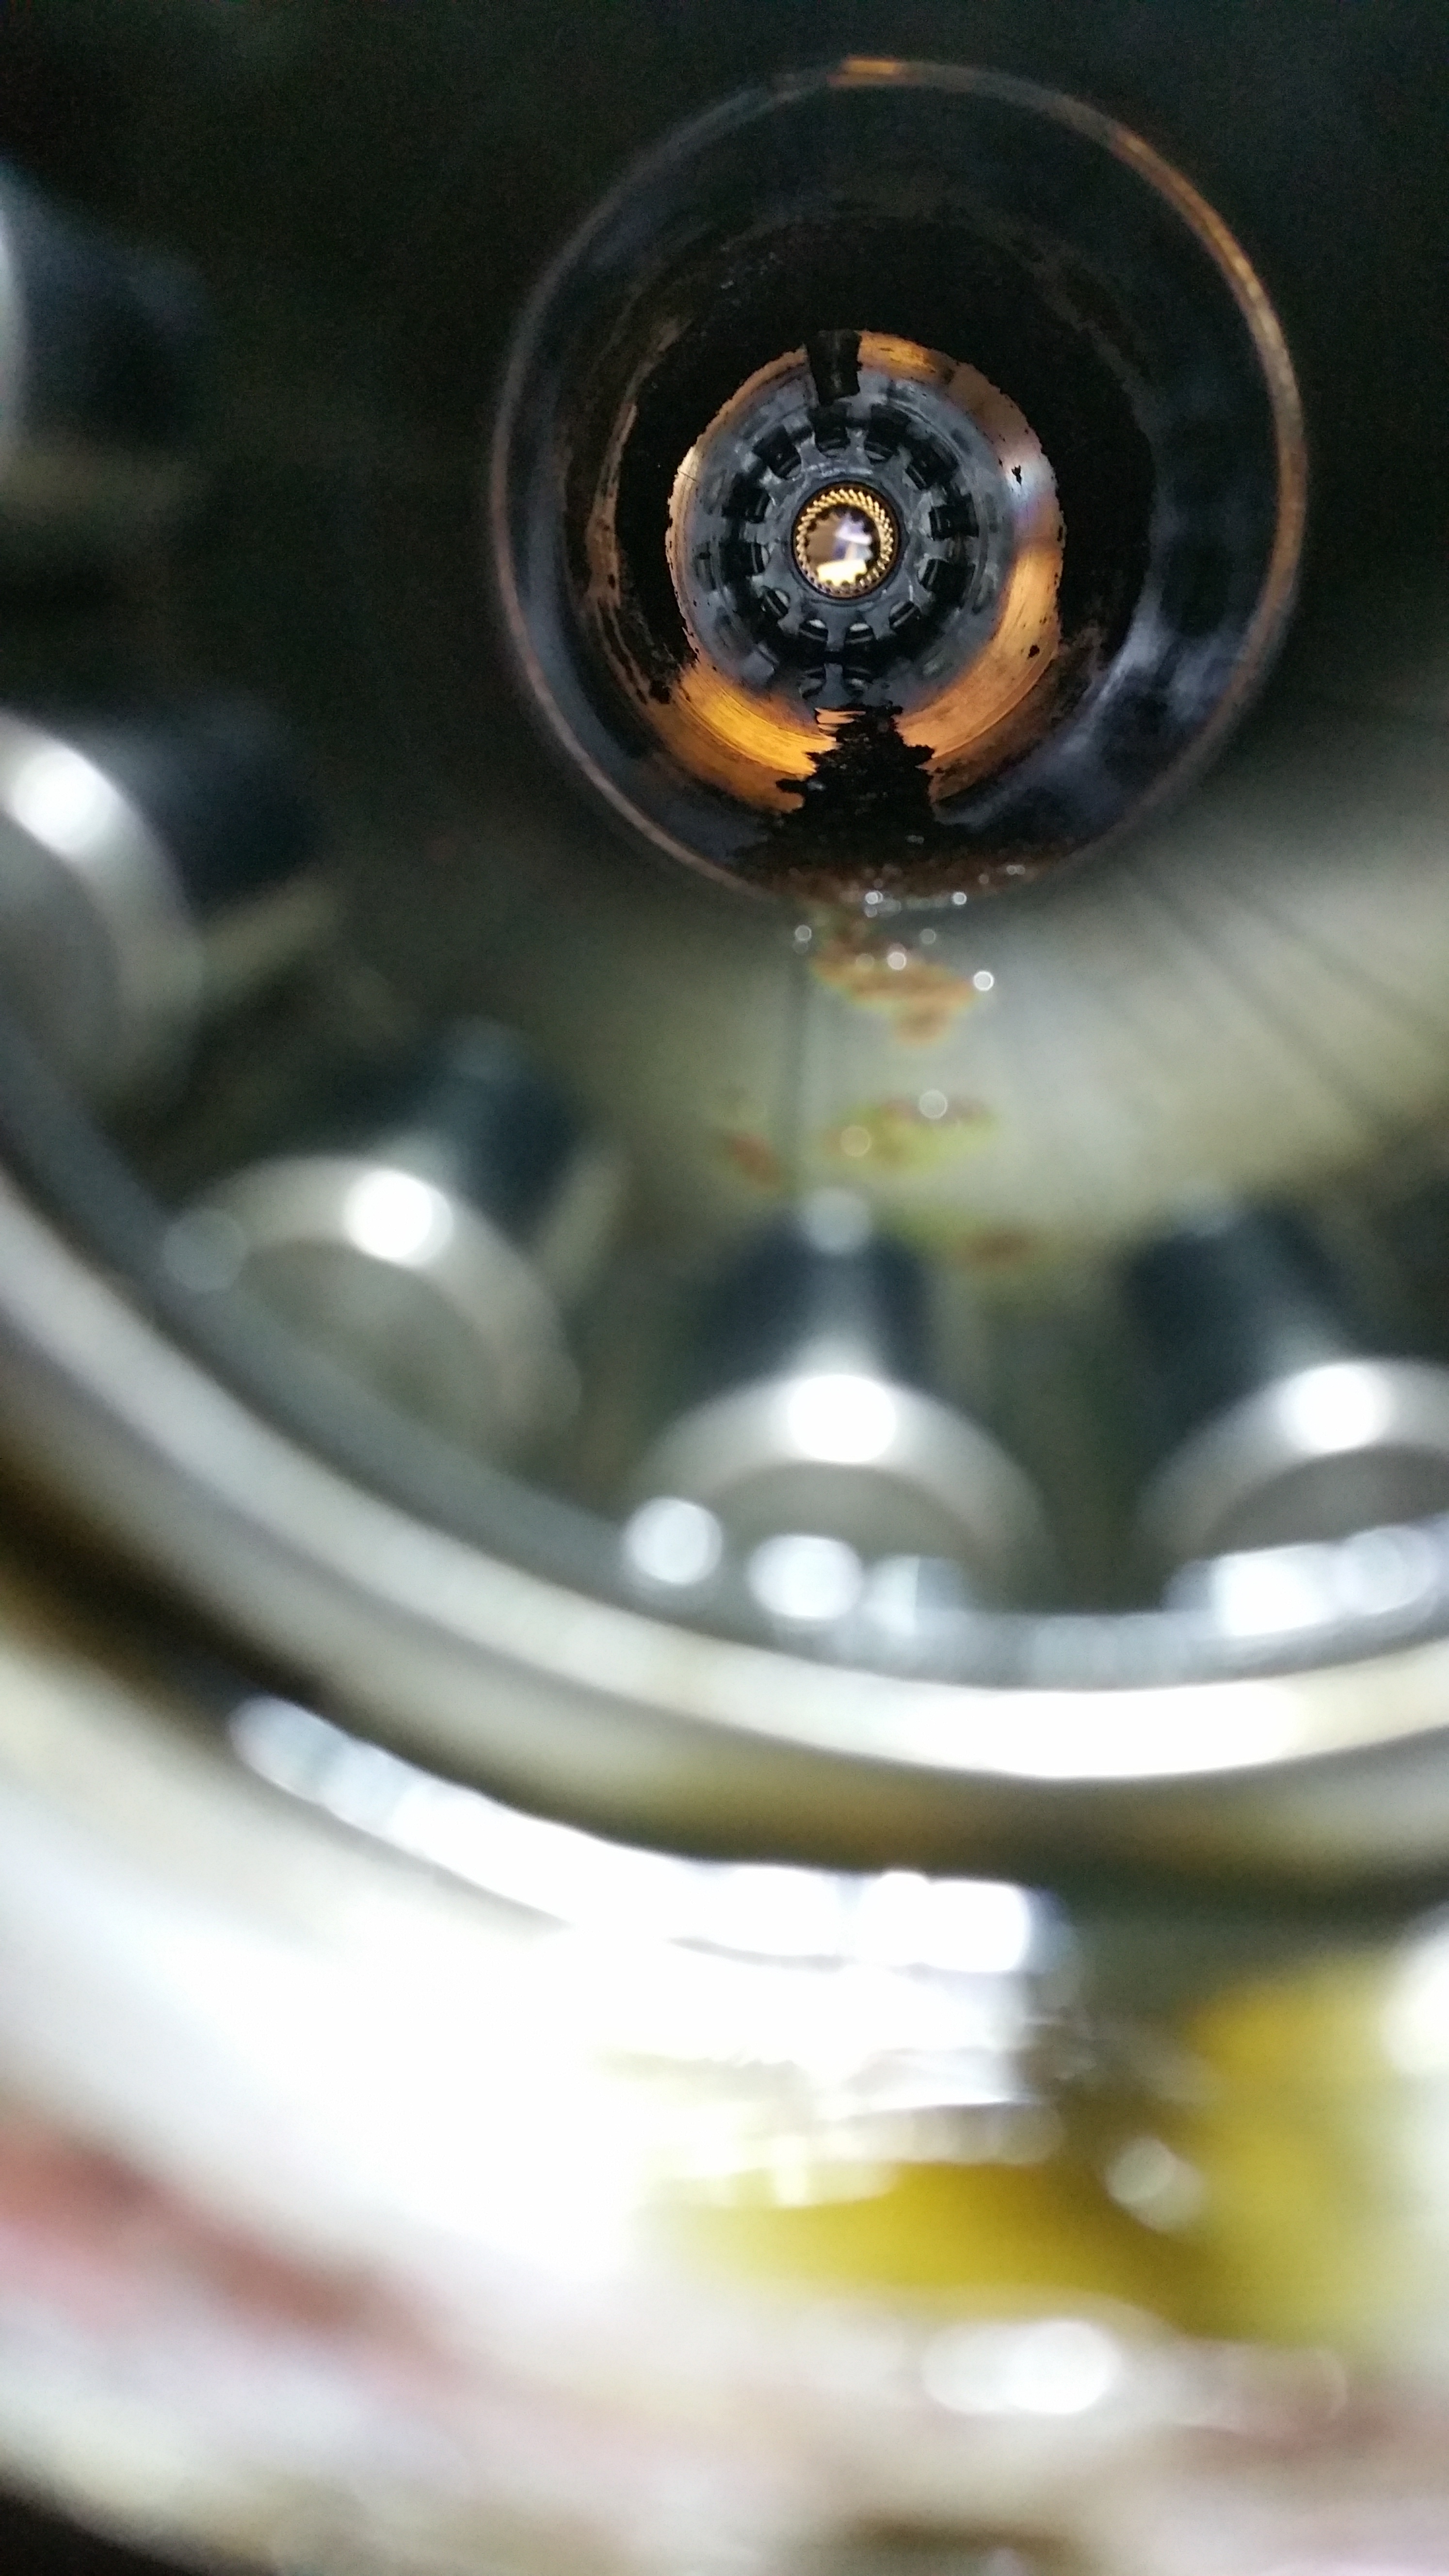
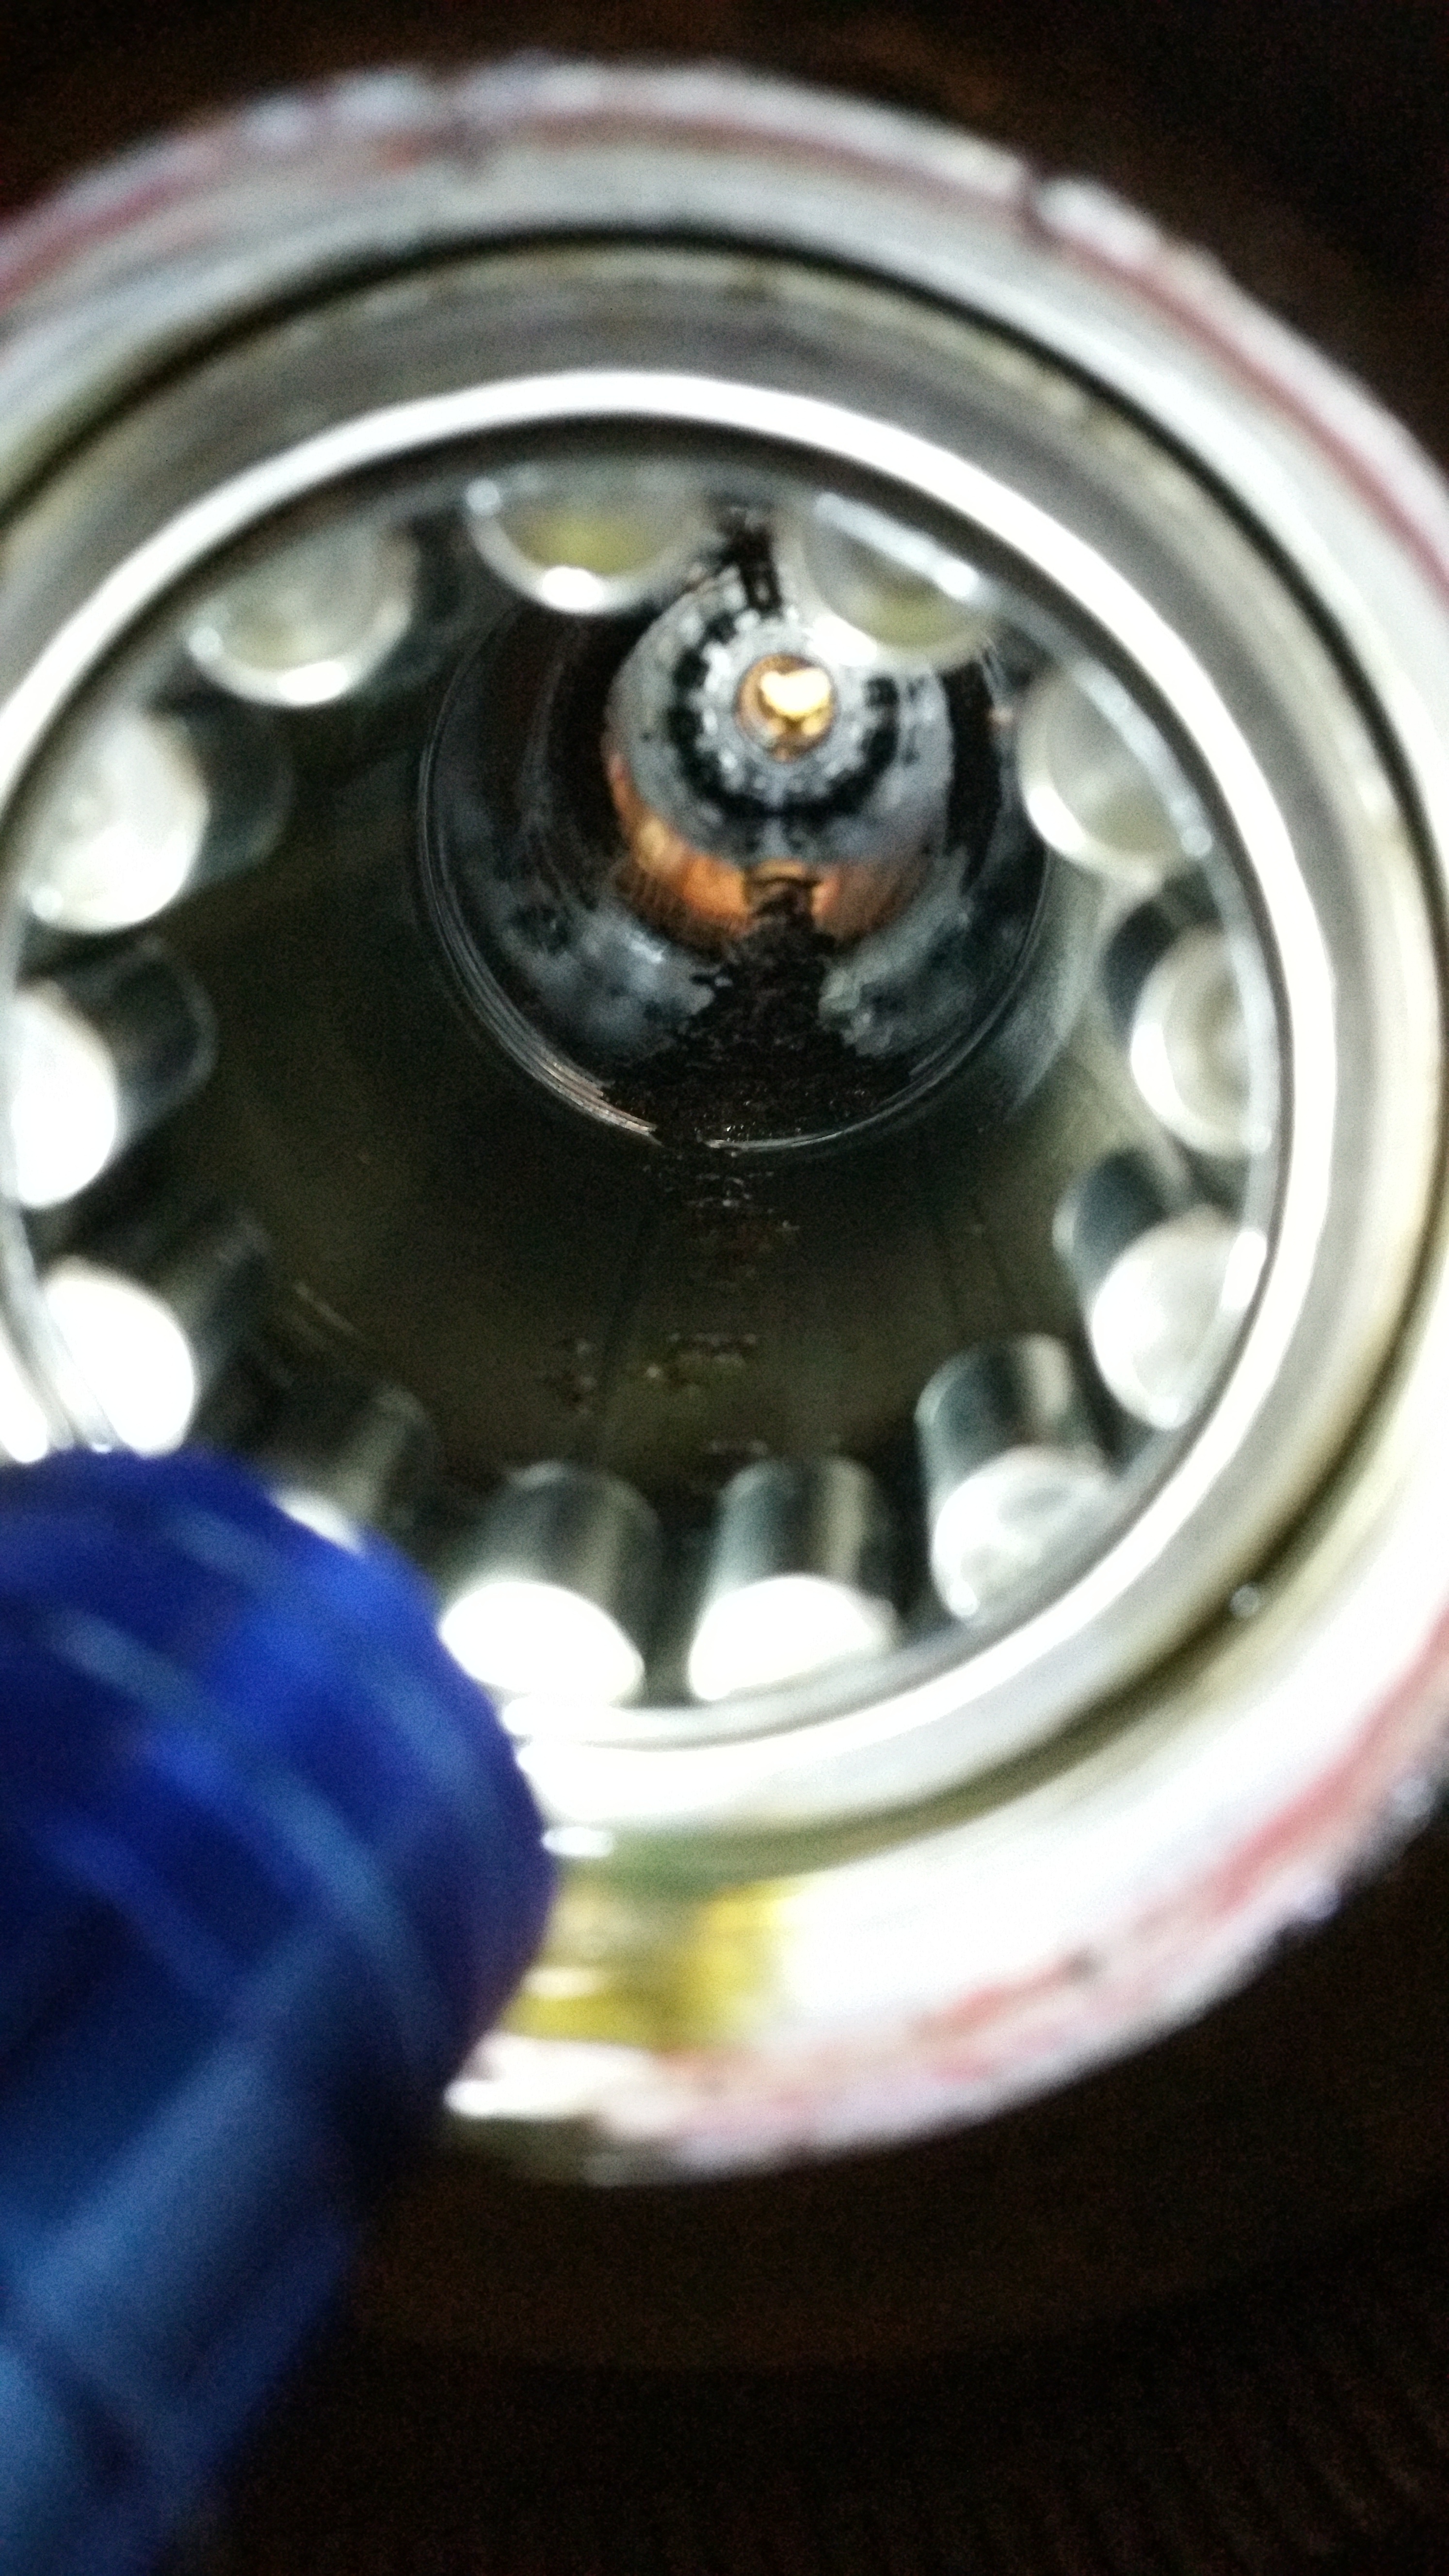
Here are the adjuster nuts in the axle, look how much dirt and crap is in the axle tubing!
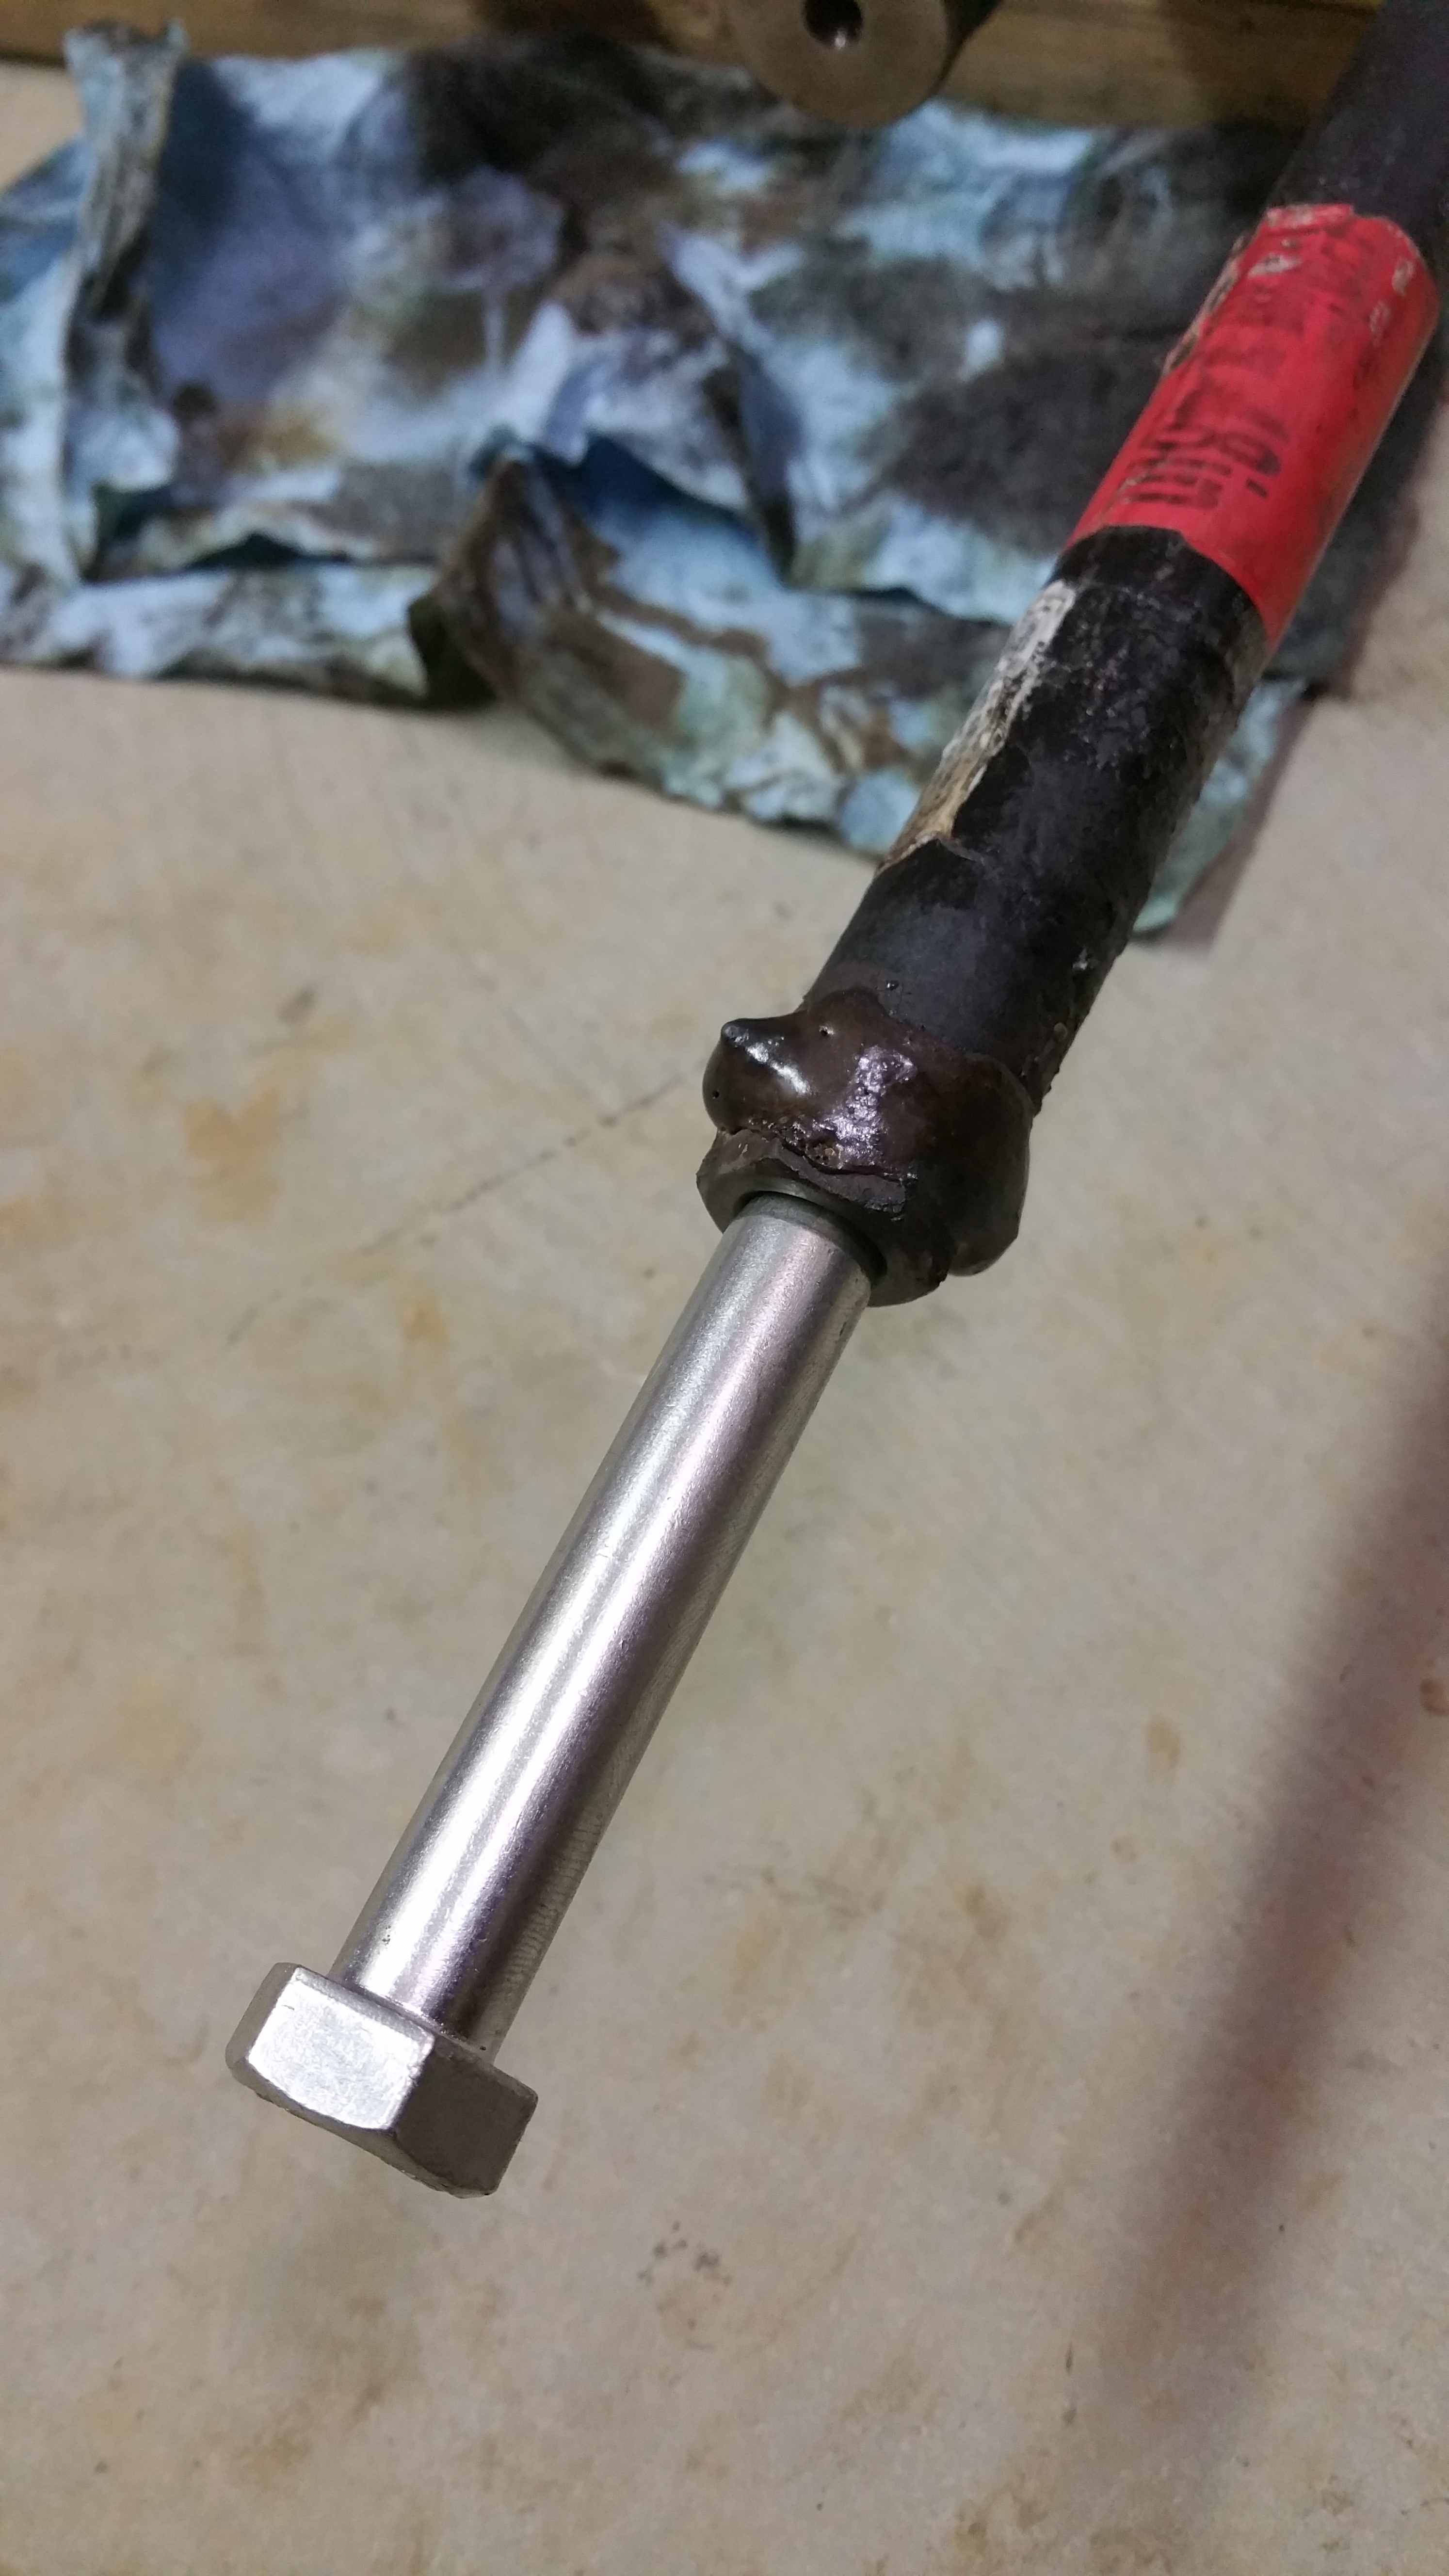
Here is my homemade tool, after welding the nut on the end, I had to grind it down to fit.

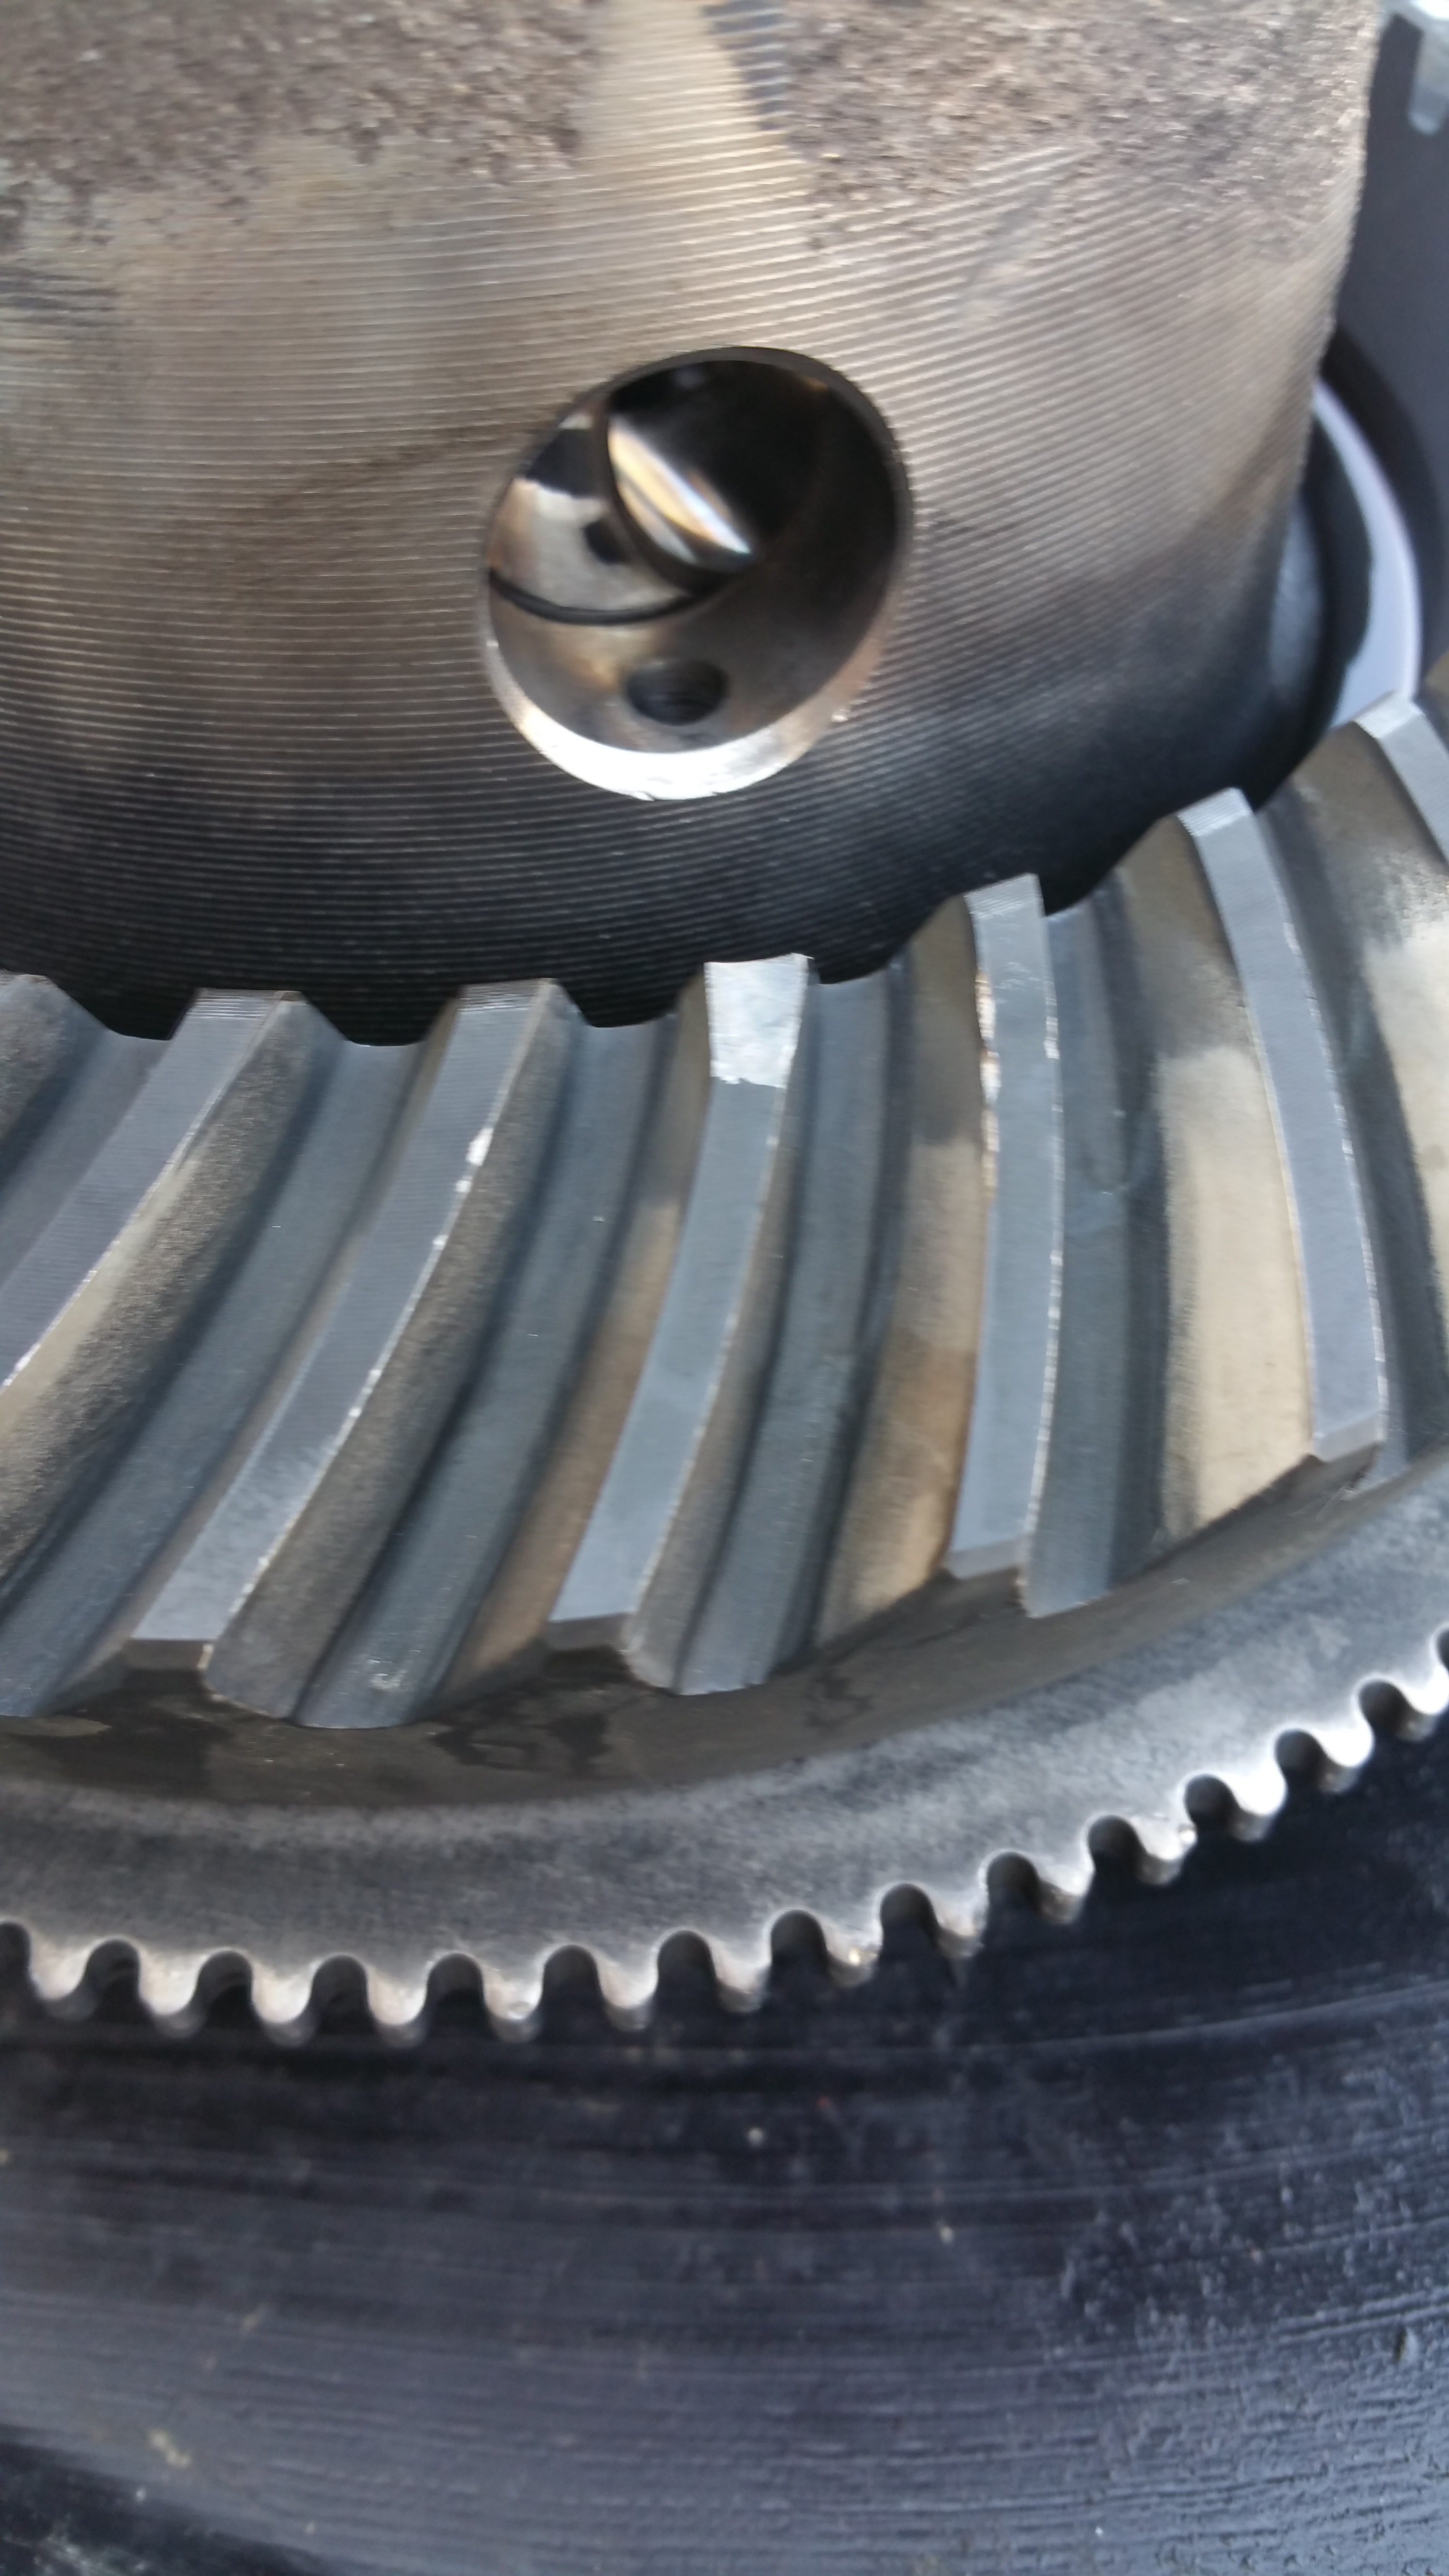
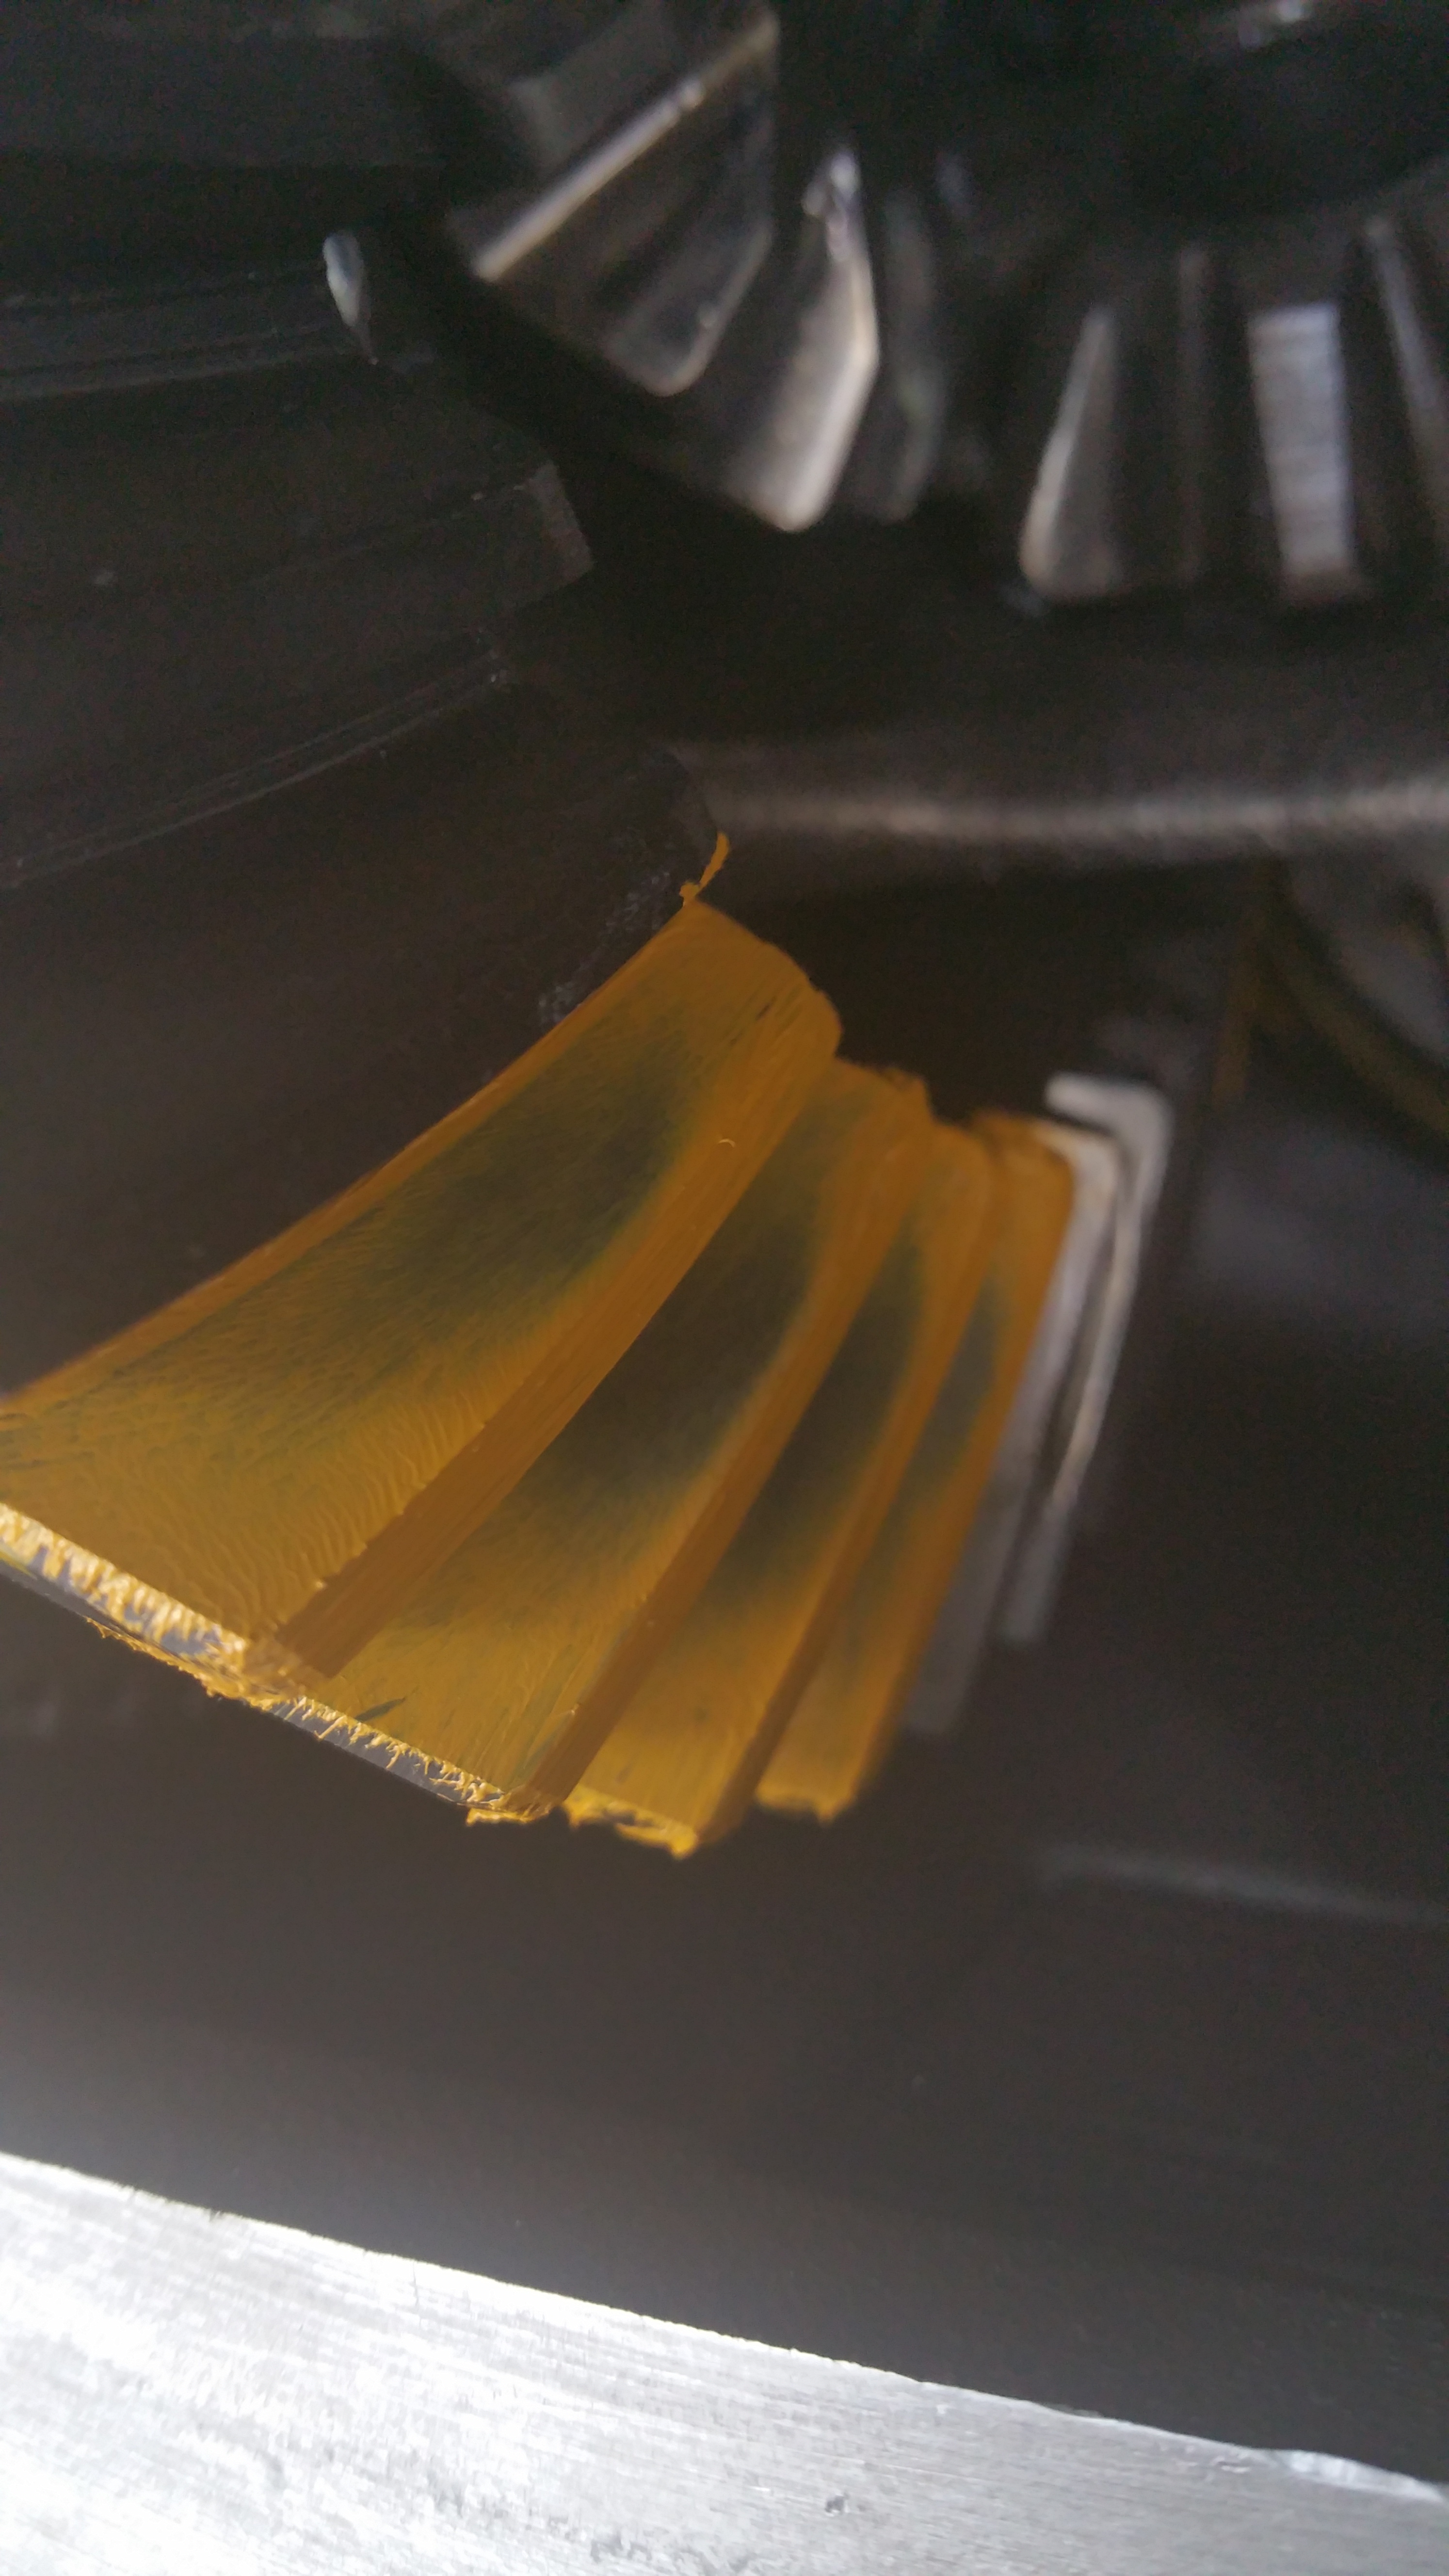
And here is the shaved tooth I thought meant the whole diff was screwed. So I bought new gears. At this time, I found out the formula of how to count the gears to find out what I had installed. They were 4:56 ratio gears. Wow. I was like, COOL man, this means I can do some serious burnouts with this baby! Boy was I ignorant to this stuff...


Yeah, they are fine, again, explanation coming later.
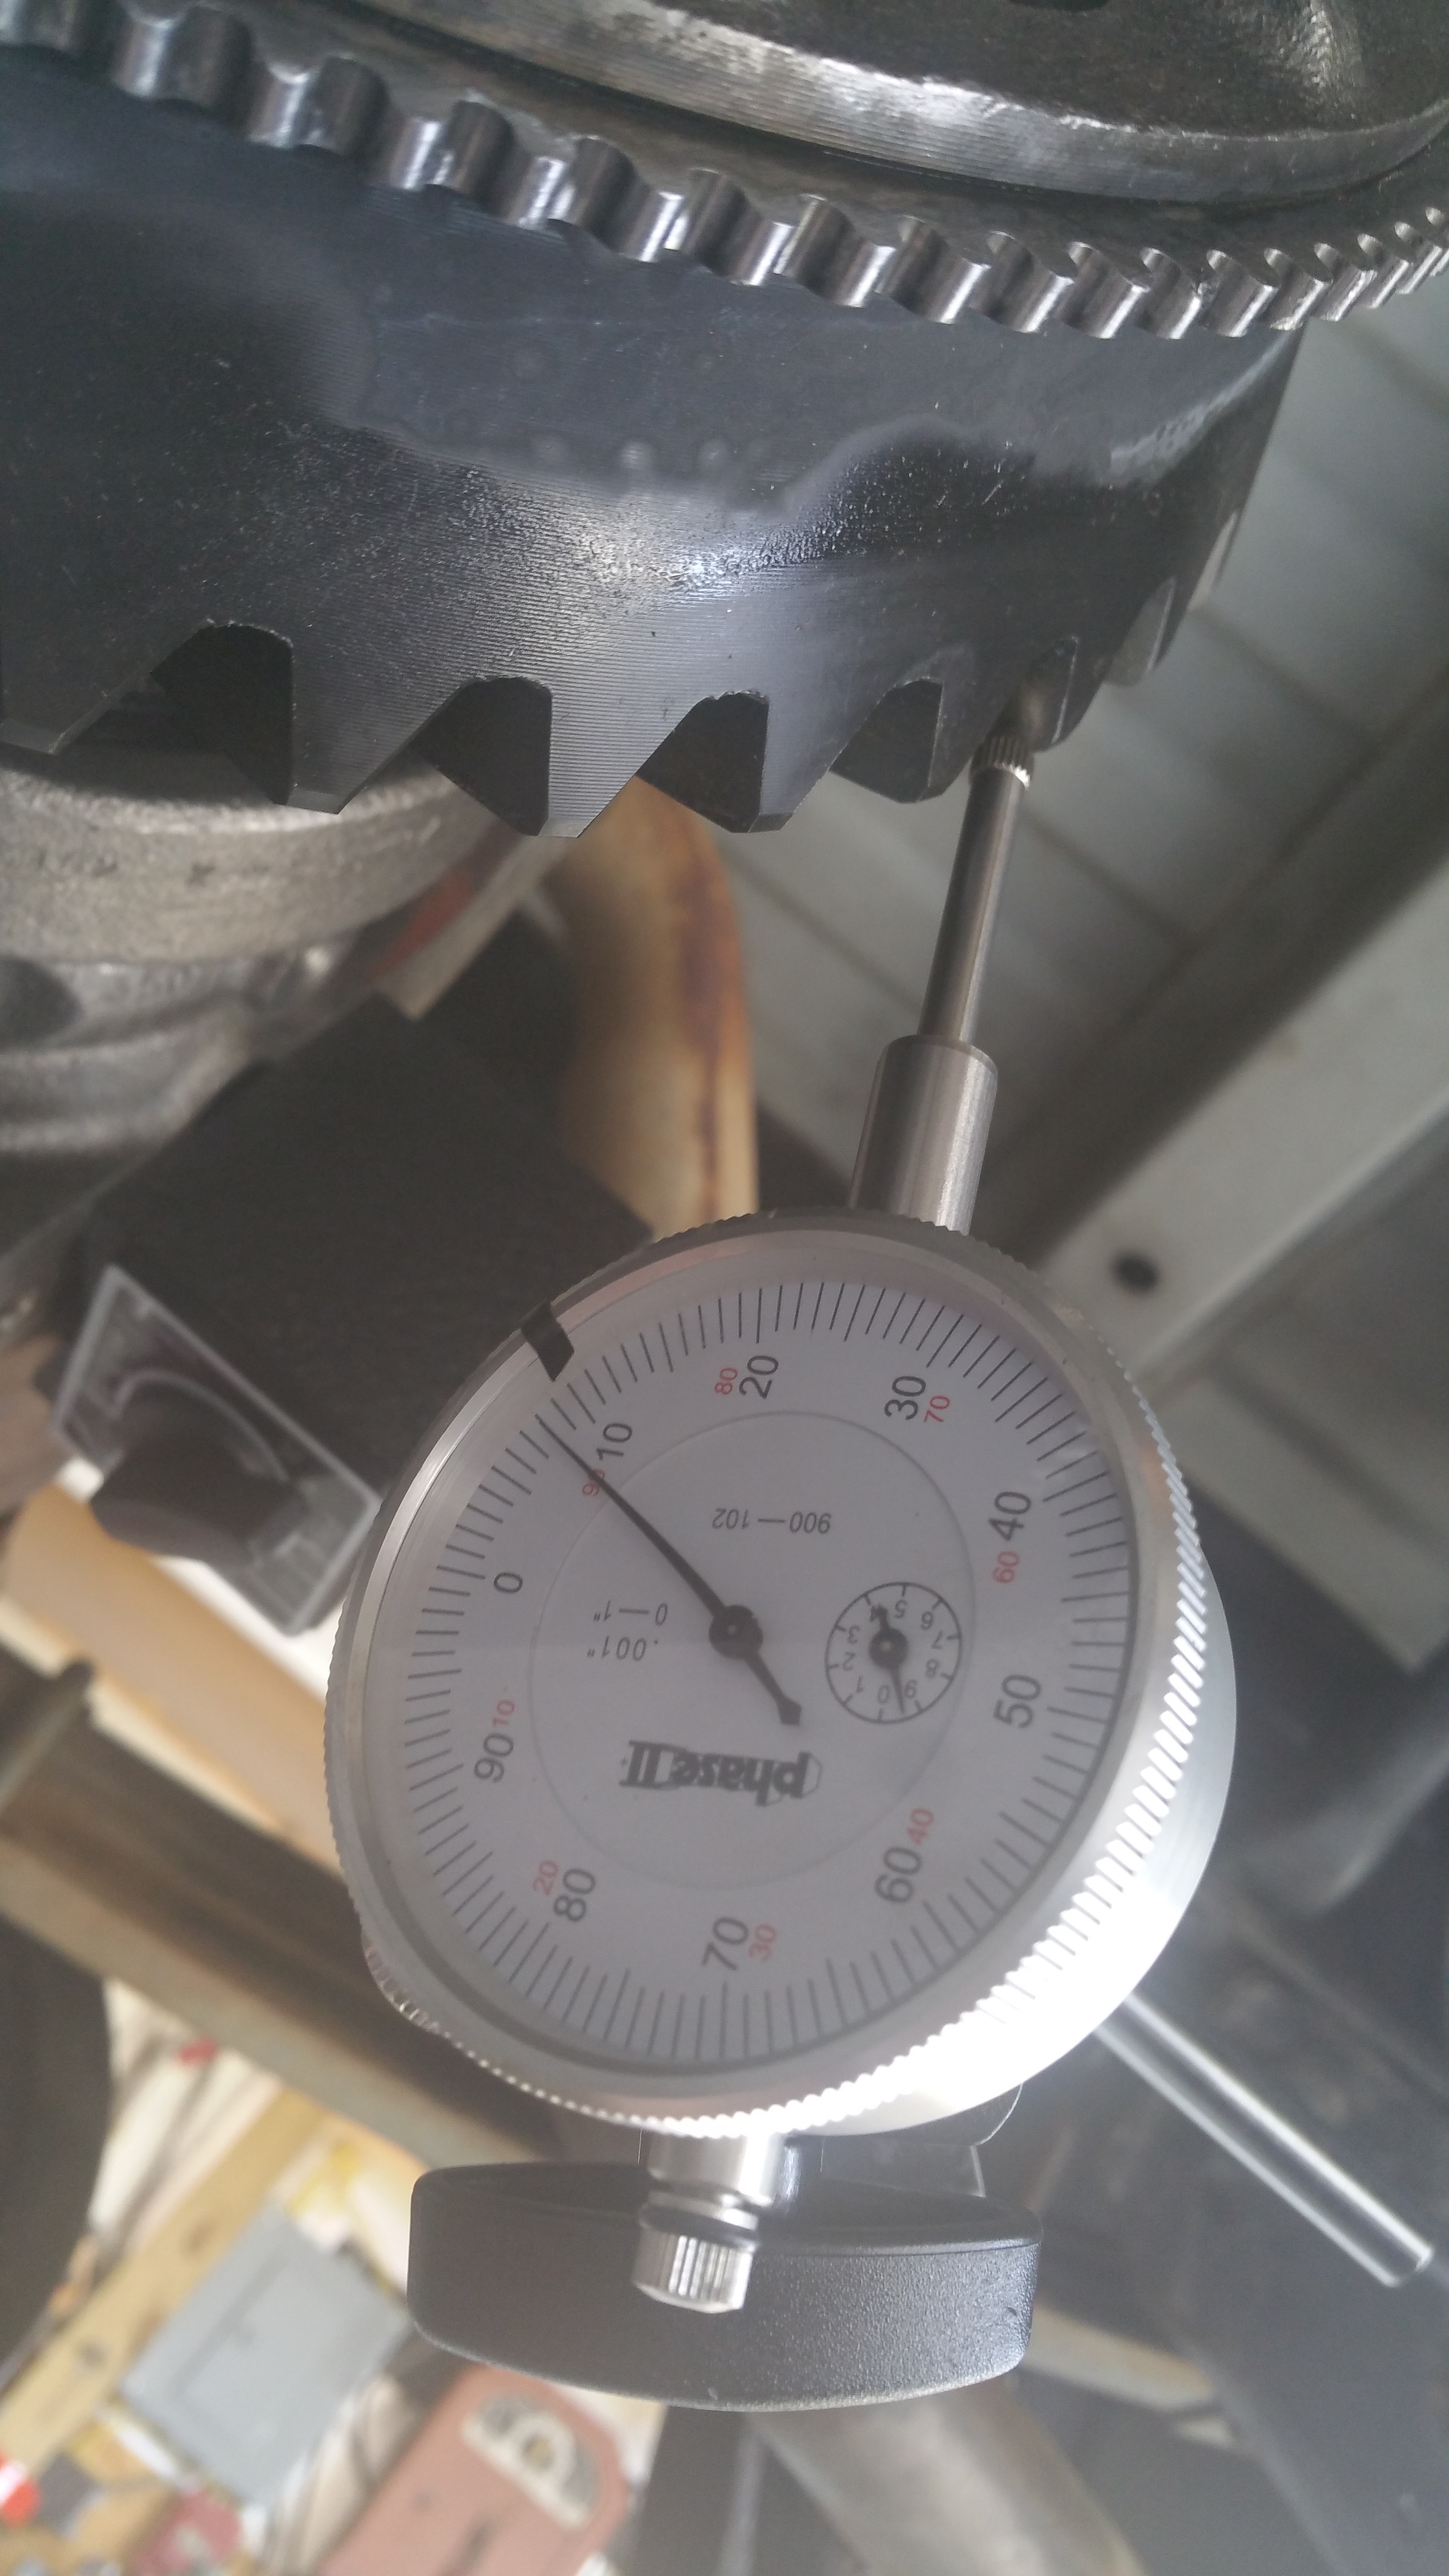
So the shop finished installing the new clutch pack, and I got my new gears from them. I kept the same ratio cuz I thought that was awesome... The shop put the new ring gear assembled for me and I did the rest. I installed the ring and pinion, took 2 crush sleeves before I finally bought an inch pound torque wrench to get it right. I will repeat that, you need an inch pound torque wrench to do the pinion nut adjustment properly... lol.
It was the same gear ratio, maybe that had something to do with it, but the spacers were the same, and all came out perfect with backlash and gear pattern. I was lucky there.
Then something amazing happened.
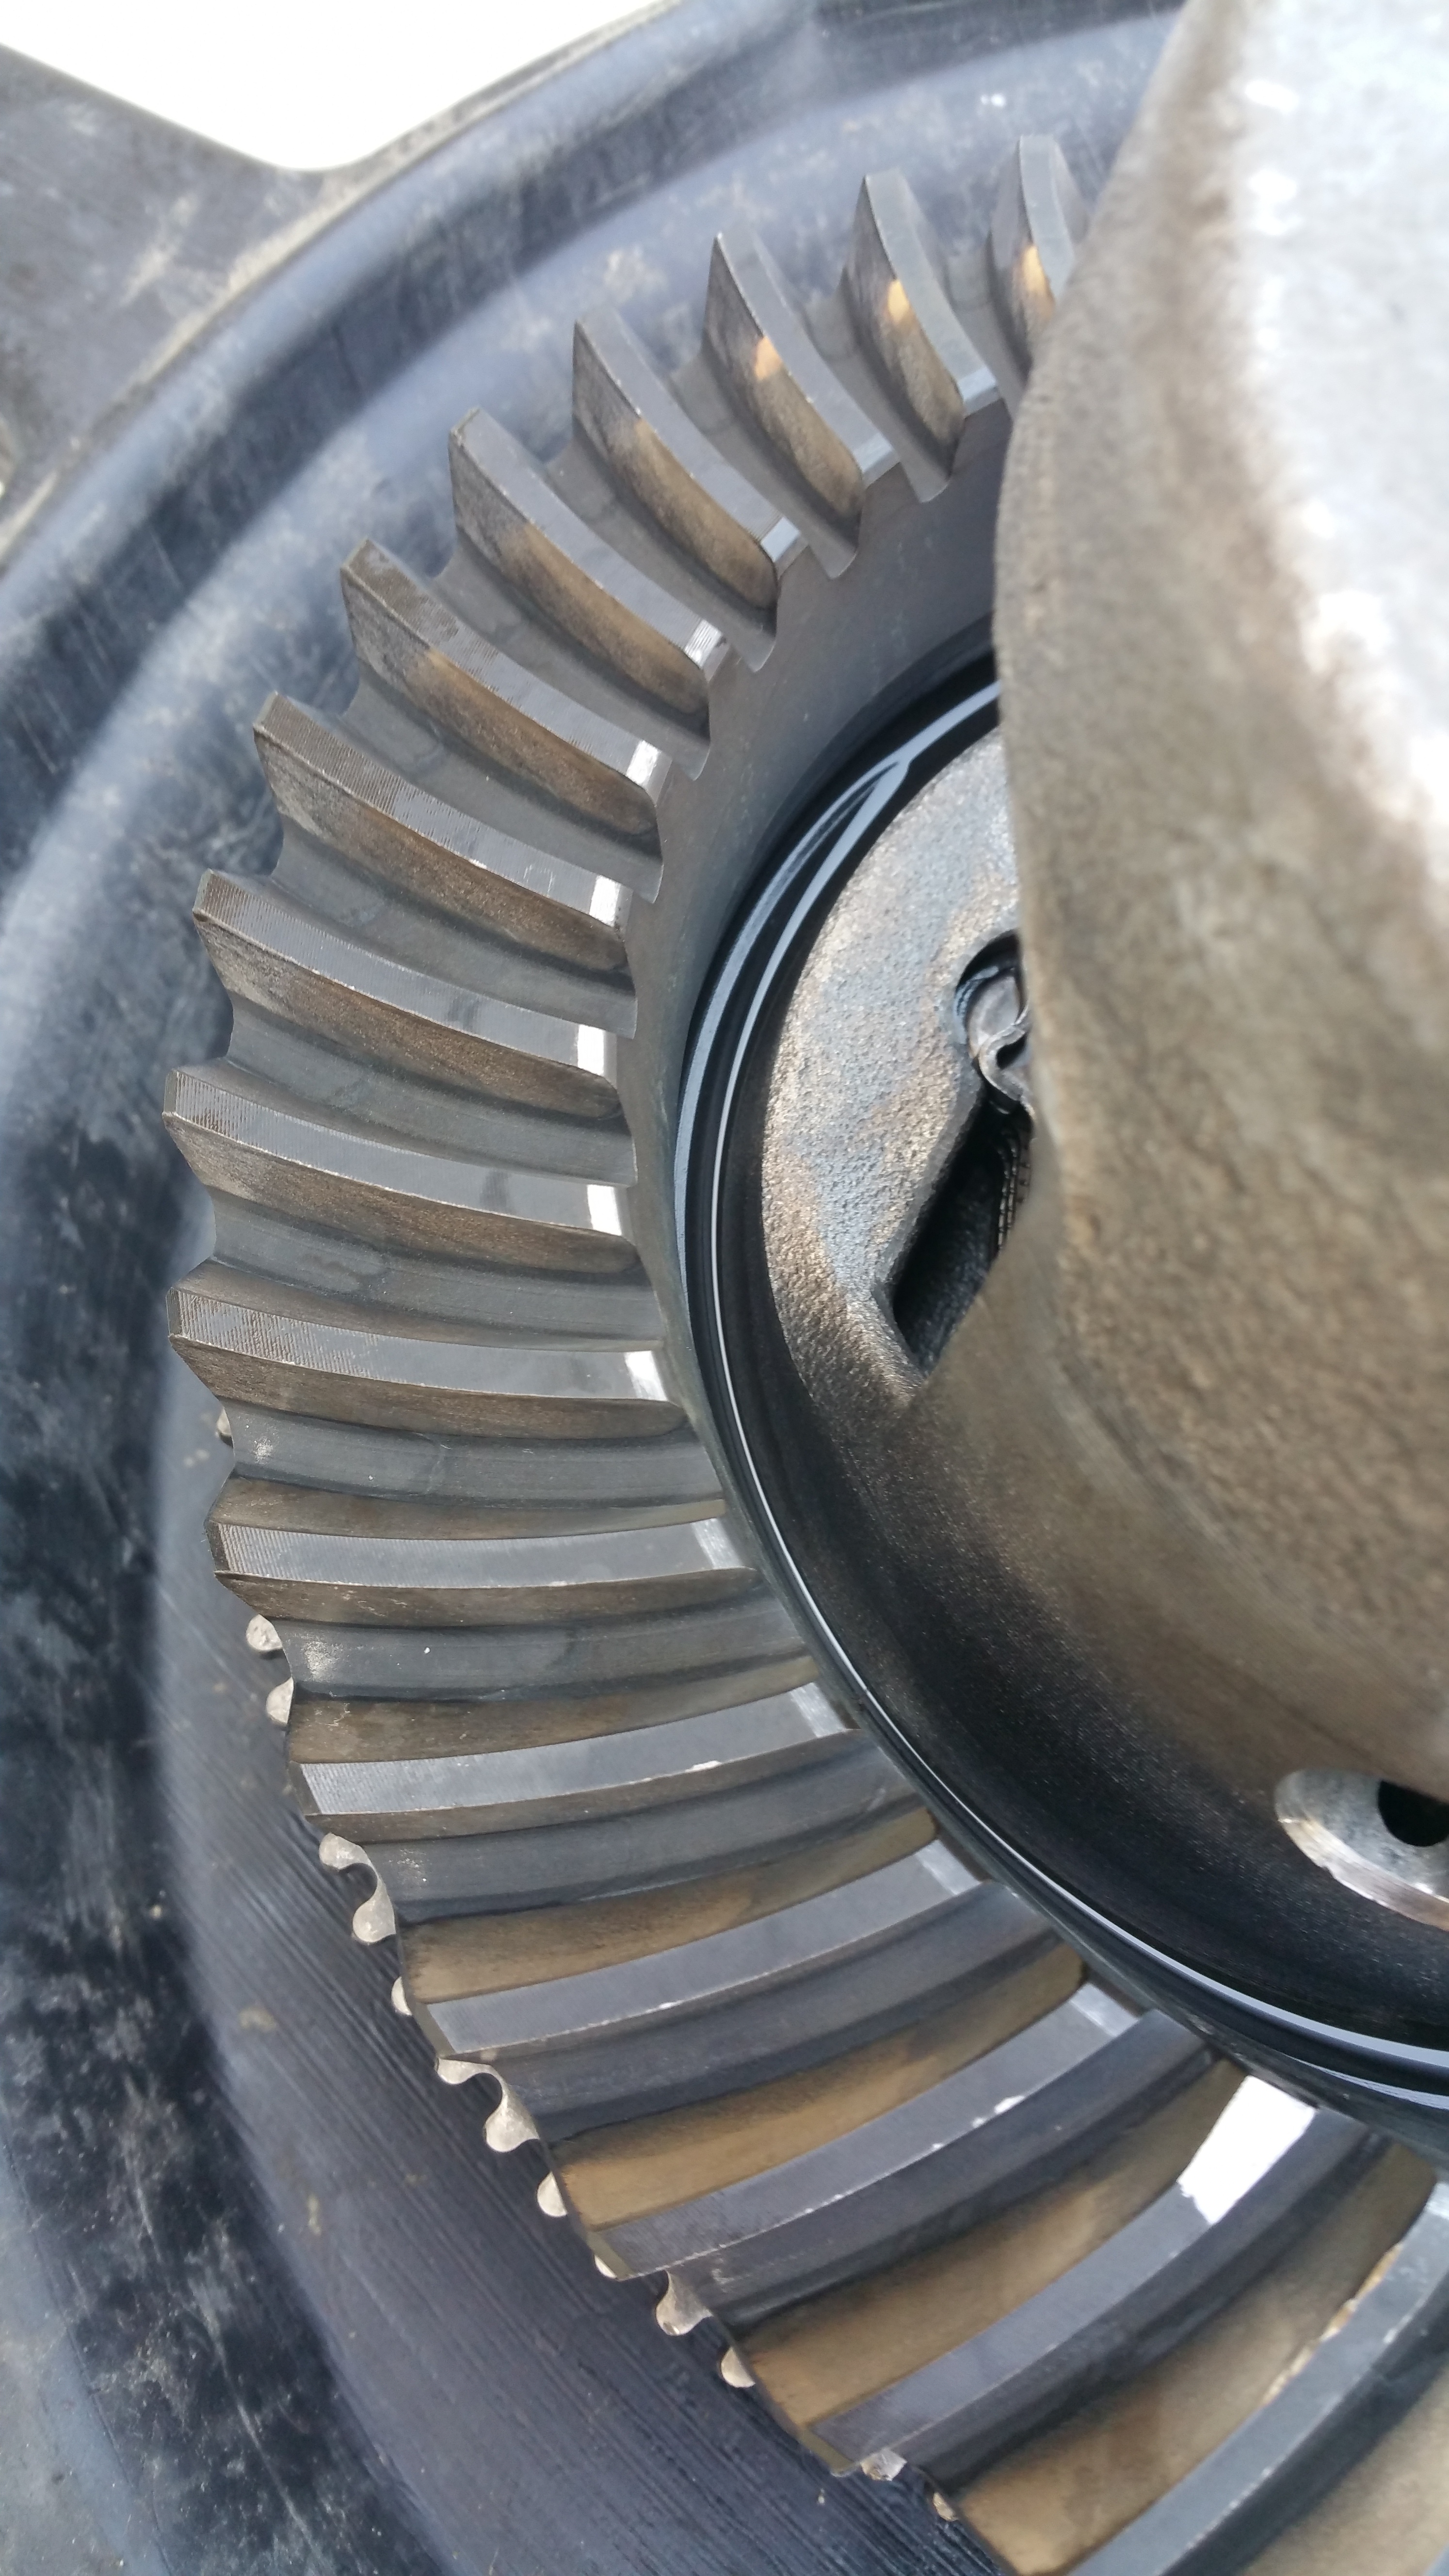
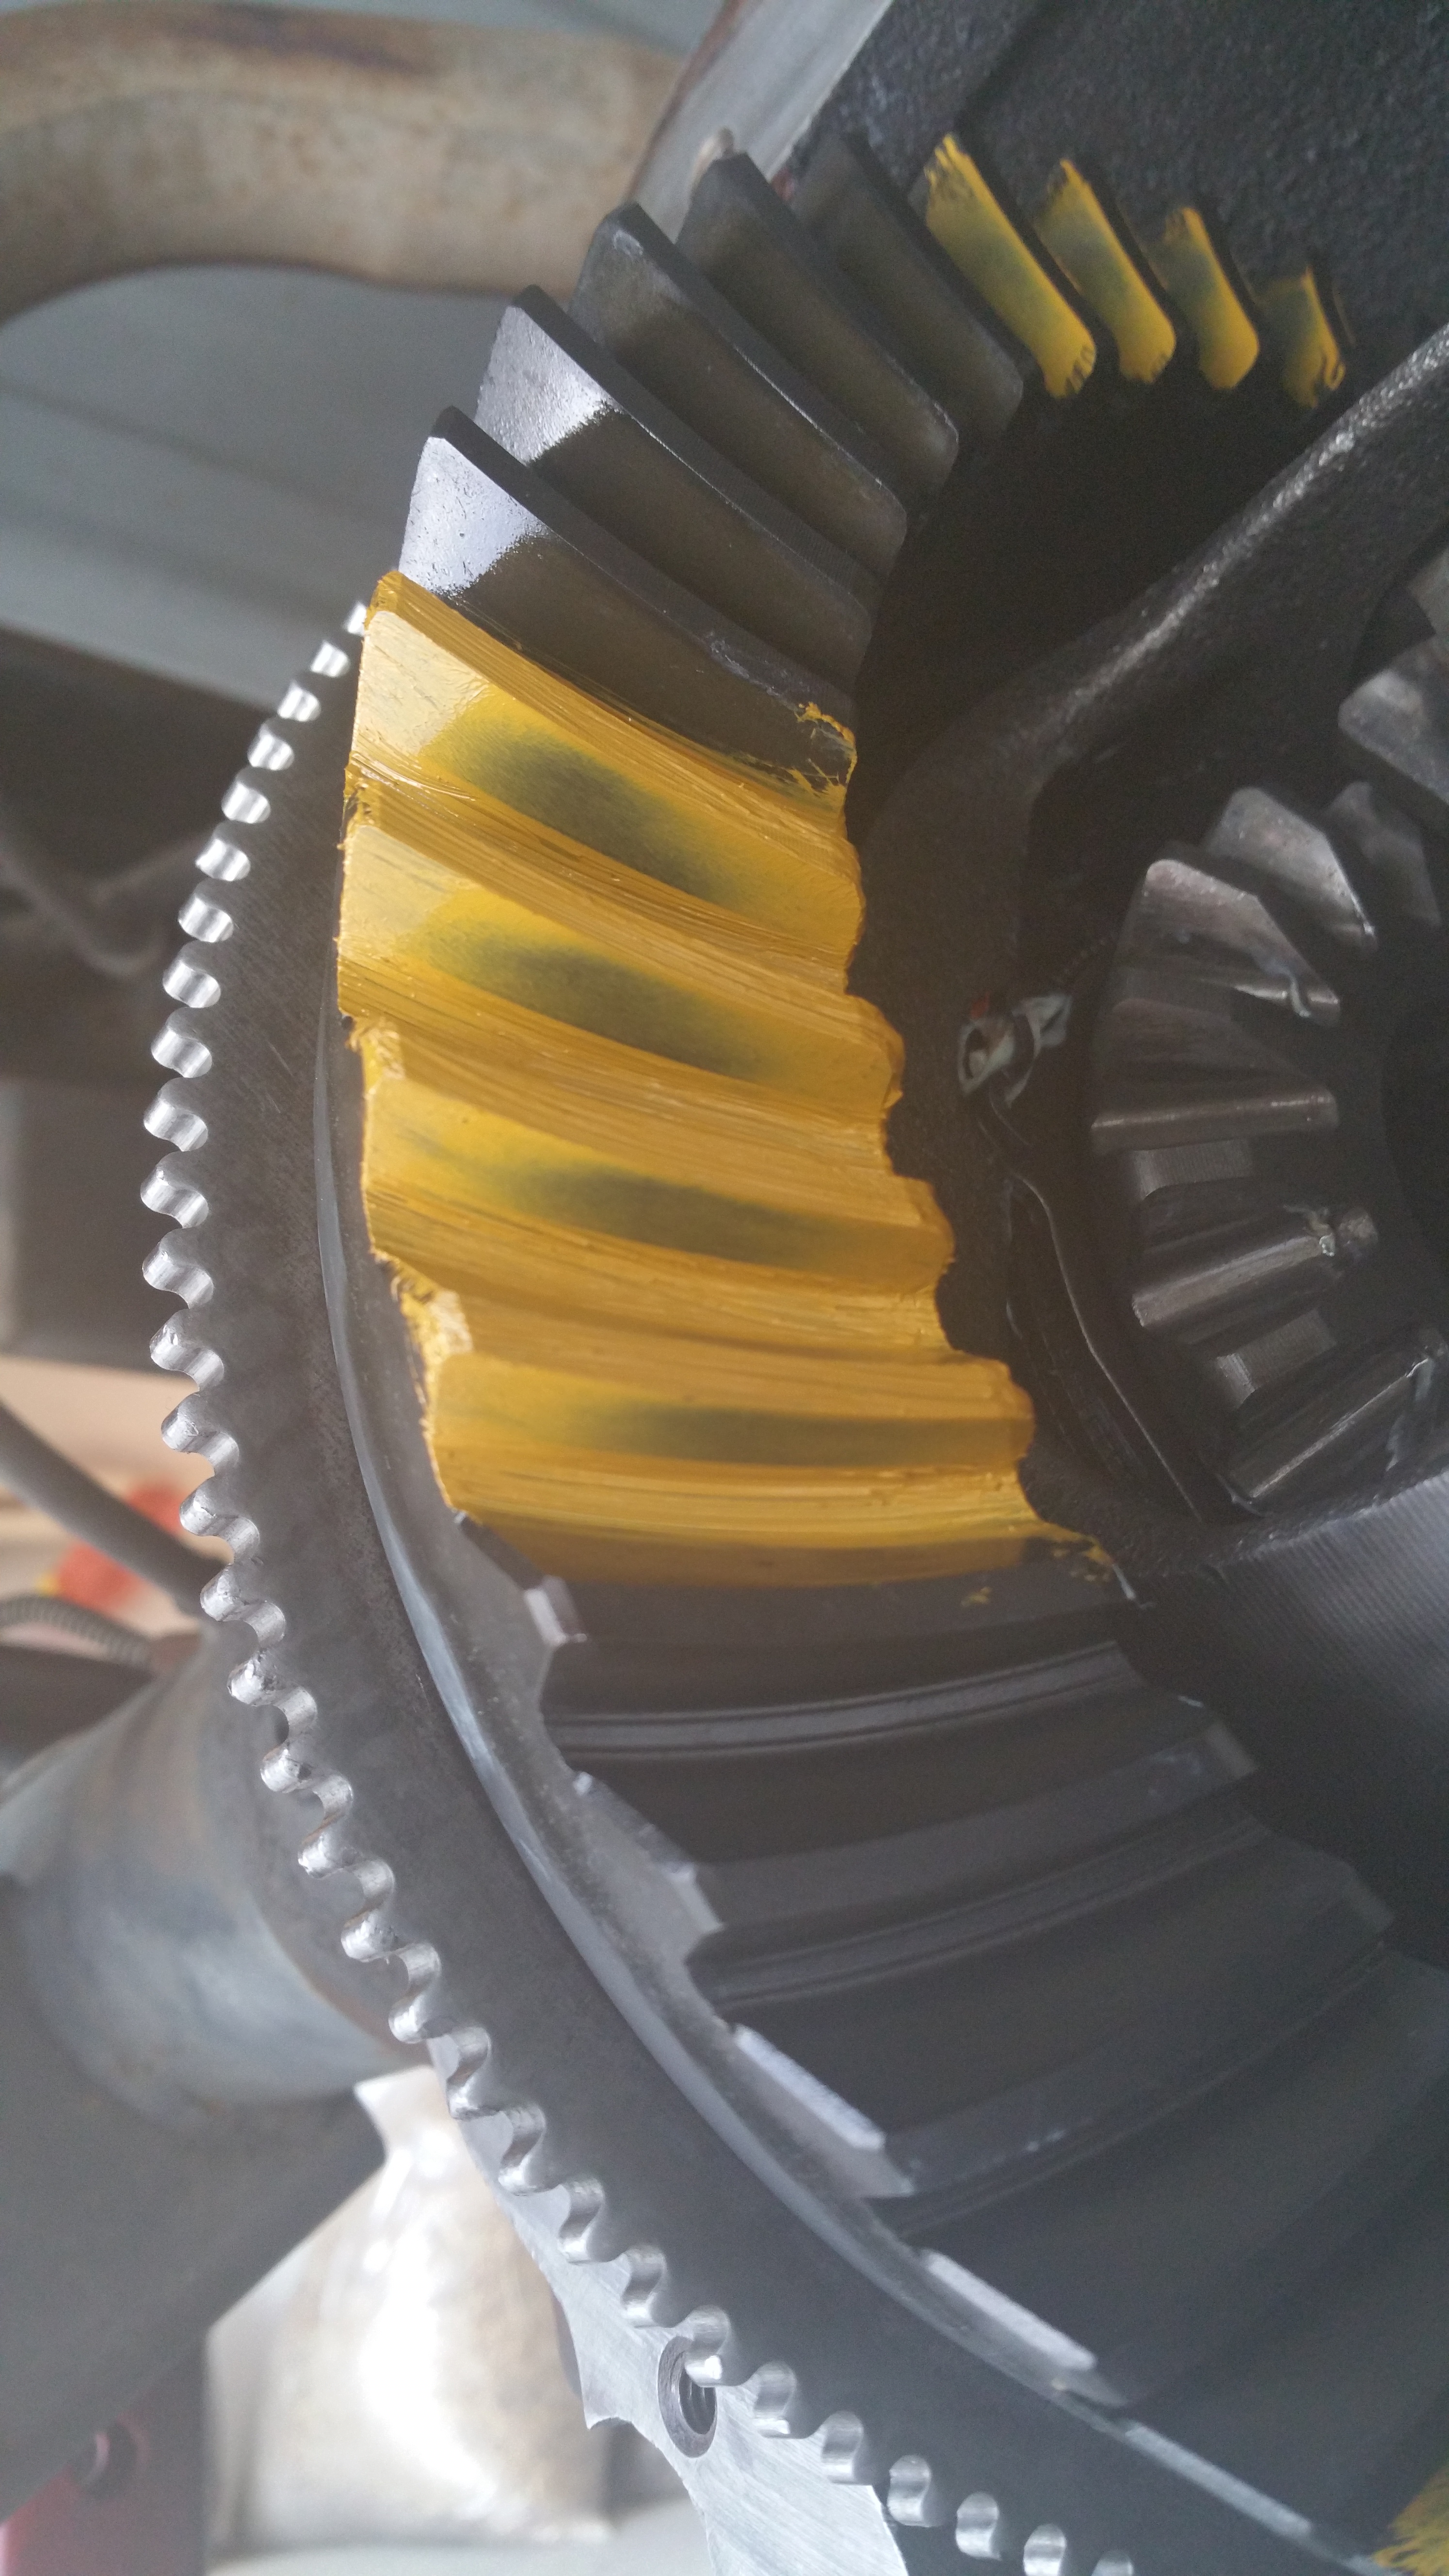
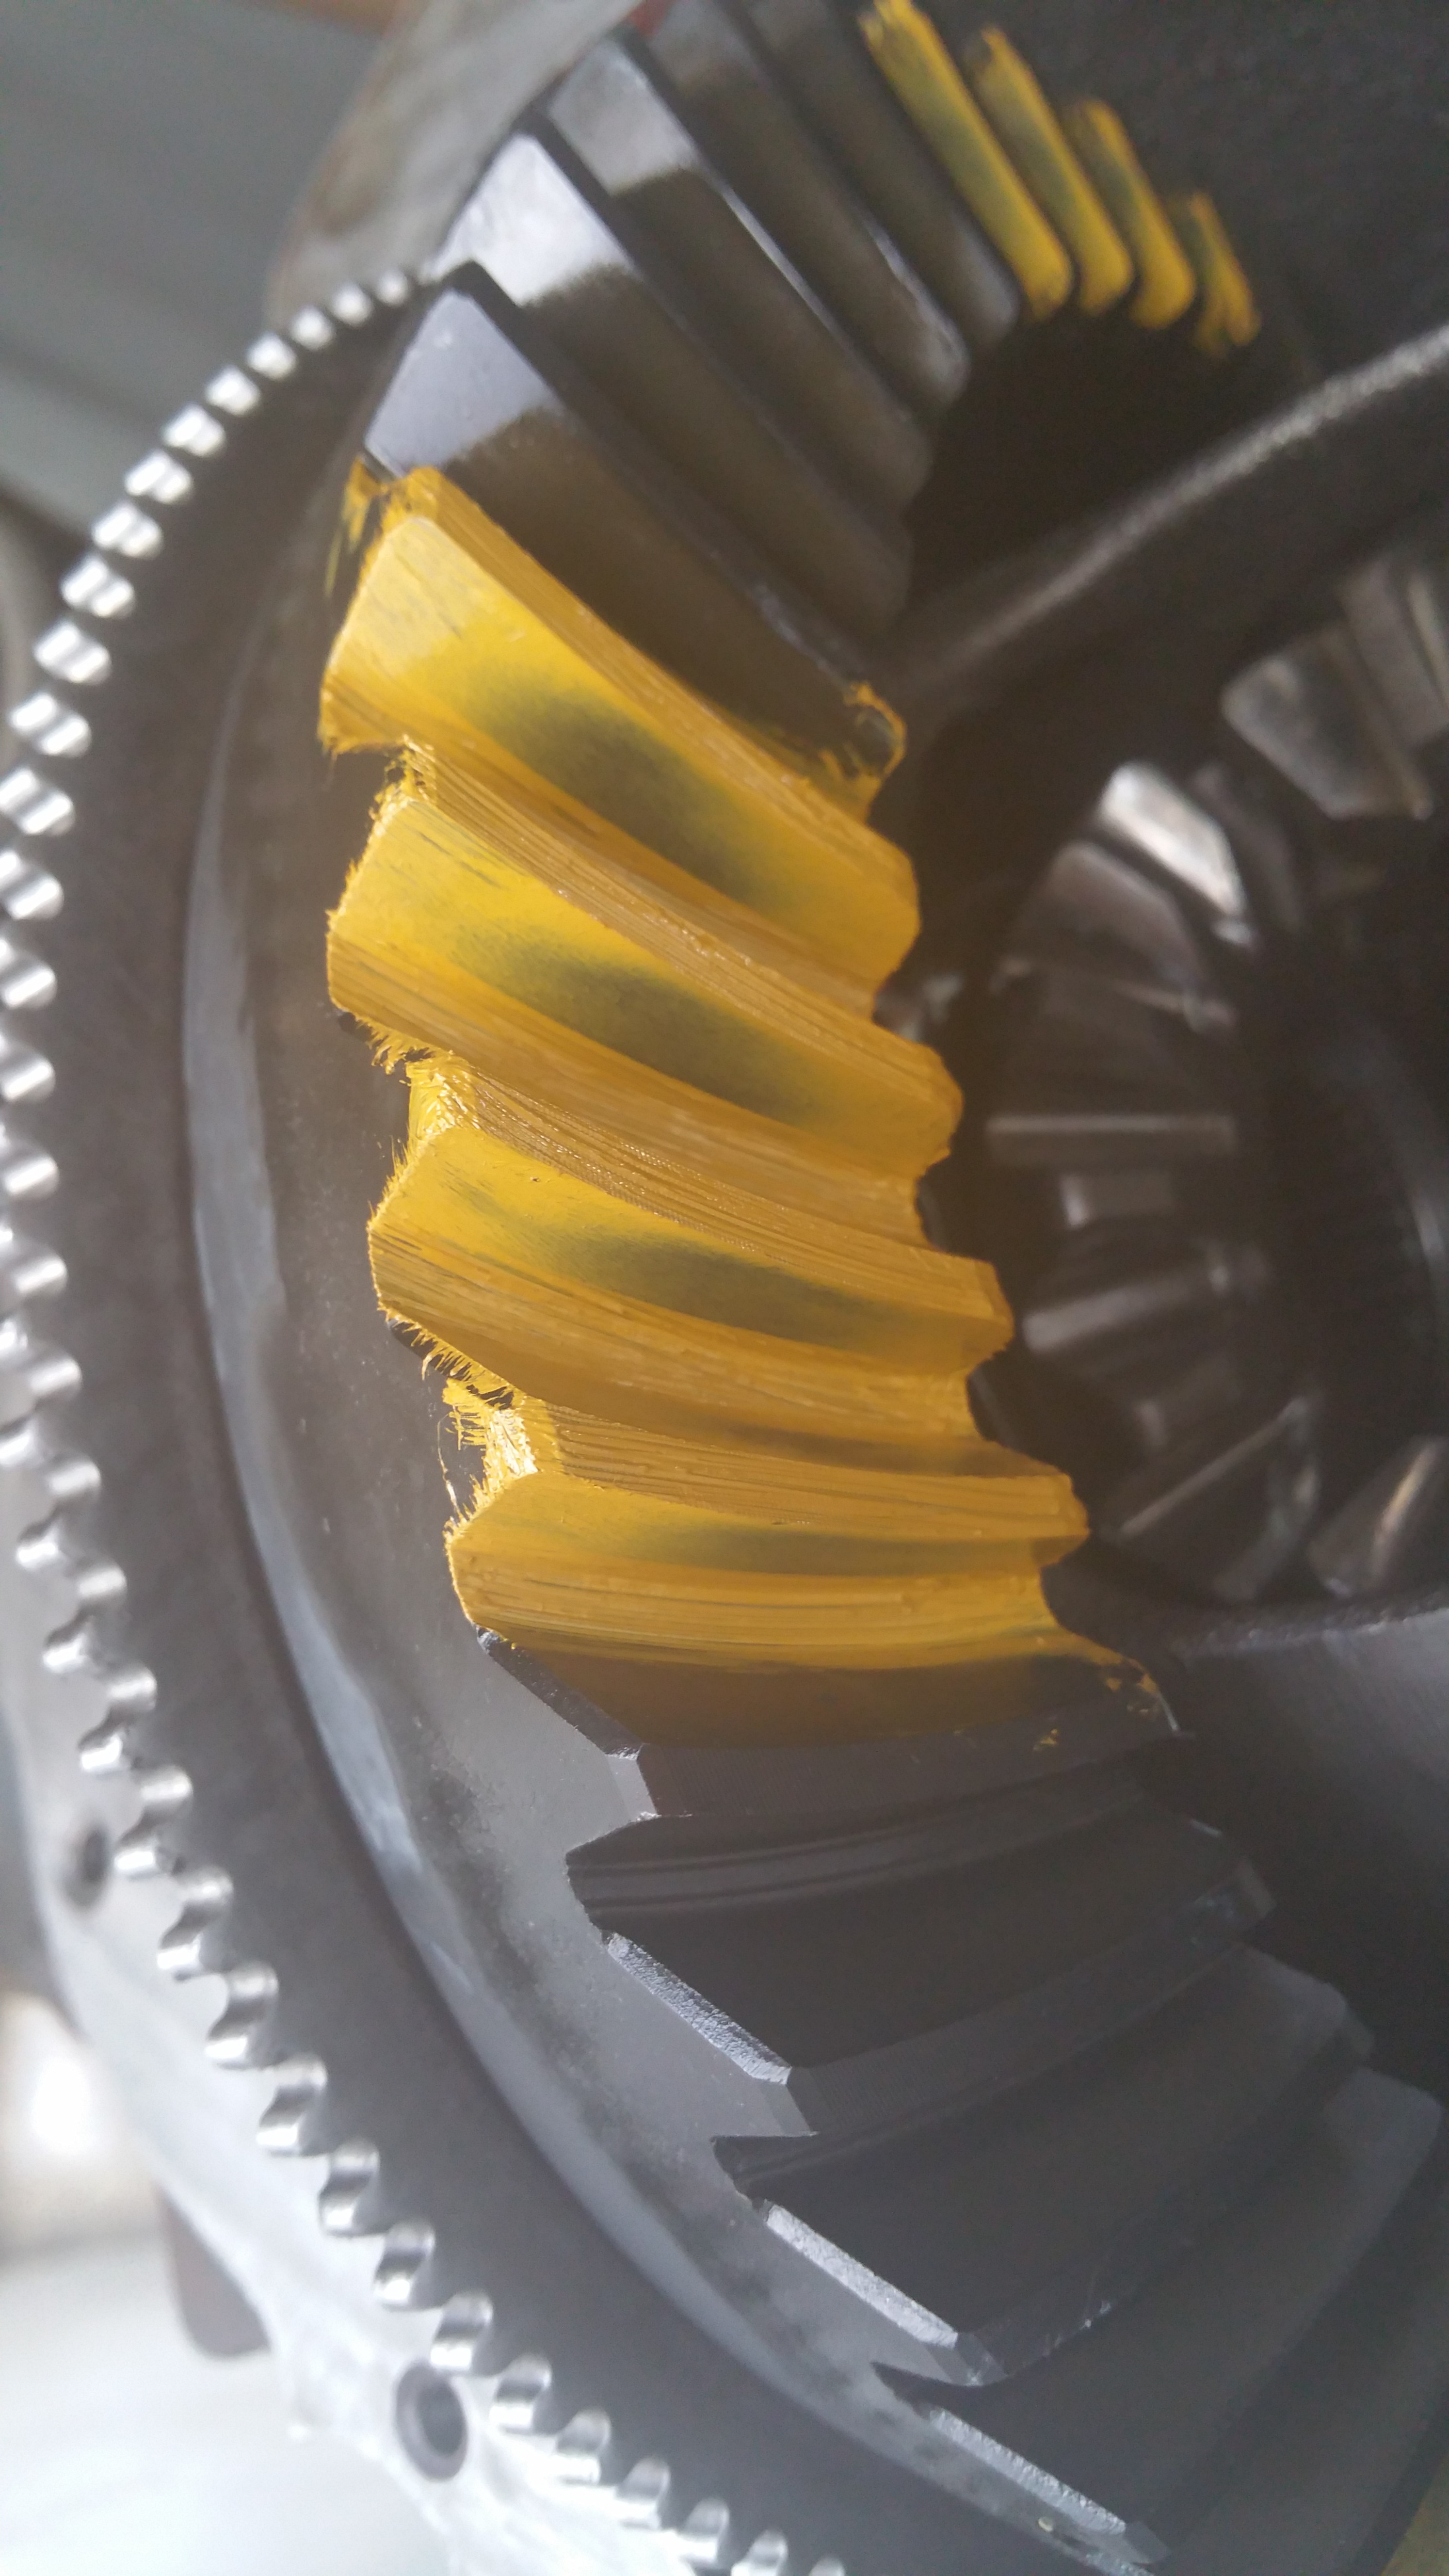
The center pin would not install because the TEETH WERE TOO BIG! I quickly figured out why that tooth was shaved. Actually it was at that point I figured out the tooth was actually "shaved" and not "broken". So the hot rod gear head way to install these massive 4:56 gears in this particular setup is to grab a die grinder and shave a tooth so that the friggin center pin will slip into the carrier. It was also at that point that I figured out the previous set of gears I had just went through the trouble to replace were FINE!!! So then my second find was that 4:56 gears are great for hauling trailers and stuff, or good for 4 wheeling in a mud hole or climbing hills, but a 2 WHEEL DRIVE truck that doesn't haul much. I was planning to lower the truck too for a better street stance. I mean come on, IFS, 2 wheel drive SS/T with racing stripes... Duh. I needed 3:73's. Not 4:56's.
I started researching and then started examining the old gears, and yeah, there were no wear marks hardly at all on them, no cracks, no nothing. I should have stopped right there and disassembled everything and took the gears back and got my $250+ dollars back but man that was a lot of work to do all over again. I was ticked off so I finished up the install and have those old set of perfectly fine 4:56 gears on the shelf... ID10T.
Whatever. I learned the hard way. Again.
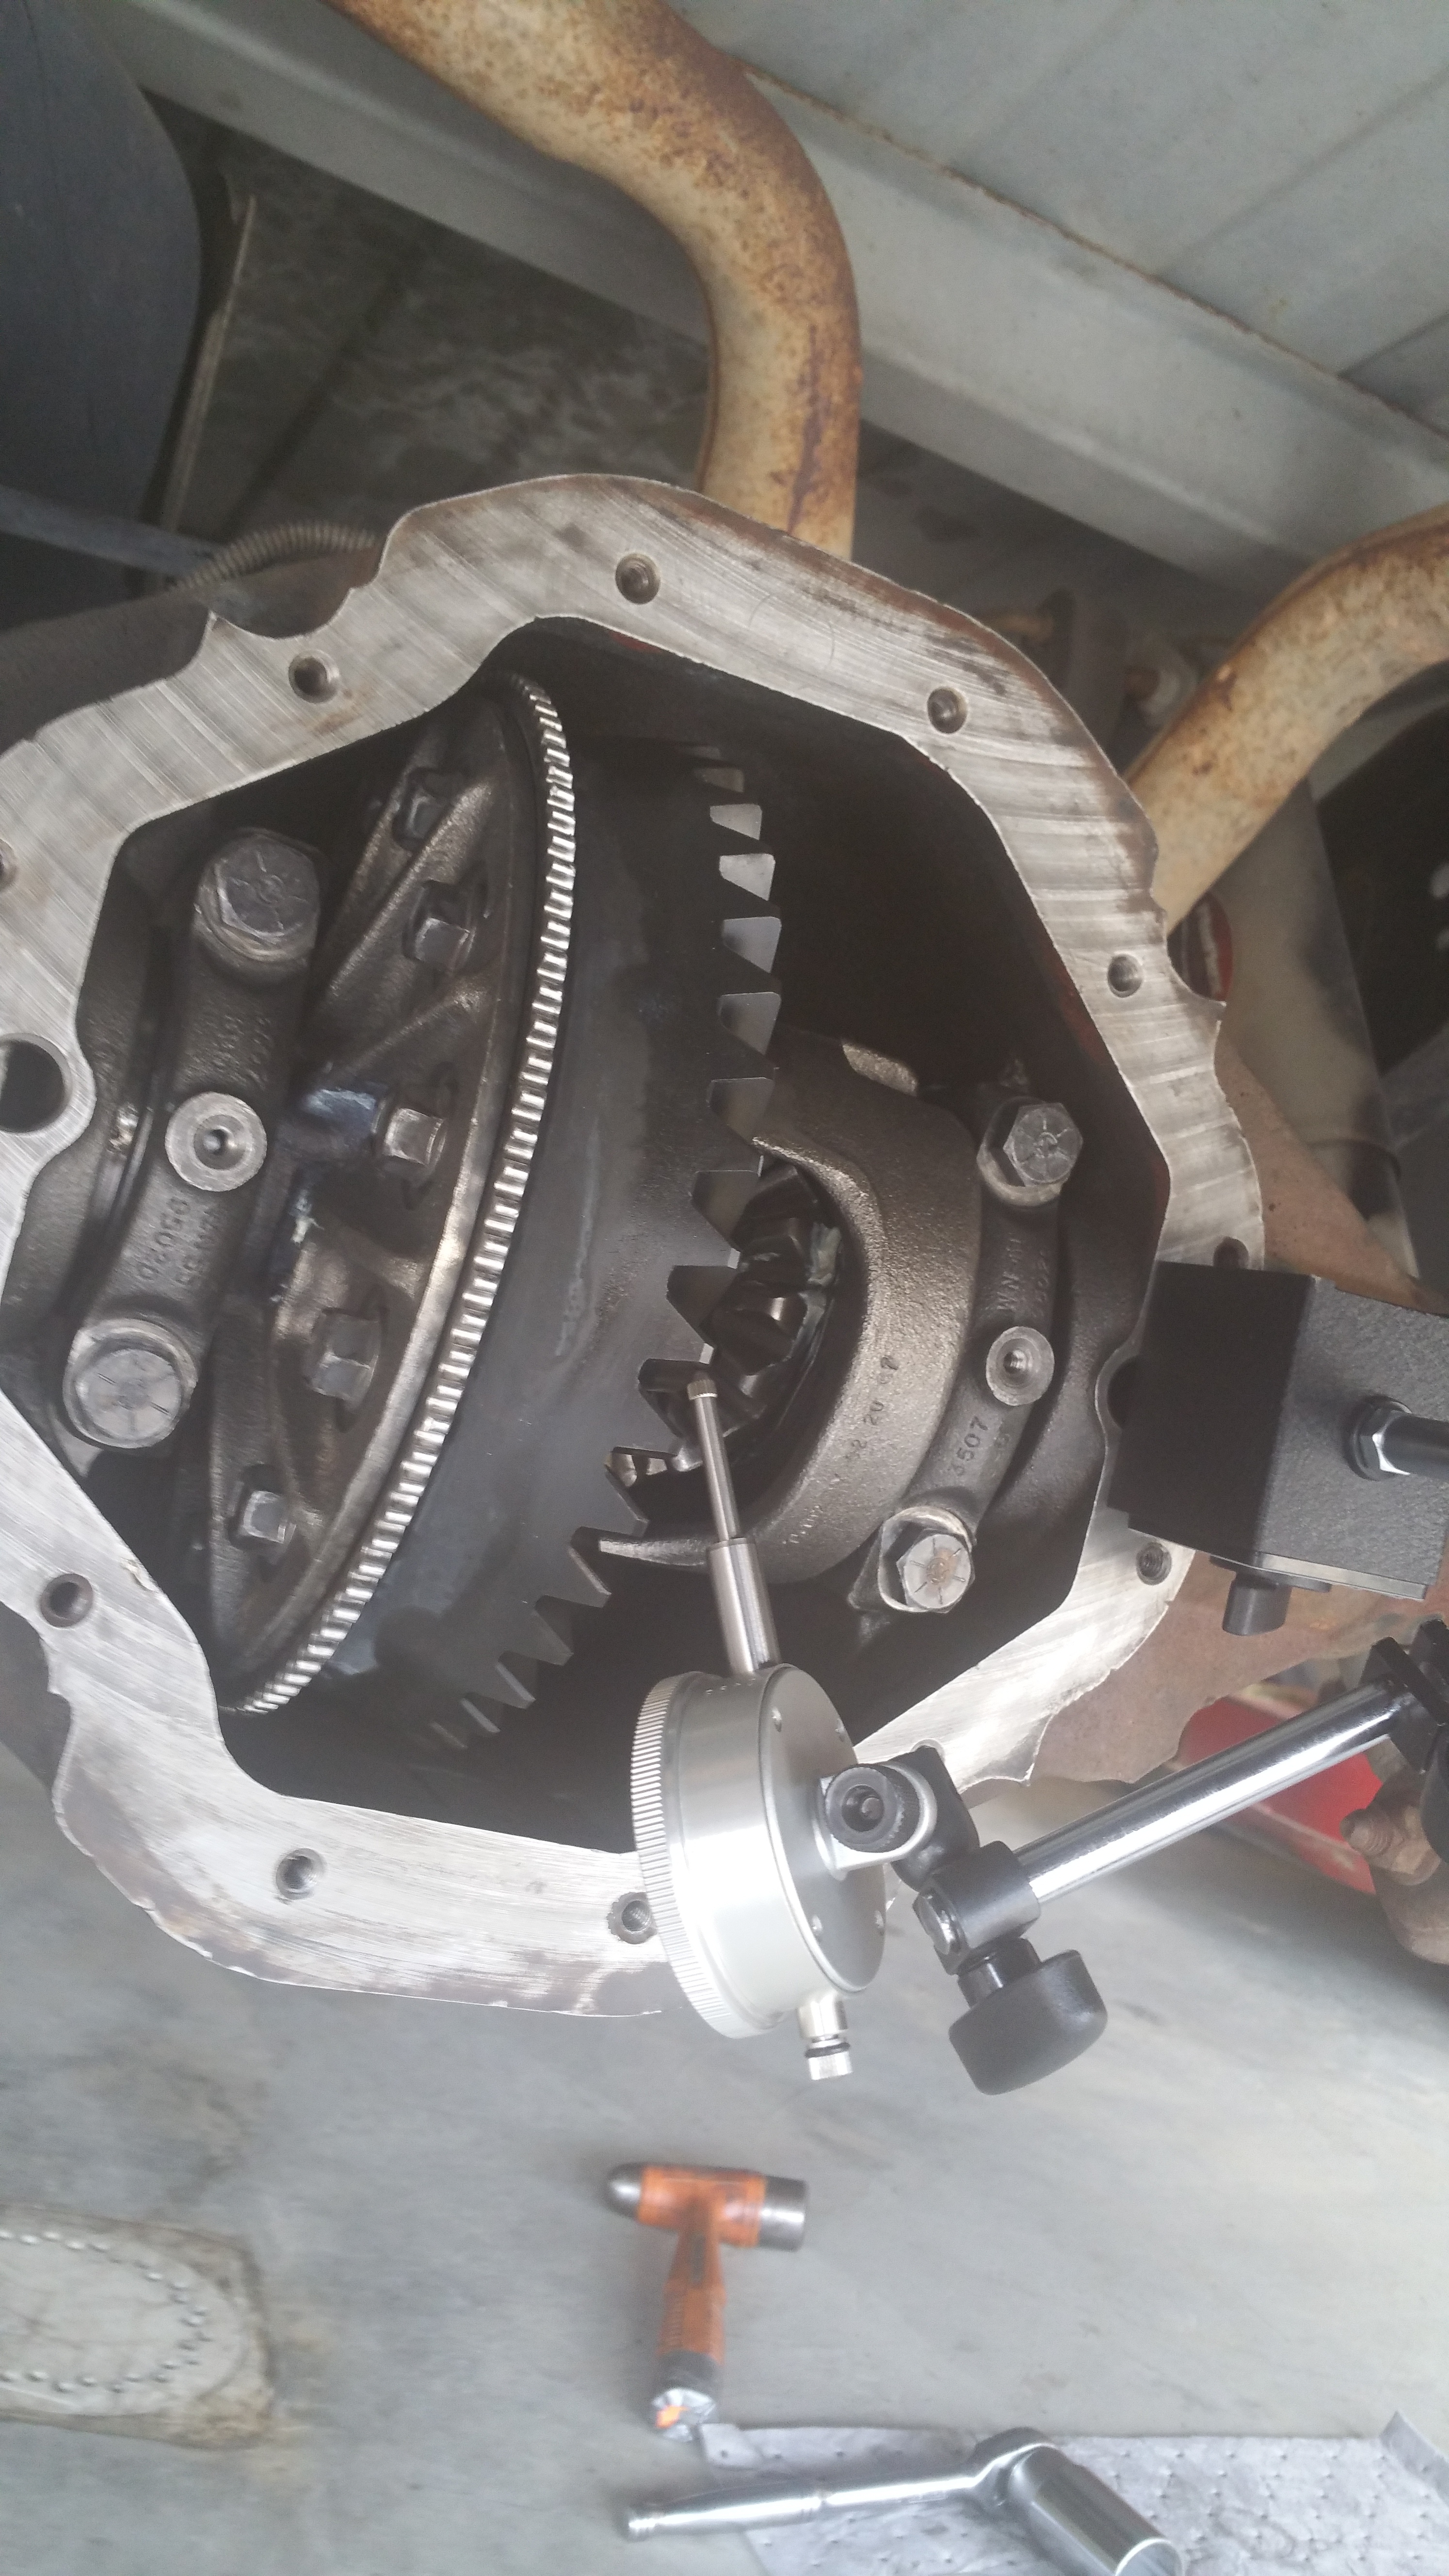
Backlash was in spec.
White lithium grease on my spider gears and the brand new clutch packs
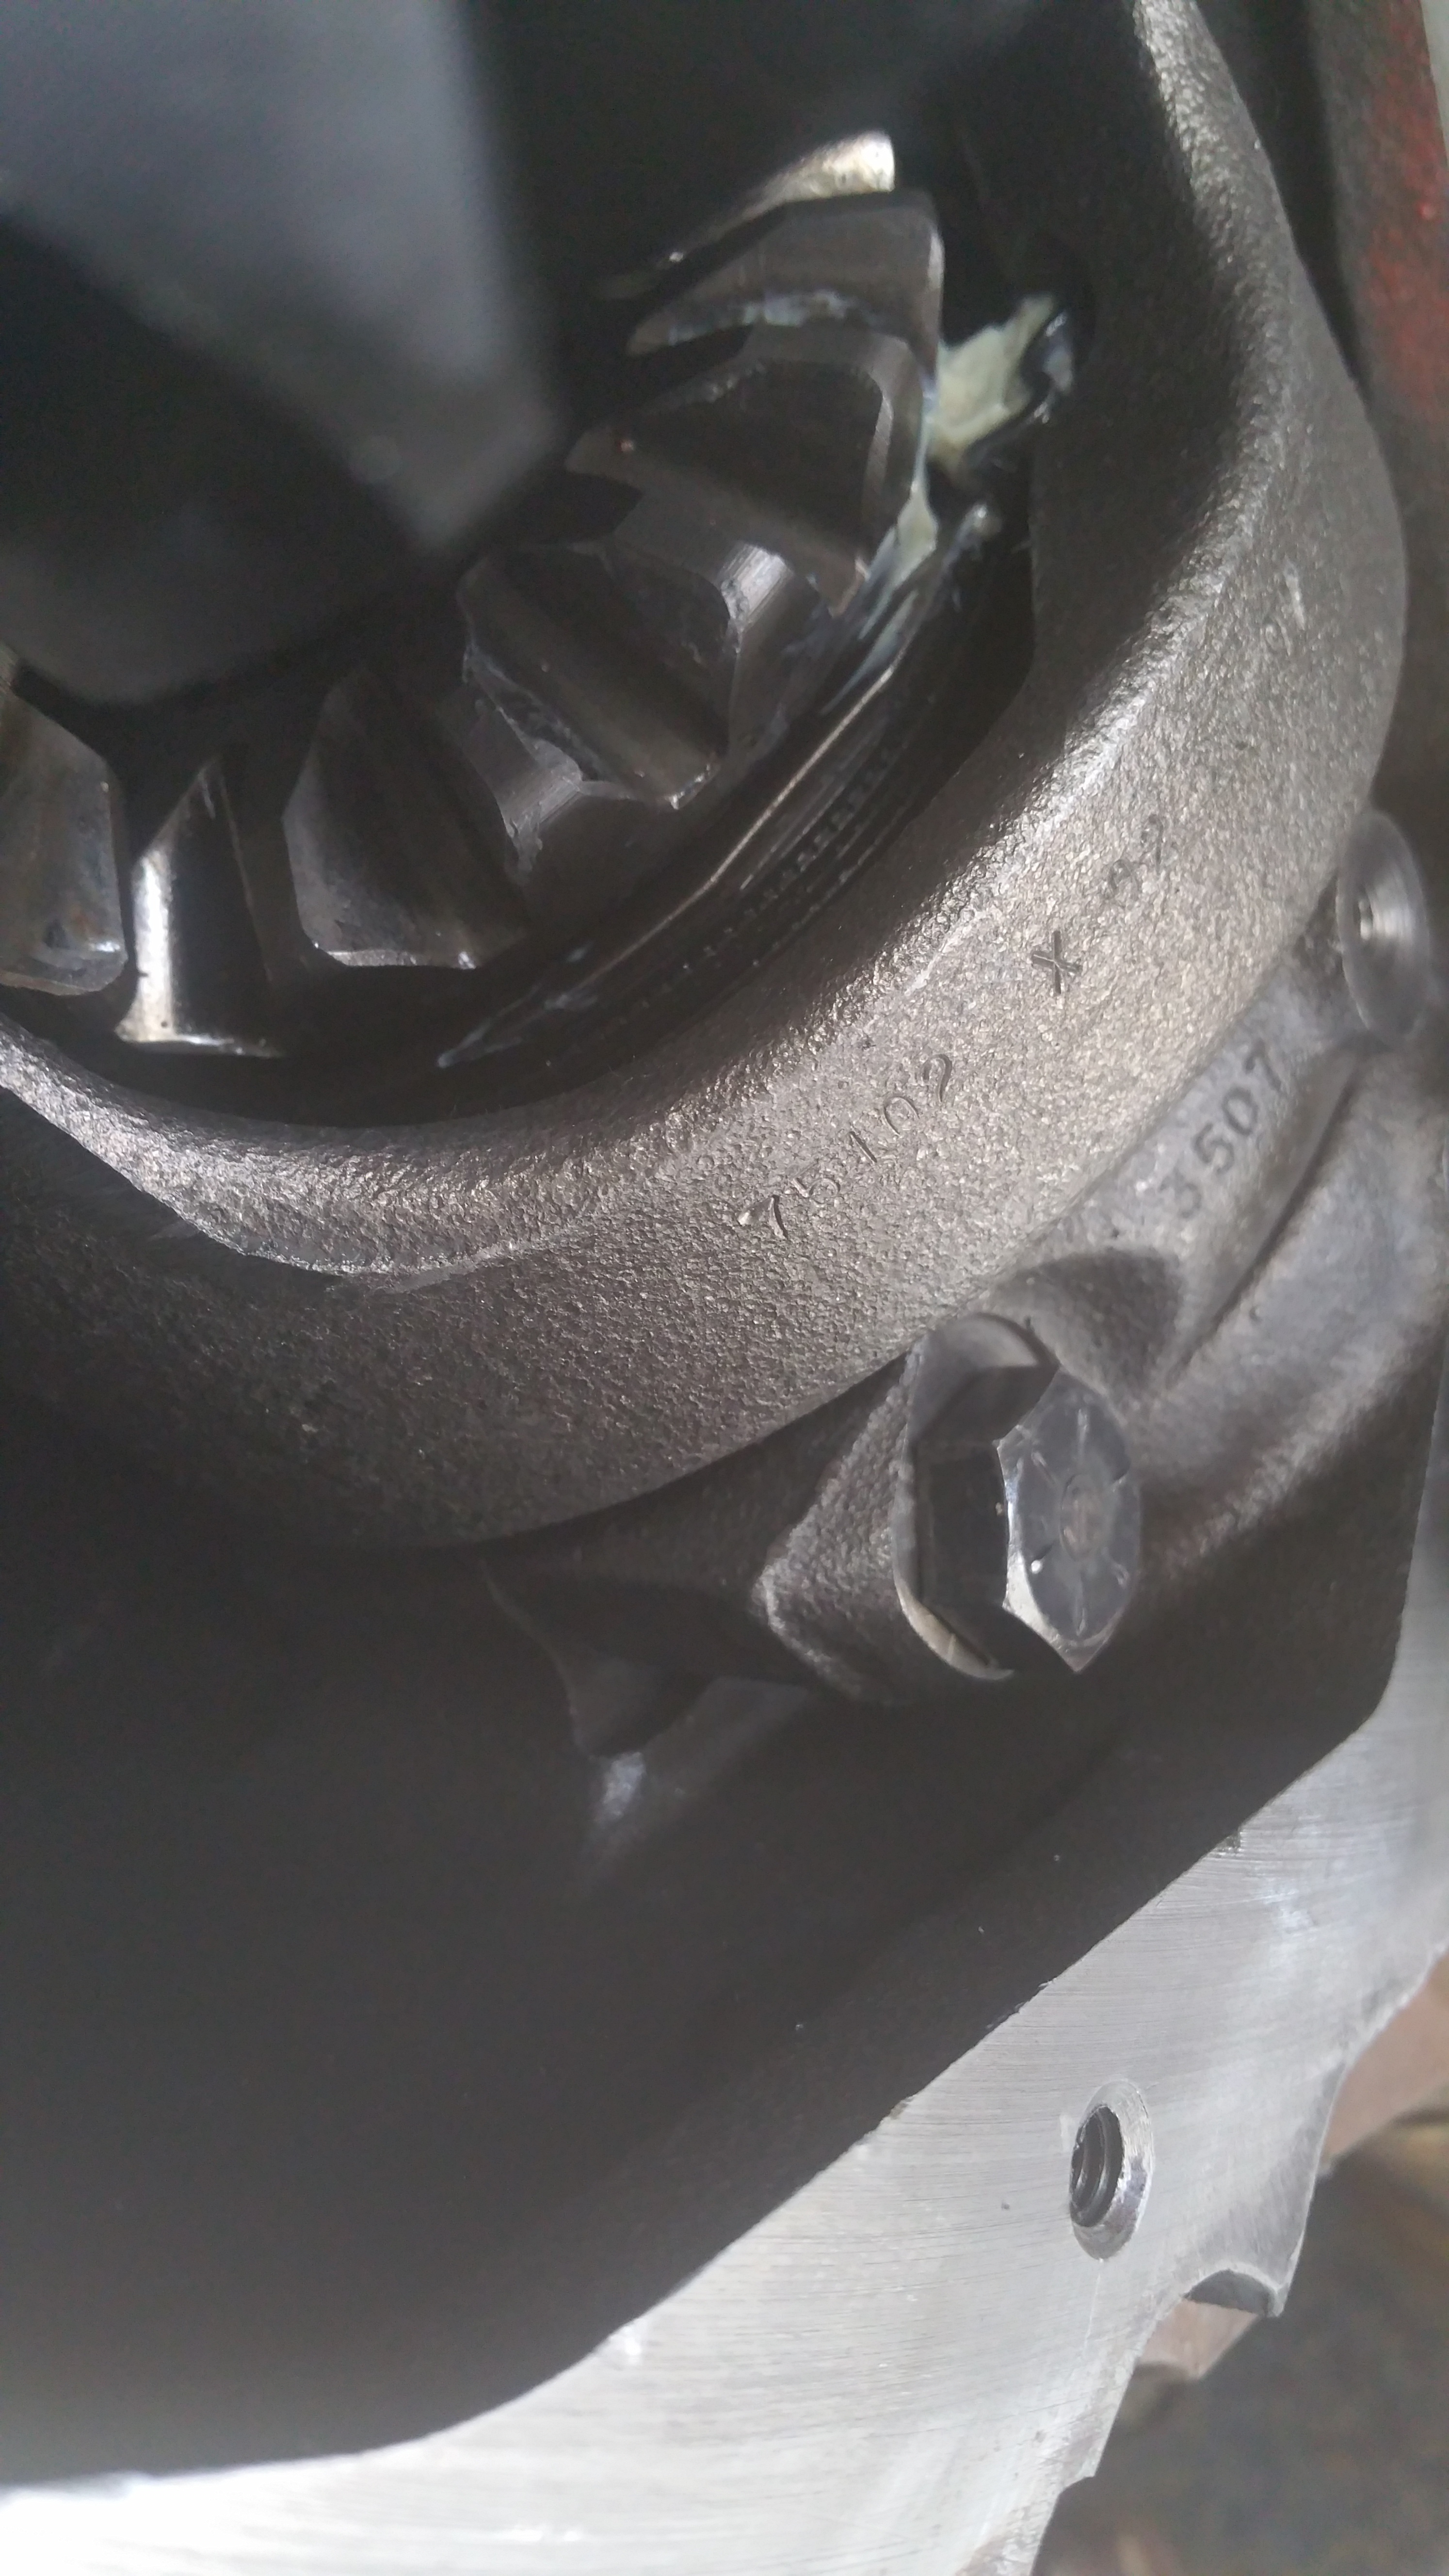
Pattern was perfect without changing original spacers from before.
Both Sides!!!
Man am I glad that's over... Don't get me wrong, I loved the experience, figured all this out on my own never doing this before, but I hate learning that the lack of experience costed me a couple hundred bucks...

Rear Diff Rebuild. About a year after I bought the truck I decided to pop the rear diff and check it out. I noticed the RPM's were very high and I knew the gears had been swapped. When I popped the diff cover I found metal in the bottom of the housing attached to the magnet. No telling how long it was in there so I was like $h!t...
Got everything drained and this is what I found:

The clutch pack was falling apart. Crazy how it was still working though, half the outter disc on both sides was cracked and fell off. But posi was still alive, I knew because I had 2 rubber marks behind my burnouts
So I jacked her up and started looking around and found a tooth shaved. I didn't know what I was looking at at the time but stay tuned, I will explain that tooth later. At that time, I thought the gears were screwed and I needed new ones. So I bought new gears and had a shop do the clutch packs for me.

So I started tearing her down, and I did some research on this job and found a great article doing exactly this here - http://www.fourwheeler.com/how-to/10...dana-trac-lok/
I learned I needed a special tool for the female nuts in the axles to release the carrier guts. So I build one! My first time welding anything on my own. I was using an old lincoln stick welder. It sucked. The sticks kept sticking constantly while I tried to start the spark but after an hour or so I finally got er done.
I used a large nut on the end of a black iron gas pipe from lowes. Stuck a bolt in the other end to turn it with a wrench, but I never needed it, the nuts in the axles were loose enough i could turn them by hand. If I remember correctly....
Here are the adjuster nuts in the axle, look how much dirt and crap is in the axle tubing!


Here is my homemade tool, after welding the nut on the end, I had to grind it down to fit.


And here is the shaved tooth I thought meant the whole diff was screwed. So I bought new gears. At this time, I found out the formula of how to count the gears to find out what I had installed. They were 4:56 ratio gears. Wow. I was like, COOL man, this means I can do some serious burnouts with this baby! Boy was I ignorant to this stuff...


Yeah, they are fine, again, explanation coming later.
So the shop finished installing the new clutch pack, and I got my new gears from them. I kept the same ratio cuz I thought that was awesome... The shop put the new ring gear assembled for me and I did the rest. I installed the ring and pinion, took 2 crush sleeves before I finally bought an inch pound torque wrench to get it right. I will repeat that, you need an inch pound torque wrench to do the pinion nut adjustment properly... lol.
It was the same gear ratio, maybe that had something to do with it, but the spacers were the same, and all came out perfect with backlash and gear pattern. I was lucky there.
Then something amazing happened.
The center pin would not install because the TEETH WERE TOO BIG! I quickly figured out why that tooth was shaved. Actually it was at that point I figured out the tooth was actually "shaved" and not "broken". So the hot rod gear head way to install these massive 4:56 gears in this particular setup is to grab a die grinder and shave a tooth so that the friggin center pin will slip into the carrier. It was also at that point that I figured out the previous set of gears I had just went through the trouble to replace were FINE!!! So then my second find was that 4:56 gears are great for hauling trailers and stuff, or good for 4 wheeling in a mud hole or climbing hills, but a 2 WHEEL DRIVE truck that doesn't haul much. I was planning to lower the truck too for a better street stance. I mean come on, IFS, 2 wheel drive SS/T with racing stripes... Duh. I needed 3:73's. Not 4:56's.
I started researching and then started examining the old gears, and yeah, there were no wear marks hardly at all on them, no cracks, no nothing. I should have stopped right there and disassembled everything and took the gears back and got my $250+ dollars back but man that was a lot of work to do all over again. I was ticked off so I finished up the install and have those old set of perfectly fine 4:56 gears on the shelf... ID10T.
Whatever. I learned the hard way. Again.

Backlash was in spec.

White lithium grease on my spider gears and the brand new clutch packs

Pattern was perfect without changing original spacers from before.

Both Sides!!!


Man am I glad that's over... Don't get me wrong, I loved the experience, figured all this out on my own never doing this before, but I hate learning that the lack of experience costed me a couple hundred bucks...
Last edited by ram-tuff; 02-06-2017 at 04:10 PM.
#20
01-18-2017, 01:09 PM
Well that doesn't sound promising. I will have to research that comment and validate. Doesn't sound normal. But if a machine shop does a bad job on the valves I can easily see that causing head damage. But if you saying there is research out there on our cast heads being weak in the valve guide area, and therefore causing them to crack after modification then ok, i will look into that.
Please elaborate. Thanks.
Please elaborate. Thanks.
here's one.
https://dodgeforum.com/forum/2nd-gen...-cracking.html
Really loving your thread and pictures!

