

Sonnax Sure Cure install with pics
#1
 03-17-2009, 10:02 AM

Well first off, let me tell you this was not an easy job. Many parts of it were a big PITA due to various checkballs, valves, clips and springs going everywhere. Not to mention very few screws were of equal length, necessitating knowledge of where they belong. Before taking this on, I strongly suggest you either:
A)Know what you're doing or
B)Don’t mind paying dearly for your lack of knowledge.
With that being said, here’s what I was aiming for: I wanted to beef up the tranny just a bit with parts that were improvements and replacements for some common failure points. I was not interested in a “Shift Kit.” To be honest, with all the reading up I did, the gains that people want from their “shift kit” is not much more than modifying the separator plate by drilling larger exhaust ports for trans fluid after clutch apply to switch gears. My understanding is that this does cause the gears to engage quicker by getting them off the clutches quicker (which saves the clutches, prolonging trans clutch life) albeit at the cost of a harsher feeling shift. Much of the Sonnax and Transgo Instructions are the same. As a matter of fact, you could buy the Sonnax Sure Cure kit and use the Transgo instructions to modify the separator plate on your own to obtain a “home brew” shift kit. Beware if you choose to go this route as the instructions for Transgo and Sonnax kits both tell you to modify the same things sometimes, just a different way. Be sure you have a full understanding of what you are doing before you start drilling and filing should you wish to get that “shift kit” feel. You might end up overdoing it.
Here’s what I used:
�” deep well socket (3/8 drive) and 6” extension
9/16” socket for the gearshift guide bracket
7/16” socket and 7/16” deep well socket (shorter socket should be 1/4” drive for the throttle and gearshift linkages)
#25 torx screwdriver (#25 torx socket will help as well for stubborn screws)
4 cans (yes 4) of brake parts cleaner
1 trans pan gasket and filter. I prefer the rubber gaskets.
10 quarts of ATF +4 (You’ll use more than normal due to pulling the valve body. Take back the extra.)
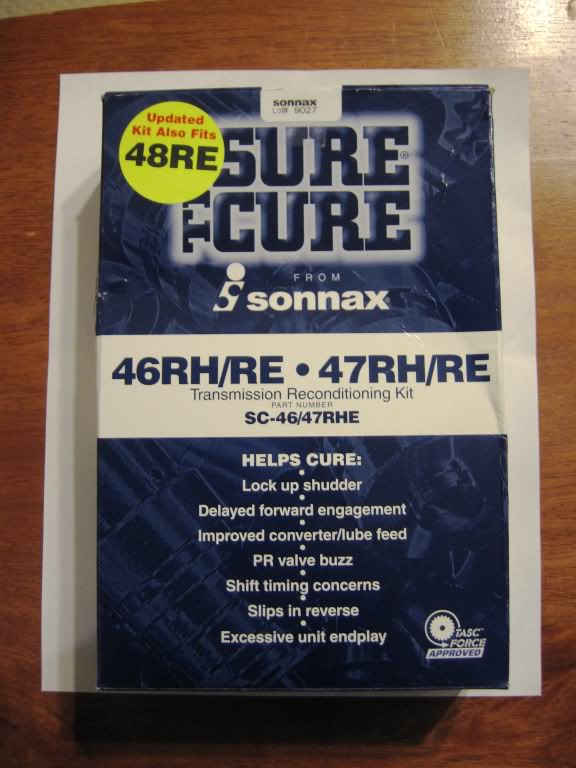
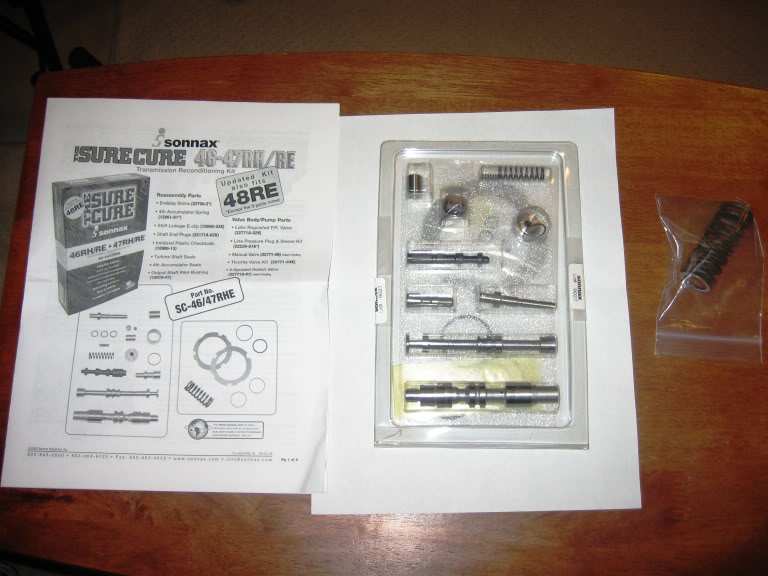
1 Sonnax “Sure Cure” kit
1 Superior TCC boost plate Part # K065
Directions for Transgo Shift kit if you’re going that route
5/64” Drill Bit - Transgo only
3/32” Drill Bit -transgo only
Drill - Transgo only
Inch/lbs torque wrench
Long needle nose pliers
standard screwdriver
small woodworker’s awl with a curved face
WD-40 to lube the linkages where they connect to the linkage shaft
FSM for your particular vehicle for a VB teardown
LOTS of baggies and a Sharpie
A small funnel that will fit into the transmission dipstick tube
4 rolls of paper towels or blue shop towels; you’ll be getting ATF everywhere
A really big catch pan. The 15 quart black Blitz pans work great
A)Know what you're doing or
B)Don’t mind paying dearly for your lack of knowledge.
With that being said, here’s what I was aiming for: I wanted to beef up the tranny just a bit with parts that were improvements and replacements for some common failure points. I was not interested in a “Shift Kit.” To be honest, with all the reading up I did, the gains that people want from their “shift kit” is not much more than modifying the separator plate by drilling larger exhaust ports for trans fluid after clutch apply to switch gears. My understanding is that this does cause the gears to engage quicker by getting them off the clutches quicker (which saves the clutches, prolonging trans clutch life) albeit at the cost of a harsher feeling shift. Much of the Sonnax and Transgo Instructions are the same. As a matter of fact, you could buy the Sonnax Sure Cure kit and use the Transgo instructions to modify the separator plate on your own to obtain a “home brew” shift kit. Beware if you choose to go this route as the instructions for Transgo and Sonnax kits both tell you to modify the same things sometimes, just a different way. Be sure you have a full understanding of what you are doing before you start drilling and filing should you wish to get that “shift kit” feel. You might end up overdoing it.
Here’s what I used:
�” deep well socket (3/8 drive) and 6” extension
9/16” socket for the gearshift guide bracket
7/16” socket and 7/16” deep well socket (shorter socket should be 1/4” drive for the throttle and gearshift linkages)
#25 torx screwdriver (#25 torx socket will help as well for stubborn screws)
4 cans (yes 4) of brake parts cleaner
1 trans pan gasket and filter. I prefer the rubber gaskets.
10 quarts of ATF +4 (You’ll use more than normal due to pulling the valve body. Take back the extra.)
1 Sonnax “Sure Cure” kit
1 Superior TCC boost plate Part # K065
Directions for Transgo Shift kit if you’re going that route
5/64” Drill Bit - Transgo only
3/32” Drill Bit -transgo only
Drill - Transgo only
Inch/lbs torque wrench
Long needle nose pliers
standard screwdriver
small woodworker’s awl with a curved face
WD-40 to lube the linkages where they connect to the linkage shaft
FSM for your particular vehicle for a VB teardown
LOTS of baggies and a Sharpie
A small funnel that will fit into the transmission dipstick tube
4 rolls of paper towels or blue shop towels; you’ll be getting ATF everywhere
A really big catch pan. The 15 quart black Blitz pans work great
Last edited by aim4squirrels; 03-17-2009 at 12:48 PM.
The following users liked this post:
Xombi (11-07-2019)
#2
03-17-2009, 10:02 AM
So here’s what I did:
Put the front of the truck up on ramps or elevate in some other manner
Set parking brake
Place vehicle in neutral
Disconnect negative battery terminal
Give the throttle and gearshift linkages a good spray of brake parts cleaner. This picture was pre-cleaning:

Unplug the two sensors, be careful with the clips.
Then I removed the linkages with the 7/16” socket on a smaller �” drive. I tried an open end wrench, but I couldn’t get it into position. I had to approach the top bolt from the top and only got about 2 clicks at a time to loosen it. Remove the spring from the throttle linkage by going for the end attached to the far anchor first. After you loosen the throttle linkage, loosen the big 9/16” bolt just right of the linkages that acts as a guidepost for the throttle linkage. You could remove the plastic top to this linkage as it’s the same as a ball hitch receiver used for towing, but I was concerned that the plastic would be brittle so I opted to remove the guidepost. After the throttle linkage has been loosened, push up on the anchor point to push the anchor clear. You may need to pry up gently with a standard screwdriver to get it to slip loose. Don’t lose the spring.
The gearshift linkage is much easier to get to. Loosen and lift it off as well. Pry gently if you need to.
Now for the fun part, CATCH PAN ready! If you’ve installed drain plug, you da man! If not, you will after this next step:
Loosen all of the pan bolts toward the back of the vehicle and remove. Then work your way up the passenger side and driver’s side. Then remove all but the two corner bolts on the driver’s side front corner. Loosen them about 3 turns and using a standard screwdriver on the OPPOSITE corner of the pan (passenger rear) pry gently where you see the gasket sticking out. Get the catch pan ready because she’s gonna dump tranny fluid like Niagara Falls. After it slows down, continue to remove the screws, but brace the pan with your other hand. Lower the pan and aim for the catch pan as you tilt it in toward the center of the pan. You should probably be wearing about 1 quart of ATF if you did it right, more if you’re slow.
You’ll notice a flat filter covering the VB, remove the 2 screws holding it on with a #25 torx screwdriver. They're very long, but don’t lose them in the catch pan. The filter will dump more ATF from the oval hole when it comes loose, so be ready. Discard old filter.
Put the front of the truck up on ramps or elevate in some other manner
Set parking brake
Place vehicle in neutral
Disconnect negative battery terminal
Give the throttle and gearshift linkages a good spray of brake parts cleaner. This picture was pre-cleaning:
Unplug the two sensors, be careful with the clips.
Then I removed the linkages with the 7/16” socket on a smaller �” drive. I tried an open end wrench, but I couldn’t get it into position. I had to approach the top bolt from the top and only got about 2 clicks at a time to loosen it. Remove the spring from the throttle linkage by going for the end attached to the far anchor first. After you loosen the throttle linkage, loosen the big 9/16” bolt just right of the linkages that acts as a guidepost for the throttle linkage. You could remove the plastic top to this linkage as it’s the same as a ball hitch receiver used for towing, but I was concerned that the plastic would be brittle so I opted to remove the guidepost. After the throttle linkage has been loosened, push up on the anchor point to push the anchor clear. You may need to pry up gently with a standard screwdriver to get it to slip loose. Don’t lose the spring.
The gearshift linkage is much easier to get to. Loosen and lift it off as well. Pry gently if you need to.
Now for the fun part, CATCH PAN ready! If you’ve installed drain plug, you da man! If not, you will after this next step:
Loosen all of the pan bolts toward the back of the vehicle and remove. Then work your way up the passenger side and driver’s side. Then remove all but the two corner bolts on the driver’s side front corner. Loosen them about 3 turns and using a standard screwdriver on the OPPOSITE corner of the pan (passenger rear) pry gently where you see the gasket sticking out. Get the catch pan ready because she’s gonna dump tranny fluid like Niagara Falls. After it slows down, continue to remove the screws, but brace the pan with your other hand. Lower the pan and aim for the catch pan as you tilt it in toward the center of the pan. You should probably be wearing about 1 quart of ATF if you did it right, more if you’re slow.
You’ll notice a flat filter covering the VB, remove the 2 screws holding it on with a #25 torx screwdriver. They're very long, but don’t lose them in the catch pan. The filter will dump more ATF from the oval hole when it comes loose, so be ready. Discard old filter.
Last edited by aim4squirrels; 03-17-2009 at 12:44 PM.
#3
03-17-2009, 10:03 AM
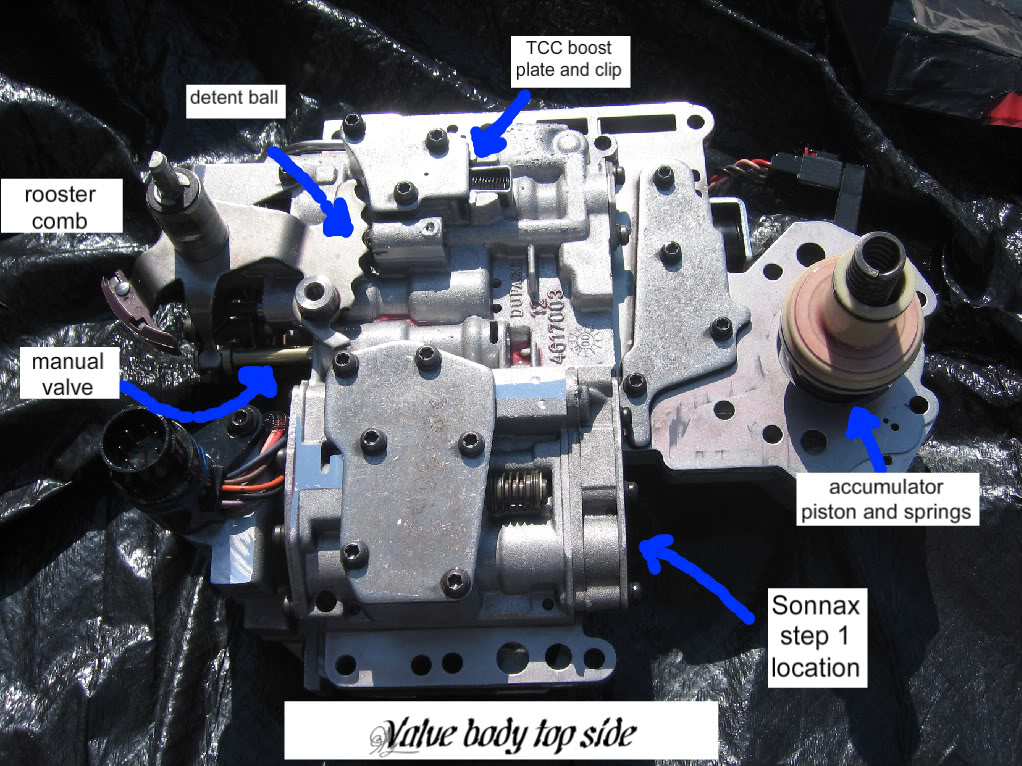
Now what we came for: the Valve Body. I believe there were 9 bolts holding up the Valve body in my 2001 Ram, all were 7/16” and they looked like this:


There are three different lengths of these, so mind where they came from. The longest 3 go on the passenger side. The mid-sided bolts go in the holes closest to the ground, and the shortest bolts go in the holes closest to the transmission. My valve body didn’t let go until the very last bolt was loosened considerably. Get ready for another flood of ATF to come raining down.
As you lower the valve body down, the accumulator piston and 2 large springs will undoubtedly fall out from the passenger side. Make sure you clean them good at set them aside. The fat spring sets on the VB then the accumulator piston sits inside it and the skinny long spring sits inside the accumulator piston on top. It’s really obvious where it goes back into the transmission housing.
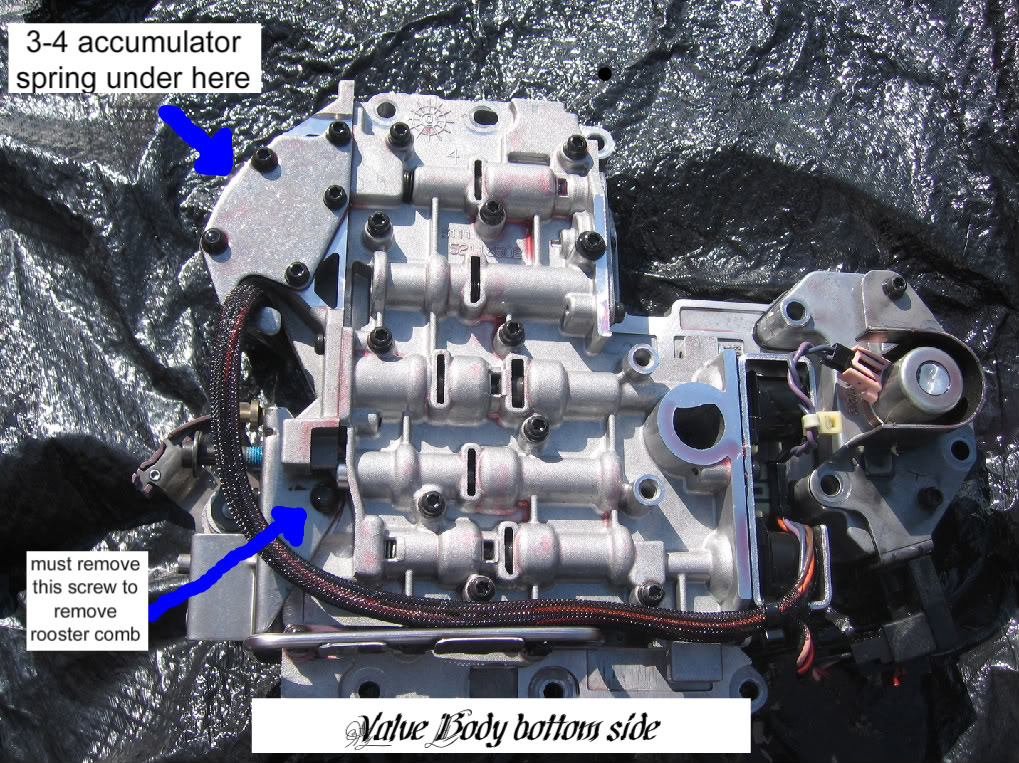
On the driver’s side there is a Parking Sprag connected to the “rooster comb” that is attached with a small “e-clip.” Transguy37 snapped a good pic of what I’m talking about:
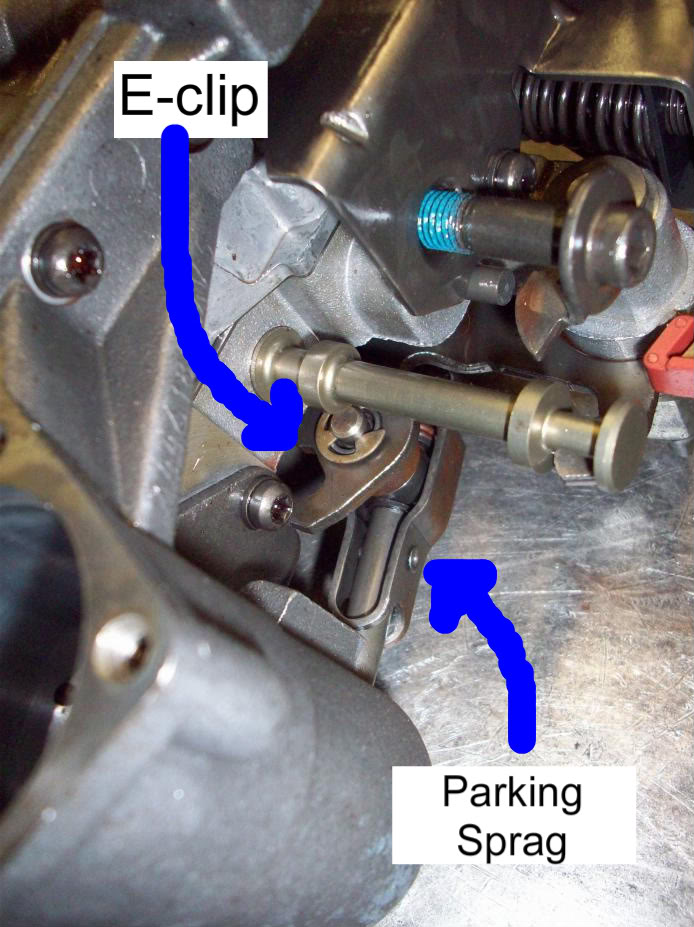
Pop that clip with a standard screwdriver and push the parking sprag mount up and out of the way. The VB should now come out of the transmission case. I set the VB on a garbage bag and took it out from under the truck. I also put the pan back on with 2 bolts to catch the dripping ATF.
Spin the VB around and around a few times to get out all the extra ATF you can and spray the outside down liberally with brake parts cleaner.
Set it down somewhere clean to work. Also, somewhere you don’t mind getting ATF all over. Get your baggies ready.
There are three different lengths of these, so mind where they came from. The longest 3 go on the passenger side. The mid-sided bolts go in the holes closest to the ground, and the shortest bolts go in the holes closest to the transmission. My valve body didn’t let go until the very last bolt was loosened considerably. Get ready for another flood of ATF to come raining down.
As you lower the valve body down, the accumulator piston and 2 large springs will undoubtedly fall out from the passenger side. Make sure you clean them good at set them aside. The fat spring sets on the VB then the accumulator piston sits inside it and the skinny long spring sits inside the accumulator piston on top. It’s really obvious where it goes back into the transmission housing.
On the driver’s side there is a Parking Sprag connected to the “rooster comb” that is attached with a small “e-clip.” Transguy37 snapped a good pic of what I’m talking about:
Pop that clip with a standard screwdriver and push the parking sprag mount up and out of the way. The VB should now come out of the transmission case. I set the VB on a garbage bag and took it out from under the truck. I also put the pan back on with 2 bolts to catch the dripping ATF.
Spin the VB around and around a few times to get out all the extra ATF you can and spray the outside down liberally with brake parts cleaner.
Set it down somewhere clean to work. Also, somewhere you don’t mind getting ATF all over. Get your baggies ready.
Last edited by aim4squirrels; 03-17-2009 at 12:50 PM.
#4
03-17-2009, 10:04 AM
If you’re going to do the shift kit stuff, follow the FSM tear down procedure. If you’re just installing the Sonnax parts, you do not need to tear down the VB, just remove the outer parts by following the “Sure Cure” directions. These are really great directions, and very simple to follow. Be VERY careful when you remove the rooster comb not to loose the detent ball or spring. If you easily forget things, I would photograph everything before you disassemble in as many angles as possible to assist with reassembly. Use a different bag for each set of items in the tear down and GO SLOWLY! You can’t afford to loose a spring, clip, or check ball. Make note of each screw that is a different length and where it goes. Sometimes it’s obvious, sometimes not so much.
Here's a link to the FSM: http://www.rm-indy.com/wavefiles/2001ramsrvcmanual.zip
Here's the Sonnax Sure Cure instructions: http://sonnax.com/instructions/SC-46-47RHE-IN.pdf
And the Transgo instructions: http://www.bionicdodge.com/Download/TransgoRev2.pdf
Here's some pics I took to help identify some parts:
Last edited by aim4squirrels; 03-17-2009 at 12:52 PM.
#5
03-17-2009, 10:09 AM
When you’ve finished the VB work, it’s time to reinstall. Make sure you don’t forget the accumulator and springs. Get a set of long needle nosed pliers and a couple VB bolts ready. Swing the VB up into the transmission and push the accumulator into its port.
Now comes the biggest PITA part of the job, at least for me: Getting the parking sprag back into it’s holder and installing the E-clip.
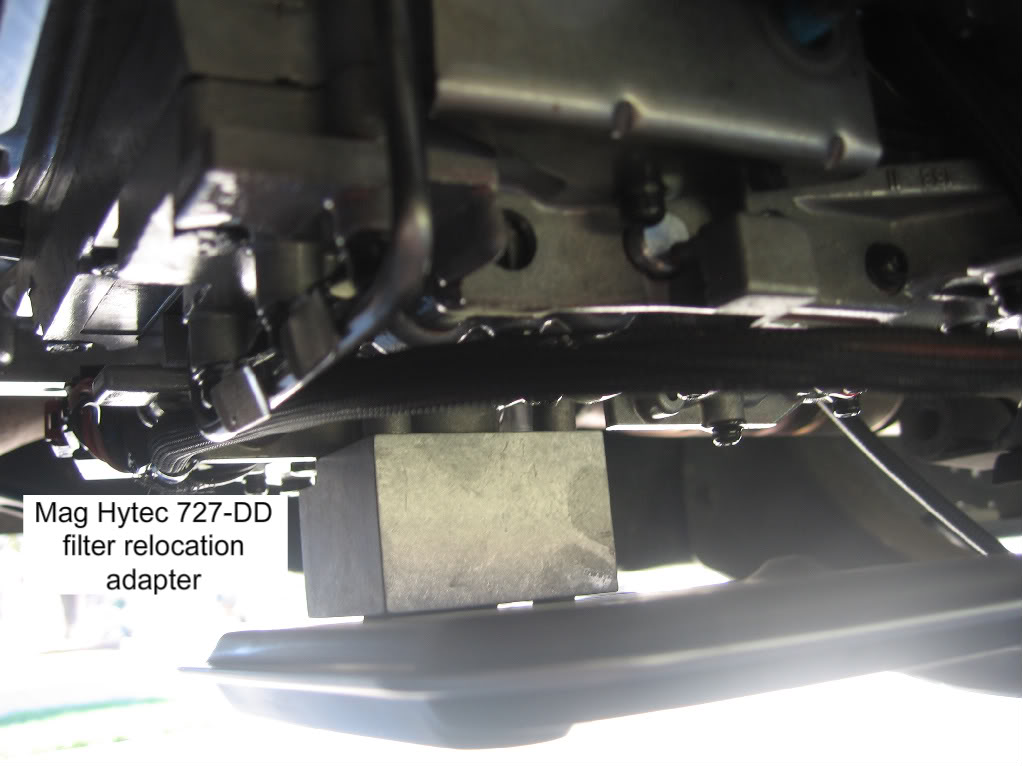
You may need to work the rooster comb arm around so the parking sprag holder is visible. Push the sprag through the holder and set the E-clip in the groove by hand. Then carefully and quickly grab the needle nosed pliers and gently squeeze both the open side and the back side of the E-clip to seat it. If you loose the E-clip, the Sonnax kit includes another, but make sure you know the lost one is clear of the VB, you don’t want a loose piece of metal floating around in there. This literally to me 1 hour to do. I dropped the accumulator piston and springs about 8 times and my arms got really fatigued holding the valve body up. After you get the E-clip in, take a standard screwdriver and position the clip so that the action of the parking sprag moving back and forth won’t pop the clip. It may not be necessary, but why risk it? Carefully guide the VB up into the housing paying close attention to the park/neutral switch sensor position. The notch in the end of rooster comb should fit right into the ball of the sensor. Guide the linkage arm up through the port on top of the VB case and set a couple bolts on each side of the VB to hold it in place. Reinstall and tighten all 7/16” bolts to 100 in/lbs. Then install a new filter with the long #25 torx screws. At this point I elected to install a Mag Hytec 727-DD pan. It had a spacer I needed to install that lowers the filter into the pan a bit deeper. You can see that here:
Here's a comparison of the old pan and the Mag Hytec pan (ignore the mess in the garage):
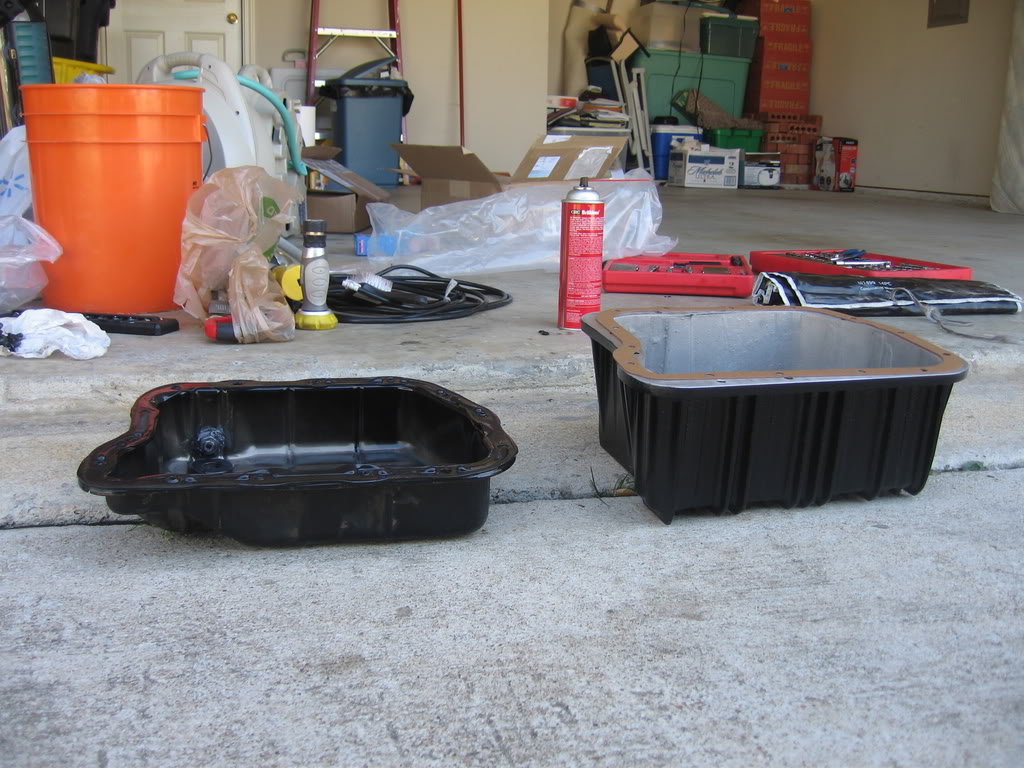
BEEFY!
Inside of the pan, the plug in the bottom is magnetic to catch fine clutch debris and when it's removed, it leaves a flush hole to get ALL the old ATF out. Much nicer than the old way!

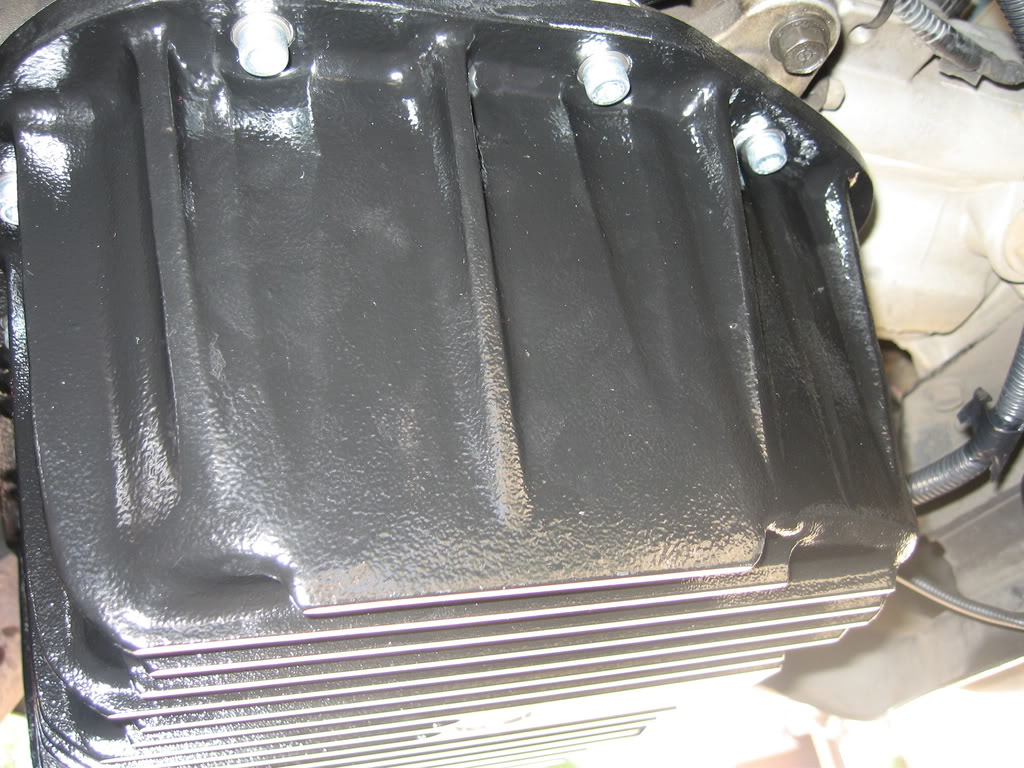
And finally installed:
Put a new gasket on top of the pan and position the pan over the VB and attach it with the �” bolts. Torque the pan down to specs using a cross hatch pattern. My pan instructions said about 14 ft/lbs. Which is 168 inch/lbs. I cut that in half and completed the cross hatch pattern twice: once at 84 inch/lbs and then again at 168 inch/lbs to ensure a good seal. Recheck all bolts.
Reinstall the gearshift linkage first (the one without the spring) make sure it sits flush at the bottom of the transmission case or it’ll have some play in it that will cause it to not shift firmly into gear, especially D, 2, and 1. A squirt of WD-40 will help it slide on nicely. The arm should attach solidly with little or no wiggle at all. Tighten the 7/16” bolt in the back. Install the throttle linkage and tighten down as well. Make sure you install the spring before you install the arm. It’s just easier that way. The top notch is “D” shaped so you must install it in the proper orientation. There should be a little of the mounting shaft sticking out of the top if you have it on correctly. Pull the spring to the far mounting point with your needle nosed pliers and then set it in place. Reconnect the 9/16” throttle linkage guide brace to your right. Plug sensors back in.
Get the small funnel and put 6 quarts of ATF +4 into the dipstick tube. Check the level. Put more in if necessary. Start engine in park and wait. I had a little clunking sound that scared the crap out of me, but I believe that was air escaping the system. Check ATF levels again and add more as the empty circuits will fill back up with ATF. Remember, the new Sonnax valves will lube the converter and other components in Park now, so the level will drop even though you haven’t cycled to neutral. Then slowly cycle through P, R, N, D, 2, 1 stopping for at least 30 seconds on each. Then check levels one last time. Button her up and close the hood and head on out to the parts store to either return the unused ATF or buy more if you're a little low.
Happy driving!
Now comes the biggest PITA part of the job, at least for me: Getting the parking sprag back into it’s holder and installing the E-clip.
You may need to work the rooster comb arm around so the parking sprag holder is visible. Push the sprag through the holder and set the E-clip in the groove by hand. Then carefully and quickly grab the needle nosed pliers and gently squeeze both the open side and the back side of the E-clip to seat it. If you loose the E-clip, the Sonnax kit includes another, but make sure you know the lost one is clear of the VB, you don’t want a loose piece of metal floating around in there. This literally to me 1 hour to do. I dropped the accumulator piston and springs about 8 times and my arms got really fatigued holding the valve body up. After you get the E-clip in, take a standard screwdriver and position the clip so that the action of the parking sprag moving back and forth won’t pop the clip. It may not be necessary, but why risk it? Carefully guide the VB up into the housing paying close attention to the park/neutral switch sensor position. The notch in the end of rooster comb should fit right into the ball of the sensor. Guide the linkage arm up through the port on top of the VB case and set a couple bolts on each side of the VB to hold it in place. Reinstall and tighten all 7/16” bolts to 100 in/lbs. Then install a new filter with the long #25 torx screws. At this point I elected to install a Mag Hytec 727-DD pan. It had a spacer I needed to install that lowers the filter into the pan a bit deeper. You can see that here:
Here's a comparison of the old pan and the Mag Hytec pan (ignore the mess in the garage):
BEEFY!
Inside of the pan, the plug in the bottom is magnetic to catch fine clutch debris and when it's removed, it leaves a flush hole to get ALL the old ATF out. Much nicer than the old way!
And finally installed:
Put a new gasket on top of the pan and position the pan over the VB and attach it with the �” bolts. Torque the pan down to specs using a cross hatch pattern. My pan instructions said about 14 ft/lbs. Which is 168 inch/lbs. I cut that in half and completed the cross hatch pattern twice: once at 84 inch/lbs and then again at 168 inch/lbs to ensure a good seal. Recheck all bolts.
Reinstall the gearshift linkage first (the one without the spring) make sure it sits flush at the bottom of the transmission case or it’ll have some play in it that will cause it to not shift firmly into gear, especially D, 2, and 1. A squirt of WD-40 will help it slide on nicely. The arm should attach solidly with little or no wiggle at all. Tighten the 7/16” bolt in the back. Install the throttle linkage and tighten down as well. Make sure you install the spring before you install the arm. It’s just easier that way. The top notch is “D” shaped so you must install it in the proper orientation. There should be a little of the mounting shaft sticking out of the top if you have it on correctly. Pull the spring to the far mounting point with your needle nosed pliers and then set it in place. Reconnect the 9/16” throttle linkage guide brace to your right. Plug sensors back in.
Get the small funnel and put 6 quarts of ATF +4 into the dipstick tube. Check the level. Put more in if necessary. Start engine in park and wait. I had a little clunking sound that scared the crap out of me, but I believe that was air escaping the system. Check ATF levels again and add more as the empty circuits will fill back up with ATF. Remember, the new Sonnax valves will lube the converter and other components in Park now, so the level will drop even though you haven’t cycled to neutral. Then slowly cycle through P, R, N, D, 2, 1 stopping for at least 30 seconds on each. Then check levels one last time. Button her up and close the hood and head on out to the parts store to either return the unused ATF or buy more if you're a little low.
Happy driving!
Last edited by aim4squirrels; 09-12-2011 at 09:33 PM.

#7
03-17-2009, 12:19 PM
Veteran
Join Date: Nov 2008
Location: Oxford, MI
Posts: 469
Likes: 0
Received 0 Likes
on
0 Posts
Ahh, that brings back memories... Bad ones. I put the transgo TFOD Jr shift kit in my truck when I did the rebuild and then had to tear the valve body out again and tear it apart when the oil pump seal ring snapped and got stuck in my manual valve passage.
As far as the "TCC boost plate and clip". For anyone who is curious, the Transgo TFOD Jr kit comes with a replacement "clip" whereas apparently the Sonnex kit puts a new plate in that takes care of the clip problem too. The Sonnex part looks a lot better and like a better solution.
As far as the "TCC boost plate and clip". For anyone who is curious, the Transgo TFOD Jr kit comes with a replacement "clip" whereas apparently the Sonnex kit puts a new plate in that takes care of the clip problem too. The Sonnex part looks a lot better and like a better solution.
 Good write-up!