

Drl dyi
#1
 11-18-2013, 09:49 AM

Join Date: Oct 2013
Location: Lutz, FL
Posts: 60
Likes: 0
Received 0 Likes
on
0 Posts
(So this is my first DYI so don't expect professional levels of materials here... Oh and this is for informational purposes, so don't blame me if you fry something in your truck...)
So I've never really liked the fact that my R/T didn't have DRL's. I know you are supposed to be able to have the dealer code them on, but that requires a trip (and probably cost) to the dealer as well as some forbidden relays that nobody seems to know which ones for certain...
Another member talked about getting some of the switchback leds to use in the front turn signal locations, and that got me thinking about making DRL's with those... Here's what I wound up with. (note, I have the factory HID's, I've not seen the halogen lights, but would hope they are the same/similar)
For this DYI, you'll need the following:
-A set (2) of 7443 white/amber switchback leds from autolumination.com. I got the 60 led AO version (more on that later). Any of the 7443's should work as long as it's not the larger diameter versions. http://www.autolumination.com/switchback.html
-A set (2) of the 15~25 ohm load equalizers (to keep from hyper-flash turn signals) again from autolumination. http://www.autolumination.com/equalizers.htm (about 2/3 down the page)
-some 18 GA wire for connection. I used the 30' black wire you can get for a few dollars at Hell*Mart, but whatever will work.
-some wire taps, again from Walmart, for splicing wires together (without cutting).
So I started on the driver's side. To get to the light, you have to remove the stock air box:
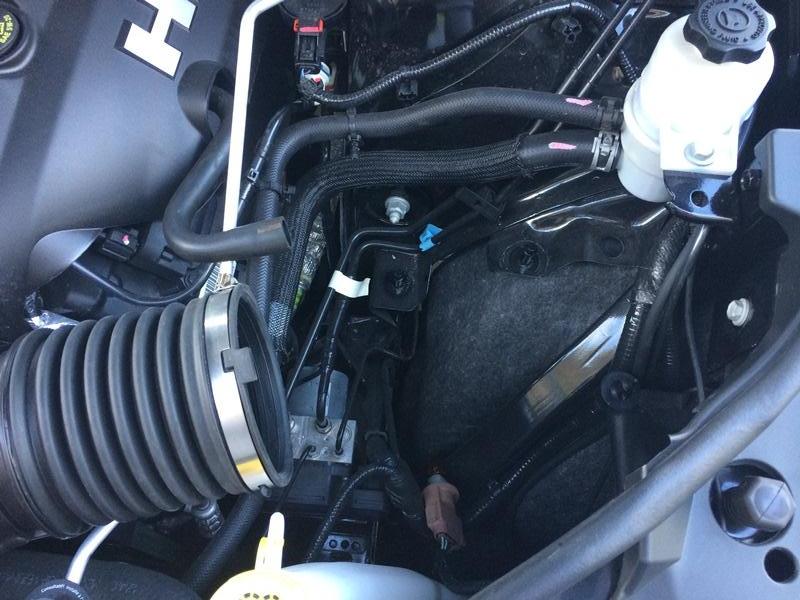
Once that is out you can get to the bulb. Turn it a quarter turn then it pulls out:
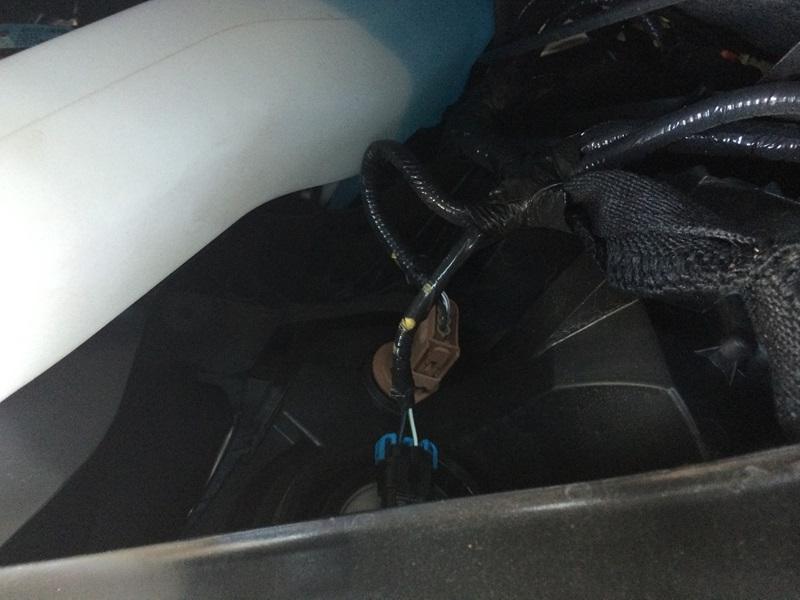
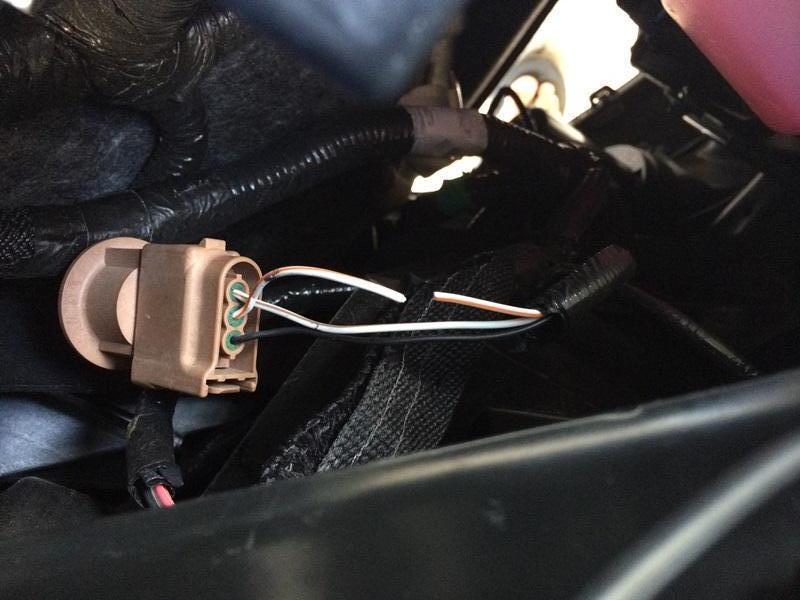
The first thing I did was to install the load resistor. It comes with wire taps to use, so I just cut the long leads on it and spliced them in. on this side, I connected them to the black and white/green wire:
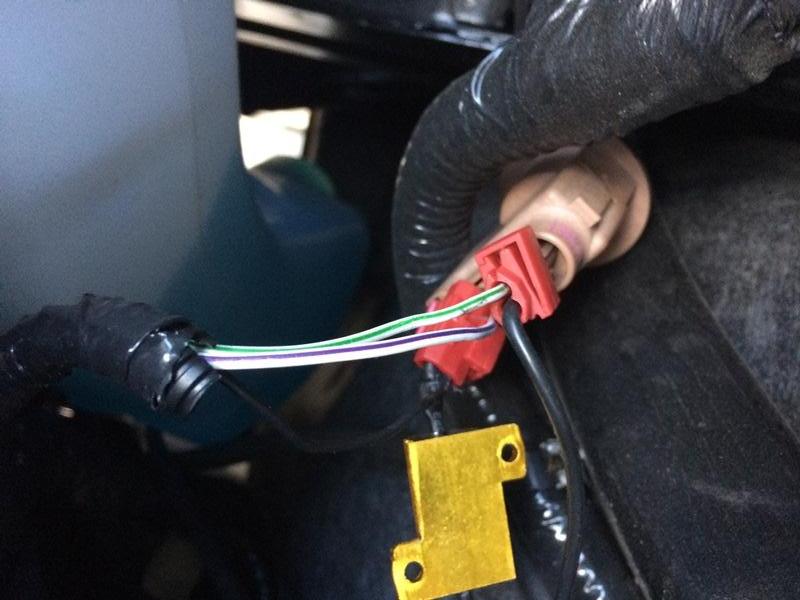
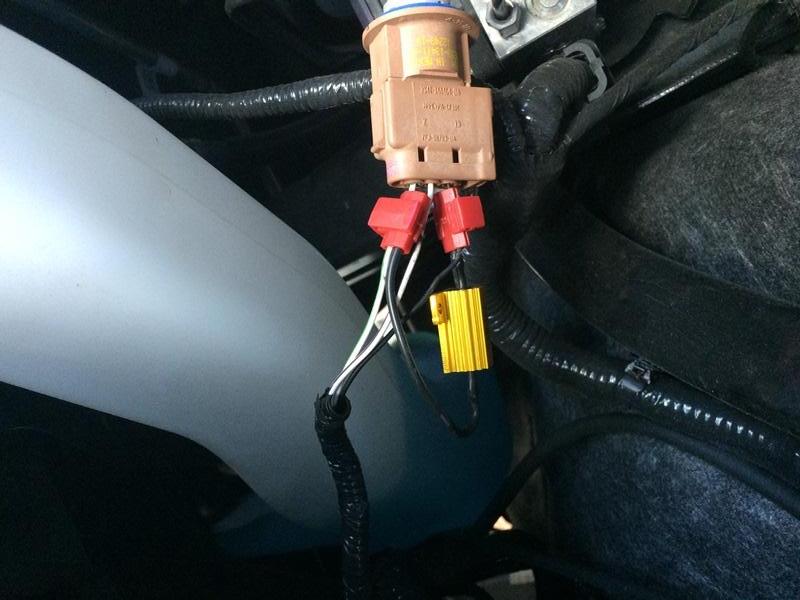
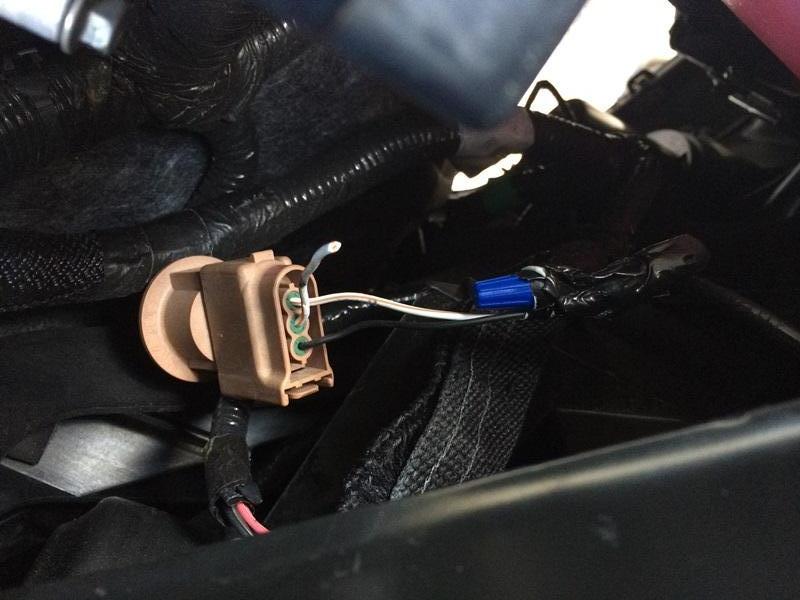
By default the second element in this bulb is for the running/parking light. I want it to run all the time, so I need to get power there. I cut the white/purple wire to remove the factory function and capped/taped it off (so it won't short out the light driver):
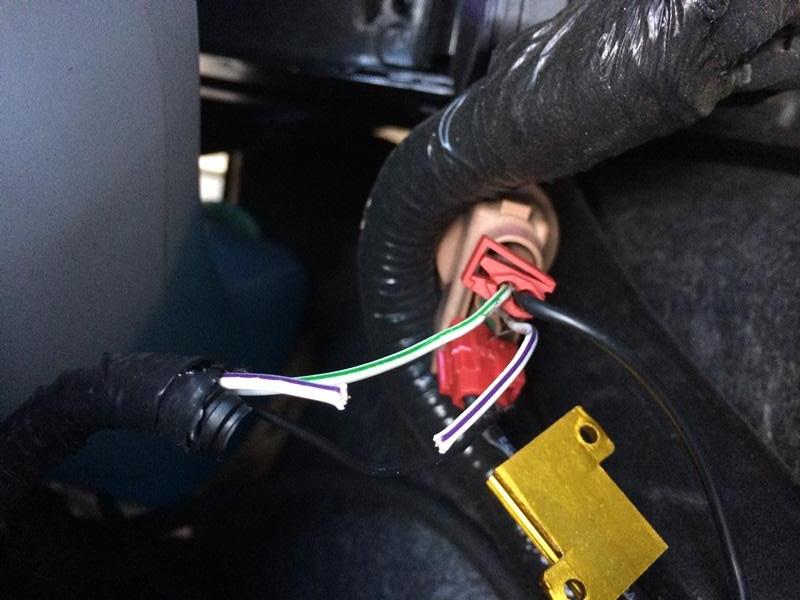
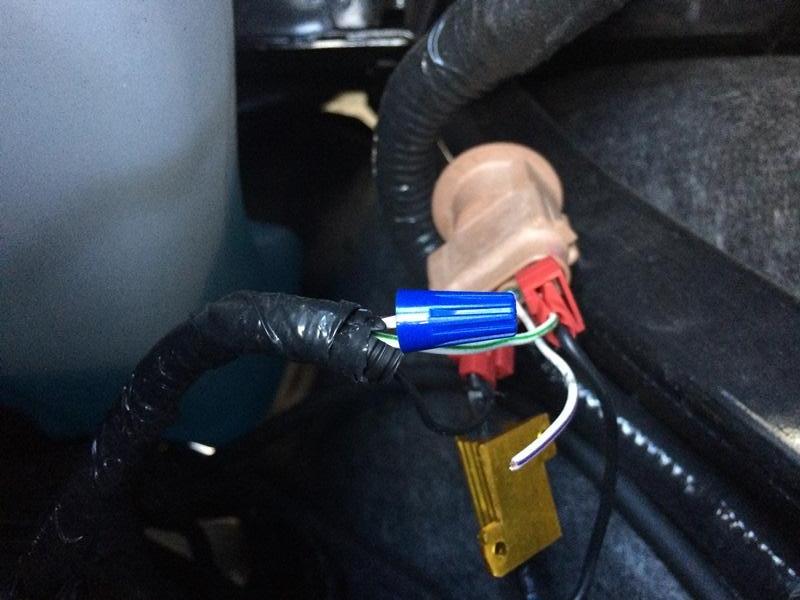
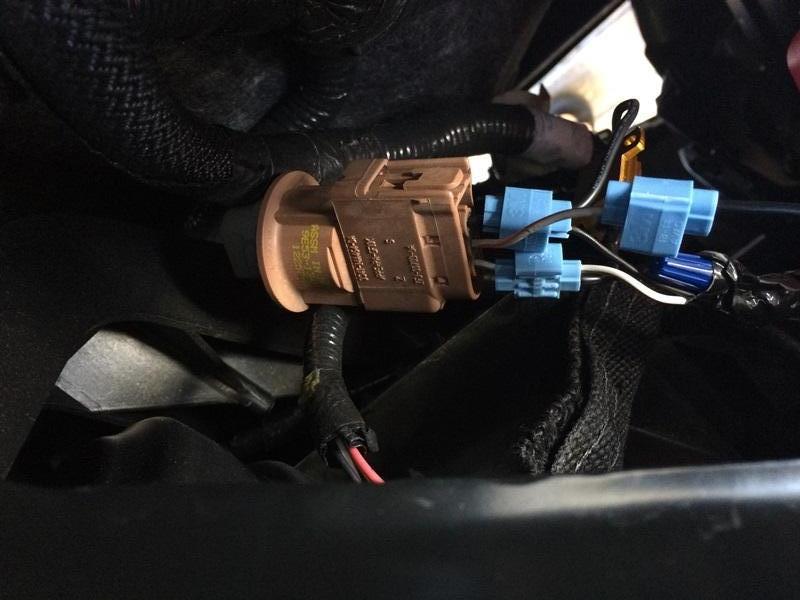
Using another wire tap, I connected my wire to the section that goes to the bulb:

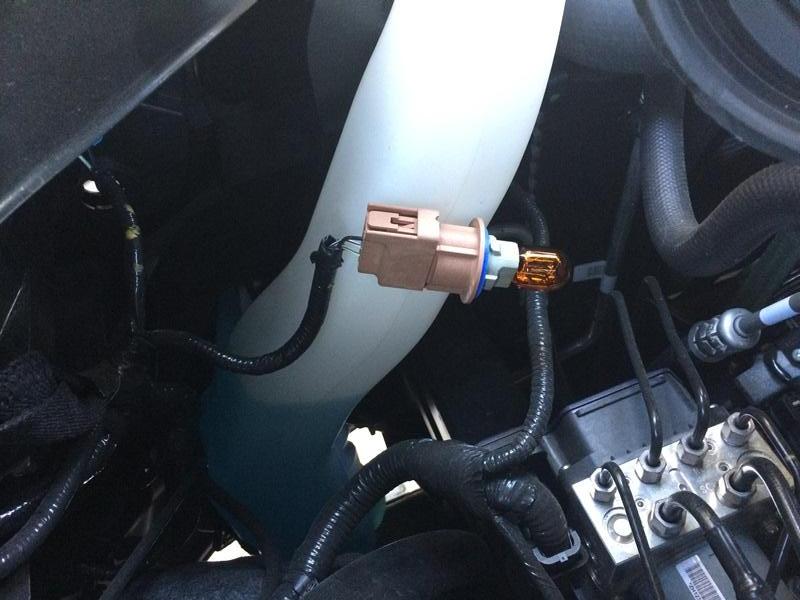
Now that I have the harness modified, I need to install the bulb. I had to push down pretty hard on the bulb base (I tried not to touch the led boards) to get it to sort of click in place and not feel like it would fall right back out:
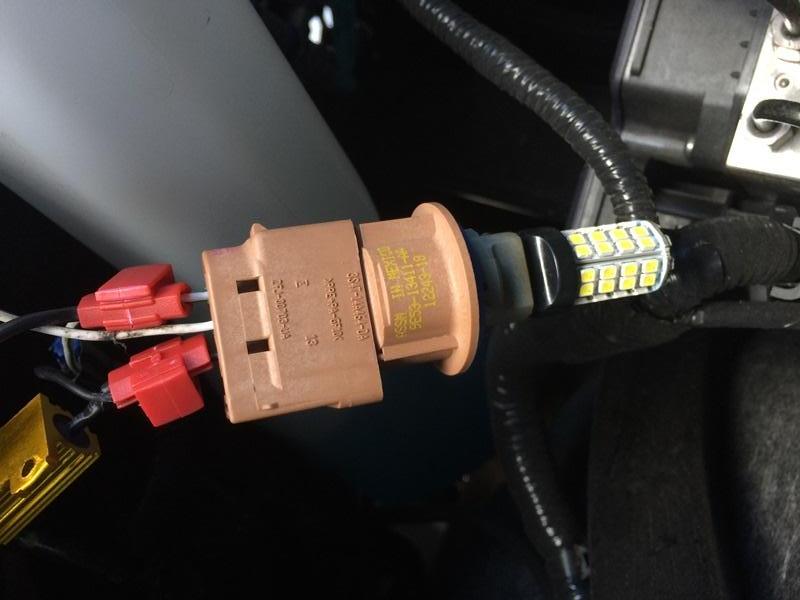
To verify that the bulb worked, I stripped the other end of my wire and touched it to the battery terminal quickly (probably not the best way to test, but it was quick and easy):
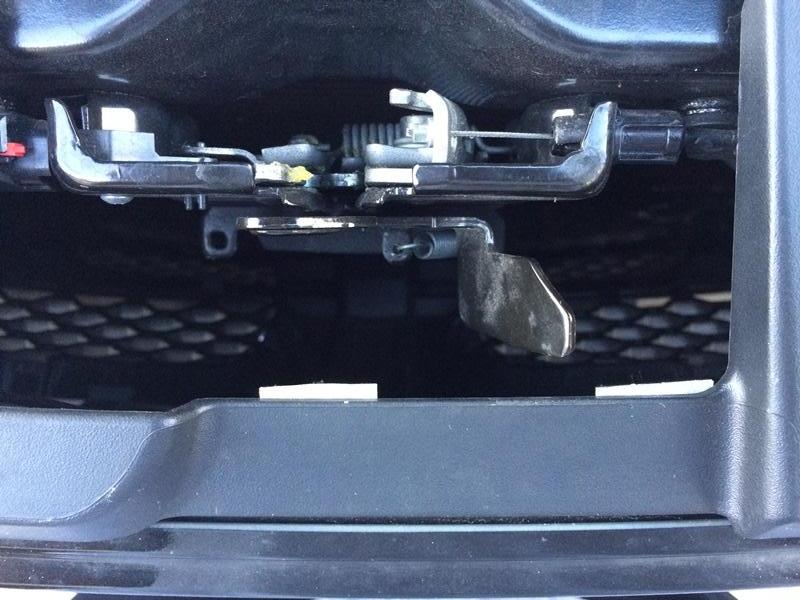
I reinstalled the bulb into the factory housing, then needed to route the wire to the other side. I decided to go behind the grill. I popped out the clips holding in the top part of the grill and ran the wire underneath the slots.
To secure it mid way as well as to make sure you don't see it I used self adhesive zip-tie mounts and stuck them underneath to the metal at the latch opening:
As well as mounting it on the passenger side:

Now to move on to the passenger side. This bulb is a bit easier to get to without removing anything. Following the same process, I cut the white/orange wire for the running light section and capped it off:
And installed the load resistor on the black and white/brown and spliced in another section of my wire (sorry, don't have as good a picture of this part):
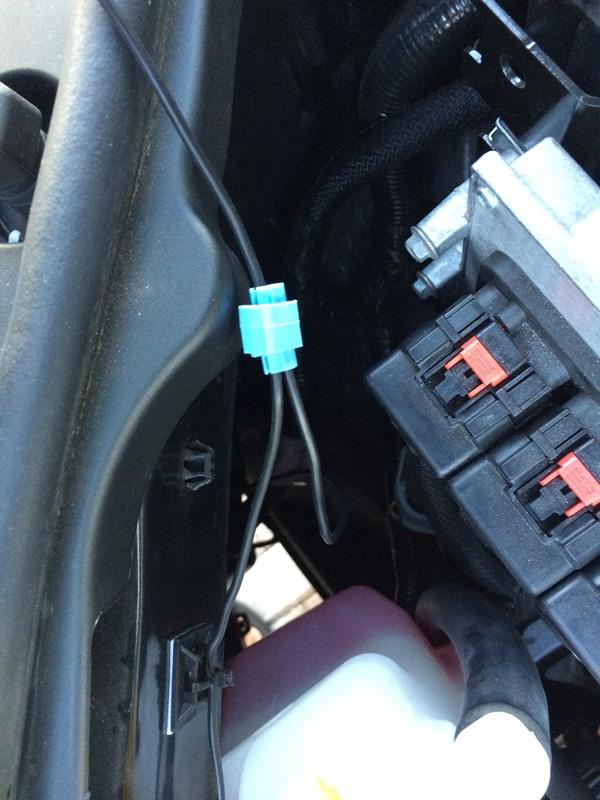
Because I want both DRL's to act a single entity, I used another wire tap to splice the passenger side bulb to the drivers side wire that I just routed:
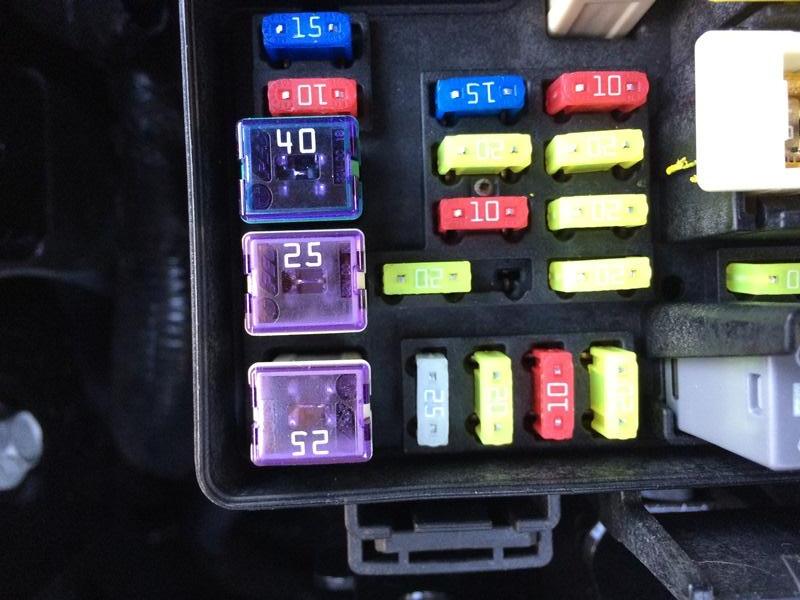
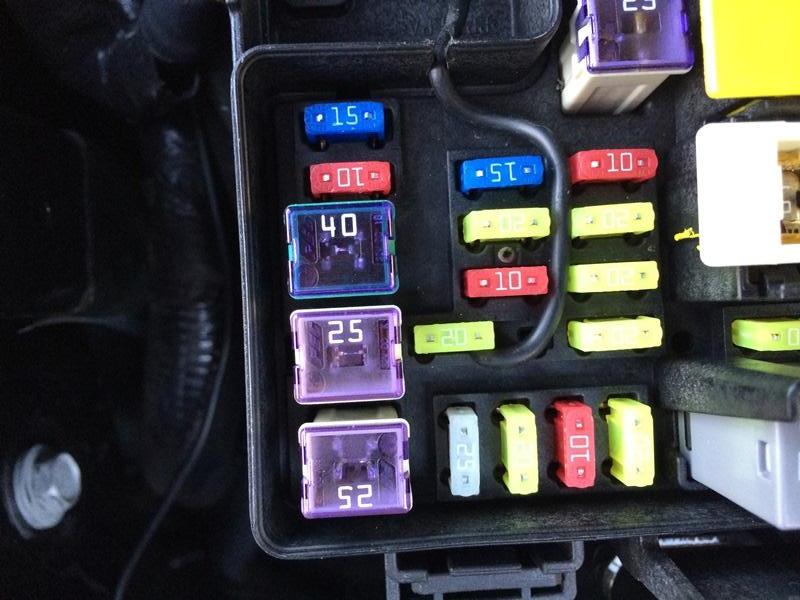
Next I needed to find a power source. Because LED's don't draw much current, I wasn't worried about them being on without the engine, so I just decided to tap power off the rear 12V lighter adapter. This is the one that you can work either with the ignition or on all the time. I'm still in the default, switched mode, so if you've changed that you'll have to find a switched source. The one I'm using is the one with the 3 holes (moving the fuse to the other hole makes it powered all the time).
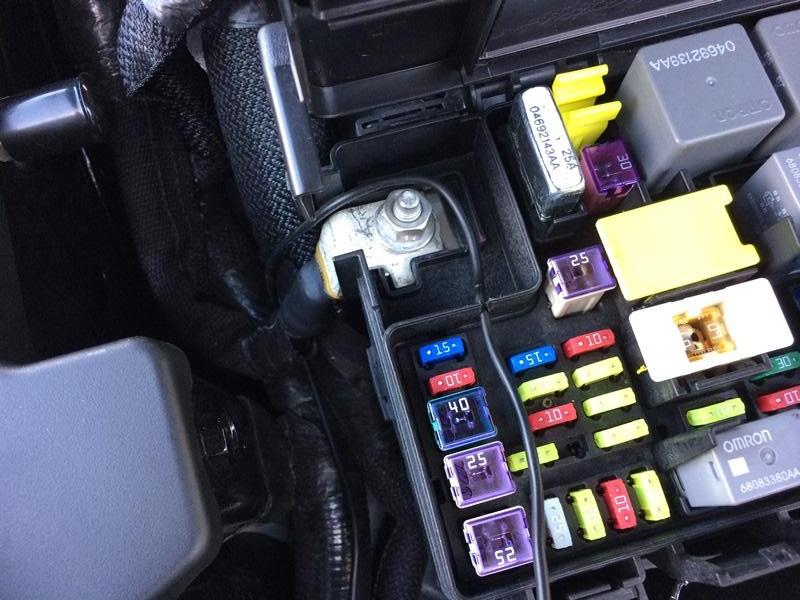
Because the fuse box is somewhat sealed, I needed to cut a small notch for the wire to fit through:
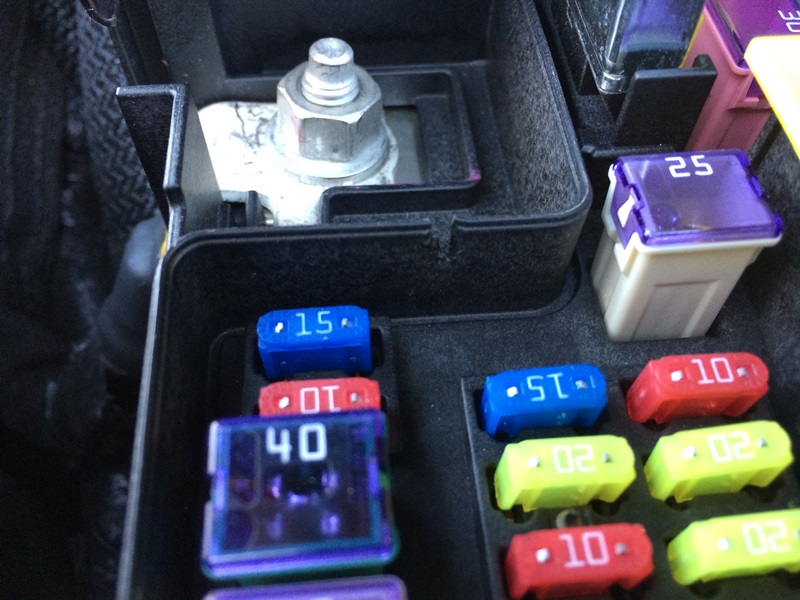
I'm using the poor man's taps (or lazy ), so I pulled the fuse and inserted the stripped end of the wire into the middle hole (the one that will be fused, want to protect the truck if something goes wrong):
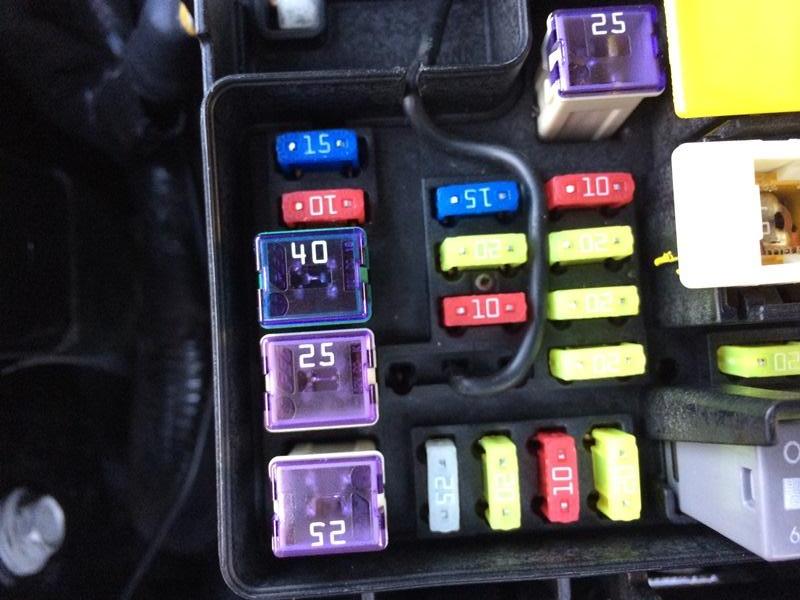
Then reinstalled the fuse over the wire (it's a bit harder to push in, but not significantly)
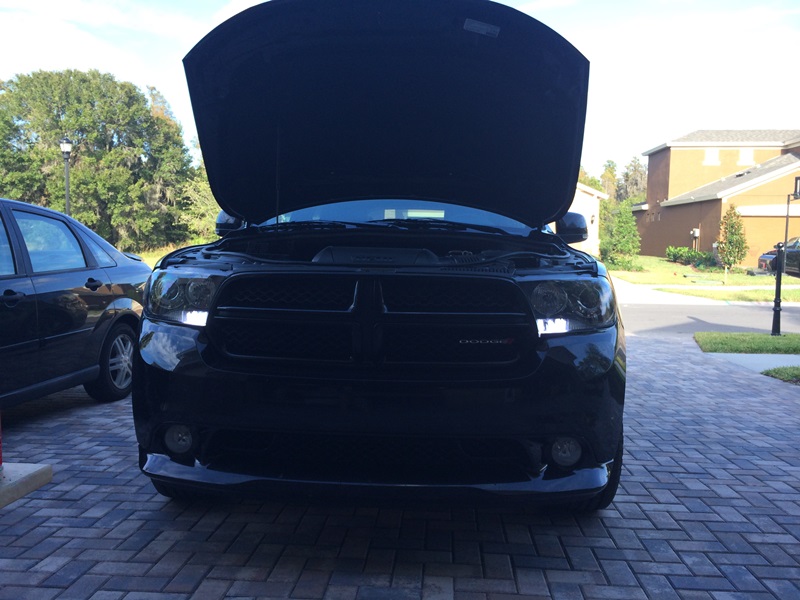
And that's it... To test, I just turned the truck on (accy is fine, no need to start). Success!!!
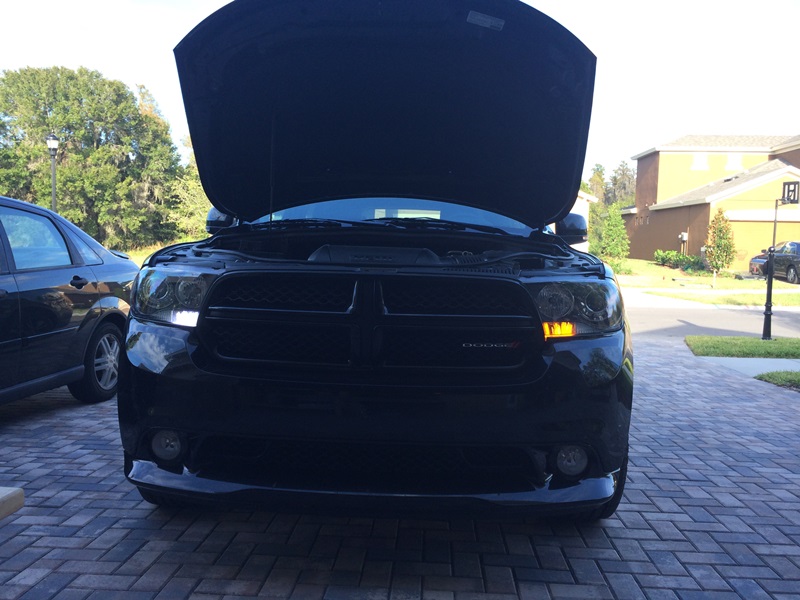
Turning on a turn signal to test that section:
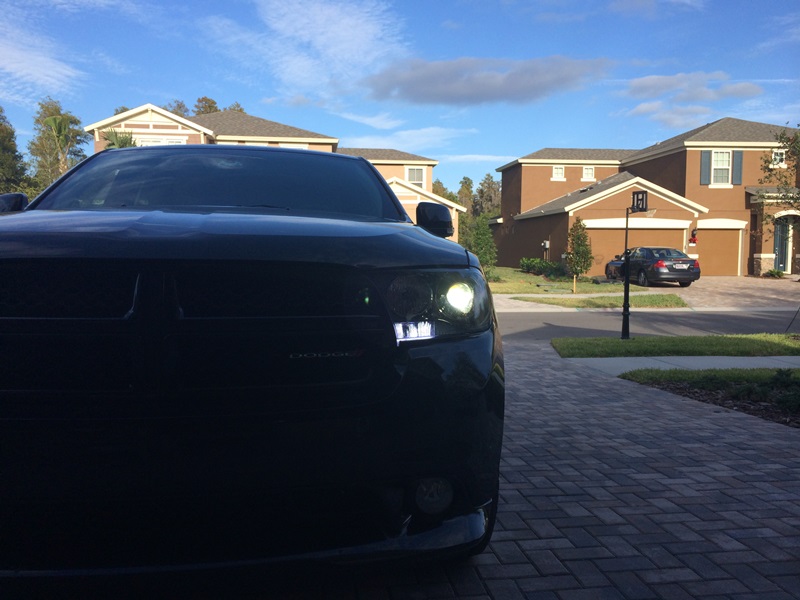
Here you can see it with the headlight on as well:
I also took a quick video of the operation if you're interested in how it works. I turned the truck on, then turned on the turn signal a couple of times. Sorry, it was taken with my iPhone 5 sitting under the hood, so not the best, but you get the gist...
Now... I love how this works and the concept is awesome (I think), however, I, personally think the 60 led bulb is not quite bright enough. I've already ordered another set of the 80W CREE's and I'll update once those come in (and if anyone wants to buy my 60 led bulbs, let me know )
)
One of the other things I tried to do was to use a DRL controller from eBay to automate the DRL's with the engine. Anyone with an electronics background knows that it's much easier to sink current then to source it. Sadly, the harness (at least the one I tried) would make or break the ground connection to control the lights instead of the 12V source. If you use one of these, your light will be on all the time. I may, in the future, use a relay, powered by the headlights, to turn the DRL's off when the lights are on, but I'm not sure about that yet... I guess that'll be a future project.
Sorry, I know this is long and picture heavy, but tried to be as thorough as I could... Hope this helps!!
So I've never really liked the fact that my R/T didn't have DRL's. I know you are supposed to be able to have the dealer code them on, but that requires a trip (and probably cost) to the dealer as well as some forbidden relays that nobody seems to know which ones for certain...
Another member talked about getting some of the switchback leds to use in the front turn signal locations, and that got me thinking about making DRL's with those... Here's what I wound up with. (note, I have the factory HID's, I've not seen the halogen lights, but would hope they are the same/similar)
For this DYI, you'll need the following:
-A set (2) of 7443 white/amber switchback leds from autolumination.com. I got the 60 led AO version (more on that later). Any of the 7443's should work as long as it's not the larger diameter versions. http://www.autolumination.com/switchback.html
-A set (2) of the 15~25 ohm load equalizers (to keep from hyper-flash turn signals) again from autolumination. http://www.autolumination.com/equalizers.htm (about 2/3 down the page)
-some 18 GA wire for connection. I used the 30' black wire you can get for a few dollars at Hell*Mart, but whatever will work.
-some wire taps, again from Walmart, for splicing wires together (without cutting).
So I started on the driver's side. To get to the light, you have to remove the stock air box:

Once that is out you can get to the bulb. Turn it a quarter turn then it pulls out:


The first thing I did was to install the load resistor. It comes with wire taps to use, so I just cut the long leads on it and spliced them in. on this side, I connected them to the black and white/green wire:


By default the second element in this bulb is for the running/parking light. I want it to run all the time, so I need to get power there. I cut the white/purple wire to remove the factory function and capped/taped it off (so it won't short out the light driver):


Using another wire tap, I connected my wire to the section that goes to the bulb:

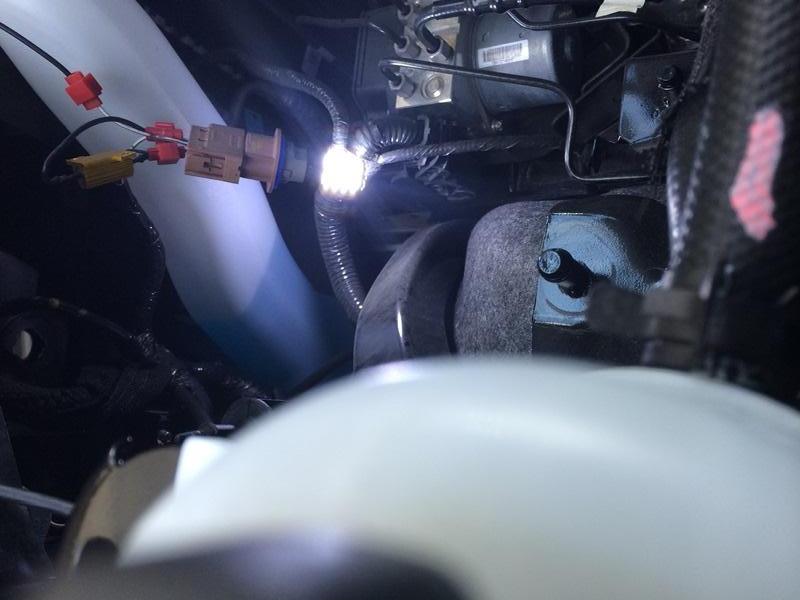
Now that I have the harness modified, I need to install the bulb. I had to push down pretty hard on the bulb base (I tried not to touch the led boards) to get it to sort of click in place and not feel like it would fall right back out:

To verify that the bulb worked, I stripped the other end of my wire and touched it to the battery terminal quickly (probably not the best way to test, but it was quick and easy):

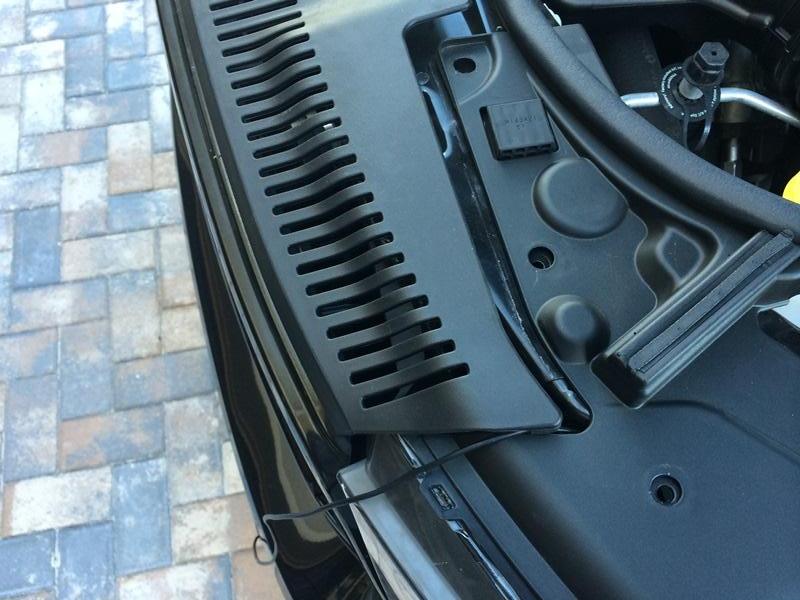
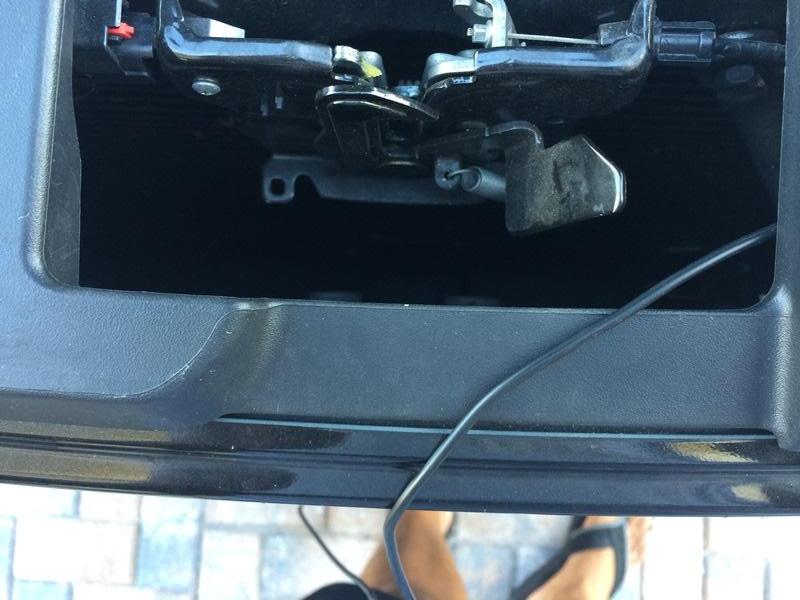
I reinstalled the bulb into the factory housing, then needed to route the wire to the other side. I decided to go behind the grill. I popped out the clips holding in the top part of the grill and ran the wire underneath the slots.

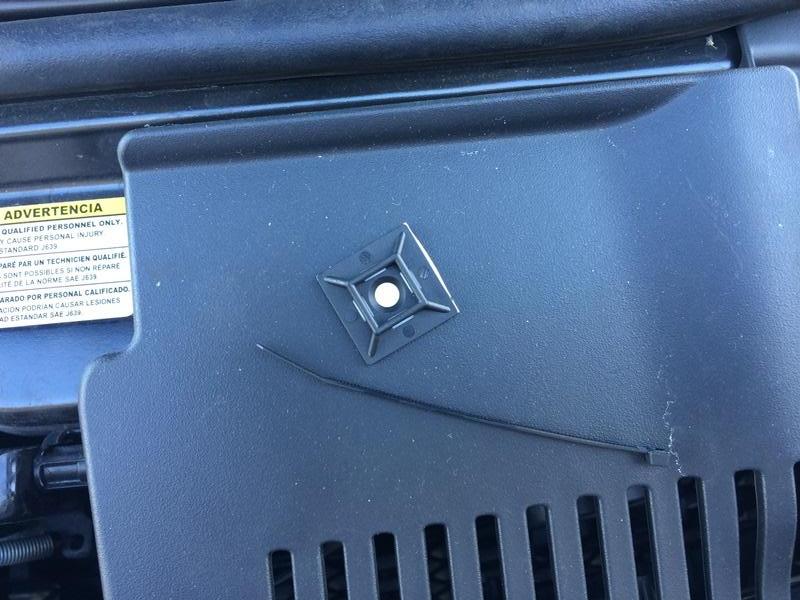
To secure it mid way as well as to make sure you don't see it I used self adhesive zip-tie mounts and stuck them underneath to the metal at the latch opening:


As well as mounting it on the passenger side:

Now to move on to the passenger side. This bulb is a bit easier to get to without removing anything. Following the same process, I cut the white/orange wire for the running light section and capped it off:


And installed the load resistor on the black and white/brown and spliced in another section of my wire (sorry, don't have as good a picture of this part):

Because I want both DRL's to act a single entity, I used another wire tap to splice the passenger side bulb to the drivers side wire that I just routed:

Next I needed to find a power source. Because LED's don't draw much current, I wasn't worried about them being on without the engine, so I just decided to tap power off the rear 12V lighter adapter. This is the one that you can work either with the ignition or on all the time. I'm still in the default, switched mode, so if you've changed that you'll have to find a switched source. The one I'm using is the one with the 3 holes (moving the fuse to the other hole makes it powered all the time).

Because the fuse box is somewhat sealed, I needed to cut a small notch for the wire to fit through:


I'm using the poor man's taps (or lazy

Then reinstalled the fuse over the wire (it's a bit harder to push in, but not significantly)

And that's it... To test, I just turned the truck on (accy is fine, no need to start). Success!!!

Turning on a turn signal to test that section:

Here you can see it with the headlight on as well:

I also took a quick video of the operation if you're interested in how it works. I turned the truck on, then turned on the turn signal a couple of times. Sorry, it was taken with my iPhone 5 sitting under the hood, so not the best, but you get the gist...
Now... I love how this works and the concept is awesome (I think), however, I, personally think the 60 led bulb is not quite bright enough. I've already ordered another set of the 80W CREE's and I'll update once those come in (and if anyone wants to buy my 60 led bulbs, let me know
)One of the other things I tried to do was to use a DRL controller from eBay to automate the DRL's with the engine. Anyone with an electronics background knows that it's much easier to sink current then to source it. Sadly, the harness (at least the one I tried) would make or break the ground connection to control the lights instead of the 12V source. If you use one of these, your light will be on all the time. I may, in the future, use a relay, powered by the headlights, to turn the DRL's off when the lights are on, but I'm not sure about that yet... I guess that'll be a future project.
Sorry, I know this is long and picture heavy, but tried to be as thorough as I could... Hope this helps!!
Last edited by jsawhite; 01-21-2014 at 08:31 AM. Reason: typo
#3
01-20-2014, 09:51 PM
Champion
#4
01-21-2014, 08:04 AM
Join Date: Oct 2013
Location: Lutz, FL
Posts: 60
Likes: 0
Received 0 Likes
on
0 Posts
The thread just posted (even though I wrote it up a few months ago), was waiting on mod approval I guess. I think that's why there were no views... 
In any case... I did get the 80W cree's and do not recommend those. With the amber leds only on 4 sides (not on the front), it was even worse than the 60led ones in the pics... I'd say go with the 92 or 120 led versions to give better light output.
Yes, I know that I didn't tape up the connections to seal them. I was waiting until I was happy with the results...
#6
01-22-2014, 12:00 PM

IMO you should have them shut of and just be parking/turn (amber color) when the headlights/ parking lights are on. There may be some sort of law about not having amber lights on for the parking lights.
this could be accomplished with a simple relay that breaks the white light when the headlights are on
this could be accomplished with a simple relay that breaks the white light when the headlights are on
#7
01-22-2014, 07:29 PM
Trending Topics
#9
03-01-2014, 04:53 AM
