
Yukon Spin Free Kit
#1
 03-29-2012, 04:36 PM


Join Date: Mar 2012
Posts: 1
Likes: 0
Received 0 Likes
on
0 Posts
This week in the shop we installed a Yukon Spin Free kit on a 2006 Dodge Ram 2500 owned by our friends at Dynamic Diesel. Dynamic Diesel is a local family owned diesel performance shop that does a lot with diesel drags and truck pulling. They were invited to a dyno day in Moses Lake, WA and wanted to show off some new parts, so we took their truck for the day to get this installed.

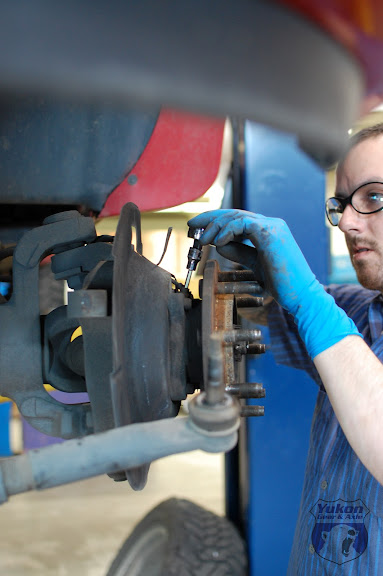
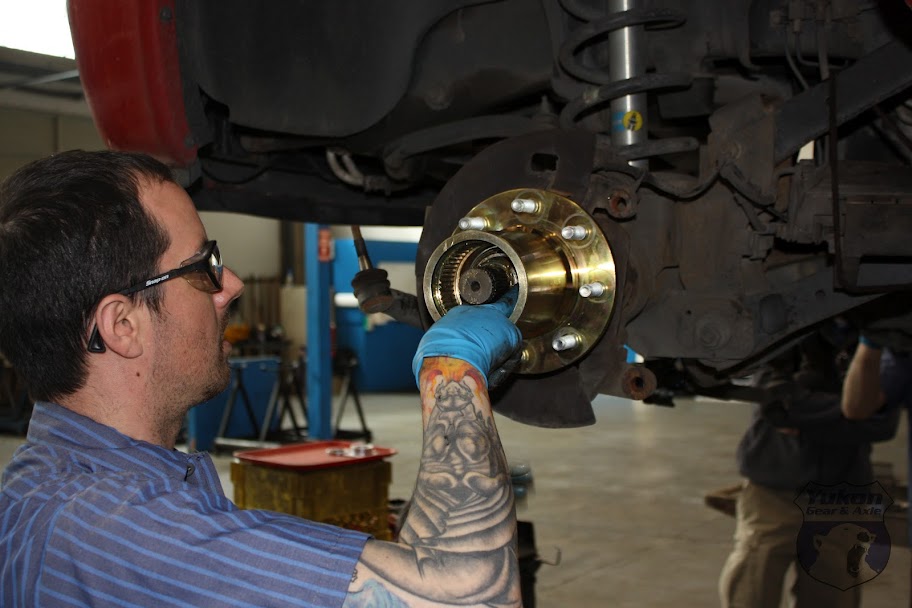
We start with putting the truck on our lift. Now this isn�t completely necessary, as you could easily do this with tall jack stands and a floor jack in your garage. Once the truck was stable and in the air, we began disassembly. Pull the front tires, brake calipers and rotors. We like to pull the differential cover and drain the fluid. It�s good to take a look at the gears and change the fluid while you have the front tore down this far. It also prevents gear oil from running down the axle tubes and dripping all over the place when you pull the axle shafts. We also pulled the tie rod from the knuckles to make things a little easier. Pulling the shafts was our next step, this can be a bit tricky depending on how many miles are on the odometer and how much rust has built up between the knuckle and the unit bearing. Sometimes the unit bearings require some persuasion from a big hammer and a drift to get them out, which was our experience with this install. After removing the unit bearings and shafts we can remove the ABS sensor, set it aside and clean up the mounting surface of the knuckle coating it with anti-seize once we�re done.


Once we got the axle shafts out it was time to separate the inner and outer shafts from each other. A good tool to have on hand for this project is a ball joint puller. It proved to be useful for a few of our tasks during this project. Here we used it for pulling the U-joints from the outer shafts. For this upgrade the outer stubs get replaced with 35 spline, Dana 60 units. Also, the owner of the truck chose to replace the U-joints while we had this tore apart so we used the puller to take the old joints completely out. It�s not always necessary to change the joints, but a it�s good idea to do it while you�re there. We then reassembled the inner and new outer shafts and set them aside until later. For this particular kit we are combining the OEM Dodge 9.25 inner axle shaft with a Dana 60 outer stub. While they are close in dimensions, a .035� spacer is used between the c-clip and the ears of the Dana 60 stub to secure the c-clips. Do not forget to install these. Once the inner and outer shafts are together we installed the axle shaft dust shields and rubber boots before setting them aside until later.


In this picture you can see the .035� spacer under the clip


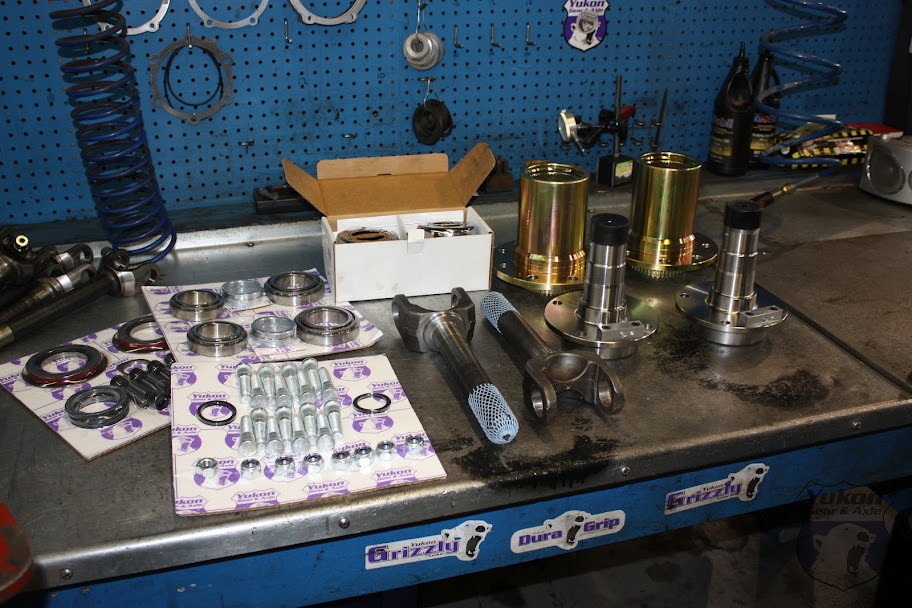
With the shafts ready to install lets take a look at the components for this kit. We have the new spindles, the hub assemblies, Warn Premium hubs, the 35 spline stub shafts, new Timken bearings and various bolts, nuts and seals. Like I said earlier the customer supplied new U-joints as well. All of these parts are premium Yukon parts, engineered and tested in-house in our facilities in Everett, WA.
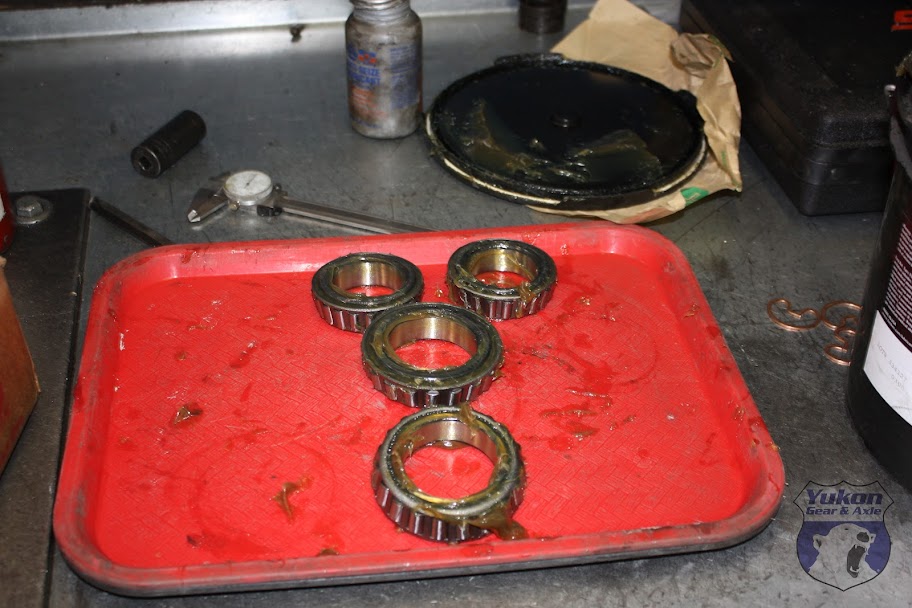
The next step in this install is pressing the wheel studs into the hubs. Using the ball joint press and an air impact made this easy, and having an extra set of hands even easier but not necessary. Once the wheel studs were in place we packed the Timken bearings and installed the seals.


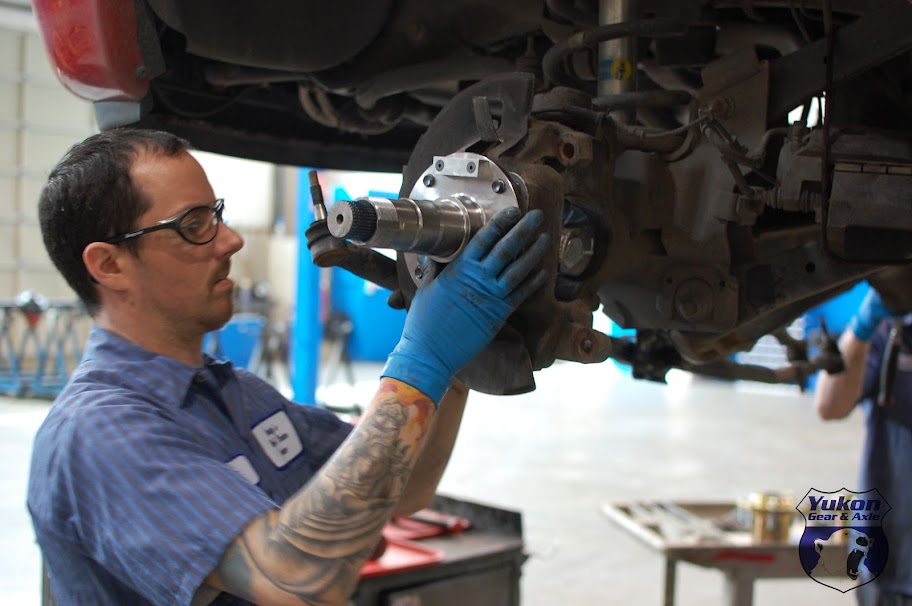
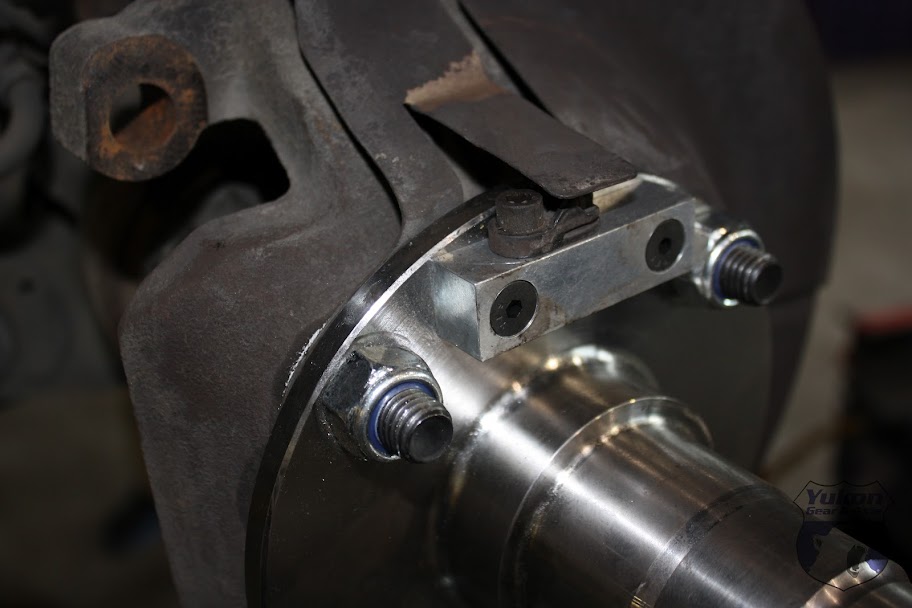
We can now slide in the axle shafts being careful not to pop out the inner seals. The seals are cone shaped and guide the shafts pretty well into the carrier. After the shafts are in we can install the spindles. First thing to do is to pop in the little seal that goes in the back of the spindle. Then you can install the spindles. Make sure you remember the factory dust shields, they go in between the spindle and the knuckle. Four bolts and four nuts supplied in the kit secure the spindle, dust shield and knuckle together. Using an impact we tightened the nuts and bolts. Before moving on we put the ABS sensors into their new home on the spindles.


Now its time for the hubs which just slide on. It�s good to coat the spindle with grease while throwing them on to ease installation and prevent moisture from getting inside later. Then we install the locking rings and spindle nut. We tightened the nut as much as we could then gave the hubs a few good whacks with a mallet to make sure the bearings were seated. A couple spins by hand ensured the hubs were tight.


It�s then time to put back in place the rotors, calipers, diff cover, tie rod and add gear oil. Pretty simple stuff.
Last step before putting on the tires is installing the Warn Locking Hubs. Step by step instructions are in the kit and they go in with ease. Then reinstall the tires, torque the lugs and take the truck for a spin.

Before rolling the truck out of the shop we took some pics. Everyone is curious how far the hubs stick out past the wheel. Now this truck has aftermarket wheels that are not exactly the same offset as OEM. As you can see they do stick out some but nothing you�ll bang your shins on when checking the engine oil or washing the windows.

All in all the install is pretty straight forward and can easily be done by one guy on a Saturday with basic garage tools and a ball joint puller. Our install took about 4 hours and that was with stopping multiple times to shoot pictures and video.
We start with putting the truck on our lift. Now this isn�t completely necessary, as you could easily do this with tall jack stands and a floor jack in your garage. Once the truck was stable and in the air, we began disassembly. Pull the front tires, brake calipers and rotors. We like to pull the differential cover and drain the fluid. It�s good to take a look at the gears and change the fluid while you have the front tore down this far. It also prevents gear oil from running down the axle tubes and dripping all over the place when you pull the axle shafts. We also pulled the tie rod from the knuckles to make things a little easier. Pulling the shafts was our next step, this can be a bit tricky depending on how many miles are on the odometer and how much rust has built up between the knuckle and the unit bearing. Sometimes the unit bearings require some persuasion from a big hammer and a drift to get them out, which was our experience with this install. After removing the unit bearings and shafts we can remove the ABS sensor, set it aside and clean up the mounting surface of the knuckle coating it with anti-seize once we�re done.
Once we got the axle shafts out it was time to separate the inner and outer shafts from each other. A good tool to have on hand for this project is a ball joint puller. It proved to be useful for a few of our tasks during this project. Here we used it for pulling the U-joints from the outer shafts. For this upgrade the outer stubs get replaced with 35 spline, Dana 60 units. Also, the owner of the truck chose to replace the U-joints while we had this tore apart so we used the puller to take the old joints completely out. It�s not always necessary to change the joints, but a it�s good idea to do it while you�re there. We then reassembled the inner and new outer shafts and set them aside until later. For this particular kit we are combining the OEM Dodge 9.25 inner axle shaft with a Dana 60 outer stub. While they are close in dimensions, a .035� spacer is used between the c-clip and the ears of the Dana 60 stub to secure the c-clips. Do not forget to install these. Once the inner and outer shafts are together we installed the axle shaft dust shields and rubber boots before setting them aside until later.
In this picture you can see the .035� spacer under the clip
With the shafts ready to install lets take a look at the components for this kit. We have the new spindles, the hub assemblies, Warn Premium hubs, the 35 spline stub shafts, new Timken bearings and various bolts, nuts and seals. Like I said earlier the customer supplied new U-joints as well. All of these parts are premium Yukon parts, engineered and tested in-house in our facilities in Everett, WA.
The next step in this install is pressing the wheel studs into the hubs. Using the ball joint press and an air impact made this easy, and having an extra set of hands even easier but not necessary. Once the wheel studs were in place we packed the Timken bearings and installed the seals.
We can now slide in the axle shafts being careful not to pop out the inner seals. The seals are cone shaped and guide the shafts pretty well into the carrier. After the shafts are in we can install the spindles. First thing to do is to pop in the little seal that goes in the back of the spindle. Then you can install the spindles. Make sure you remember the factory dust shields, they go in between the spindle and the knuckle. Four bolts and four nuts supplied in the kit secure the spindle, dust shield and knuckle together. Using an impact we tightened the nuts and bolts. Before moving on we put the ABS sensors into their new home on the spindles.
Now its time for the hubs which just slide on. It�s good to coat the spindle with grease while throwing them on to ease installation and prevent moisture from getting inside later. Then we install the locking rings and spindle nut. We tightened the nut as much as we could then gave the hubs a few good whacks with a mallet to make sure the bearings were seated. A couple spins by hand ensured the hubs were tight.
It�s then time to put back in place the rotors, calipers, diff cover, tie rod and add gear oil. Pretty simple stuff.
Last step before putting on the tires is installing the Warn Locking Hubs. Step by step instructions are in the kit and they go in with ease. Then reinstall the tires, torque the lugs and take the truck for a spin.
Before rolling the truck out of the shop we took some pics. Everyone is curious how far the hubs stick out past the wheel. Now this truck has aftermarket wheels that are not exactly the same offset as OEM. As you can see they do stick out some but nothing you�ll bang your shins on when checking the engine oil or washing the windows.
All in all the install is pretty straight forward and can easily be done by one guy on a Saturday with basic garage tools and a ball joint puller. Our install took about 4 hours and that was with stopping multiple times to shoot pictures and video.