
[2nd Gen : 91-95]: 94 caravan heater core
#1
 08-30-2014, 09:13 PM


Join Date: Aug 2014
Posts: 10
Likes: 0
Received 0 Likes
on
0 Posts
Im changing the heater core on a 94 dodge caravan. My Haynes book stopped being useful. It assumes you know what to do.
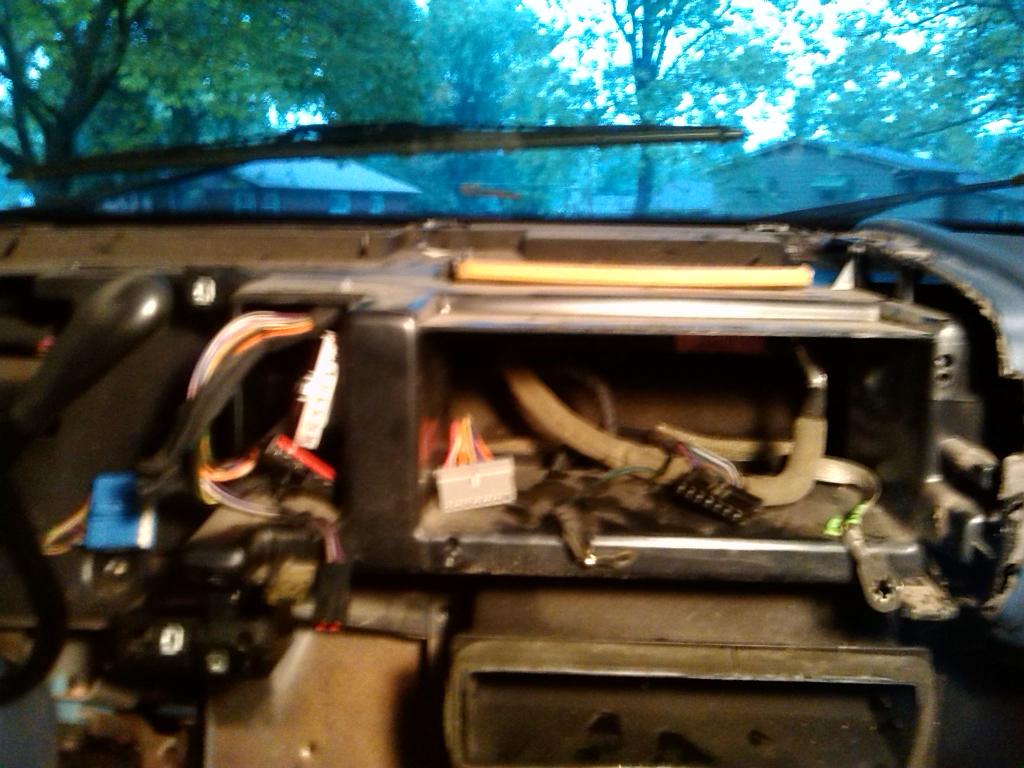
I have almost all of the dash torn out. The heater core from this angle is located just below the "helicopter leaf" on my windshield.
The heater core is located behind these black panels. I have all of the bolts that bolt into the firewall from the dash. The book does not tell me if I'm supposed to pull the dash back to get at the heater core, or if I'm supposed to get at the heater core from down below. I also am aware that I have a piece of blue dash still connected on right of both pictures. There is an air bag assembly inside with a panel that has to come off before the rest of this dash piece still attached. The book tells you nothing about how to take this off. I don't actually think I need to take it off anyways.
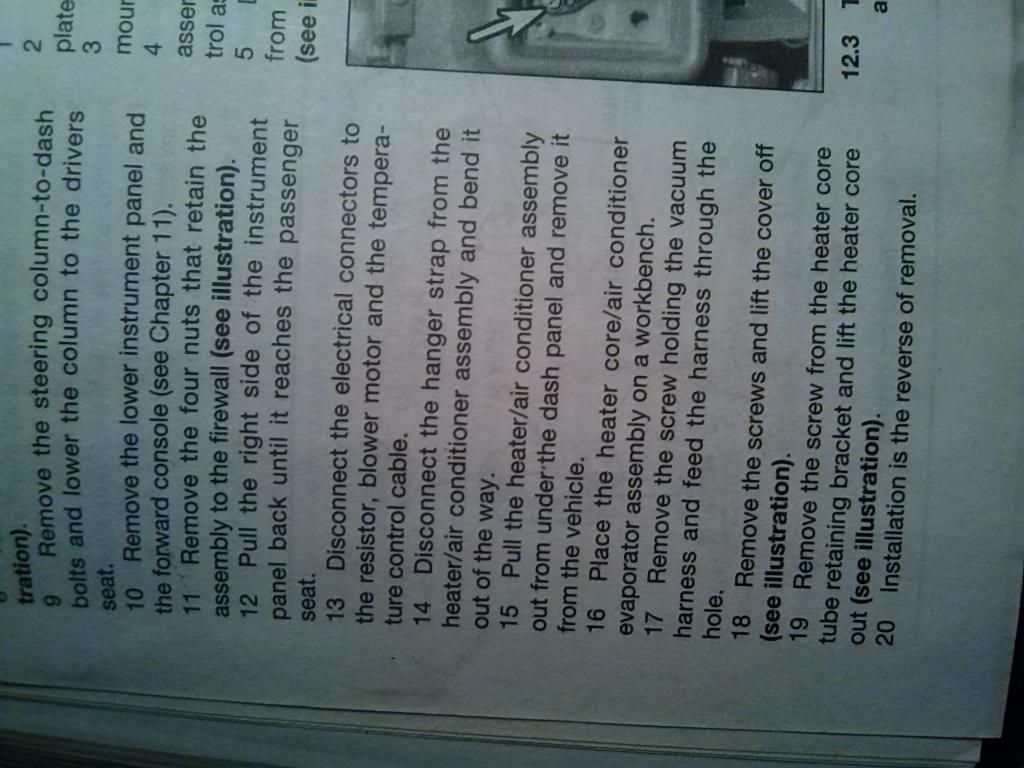
These are the instructions for taking the dash off.
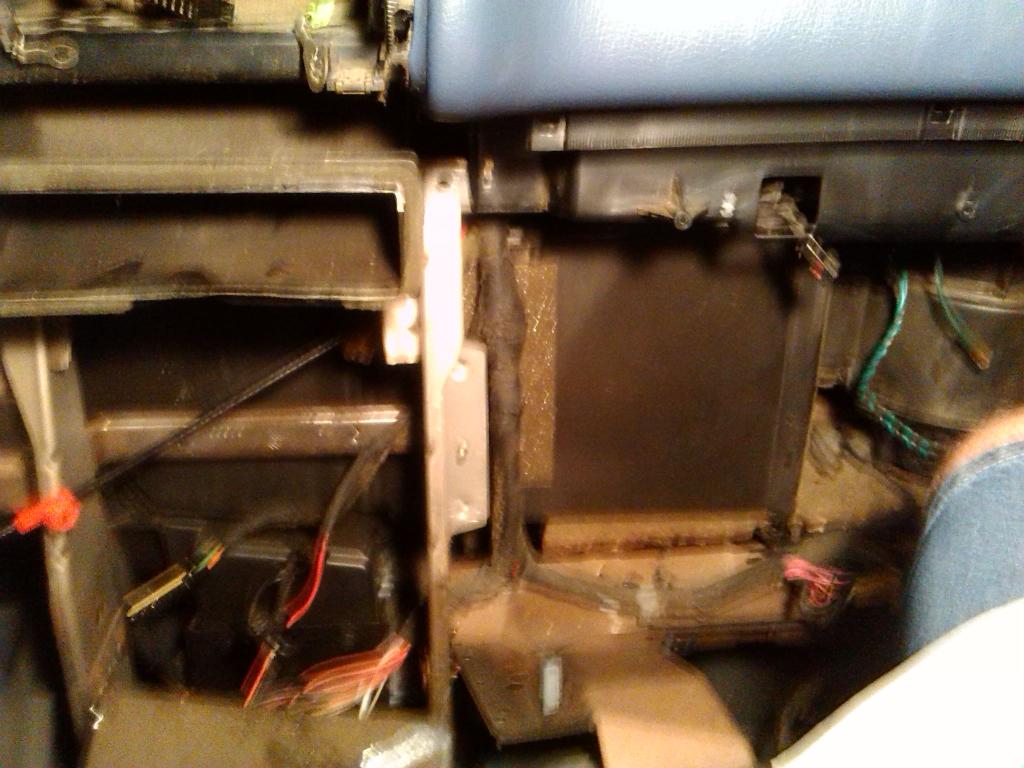
This is the black panels from the earlier picture. It states to remove the screws on it but it doesn't not tell you how to get at them.
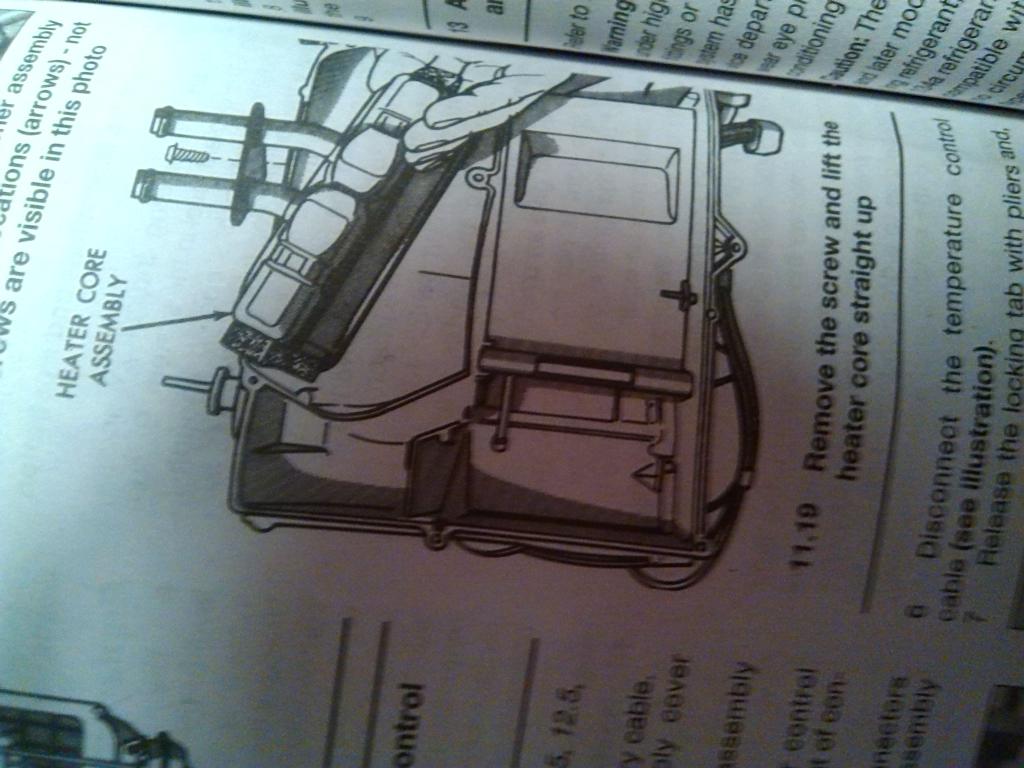
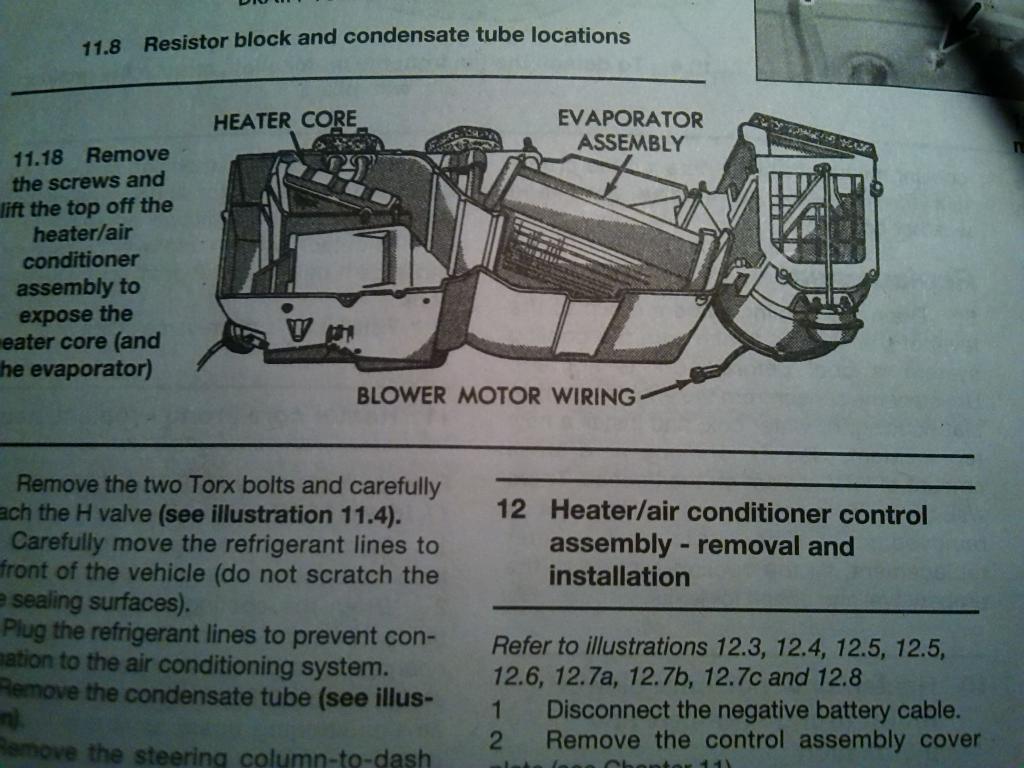
This is how the heater core lifts out. No where does it tell me whether I need to pull the dash away from the firewall to get at it, or if I need to start taking the metal frames off from the second picture. The dash does not pull away yet so if I need to pull the dash from the firewall Ill need to take some more off. Any ideas?

I have almost all of the dash torn out. The heater core from this angle is located just below the "helicopter leaf" on my windshield.

The heater core is located behind these black panels. I have all of the bolts that bolt into the firewall from the dash. The book does not tell me if I'm supposed to pull the dash back to get at the heater core, or if I'm supposed to get at the heater core from down below. I also am aware that I have a piece of blue dash still connected on right of both pictures. There is an air bag assembly inside with a panel that has to come off before the rest of this dash piece still attached. The book tells you nothing about how to take this off. I don't actually think I need to take it off anyways.

These are the instructions for taking the dash off.

This is the black panels from the earlier picture. It states to remove the screws on it but it doesn't not tell you how to get at them.

This is how the heater core lifts out. No where does it tell me whether I need to pull the dash away from the firewall to get at it, or if I need to start taking the metal frames off from the second picture. The dash does not pull away yet so if I need to pull the dash from the firewall Ill need to take some more off. Any ideas?
#2
05-30-2015, 05:11 PM

Heater core removal including Dash Removal Pictures removed as original document too large. FSM does not have clear instructions how to do this. Just pieces of procedure in different places.
1994 Chrysler Corp minivan.
NOTES: Advantages. Faster. No need to discharge AC or antifreeze. Minimal coolant loss. Process suggested by KOG. http://www.allpar.com/forums/index.p...=&fromsearch=1
Some of write up directly quoted from dw8 http://www.allpar.com/forums/index.php?showtopic=118230
**Remember take pics of everything, especially heater ac controls as hard to reassemble tiny parts from memory.** Also steel supports in mid lower dash. Take pics.
Disconnect battery and leave sit 30 minutes for air bag. After sitting, turn key on to confirm air bag capacitor is discharged. The upper passenger panel with the rectangular area with rounded corners contains the passenger air bag. Did not need to remove either airbag for heater core. Did not need to remove seats.
Parts that interfere with dash roll down must be removed. Fasteners to be removed to roll down dash are 6 or so fence line bolts near windshield, two bolts above steering column. Loosen but do not remove 2 roll down bolts. Parts in the way of roll down must be removed including center dash. Wires that would hold the IP up and prevent roll down must be disconnected. Steering column must be dropped but not removed. Some IP parts were removed unnecessarily or to prevent damage later. Factory service manual is not very specific as to what does and does not need removal for heater core work. If a part can not be removed, look for a hidden screw. All errors and omissions are mine. Not a complete procedure. These are only observations of what was done. Not a recommendation. Take all safety and hazmat precautions including but not limited to safety goggles, safe hazmat disposal of coolant. Not responsible for problems or injuries.
=============== Remove Ash Tray and Cup Holder ================
1) These are a unit and are not to be separated.
2) Pull out ashtray
3) There are two spring latches (right and left) attached to upper part of the tray hidden in back. Push down the two tabs (one broken in pic) with two small flat head screwdrivers and at the same time pull to remove Ash Tray and Cup holder.
Remove Glove Box (3 Phillips, 2 hex head) See above pics .
1) There is a plastic tab on either side of the box attached to a cable. Lift the tab, and slide the tab toward the passenger seat in order to remove the tab and cables and rest the glove box on your knee.
2) Remove the three phillips and then 2 hex that hold the box hinge.
3) The glove box latch and screw does have to be removed LATER to remove lower dash plastic. (1 Phillips)
=================== Top Panels (Bezels) ===================
Remove top gray panel (bezel) which butts up against front window
There are 5 spring clips closet to you and two side spring clips that hold this panel on. They are the same as the heater control panel (bezel) spring clips.
2) Recommend two 3 to 4 inch stiff putty knives and a couple of flat wood shims or old credit cards to protect the other dash panels while working. An extra long flat screwdriver may be needed to save the gaskets around the vent openings or clips near windshield. 3) Slide the putty knives under the front edge of the panel closest to you and then insert a wood shim or old credit card between the putty knife and the dash top. Lift and press until the clips let go. Raise the panel gently. Look and see if the vent gaskets are raising with the panel. If they are, insert the long flat screwdriver and gently dislodge the gasket from the panel pressing it back into place around vents.
4) Now insert the long screw driver under the back metal clips (4 of them) and gently twist to release. Or just pull up.
5) Remove panel
Information Center Cover in Front (black)
1) Has three spring clips (left, center, right)
2) Use putty knife with wood shim underneath.
Information Center Itself (black) and Back Top Cover (gray) (6 phillips) (lights bulbs for information center are accessible once removed) Might not need to remove for heater core work.
1) 3 phillips on gray, 3 phillips on black. Use stubby phillips Be careful when removing or installing screw so they don�t fall through holes into lower dash area.
2) Has 3 spring clips (far left, far right center, and far right)
3) Remove blue connector
4) Remove instrument cluster with speedo. 4 screws. Removed to prevent damage. Might not need to remove for heater core work. Disconnect transmission range cable from tab around steering column and removing allen wrench screw. White plastic with black cable in picture. Disconnect yellow connector in picture.
E) Radio Removal 2 bolts, cable reached thru upper hole. No need to remove.
F) Top Bezel with Passenger Air Bag. No need to remove to replace heater core
================== Bottom Panels and Bezels =================
A) Remove lower gray bezel cover below ash tray (4 phillips screws)
No picture.
B)Remove driver side plastic dash lower panel (5 phillips screws) 2) two top, two bottom, one side screw (use stubby phillips for side) 1) Disconnect emergency brake release rod. Rod snaps into plastic retainer. One way to remove is put a flat piece of metal on top of plastic retainer and on top of rod and then use pliers to squeeze rod and metal away from plastic retainer so it doesn�t break. NOTE: The piece the rod goes into is spring loaded and will pop up when the rod is removed. Or slightly bend gray plastic park brake lever where it pivots on lower plastic panel to get it off the 2 pivot pins. Remove tailgate latch release connector. Black with yellow green wires.
C) See immediately above right. Remove thin gray dash bezel over steering wheel (2 phillips screws to dash) sees
D) Tilt steering wheel to full up if needed.
E) Remove center AC vents Just pull out by hand or see below.
1) The bezel is held on the bottom by two spring locks on either side located just in front of the the ash tray mount. Insert a small screw driver between the metal and the gray plastic and pry or twist the screwdriver lightly to force the snap spring from its hole.
2) The top is also held by two spring locks. Insert a right angle implement � or just pull with hands.
F) Remove Ash Tray bracket (4 phillips)
G) Remove heater control assembly. 2 screws. Needed because plastic must be removed to roll dash down.
1) Disconnect cable. Depress red locking tab using plier and slide it through the black retainer rectangle. Unhook the cable mounting point. Lift cable off of pin. See below right.
2) Unplug electrical connector 3) CRITICAL do not remove vacuum tubes. Just turn heater assembly sideways and place in opening on top of bezel for now. To remove vacuum tube assembly, remove the two metal screws (#1 phillips) on top of assembly. Turn assembly over and there are two plastic tangs holding vacuum assembly. Gently push the tangs back and wiggle out the vacuum assembly from its buttons. Observe carefully how the 4 white buttons and black attachment on the defrost button go and be ready to reassemble them when needed. Take pictures if you can. The heater control is removed but vacuum assembly stays on the car on its wires.
H) Remove cigarette lighter wiring by reaching through hole and pulling off both connectors; (one on back and one on top)
To remove plastic middle lower dash. 1) Remove center duct bottom holddown screw above heat control assembly (1 phillips) no picture.
2) Gently lift top duct below cigar lighter. Remove two screws hidden under duct and way back (2 phillips -- Requires long phillips) /
3) Remove Cluster Bezel, around radio and speedometer. Remove Cluster Bezel screws that go around radio (3 phillips) 1) Two are above heat control assembly and one is left of steering wheel. Pull off. Might not need to remove for heater core work. No picture.
4) Remove middle lower bin. Screws. 2 at carpet. Might be more.
I)To remove plastic right lower dash 1) Screws are under dash and side screw removal is easiest with a stubby phillips from the passenger door or 90 degree screwdriver. There is also two hidden screws (see remove center duct above) and one at upper left (see Top Bezel with Passenger Air Bag) and hidden at glovebox latch.
2) Remove glove box light (in my case just cover that snaps over plug
3) Remove bracket for wires near lower glovebox hole.
4) Work panel on driver side loose. Insert hands into glove box � put hands on right and left and between lower panel and braces � and pull. There are three tabs that are felt covered (No clips) that support the lower panel from top. DID NOT NEED TO REMOVE PASSENGER SIDE UPPER DASH PANEL which has AIRBAG.
J) Remove left and right door jamb plastic including plastic near hood release and plastic at front of door jambs but do not remove around top of window. I unbolted but did not remove hood release handle. Not sure if needed.
================= Dash Supports ================
A) Remove steel bracing that held middle and lower dash plastic. (phillips screws, 3/8� and 10mm bolts, one 10mm nut) 13mm nuts at floor and middle.
PHOTOGRAPH AND REMEMBER HOW STEEL SUPPORTS GO TOGETHER. SEE BELOW. PICS FROM LEFT TO RIGHT.
1) Disconnect the gray and black wire which runs to the blower motor. Mine is green.
2) Remove plastic push pins that attach wiring to dash supports as needed. Dash supports must be removed to roll the dash down later.
3) Remove support bracing bolts and nuts and pull out bracing.
4) Separate electrical connector.
================STEERING COLUMN==================
To lower steering column: Before dropping column, as noted on page 3, disconnect transmission range cable (attached to instrument cluster with speedometer) from tab around steering column and removing allen wrench screw. If you do not, the steering column will drop and break the tab or cable. 2 -10mm nuts near wheel. 3 nuts lower on column. See pics of upper nuts and lower studs with nuts removed.
Lower steering wheel to front seat.
================= ROLL DOWN ================
Loosen 13 mm bolts at right and left lower corners of dash where dash will rotate.
Remove 5 or 6 3/8� or 10mm bolts at fence line, 2� from windshield. Fence line is near �PLASTIC NUT� arrow in picture below. No photo. Remove 2 nuts near where steering column was. See above right. One removed in picture above, one has a socket on it.
Dash should roll down. It actually rotates down, pivoting on right and left lower bolts near parking brake pedal and right lower corner.
See picture from another car.
Here is a view of heater box, dash rotated down. And a view behind steering wheel.
================= HEATER CORE REMOVAL ==============
Remove heater hoses from core. Remove four 11mm nuts holding heater box on fire wall from engine side. See above. Heater box must move back slightly from firewall to remove heater core but heater box does not get removed. Remove nut from pivot rod of heater blend air door. In picture it is connected to a bronze colored plate which hooks to a cable. Pull bronze plate off heater blend air door but do not disconnect from cable. Heater blend air door stays with bottom of heater box. Unbolt heater cable attaching bolt through a black plastic holder. 8mm. Remove top of heater box by removing many 8mm bolts.
Important **Drill hole from engine side of firewall where 8mm bolt holds heater core on heater box. Just below where heater hoses connect. **
After drilling, might need to pull down on the plastic heater box through hole for heater hoses to reach 8mm bolt head. See below where bolt should be on picture of removed heater core below. Should be in grey plate below heater hose fittings. Remove bolt. 8mm head. See removed heater core picture below. Save and reuse black insulator around heater pipes.
Pull core up and and out of plastic heater box. See above.
=====================Installation================= =====
Installation is reverse of removal. Make sure the heater blend air door pivot and nearby guide pin (no picture) from the bottom of the heater box fit through the correct holes on top of the heater box. Put nut on heater blend air door pivot and 1-2 bolts on left side on cover to secure top while you fiddle with fitting cover over evaporator. The evaporator sticks up so it will seem impossible to put the cover of heater box properly. Use fingers on bottom side of cover to force top of heater box that curve over AC evaporator to go around the evaporator and not get stuck on the foam covering the evaporator.
Adjust transmission range cable by turning allen head screw to the right place.
End.
Tools needed are usual ones and a few listed below.
Socket sets, screwdrivers. Sockets including sizes 8mm, 10mm, 3/8� for fence line, 10mm deep socket for battery terminal, 11mm deep for nuts on firewall, 13 mm for nuts and bolts on steel support interior parts. Medium length #2 Phillips screwdriver, short and long Phillips. Long flat screwdriver. 90 degree screwdriver or similar made of �� drive ratchet handle, �� socket and Philips screwdriver bit helps with leverage and tight spots. �� and 3/8� drive ratchet handles. �� drive ratchet if needed for deep sockets. �� drive long extension. 3/8� drive extensions. Allen wrench 9/64� or similar for transmission range cable. Or just use a plier.
Channel lock plier for heater hoses. Factory service manual highly recommended.
Drill and bits to drill firewall. Flashlight and Work light. Cool one better. Lots of patience. Not a dirty job. Just a time consuming one.