

DIY: Transmission Work NV5600
#11
 06-26-2007, 11:19 PM


Join Date: Mar 2007
Location: Mississippi
Posts: 485
Likes: 0
Received 0 Likes
on
0 Posts
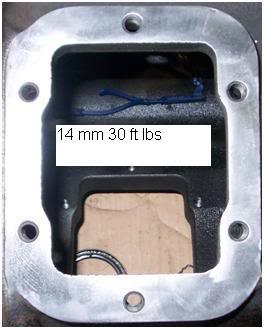
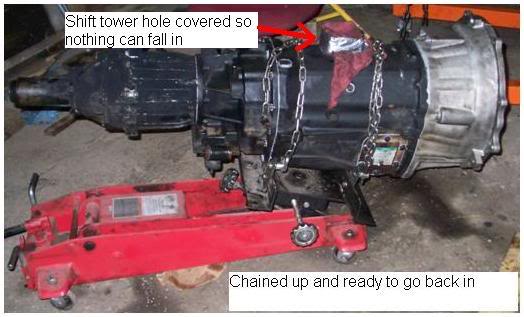
Once I had it all together I put the shift tower on just to make sure it would go through the gears. After I had checked this and knew I hadn’t dropped anything in the main case I bolted the PTO covers back on. Make sure you have all the surfaces clean before you start putting sealant on.
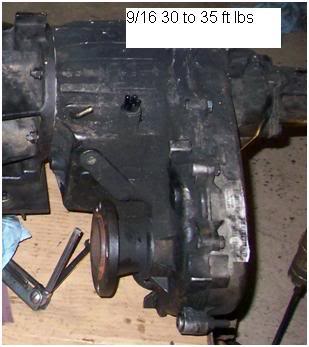
You can now put the transfer case back on. Mine had a gasket on it when I took it apart, but I was told sealant works just fine for when you put it back together.
You are now ready to put it back in the truck. I found a better transmission jack that would allow me to roll the entire assembly under the truck.
When you get it back under the truck the first order of business is to get it bolted back to the engine. Do not use the bolts to pull it up to the engine. I put mine in 6th and locked the transfer case in 4X4 so that I could just turn the disc that the front driveshaft bolts to to align the splines for the input shaft and clutch. Keep the distance even between the sides and top and bottom of the bell housing and clutch. It should slide together pretty easily if you have everything lined up. Remember to watch where the shift tower bolts on as that is what is most likely to hit the floor. Once you get it back together you can put the bolts back in and torque it down. It is a 14mm socket and the torque is 35 ft lbs.
Once you have that back in I would put the support cross member back in. I used the port a power to spread the frame rails to get it back in. The heads of the bolts are 13mm and the nuts are 15mm. Set the transmission down onto the cross member and bolt it down (15mm).
After I had the support cross member in and the transmission bolted to the engine I took out the jacks so it was easier to work underneath the truck. Put the clutch release cylinder ( ½ ), starter ( 12 point 10 mm), transfer case linkage, and vacuum lines (10mm) back in at this point. For pictures go back to earlier in the document.
Once you have that stuff connected you are ready to put the driveshafts back in. When you go to bolt the front driveshaft (5/8) back on make sure you get your alignment marks back in the correct places. For the rear driveshaft I slid it into the transfer case first and used a jackstand to hold up the back end while I put the hanger bearing back in (15mm socket and wrench). When you go to bolt the rear U-joint together (5/16) make sure you get it aligned the same way as when you took it out.
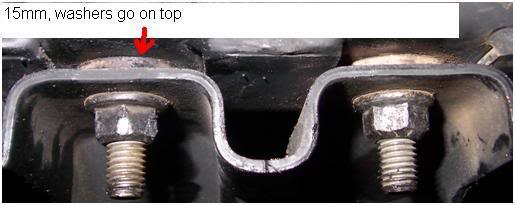
Now put the other cross member and skid plate back in (15mm). The washers for the cross member go on top of the cross member.
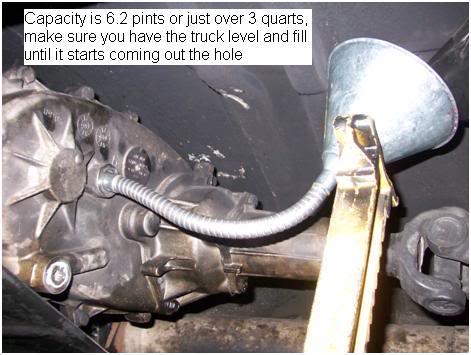
Now that you have everything reassembled underneath the truck you can fill the transfer case and transmission with fluid. For the transfer case I used a flex funnel pushed all the way against the floor to get the fluid in. It uses automatic transmission fluid.
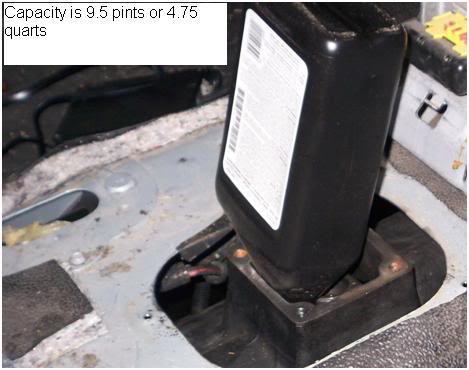
The transmission was much easier as you can use the shift tower hole to fill it. There is a lot of debate on which fluids are best, I just used the part number off of the PTO cover and got if from the dealer. I just put in the full 5 quarts as a lot of places say to overfill it by up to a quart.
Now that you have the transmission full of fluid you are ready to put the inside back together. The rubber and metal gasket that was between the shift tower and the transmission gets sealant on the side that goes against the transmission but not the rubber side that is up. Once you have sealant on that put the shift tower back in and bolt it down.

After you have the shift tower back in finish putting your interior back together. The dust boot and console use 5/16 and the transfer case shifter uses 10mm.
#12
06-26-2007, 11:20 PM
Join Date: Mar 2007
Location: Mississippi
Posts: 485
Likes: 0
Received 0 Likes
on
0 Posts
Now is the moment of truth, start her up and see if you have 6 forward and one reverse. You should have seen the look on my face when I started mine and everything worked the way it was supposed to. I hope you get that same look on your face when you start yours for the first time.
I have to thank my grandpa for letting me use his shop and tools. He also shared a little wisdom every once in a while (like using the chisel to losen the huge nut on the output shaft or using an air hammer to crack the bearing so it came off easy). He used to do a lot of trucking and farming and did all his own maintenance so I had more tools than I needed for this job. That’s also why I had to find a different transmission jack, the one for the semis was too tall to roll out from underneath my truck with the transmission on it. The project took me a few days, but I didn’t work to fast and had no guidance, hopefully this helps you so it goes quicker and you don’t have to figure to many things out on your own.
Let me know what you guys think.
#13
06-27-2007, 12:40 AM


#15
06-27-2007, 03:37 AM

#17
06-27-2007, 07:49 AM

Hall Of Fame


