
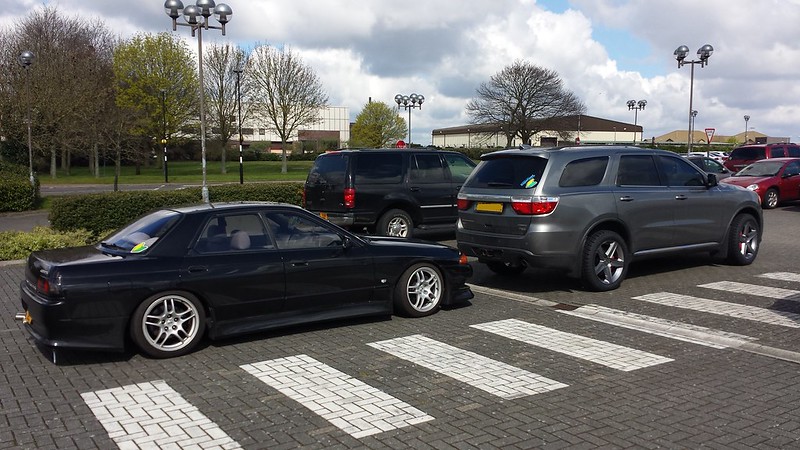
1991 Nissan Skyline GTS25 4-door
#11
 04-17-2016, 08:39 AM

A while back I had a maintenance day planned that was a good day:
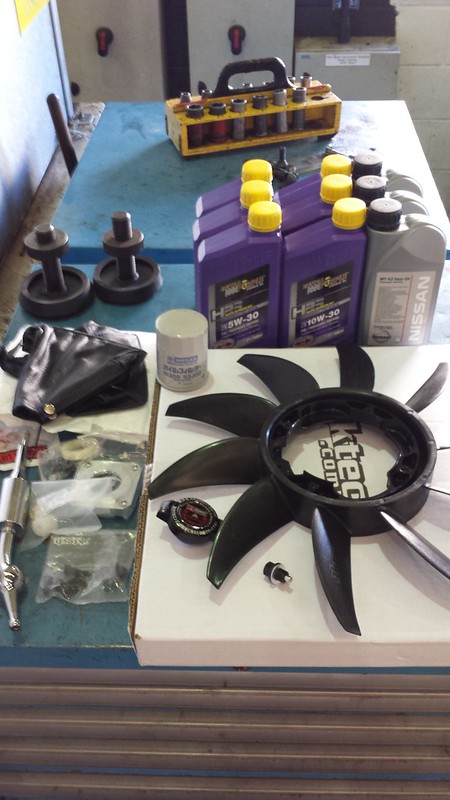
Used the day to service the engine and transmission oils, install a short shifter, replace the shifter and hand brake boot and install an uprated fan from an Australian company GKTech for the Nissan SR and RB engine series.
I drained the engine oil from the oil cooler as well since I didn't know what type or age of oil was present. I went with Royal Purple for the oil and mixed 5w-30/10w-30 for the 7.5w-30, which is what Nissan called for the engine, also changed the filter and went with the standard Nissan part 15208-53J00. I would have gone with an aftermarket option but haven't heard of any in particular to go with. I also installed an aftermarket Dirftworks magnetic oil pan plug and used the stock Nissan copper crush washers.
For the transmission oil, I used the standard Nissan oil (KE916-99932 75w-50 GL4+) since I've been dealing with some transmission whine. I have to say that there has only been a very minor improvement on the whine... it almost sounds like dog cut gears. I've got too much stuff going on to try and drop the gearbox just to open and look at it out of curiosity.
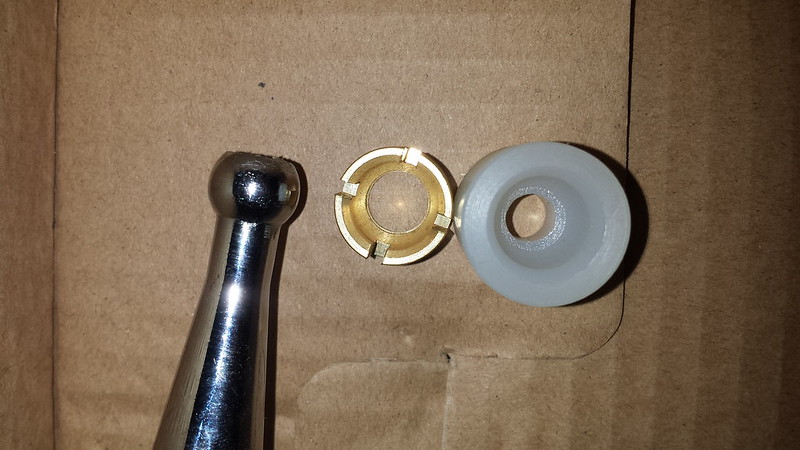
After sorting the oils I put in a short shifter. I had one in my old Skyline and missed how that felt. I ordered one online but the part showed with a larger nylon bushing at the base than what mine uses, which was fine since I was replacing it with a brass one. Here's the kit:

The larger bushing didn't matter as I was going to install the brass bushing:
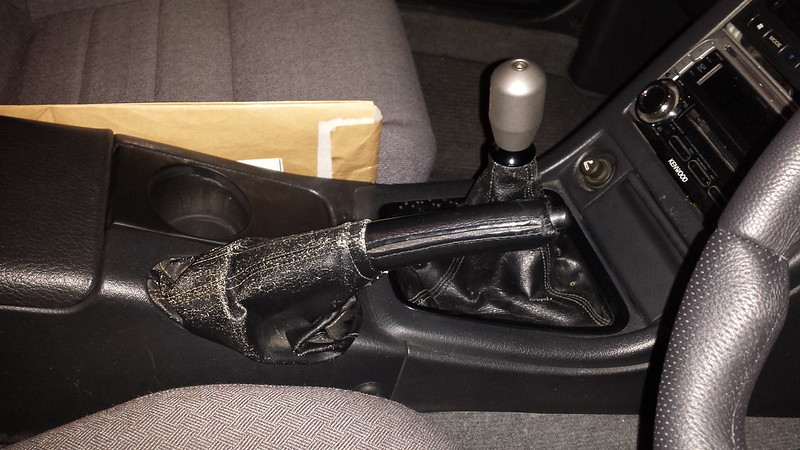
As most of the 20+ year older Skylines are, mine had the wear on the shifter and handbrake boots:
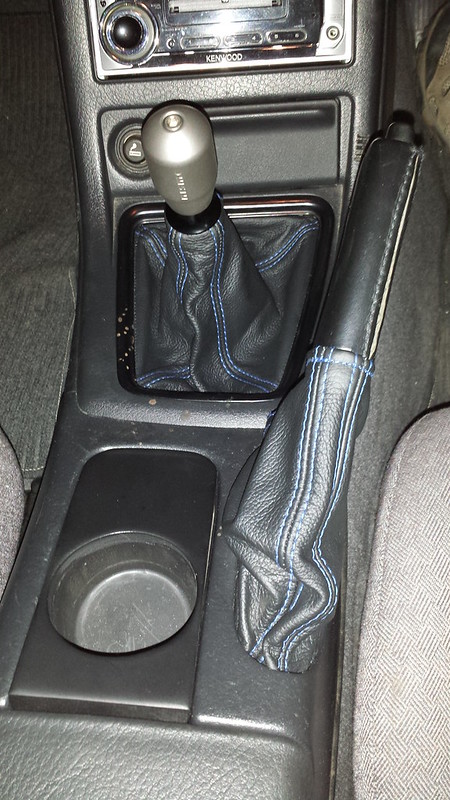
So I ordered the replacement boots. I went with black leather and blue stitching:

I think it turned out looking much better. Especially with the new shift boot adapter that sits well under the Nismo shift ****. Also with the new cup holder insert that has helped reduce my spills (though you can see in the picture it has not eliminated them):
Last on the list for that day was the fan. I ordered the GK Tech SR20 fan:S13/S14/S15 Replacement Engine fan - 60% more air flow It claims 40% more airflow than the RB25 stock fan and can be installed on the RB using the SR to RB fan adapter: SR to RB clutch fan adapter
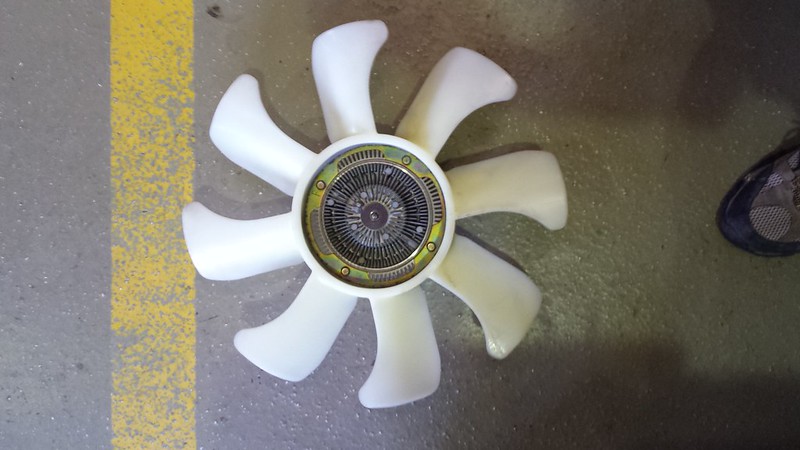
I took out the installed fan:
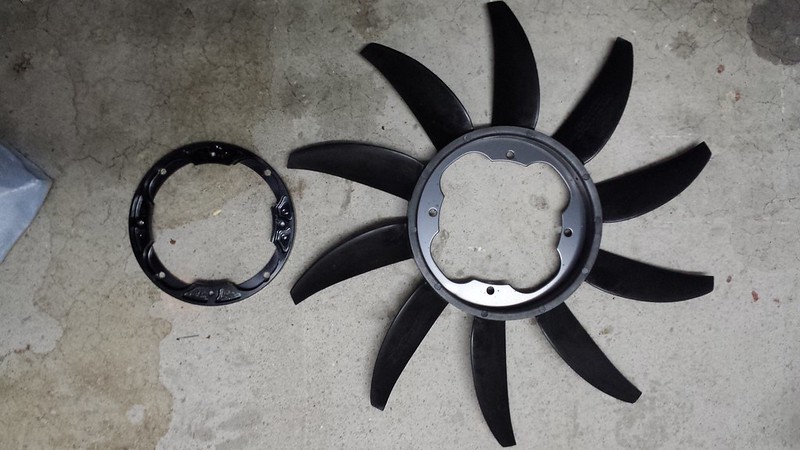
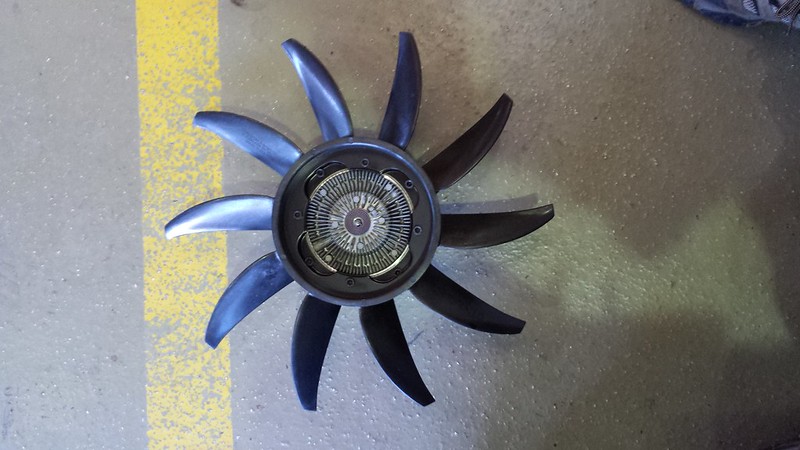
Next was breaking out the GK Tech fan and adapter and combining them:
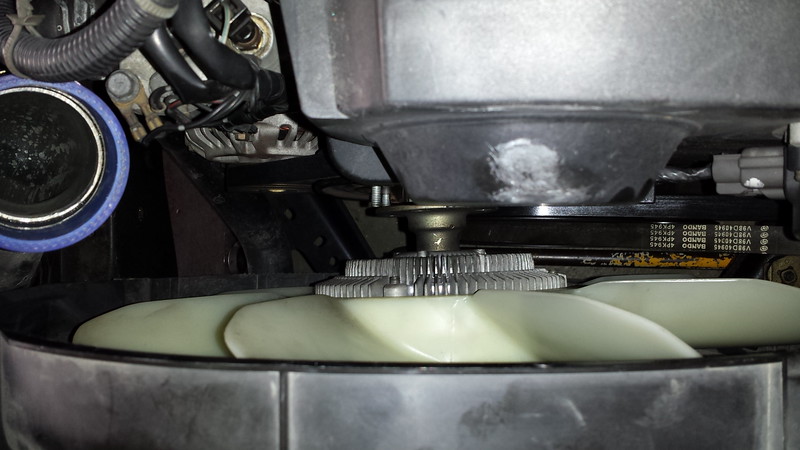
Here's the old and new installed. The new one is hard to see and I didn't do the best and getting the picture:

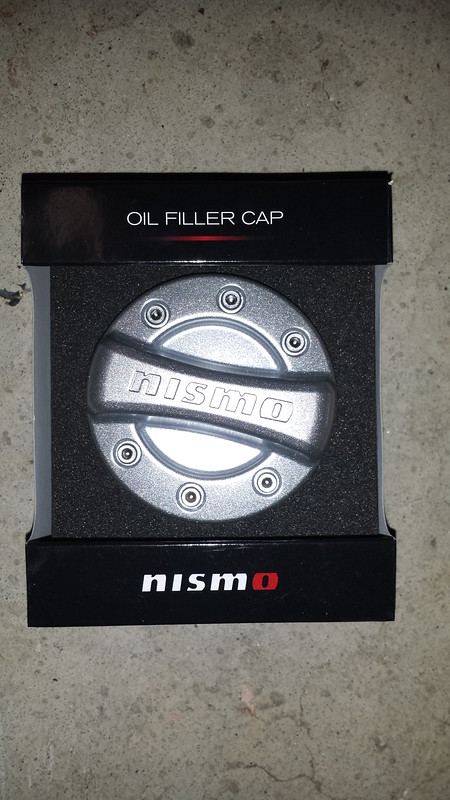
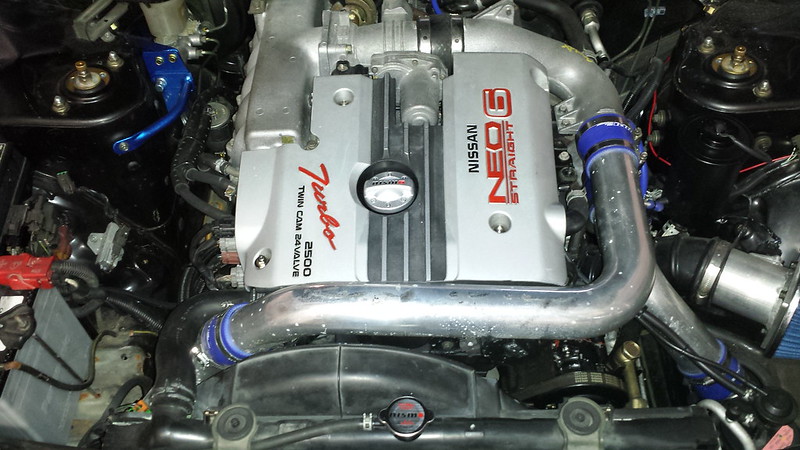
Up next is just some cleaning up of the engine bay for show purposes. Getting the Neo engine cover installed. I had to order a new bracket for the cover and the cover. Also found out I don't have the oil filler cap gasket (the installed funnel looking thing) so ordered one of those. I've the the Nismo ratcheting oil cap that's shown up:
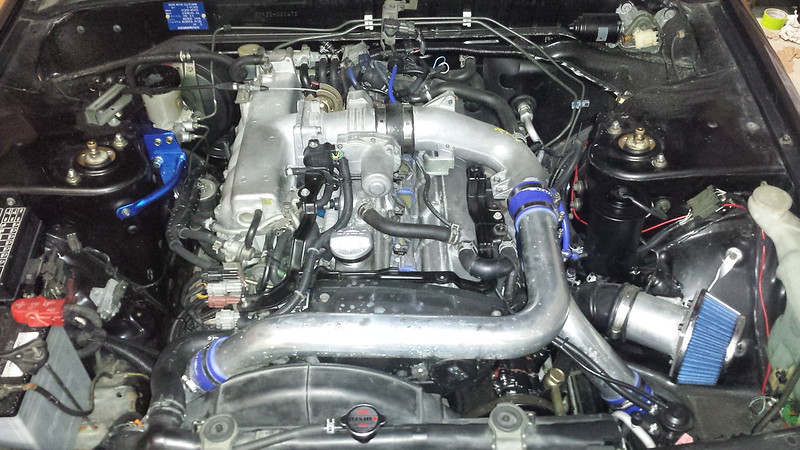
I got the Neo engine cover. It's a used one that wasn't in the greatest condition, but I knew I'd have to cut it down due to the intercooler piping and will clean it up. Here's the way the engine bay was looking:
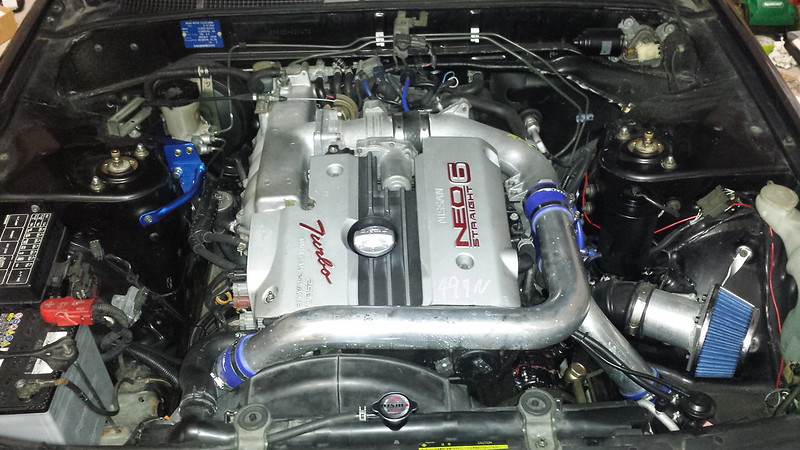
And with the Neo engine cover:
Used the day to service the engine and transmission oils, install a short shifter, replace the shifter and hand brake boot and install an uprated fan from an Australian company GKTech for the Nissan SR and RB engine series.
I drained the engine oil from the oil cooler as well since I didn't know what type or age of oil was present. I went with Royal Purple for the oil and mixed 5w-30/10w-30 for the 7.5w-30, which is what Nissan called for the engine, also changed the filter and went with the standard Nissan part 15208-53J00. I would have gone with an aftermarket option but haven't heard of any in particular to go with. I also installed an aftermarket Dirftworks magnetic oil pan plug and used the stock Nissan copper crush washers.
For the transmission oil, I used the standard Nissan oil (KE916-99932 75w-50 GL4+) since I've been dealing with some transmission whine. I have to say that there has only been a very minor improvement on the whine... it almost sounds like dog cut gears. I've got too much stuff going on to try and drop the gearbox just to open and look at it out of curiosity.
After sorting the oils I put in a short shifter. I had one in my old Skyline and missed how that felt. I ordered one online but the part showed with a larger nylon bushing at the base than what mine uses, which was fine since I was replacing it with a brass one. Here's the kit:
The larger bushing didn't matter as I was going to install the brass bushing:
As most of the 20+ year older Skylines are, mine had the wear on the shifter and handbrake boots:
So I ordered the replacement boots. I went with black leather and blue stitching:
I think it turned out looking much better. Especially with the new shift boot adapter that sits well under the Nismo shift ****. Also with the new cup holder insert that has helped reduce my spills (though you can see in the picture it has not eliminated them):
Last on the list for that day was the fan. I ordered the GK Tech SR20 fan:S13/S14/S15 Replacement Engine fan - 60% more air flow It claims 40% more airflow than the RB25 stock fan and can be installed on the RB using the SR to RB fan adapter: SR to RB clutch fan adapter
I took out the installed fan:
Next was breaking out the GK Tech fan and adapter and combining them:
Here's the old and new installed. The new one is hard to see and I didn't do the best and getting the picture:
Up next is just some cleaning up of the engine bay for show purposes. Getting the Neo engine cover installed. I had to order a new bracket for the cover and the cover. Also found out I don't have the oil filler cap gasket (the installed funnel looking thing) so ordered one of those. I've the the Nismo ratcheting oil cap that's shown up:
I got the Neo engine cover. It's a used one that wasn't in the greatest condition, but I knew I'd have to cut it down due to the intercooler piping and will clean it up. Here's the way the engine bay was looking:
And with the Neo engine cover:
Last edited by Norge; 04-17-2016 at 09:01 AM.
#12
04-17-2016, 09:02 AM
Got caught up on a few things. First I worked on the rear end, installed the SuperPro Poly rear subframe bushing inserts. I also replaced the GTS25 rear sway bar with a GTR sway bar.
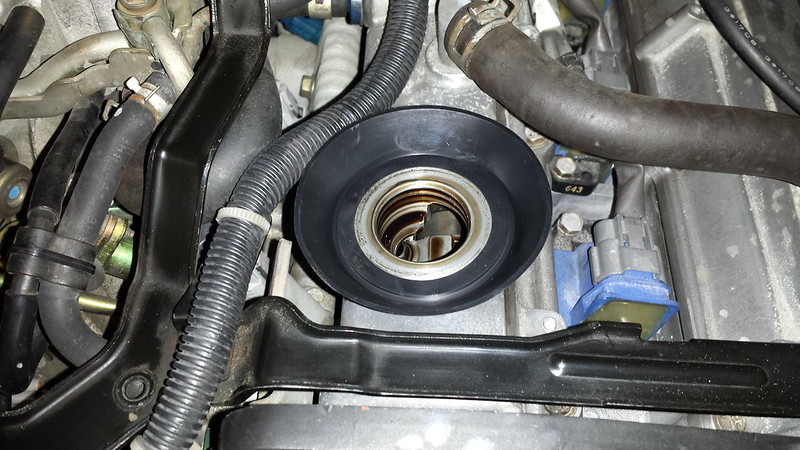
Next was catching up on some trim for the NEO engine cover. First was getting the oil filler cap gasket 13276-4P100 that surrounds the fill port so any spillover when filling doesn't run under the cover onto the engine:
Then I cleaned the engine cover as best I could, tried panting the red a brighter NISMO red shade. I also painted the previously unpainted Nissan indention and the raised 2500 etc lettering black so it stood out more:
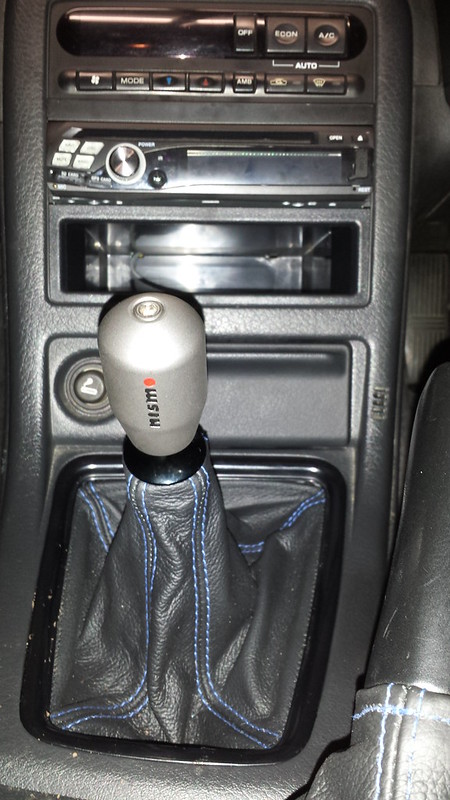
I also painted the NISMO oil cap letters. That led me to do the same to the shift ****:
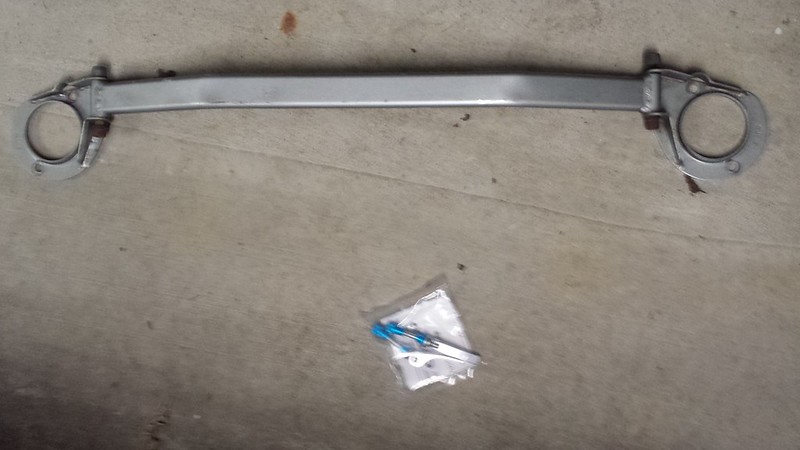
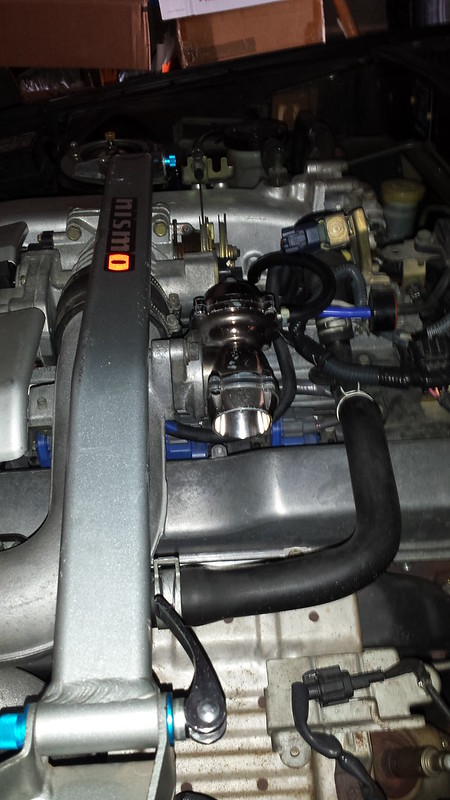
I'd also been fighting with finding a strut brace that would clear the NEO engine. After a long search, it looked like the NISMO strut brace would clear. Of course they are discontinued so I had to hunt for a used one. After some searching I finally found one that also happened to come with the rear strut brace also. I ordered them and they showed up this week. I also ordered a some quick releases for them. So I pulled out the front strut brace and used the CUSCO quick releases (sorry, blurry photo) and installed them:
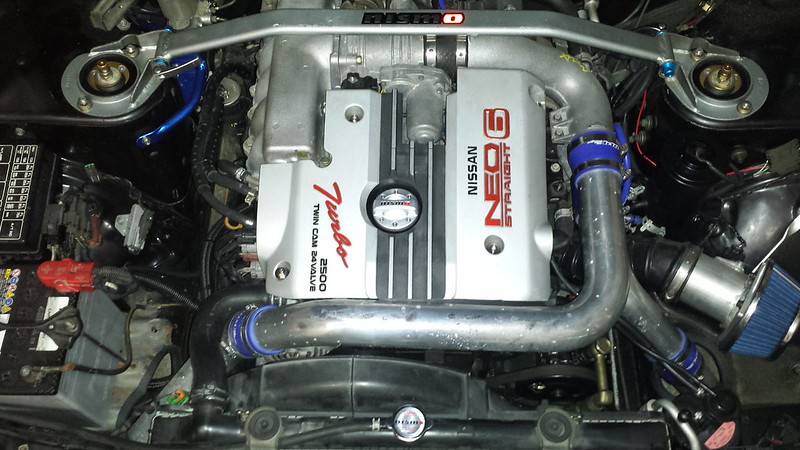
It just touches the rubber connection for the intake piping, the best fit I could ask for.
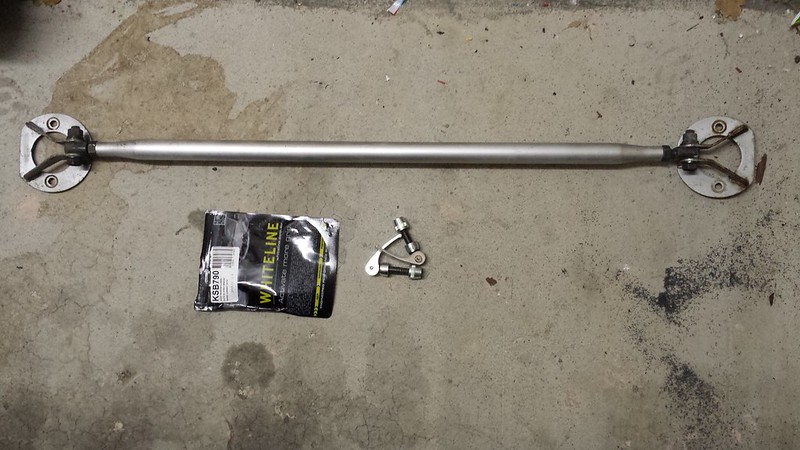
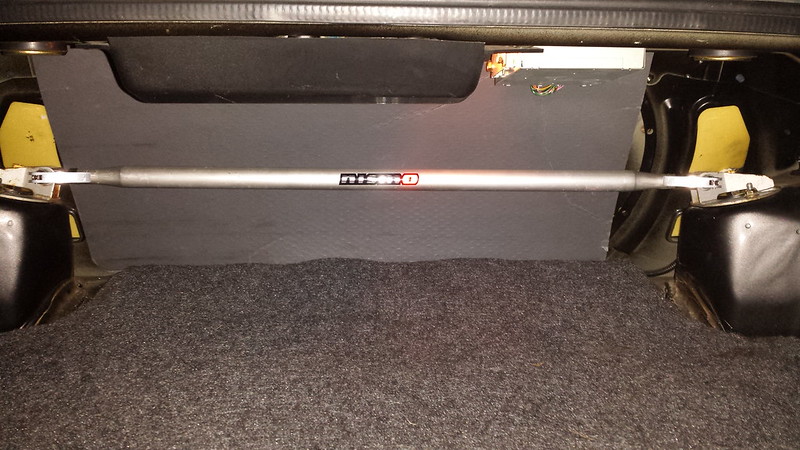
Next was pulling out the boot's rear side trim and getting the rear strut brace installed. For this I used the Whiteline quick releases:
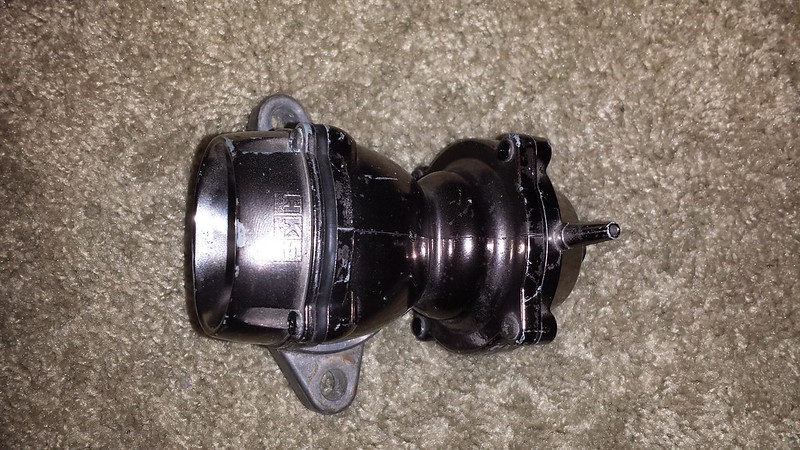
The last of the mods was to install a BOV. The engine had a cover put in on the recirc valve location, no BOV or recirc valve. My old Skyline had an early model HKS sequential BOV that I preferred. After finding one from on here and luckily finding an original HKS RB adapter on eBay that was cheap because the person didn't know what engine it was for I was able to get it together and installed:
That's it for now. The next project I'll be tackling is (hopefully) the Durango's brakes... The wheels have finally been shipped and hopefully will be here next week. The next things to do on the Skyline is getting an A-piller gauge pod, boost gauge and probably a turbo timer. There's some small things I'll have to look at sorting, trying to get the manual transmission lower instrument trim panel and the boot's side trim panels that can be cut up.
Next was catching up on some trim for the NEO engine cover. First was getting the oil filler cap gasket 13276-4P100 that surrounds the fill port so any spillover when filling doesn't run under the cover onto the engine:
Then I cleaned the engine cover as best I could, tried panting the red a brighter NISMO red shade. I also painted the previously unpainted Nissan indention and the raised 2500 etc lettering black so it stood out more:
I also painted the NISMO oil cap letters. That led me to do the same to the shift ****:
I'd also been fighting with finding a strut brace that would clear the NEO engine. After a long search, it looked like the NISMO strut brace would clear. Of course they are discontinued so I had to hunt for a used one. After some searching I finally found one that also happened to come with the rear strut brace also. I ordered them and they showed up this week. I also ordered a some quick releases for them. So I pulled out the front strut brace and used the CUSCO quick releases (sorry, blurry photo) and installed them:
It just touches the rubber connection for the intake piping, the best fit I could ask for.
Next was pulling out the boot's rear side trim and getting the rear strut brace installed. For this I used the Whiteline quick releases:
The last of the mods was to install a BOV. The engine had a cover put in on the recirc valve location, no BOV or recirc valve. My old Skyline had an early model HKS sequential BOV that I preferred. After finding one from on here and luckily finding an original HKS RB adapter on eBay that was cheap because the person didn't know what engine it was for I was able to get it together and installed:
That's it for now. The next project I'll be tackling is (hopefully) the Durango's brakes... The wheels have finally been shipped and hopefully will be here next week. The next things to do on the Skyline is getting an A-piller gauge pod, boost gauge and probably a turbo timer. There's some small things I'll have to look at sorting, trying to get the manual transmission lower instrument trim panel and the boot's side trim panels that can be cut up.
#14
04-24-2016, 01:16 AM
Thanks, the body style is a classic.
Here's where all the pics of the Laurel are: https://www.flickr.com/photos/545883...57624999663039
I still have a lot of work to do in that project.
Here's where all the pics of the Laurel are: https://www.flickr.com/photos/545883...57624999663039
I still have a lot of work to do in that project.
#16
04-25-2016, 07:28 AM
Thanks, the body style is a classic.
Here's where all the pics of the Laurel are: https://www.flickr.com/photos/545883...57624999663039
I still have a lot of work to do in that project.
Here's where all the pics of the Laurel are: https://www.flickr.com/photos/545883...57624999663039
I still have a lot of work to do in that project.
#17
05-28-2016, 12:53 PM
Time to get the audio sorted out. The factory original speakers have been in the car, so horrible sound and cutting out, the usual for an about 25 year old car. Since I finally updated the stereo head unit, the speakers were driving me nuts. Since I haven't updated speakers in a car since the last Skyline I owned (so 16 years ago!) I took my time figuring out decently cheap, good sound and well rated speakers. Keeping stock sizish, so the 4x6" fronts and with 6.5" rears. I went with Kickers, a change from my usual Kenwood taste. They showed and I decided to tackle the fronts first. I knew it wouldn't be just an easy install, it never is on Japanese cars since the speaker sizes and mounting holes are slightly different.
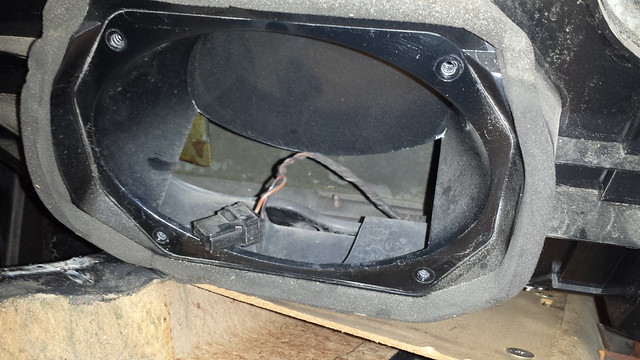
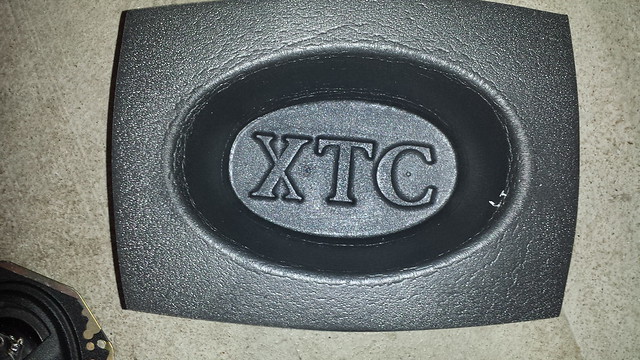
I started by getting the door panel off and seeing the usual defunct 25 year old speaker:
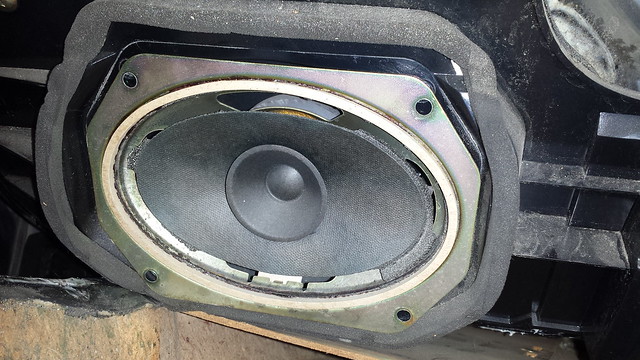
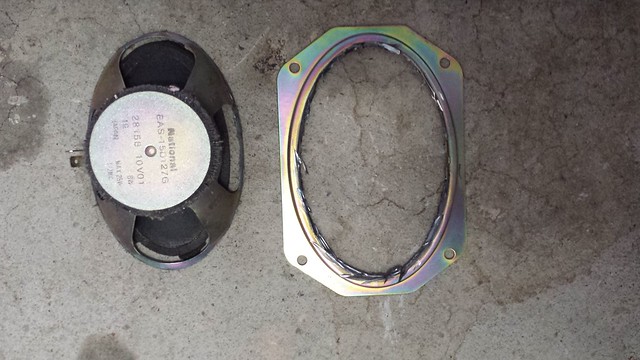
Got it pulled out and the surround is the usual and here's the speakers side by side:
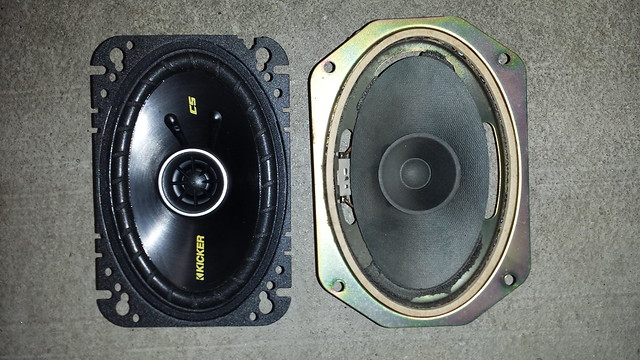
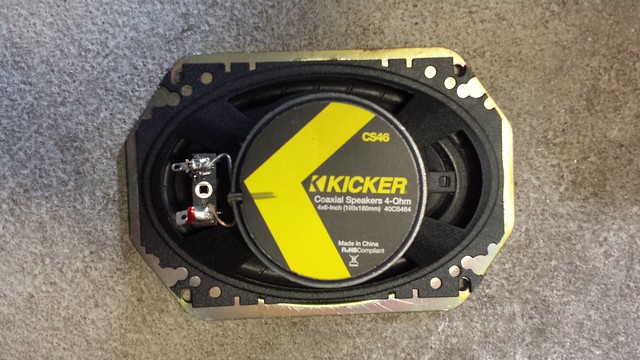
Of course the issue is that the new 4x6 corners don't quite fit the surround. and on top of that, the metal surround on the speaker didn't seem that strong, especially with the multiple holes it has:
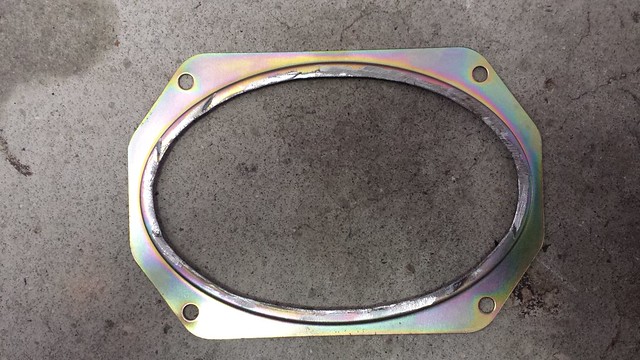
So, since the original speakers have the same size center, just the fixture part that's a little odd, I decided to use the old speakers surround as a fixture to hold the new ones in place. I started by first cutting the surround off, then grinding it smooth:
Now that it was cut out, reversed it and placed over the speaker as a mount fixture. You can see the corners that needed to be trimmed:

Trimmed the corners and checked for fitment:
As you can see, I decided to use baffles. I haven't used them in the past (I don't even think they had them back then), so figured I'd try them out and see if it helps with preventing some of the door vibration. The only issue is that they are deeper than needed:

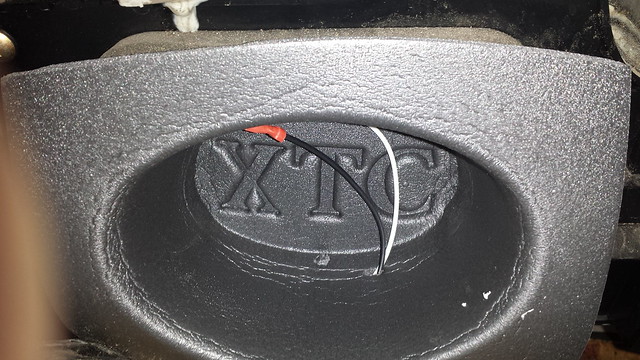
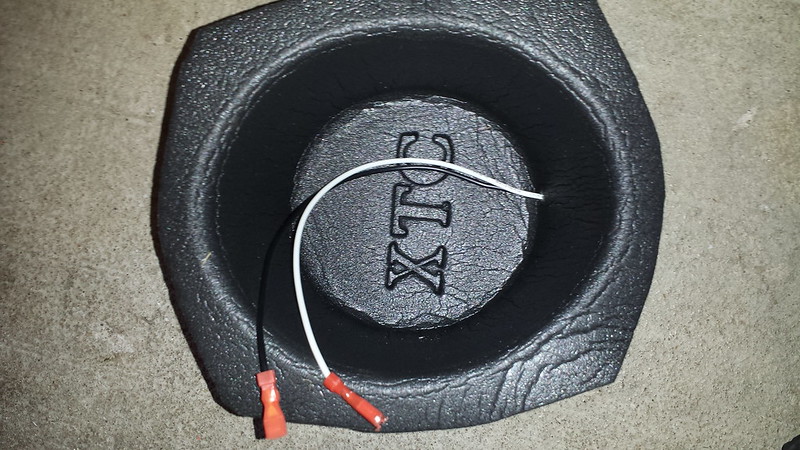
This was an issue due to the door mount depth, the baffle didn't fit in all the way. Here's getting the speaker lead adapter installed (didn't want to cut and splice wires):
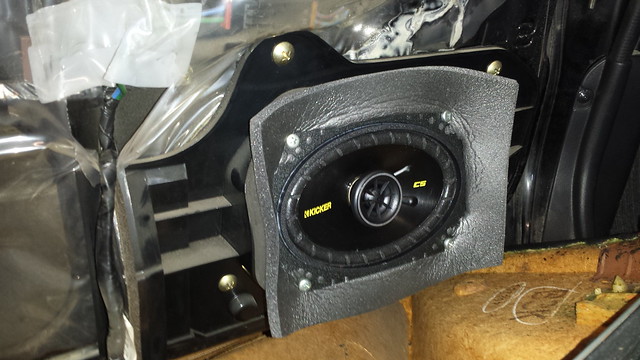
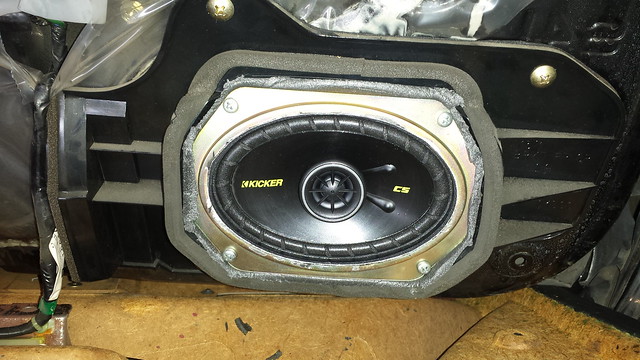
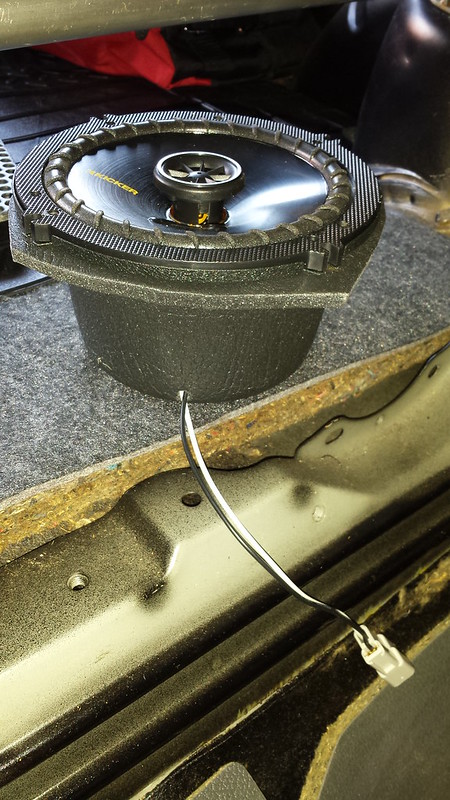
Because of this, the baffles had to be manhandled a little to have the speaker fit in deeper. This was helpful in using the original surround to sandwich over the speaker, and be able to hold being screwed in. Then got the baffle excess trimmed off and the speaker install was done... for the fronts:
After having the front speakers sorted I got around to getting the rears done. It was not just the rears speakers to replace on the to do list. There was also bypassing stock rear speaker amp, installing a subwoofer, getting a backup camera installed and also getting old FM/AM and TUNE buttons on the dash working again.
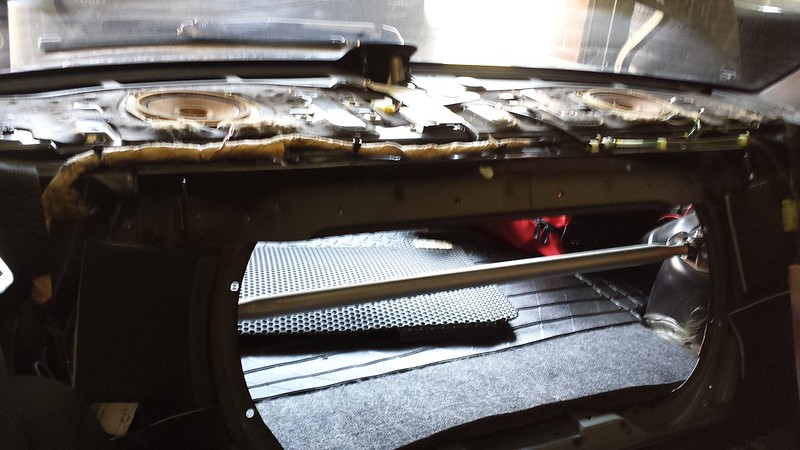
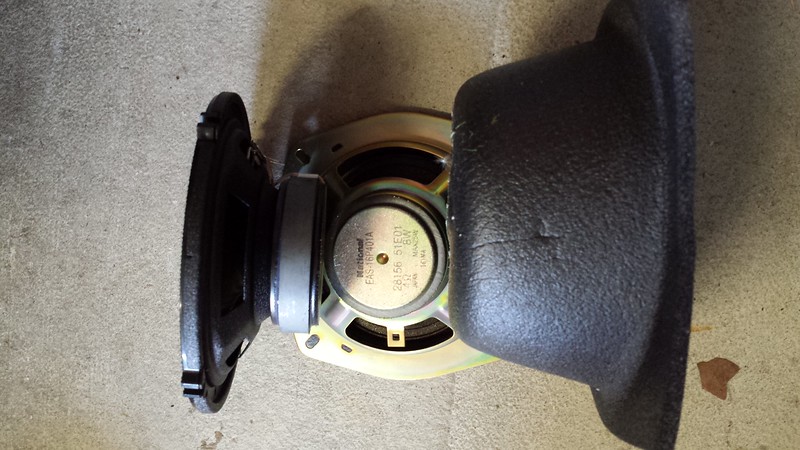
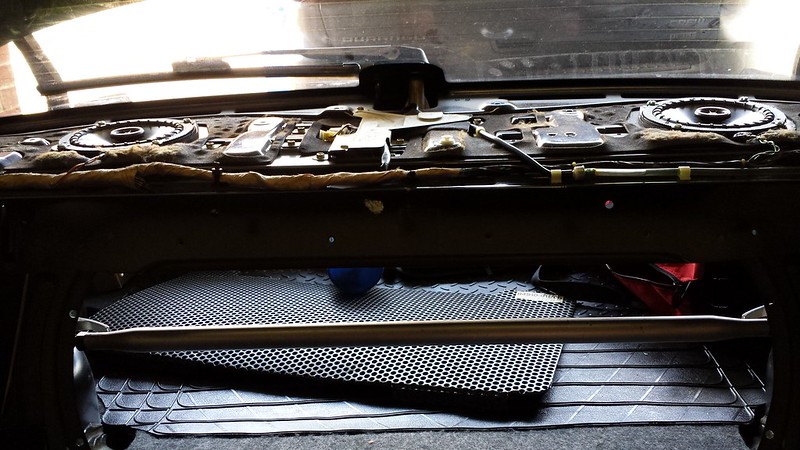
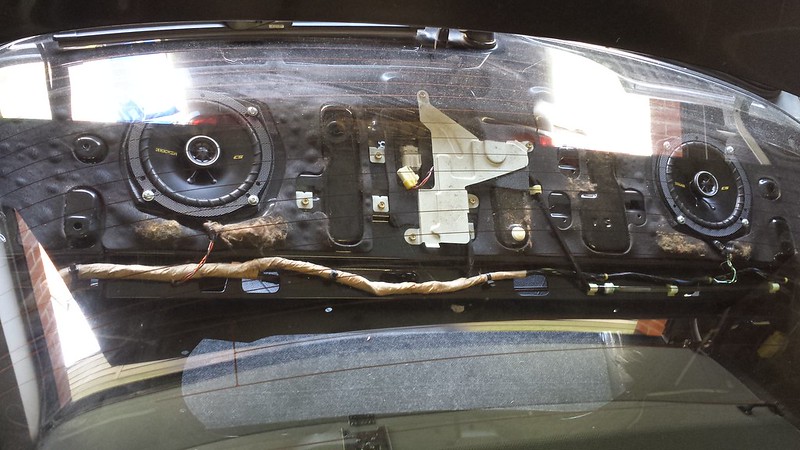
Since I had a lot to do, I decided to strip the rear seats. Here it is stripped and the old speakers:

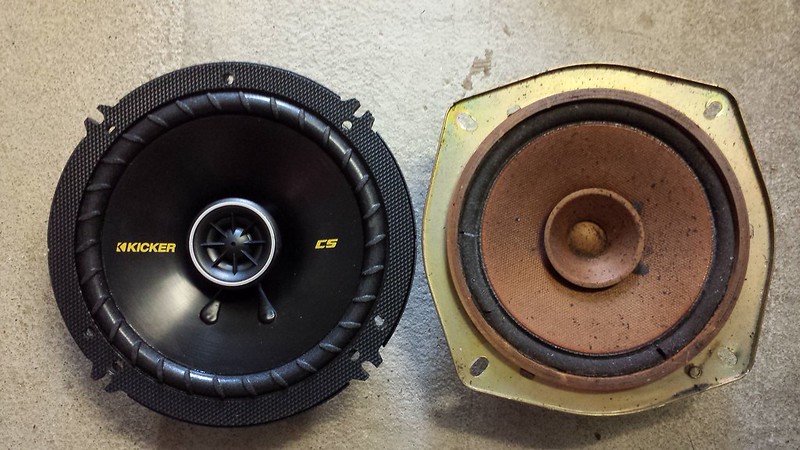
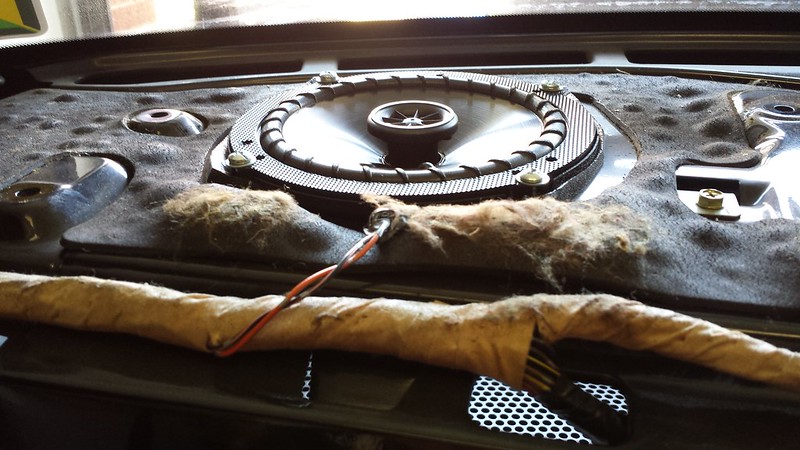
Here's the old and the new rear speakers:
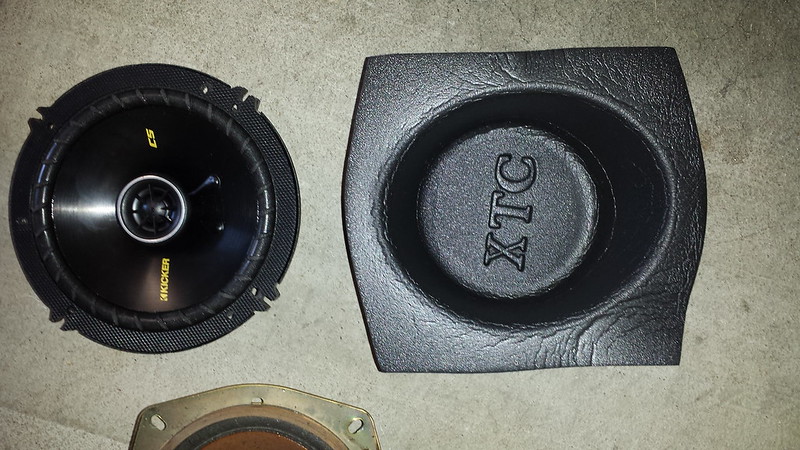
Again I'm using a baffle:
And here they are installed:
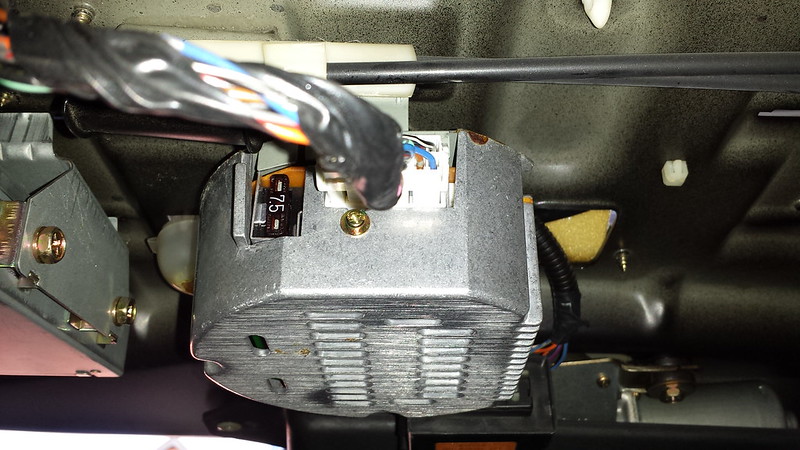
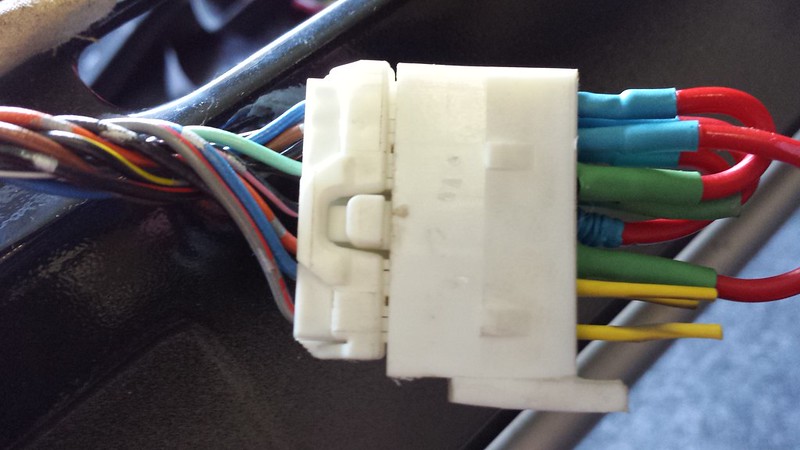
Next on the list was the rear amp bypass. The rear amp on this car works, so I wanted to bypass it as I'm keeping everything I can for potential next owner (I hope there isn't one, but planning for it) since these are becoming classics and someone may want to put it back to stock, or I can sell the amp to someone like that. The whole point was that I didn't want to cut the original harness. Before starting I had already made the bypass, using a connector from a bad amp:
So it was easy to disconnect from the old amp and install the bypass:
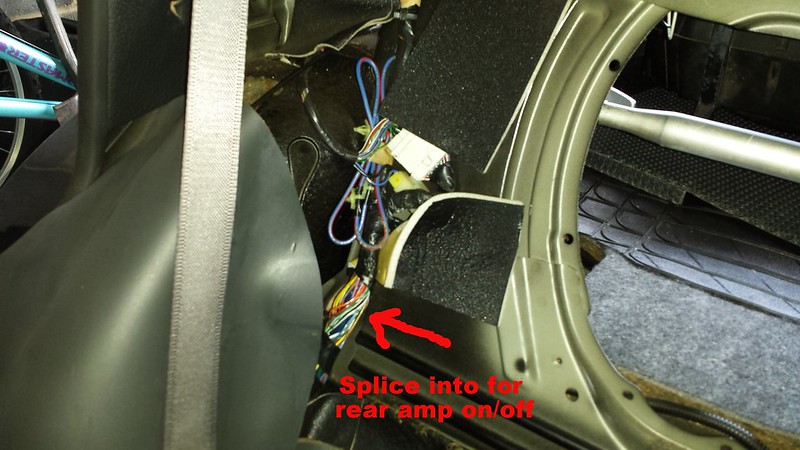
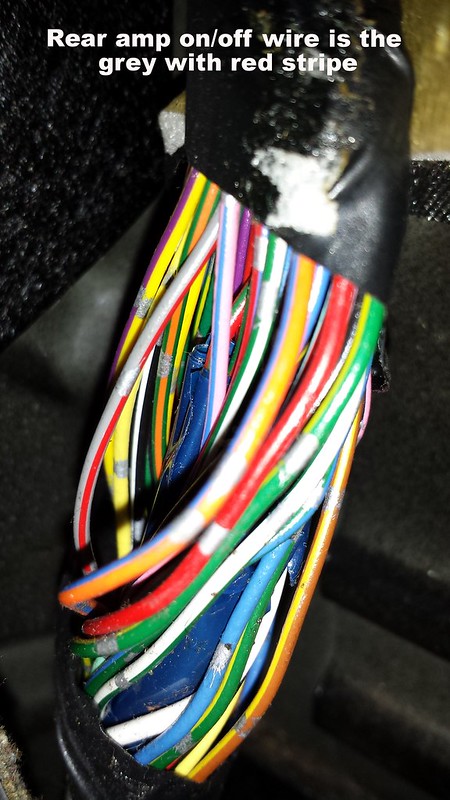
For the subwoofer, I needed to pick up the amp turn on/off wire. Since the rear amp needed one, I wanted to splice off that instead of running a new wire from the head unit. So I checked for the wire, followed it back and there was a good spot behind the seat to tap in:
There was nothing different with running the actual amp/sub's power and ground wires.
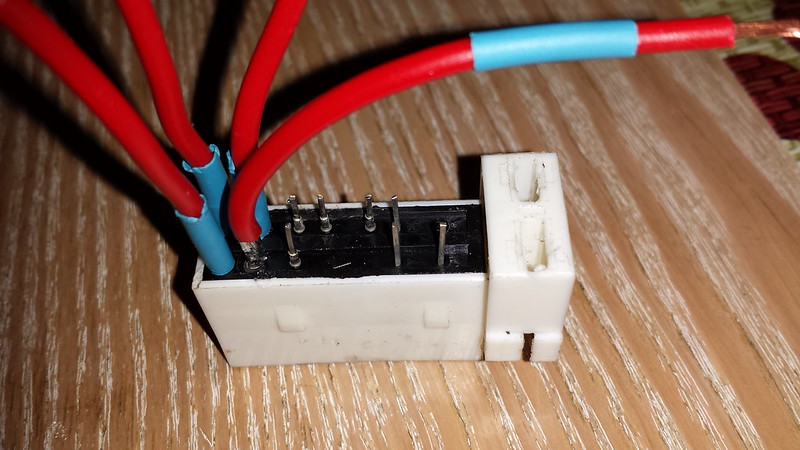
Next was figuring out how to use the FM/AM and TUNE buttons. The stereo I got can take steering wheel controls and you can program them differently. There's two inputs for them:
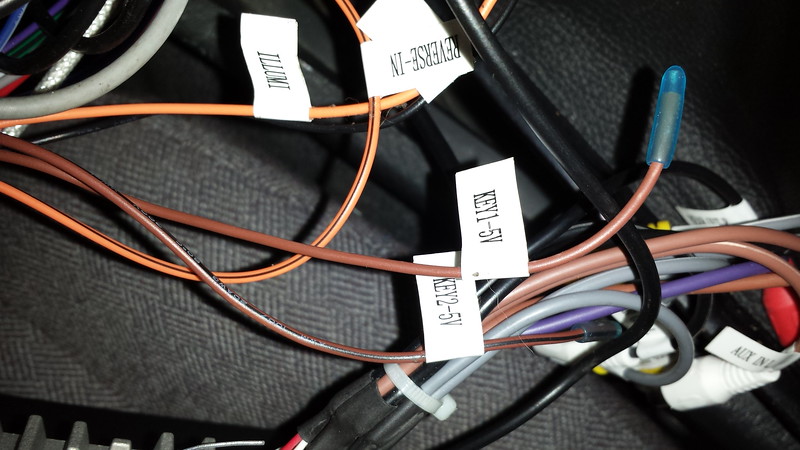
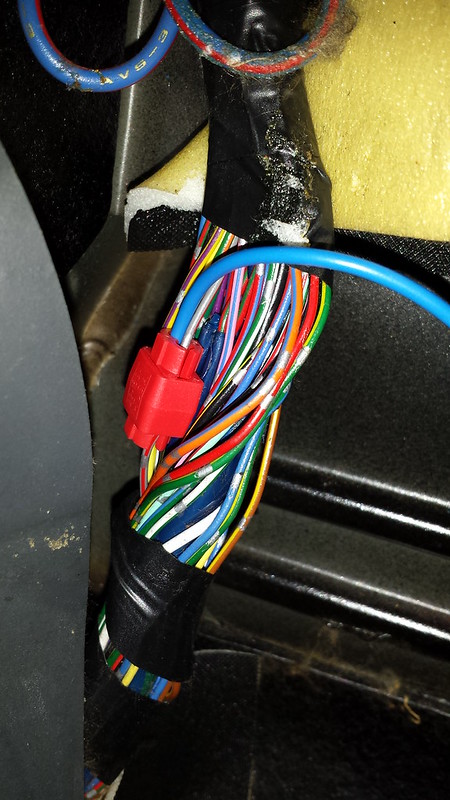
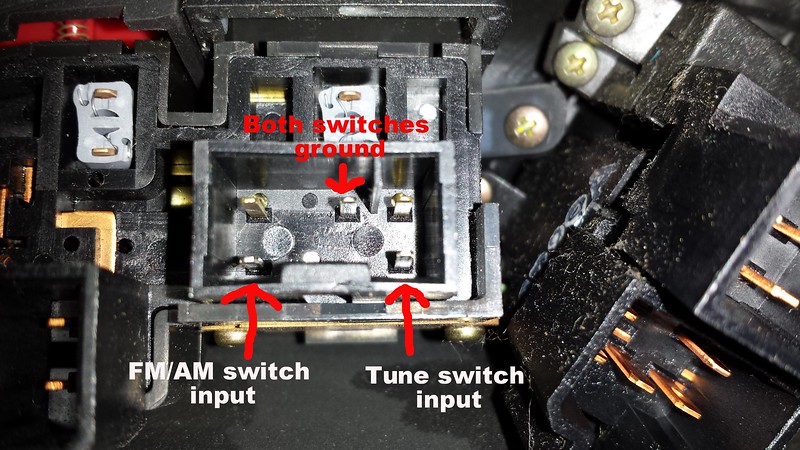
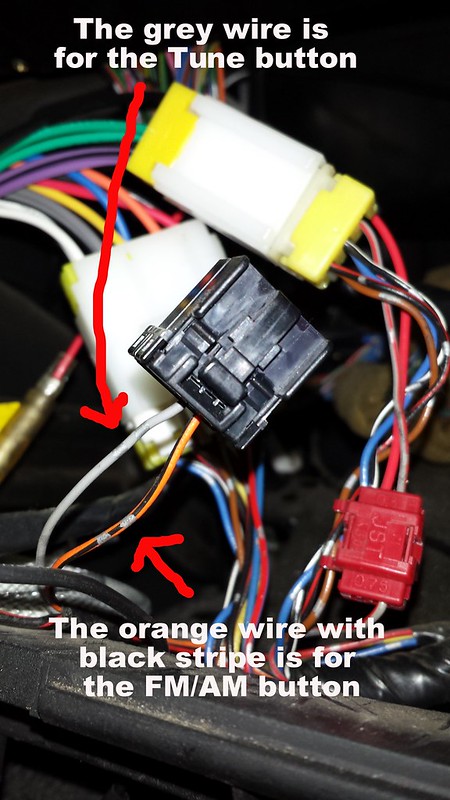
So I had to find out how the wiring went. I checked the switch and figured out which wire did which:
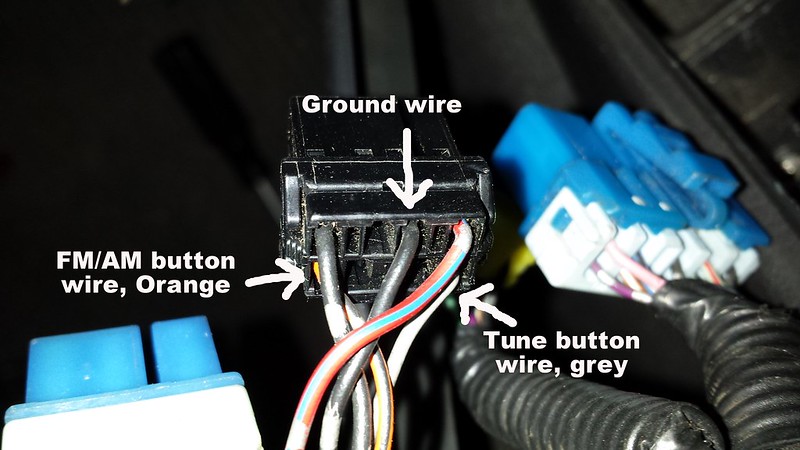
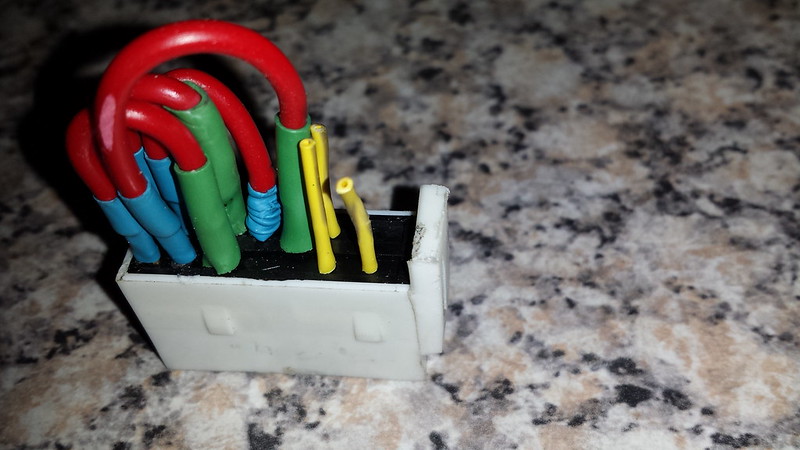
With that figured out, the stereo side was easy with the normally unused connector for aftermarket stereos:
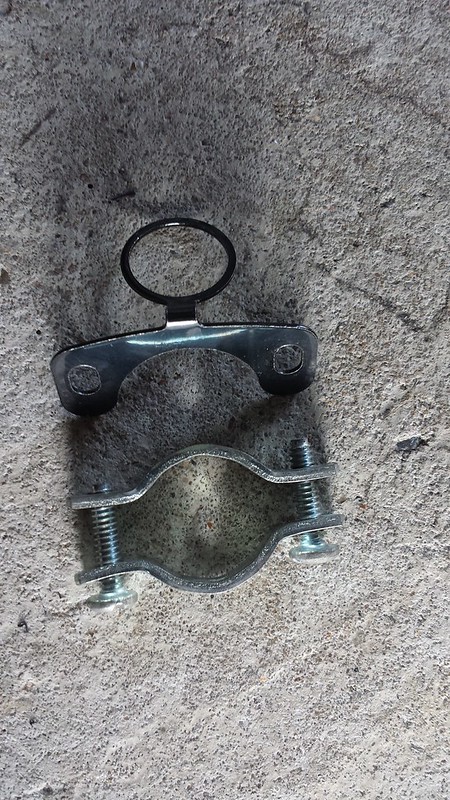
Having that sorted, I moved on to the reverse camera. The stereo came with the option, but I didn't get it at the time since buying one afterwards has the same price. Since it was pretty cheap to get one, I figured I'd add it since I was doing all this other work that would allow it to be routed in:
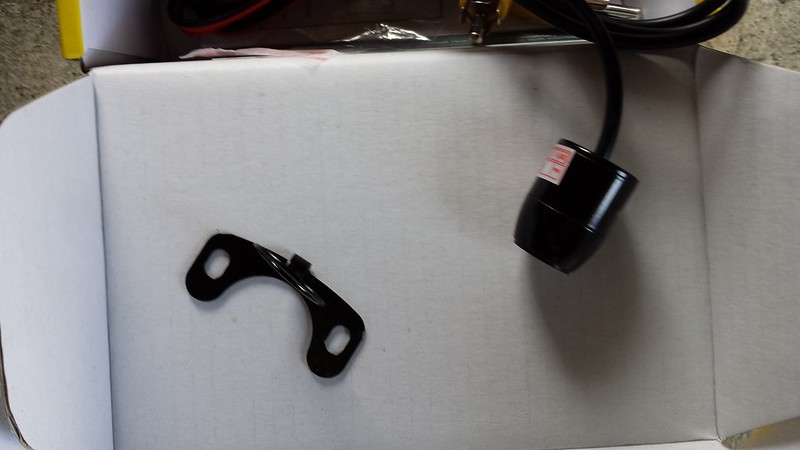
First I tested where I wanted it to fit:
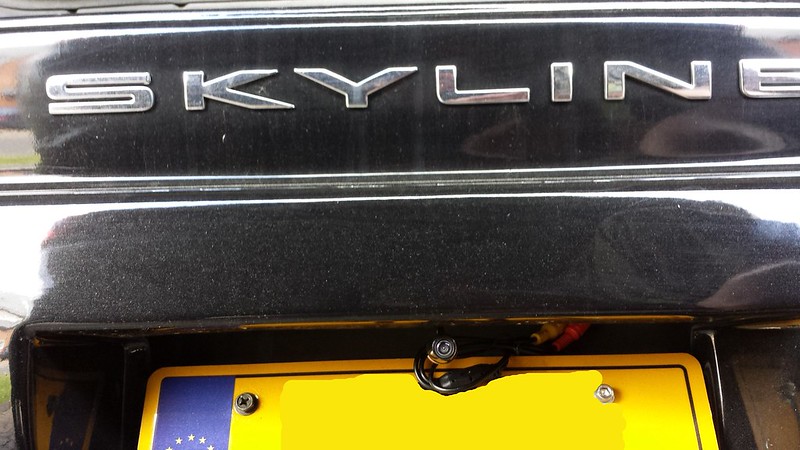
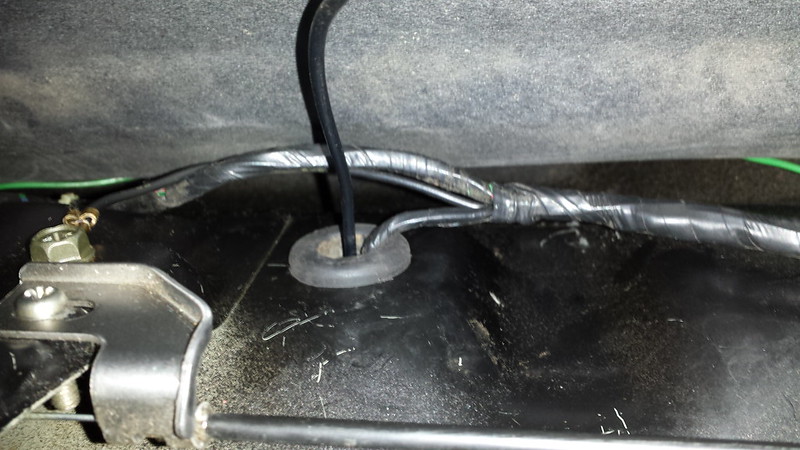
It was a bit of a struggle to get the power and video connectors for it through the grommet that goes through to the trunk for the license plate lights, but got it in the end:
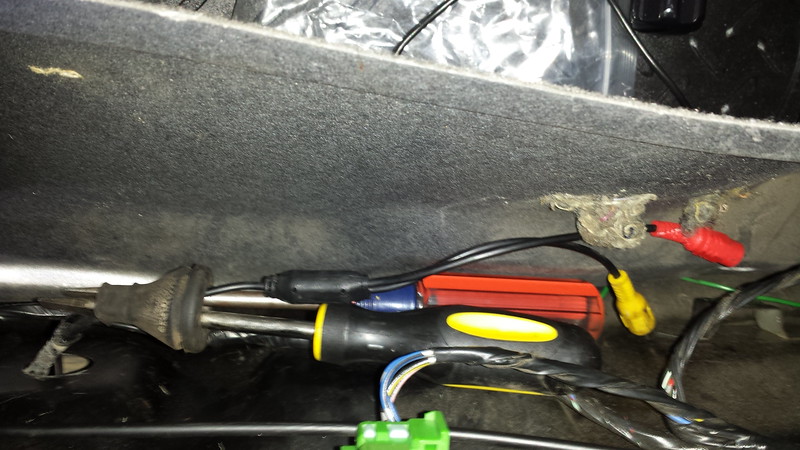
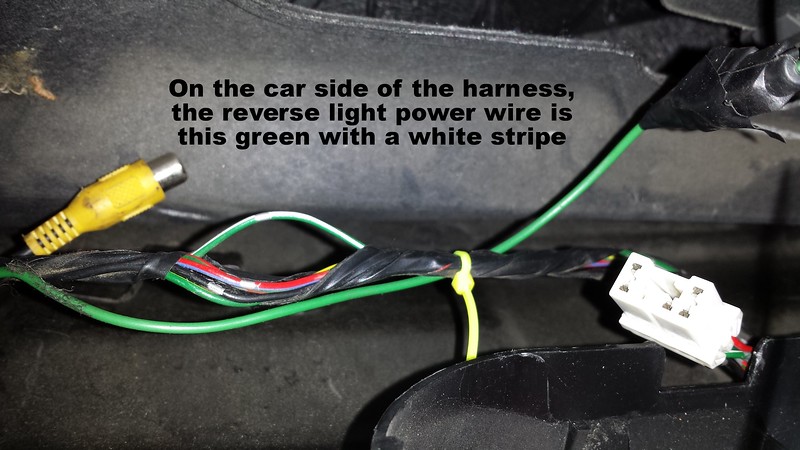
For the camera power, it splices into the reverse lights power wire. So I hunted that out. I found the wire to splice into:
So powering the camera was done and the video wire was easy to route. Next, the stereo needs a signal to switch to the backup camera. So I needed to get the reverse signal to it. The car was originally an automatic and the old instrument surround is there with the transmission indicators. So I decided to use the reverse indicator light power. First I had to find out which pin is the reverse indicator power:
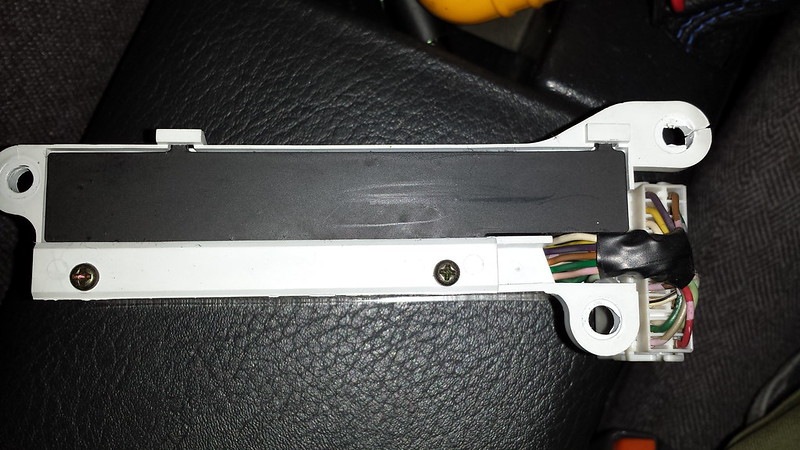
Since it had been painted over, I had to disassemble the front to get to the side that showed the indications and match up which light holder it is:
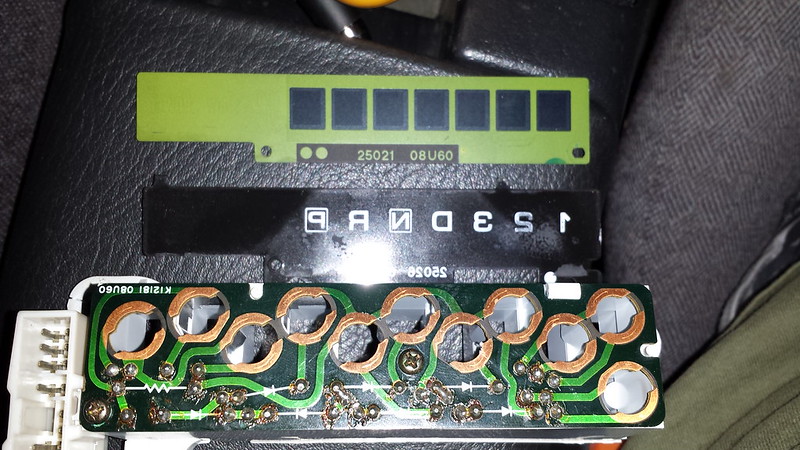
Next I shot to which pin on the connector it is:

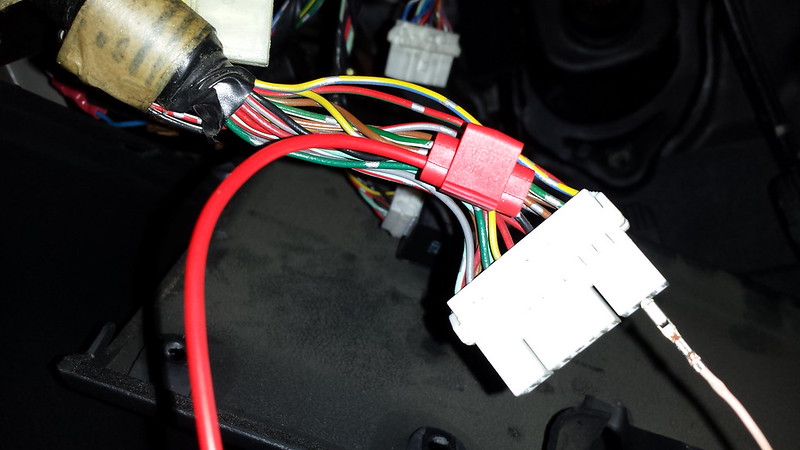
With that figured out, it was a green wire on the vehicle side to splice into and run to the stereo:


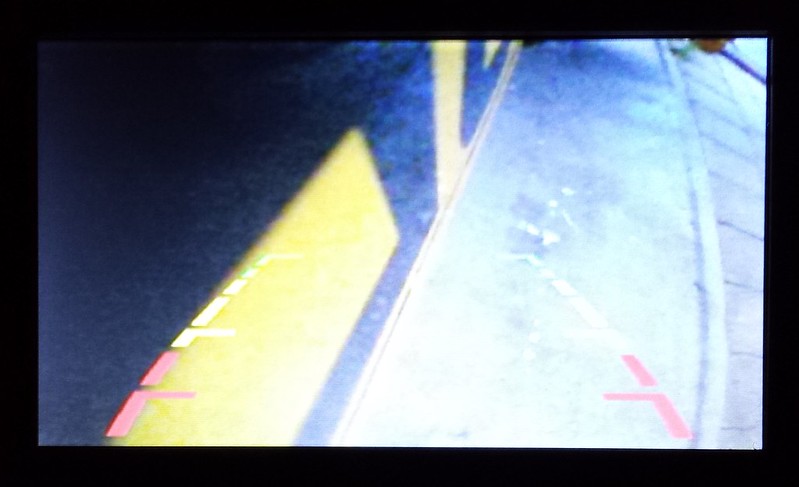
At this point, the camera hadn't been mounted to the bumper. So I turned it on to see if it would work:
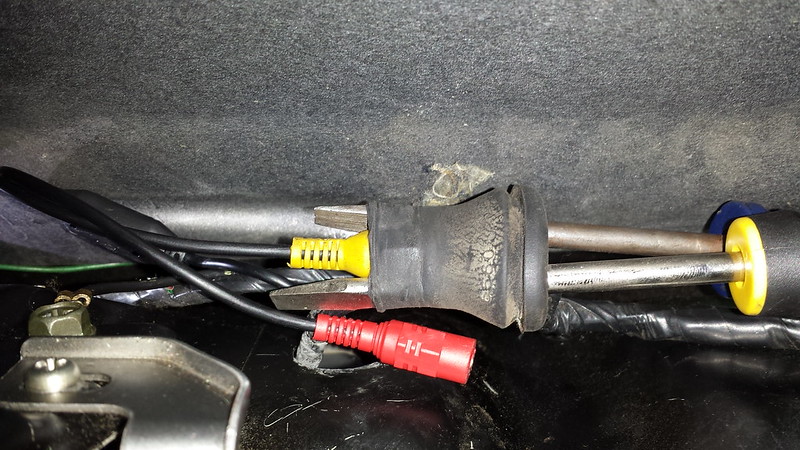
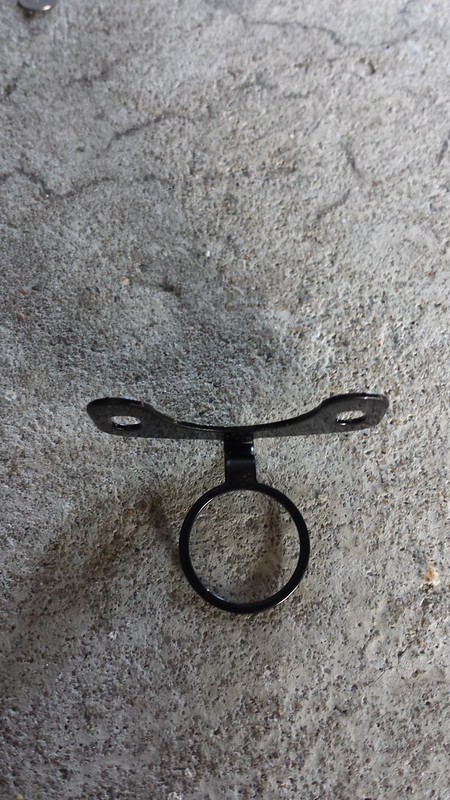
Next was working on mounting the camera to the bumper since it works. The mount is very simple:
Where I mounted it, there's not the greatest access and I needed a bot/nut setup over the screws it came with. I was trying to find the ridiculously small hardware to mount it in my scrounge of stuff. When looking, I found that an electrical wire clamp from an old electrical box or something was a perfect size and spacing:
So I changed the setup to match what I needed:
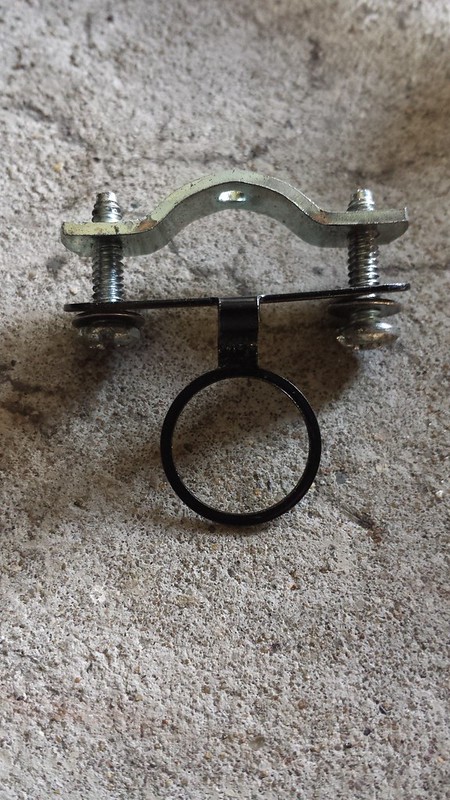
matched up where center was and drilled to install:
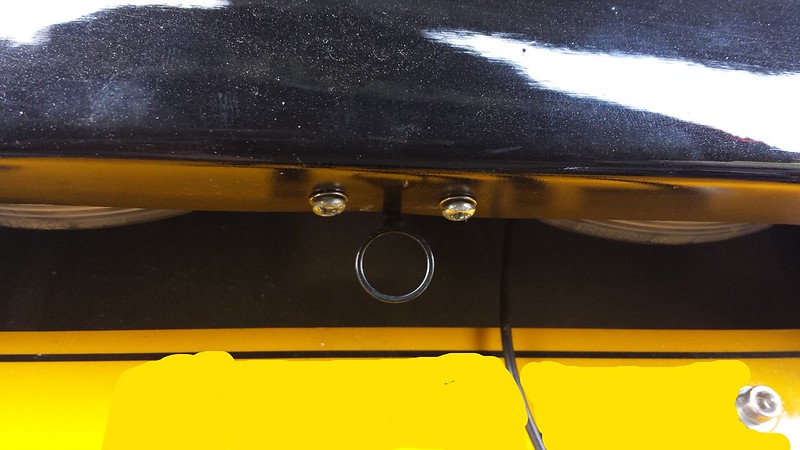
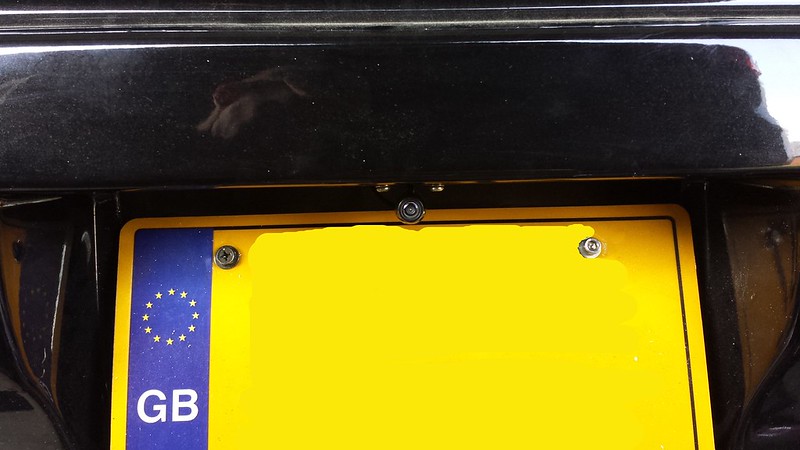
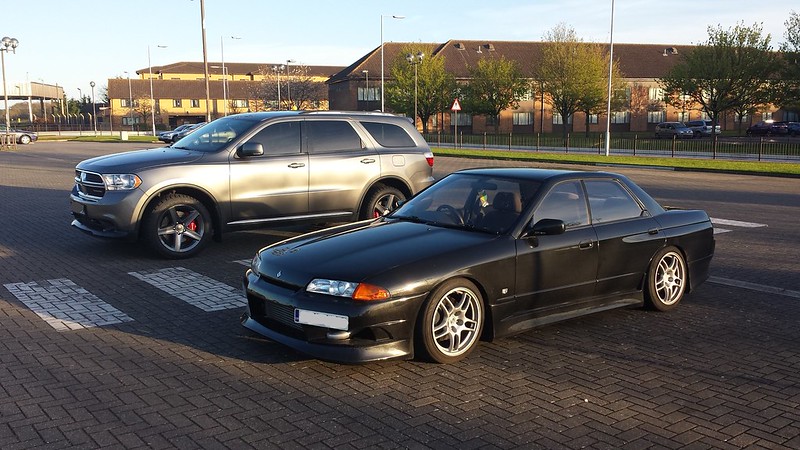
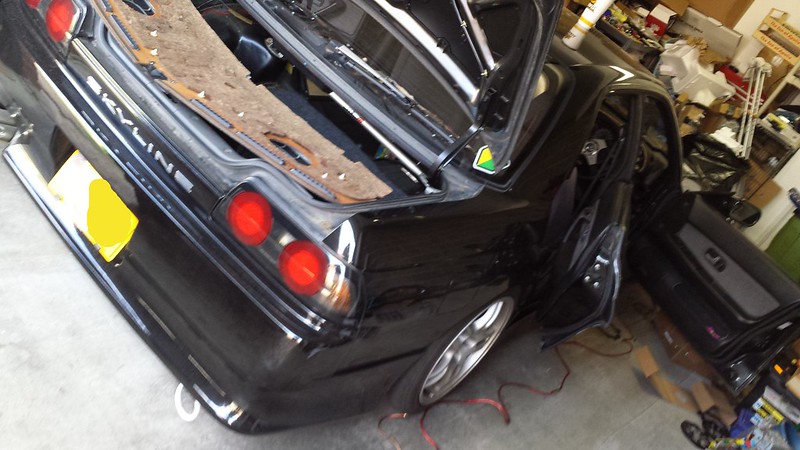
With it all mounted and wired in, tried it again and it works great! (note the gratuitous shot of the Durango behind the car):

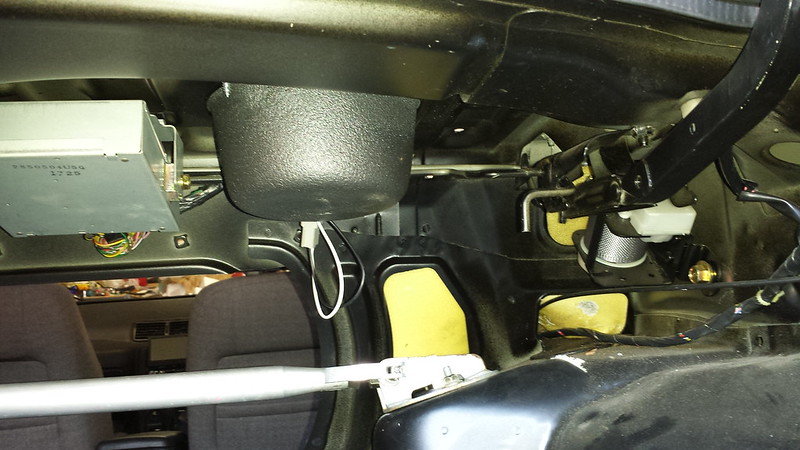
Then it was time to put everything back together. So this amazing mess of wires is back in place:
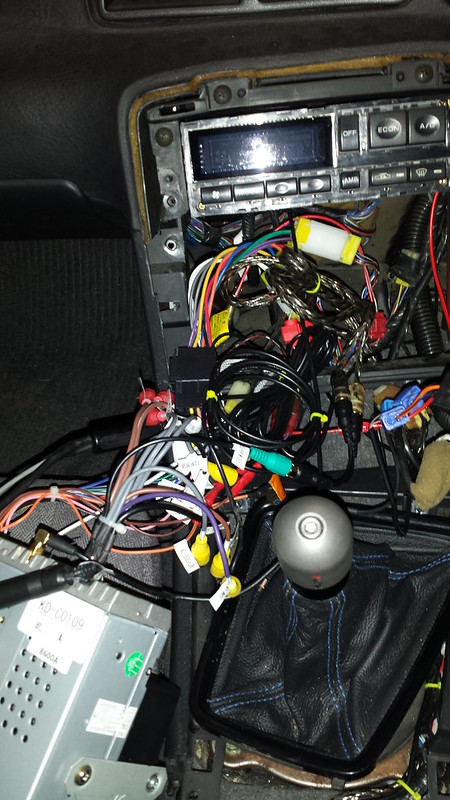
The dash before reassembly:
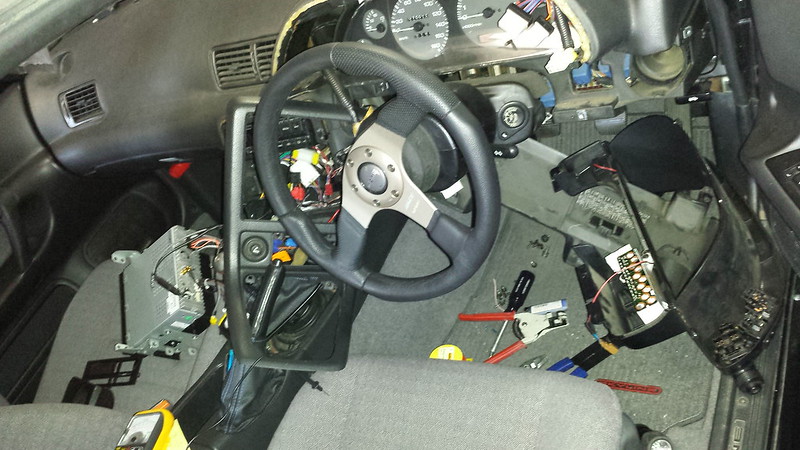
And the car back from this:
To this:
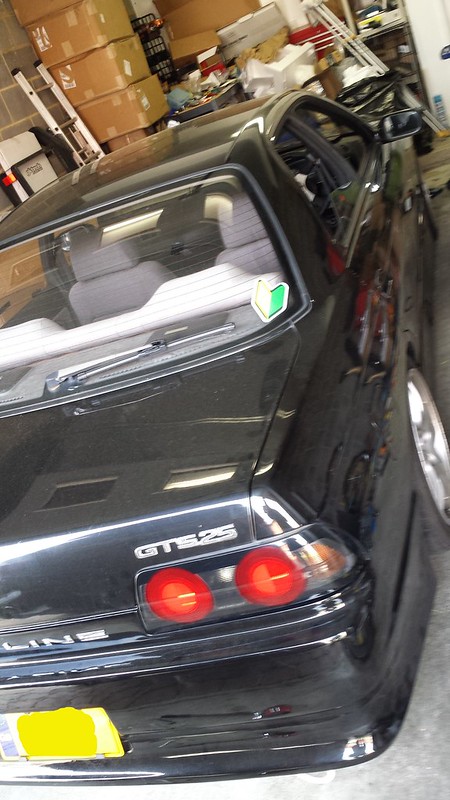
And lastly, a gratuitous shot of the Durango and Skyline:
I started by getting the door panel off and seeing the usual defunct 25 year old speaker:
Got it pulled out and the surround is the usual and here's the speakers side by side:
Of course the issue is that the new 4x6 corners don't quite fit the surround. and on top of that, the metal surround on the speaker didn't seem that strong, especially with the multiple holes it has:
So, since the original speakers have the same size center, just the fixture part that's a little odd, I decided to use the old speakers surround as a fixture to hold the new ones in place. I started by first cutting the surround off, then grinding it smooth:
Now that it was cut out, reversed it and placed over the speaker as a mount fixture. You can see the corners that needed to be trimmed:
Trimmed the corners and checked for fitment:
As you can see, I decided to use baffles. I haven't used them in the past (I don't even think they had them back then), so figured I'd try them out and see if it helps with preventing some of the door vibration. The only issue is that they are deeper than needed:
This was an issue due to the door mount depth, the baffle didn't fit in all the way. Here's getting the speaker lead adapter installed (didn't want to cut and splice wires):
Because of this, the baffles had to be manhandled a little to have the speaker fit in deeper. This was helpful in using the original surround to sandwich over the speaker, and be able to hold being screwed in. Then got the baffle excess trimmed off and the speaker install was done... for the fronts:
After having the front speakers sorted I got around to getting the rears done. It was not just the rears speakers to replace on the to do list. There was also bypassing stock rear speaker amp, installing a subwoofer, getting a backup camera installed and also getting old FM/AM and TUNE buttons on the dash working again.
Since I had a lot to do, I decided to strip the rear seats. Here it is stripped and the old speakers:
Here's the old and the new rear speakers:
Again I'm using a baffle:
And here they are installed:
Next on the list was the rear amp bypass. The rear amp on this car works, so I wanted to bypass it as I'm keeping everything I can for potential next owner (I hope there isn't one, but planning for it) since these are becoming classics and someone may want to put it back to stock, or I can sell the amp to someone like that. The whole point was that I didn't want to cut the original harness. Before starting I had already made the bypass, using a connector from a bad amp:
So it was easy to disconnect from the old amp and install the bypass:
For the subwoofer, I needed to pick up the amp turn on/off wire. Since the rear amp needed one, I wanted to splice off that instead of running a new wire from the head unit. So I checked for the wire, followed it back and there was a good spot behind the seat to tap in:
There was nothing different with running the actual amp/sub's power and ground wires.
Next was figuring out how to use the FM/AM and TUNE buttons. The stereo I got can take steering wheel controls and you can program them differently. There's two inputs for them:
So I had to find out how the wiring went. I checked the switch and figured out which wire did which:
With that figured out, the stereo side was easy with the normally unused connector for aftermarket stereos:
Having that sorted, I moved on to the reverse camera. The stereo came with the option, but I didn't get it at the time since buying one afterwards has the same price. Since it was pretty cheap to get one, I figured I'd add it since I was doing all this other work that would allow it to be routed in:
First I tested where I wanted it to fit:
It was a bit of a struggle to get the power and video connectors for it through the grommet that goes through to the trunk for the license plate lights, but got it in the end:
For the camera power, it splices into the reverse lights power wire. So I hunted that out. I found the wire to splice into:
So powering the camera was done and the video wire was easy to route. Next, the stereo needs a signal to switch to the backup camera. So I needed to get the reverse signal to it. The car was originally an automatic and the old instrument surround is there with the transmission indicators. So I decided to use the reverse indicator light power. First I had to find out which pin is the reverse indicator power:
Since it had been painted over, I had to disassemble the front to get to the side that showed the indications and match up which light holder it is:
Next I shot to which pin on the connector it is:
With that figured out, it was a green wire on the vehicle side to splice into and run to the stereo:
At this point, the camera hadn't been mounted to the bumper. So I turned it on to see if it would work:
Next was working on mounting the camera to the bumper since it works. The mount is very simple:
Where I mounted it, there's not the greatest access and I needed a bot/nut setup over the screws it came with. I was trying to find the ridiculously small hardware to mount it in my scrounge of stuff. When looking, I found that an electrical wire clamp from an old electrical box or something was a perfect size and spacing:
So I changed the setup to match what I needed:
matched up where center was and drilled to install:
With it all mounted and wired in, tried it again and it works great! (note the gratuitous shot of the Durango behind the car):
Then it was time to put everything back together. So this amazing mess of wires is back in place:
The dash before reassembly:
And the car back from this:
To this:
And lastly, a gratuitous shot of the Durango and Skyline:
Last edited by Norge; 05-28-2016 at 12:56 PM.
#18
05-28-2016, 02:38 PM
Always like the skylines...I'm drawn to the not so common and I've only seen a couple of these in the states in the past 25 years. I must commend you on the time you've taken to document your work. I'm building a 90 dak convertible and I don't take near the time to document the process...so kudos to you sir!
#19
03-08-2017, 02:26 PM
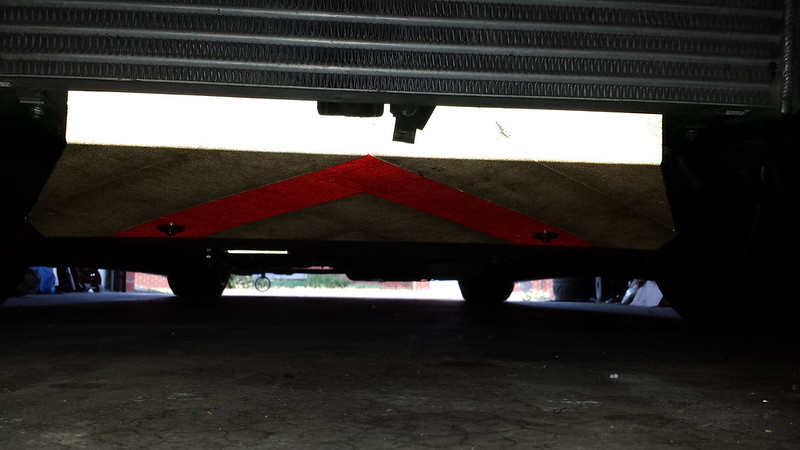
Been slowly progressing on this. There was no underside protection, the stock plastic cover was removed when I'd gotten it. So I ordered a metal skid plate to protect it since it's a low car.
So here's what it was like before without the original plastic underbody piece:
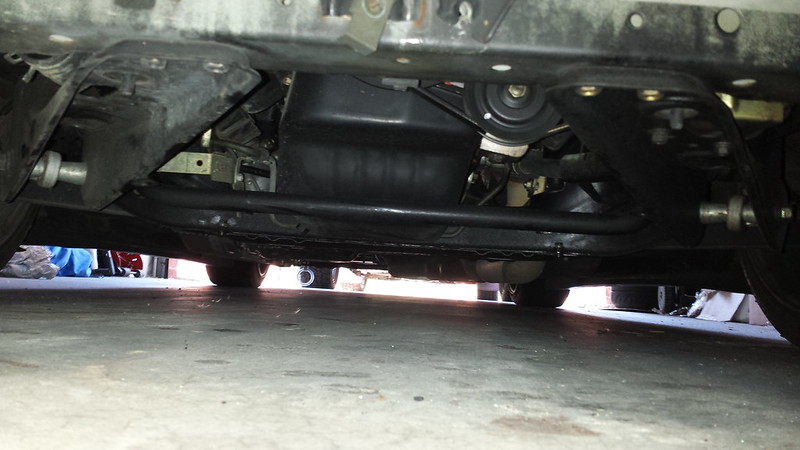
And with the skid plate on:
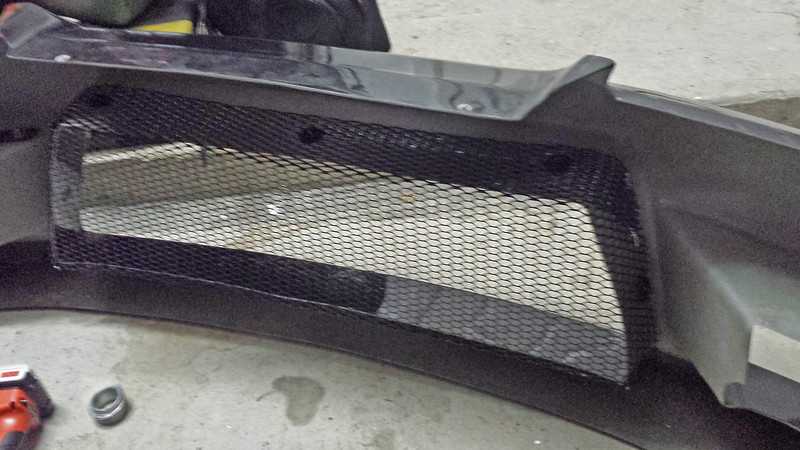
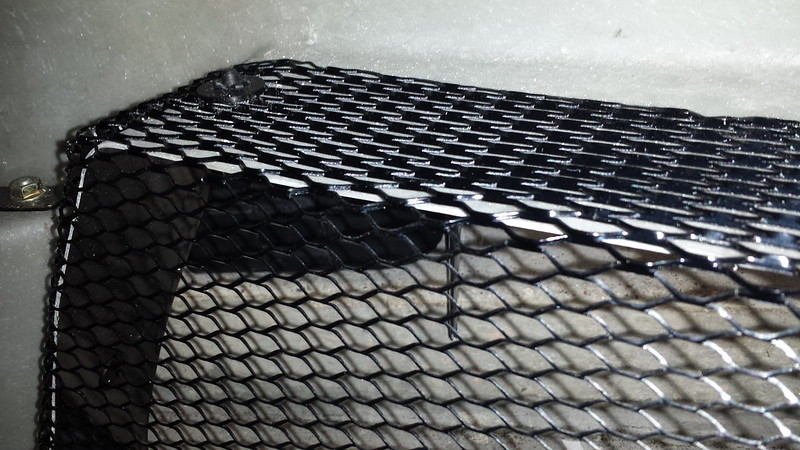
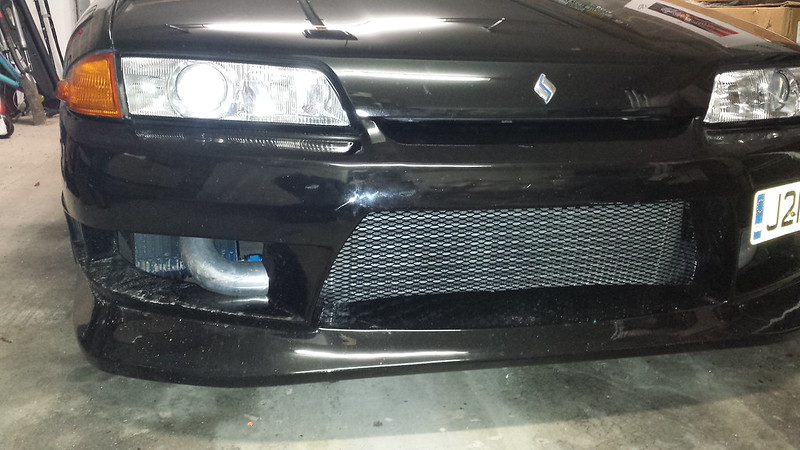
Next was putting aluminum mesh on in front of the intercooler, part to help protect it from things, the other to help make it a little less noticeable... not that you can make one that big unnoticeable. I used black plastic rivets on the top and sides to attach it without messing up the appearance.
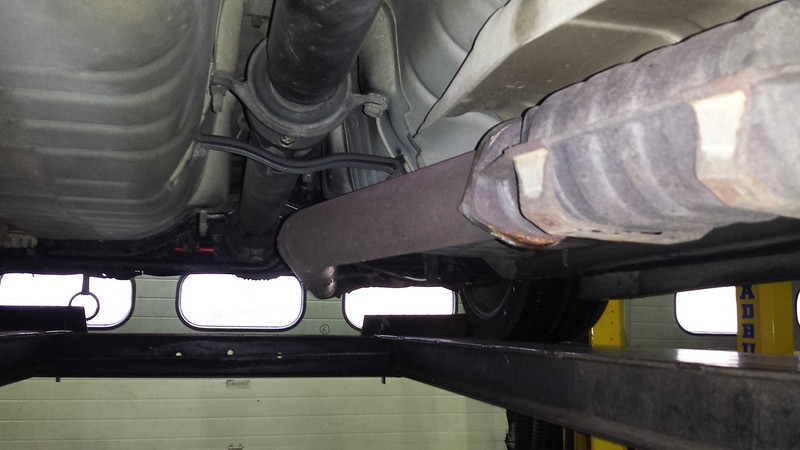
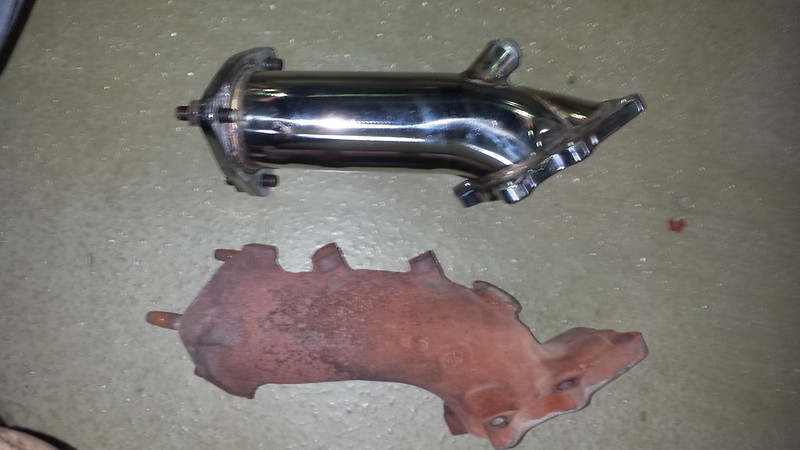
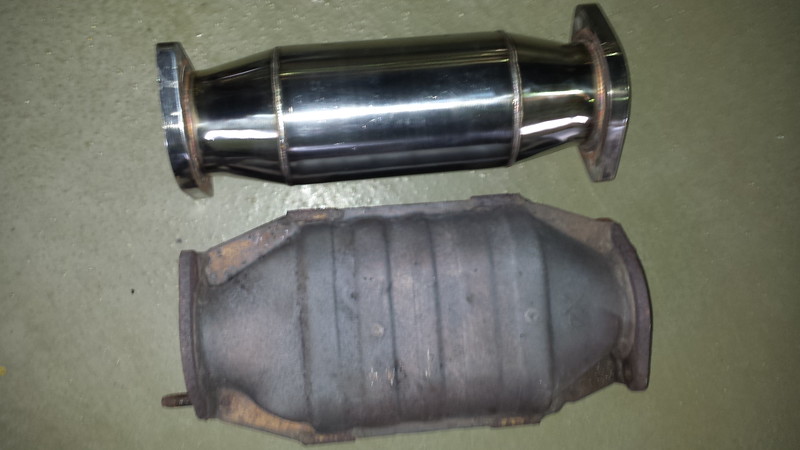
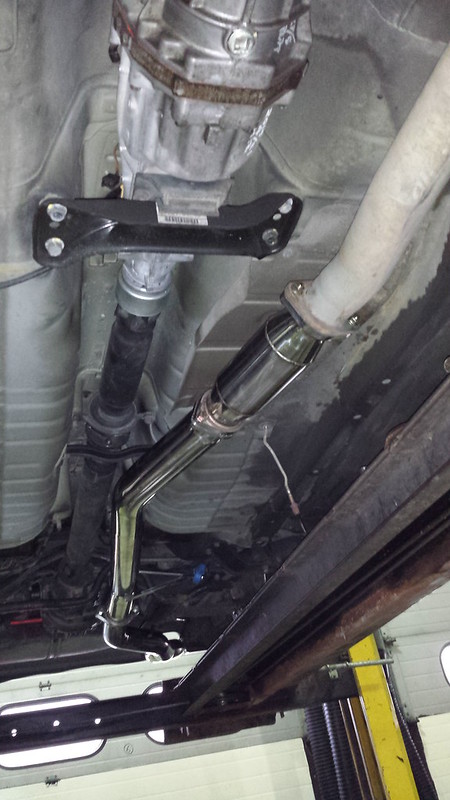
I'd been waiting to have a little free time to swap out my exhaust. Its had a single piece custom made shotgun exhaust. There's no issues with it, but I've wanted to be able to switch between the shotgun and super single exhausts. I also wanted to upgrade the turbo elbow and put on a hi-flow cat. While doing that I also swapped out the steering column bushing for the poly urethane.
First the old exhaust in and removed:


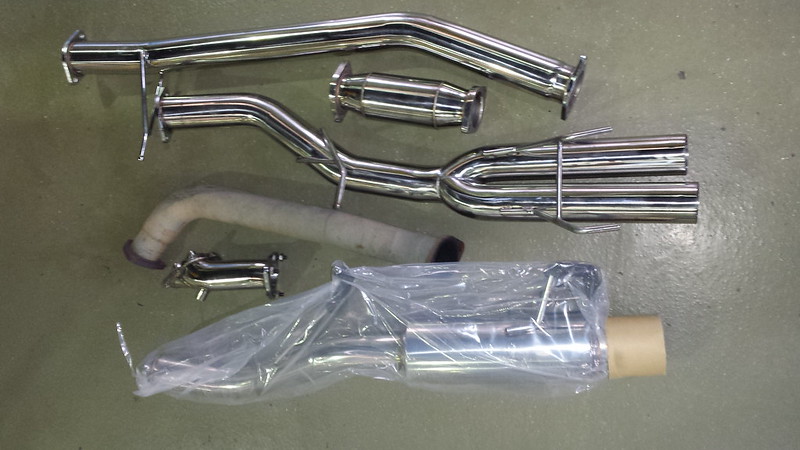
Time for the shiny new parts:
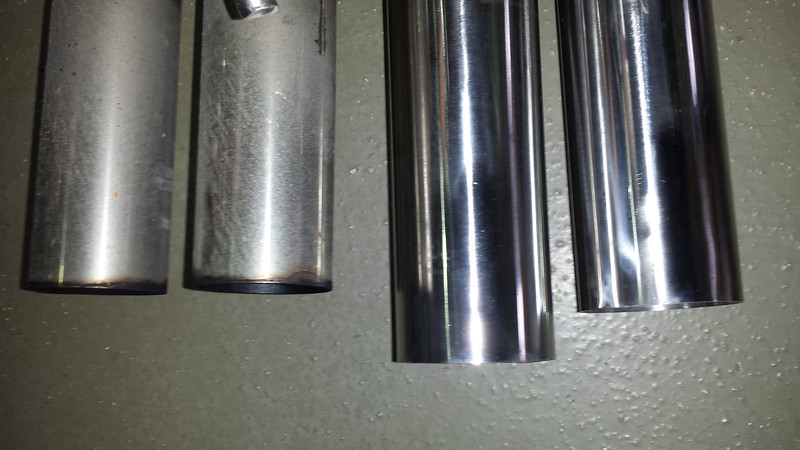
The Japspeed shotgun exhaust has the final dual pipes slightly larger than the one I had:
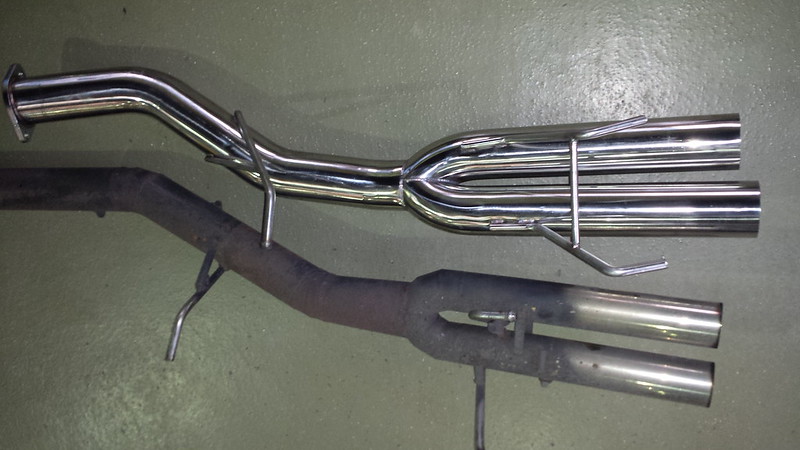
Time for all the stuff to go back in... I was really torn which exhaust to put in, the single or shotgun. Decided on the shotgun...
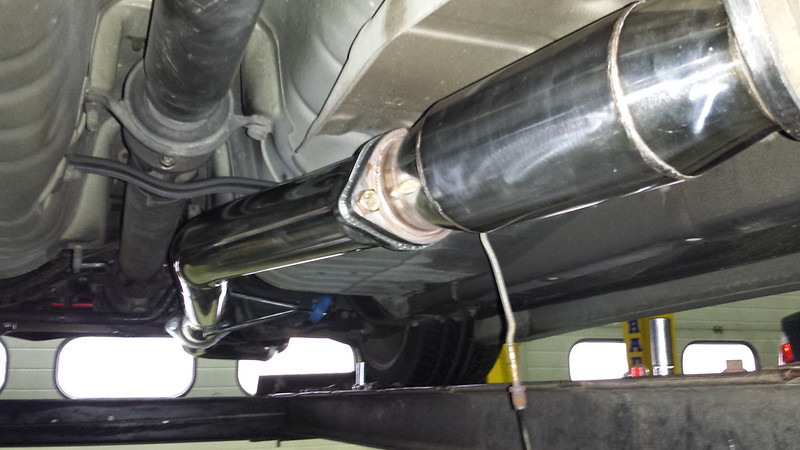
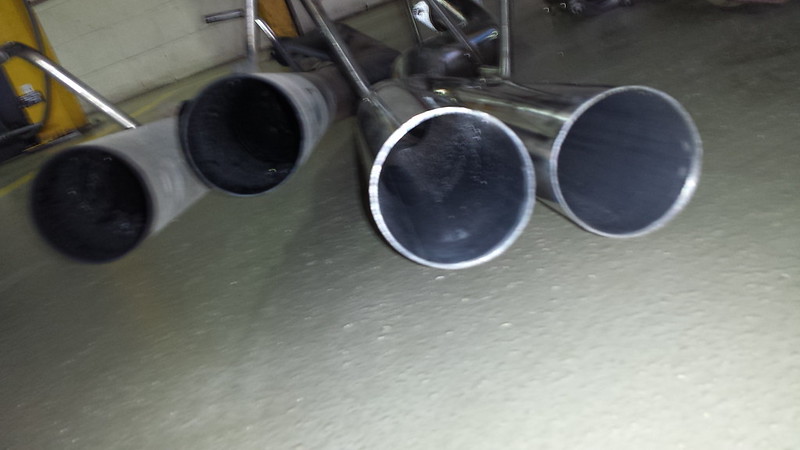
It was a very tight fit with the bumper. It does sit in more than my other one did. Here's how it looks now:
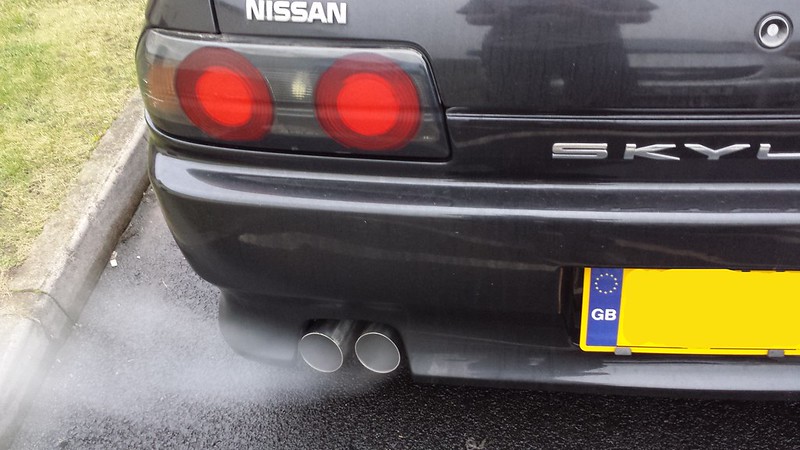
It's definitely a bit louder than my old one. I don't have a great picture showing how much the old exhaust stuck out relative to this one.
So here's what it was like before without the original plastic underbody piece:
And with the skid plate on:
Next was putting aluminum mesh on in front of the intercooler, part to help protect it from things, the other to help make it a little less noticeable... not that you can make one that big unnoticeable. I used black plastic rivets on the top and sides to attach it without messing up the appearance.
I'd been waiting to have a little free time to swap out my exhaust. Its had a single piece custom made shotgun exhaust. There's no issues with it, but I've wanted to be able to switch between the shotgun and super single exhausts. I also wanted to upgrade the turbo elbow and put on a hi-flow cat. While doing that I also swapped out the steering column bushing for the poly urethane.
First the old exhaust in and removed:
Time for the shiny new parts:
The Japspeed shotgun exhaust has the final dual pipes slightly larger than the one I had:
Time for all the stuff to go back in... I was really torn which exhaust to put in, the single or shotgun. Decided on the shotgun...
It was a very tight fit with the bumper. It does sit in more than my other one did. Here's how it looks now:
It's definitely a bit louder than my old one. I don't have a great picture showing how much the old exhaust stuck out relative to this one.
#20
03-08-2017, 02:32 PM
A project I'd been wanting to do, hesitated on, and finally due to fortunate circumstances jumped into is seat upgrades. It will be front and rear seats going to Recaros. The front seats are here, just had to wait to afford and order the proper rails that suit these seats and the Skyline... crazy that the two front seat rails cost more than all the seats together.
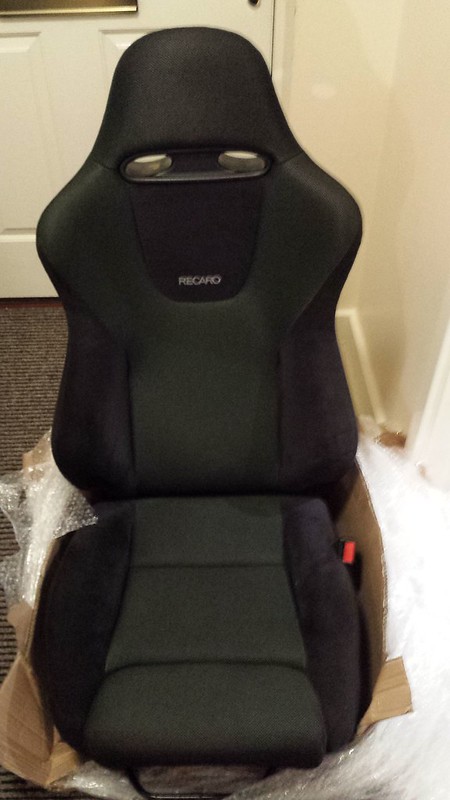
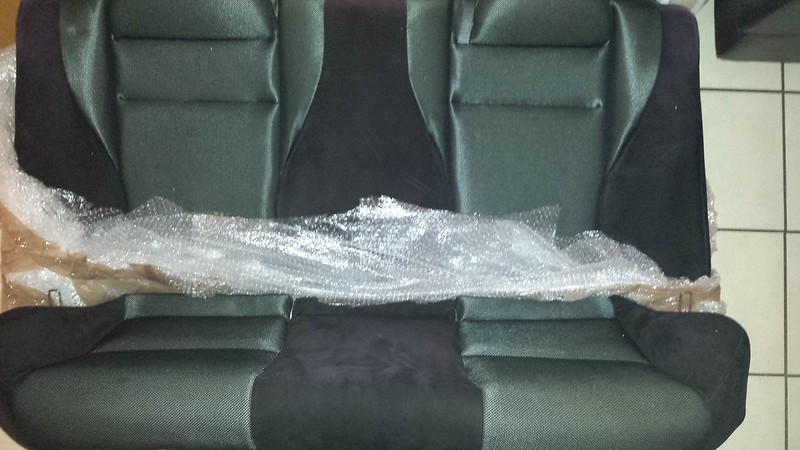
Also got the rear seats finally... either modifying these to fit or getting the covers swapped onto the stock seats.
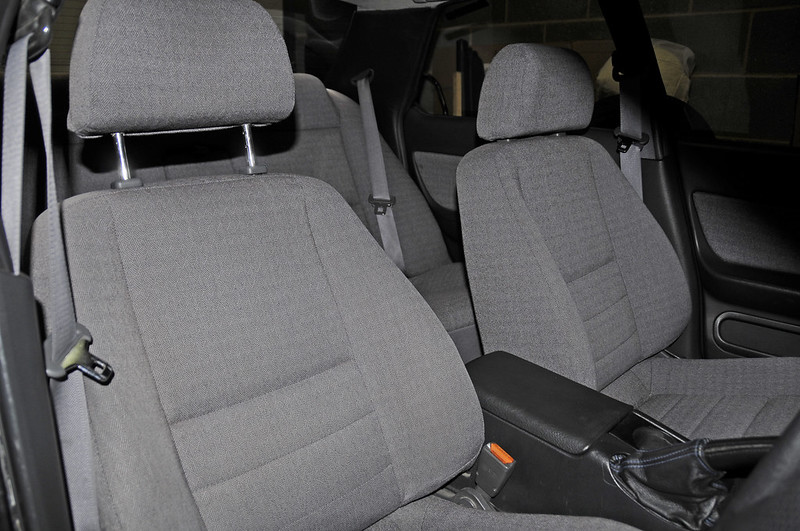
Front seats before:
Did the Driver's seat first:
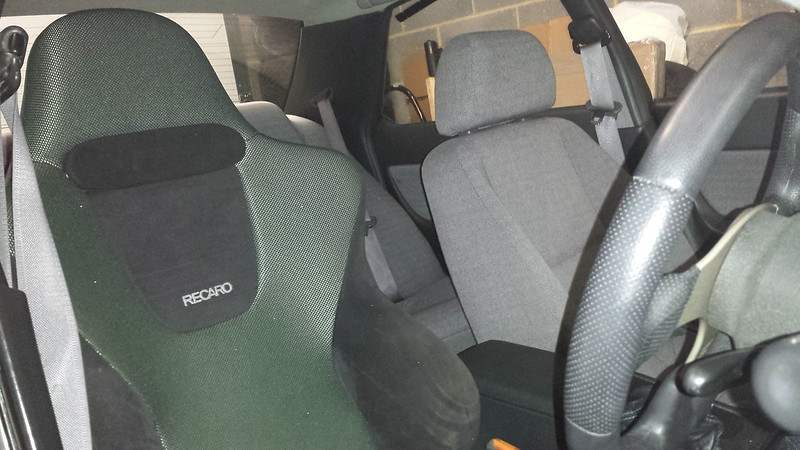
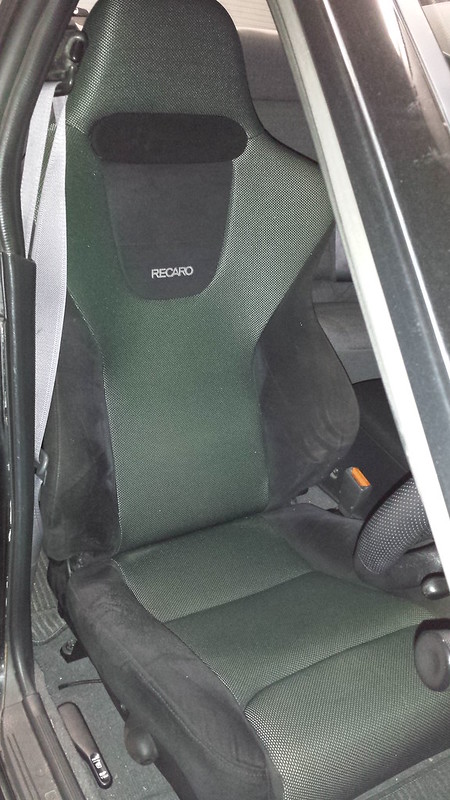
Tackled the passenger seat next. With it pulled out, I was able to get a decent picture of the driver's seat install:
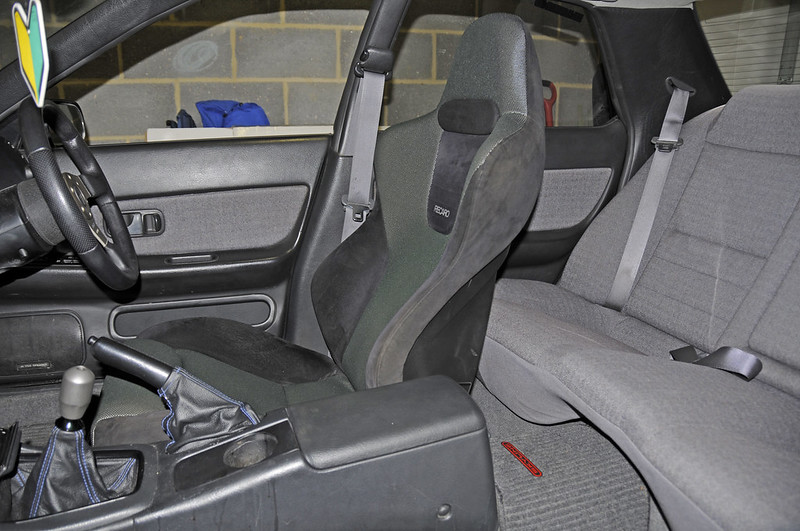
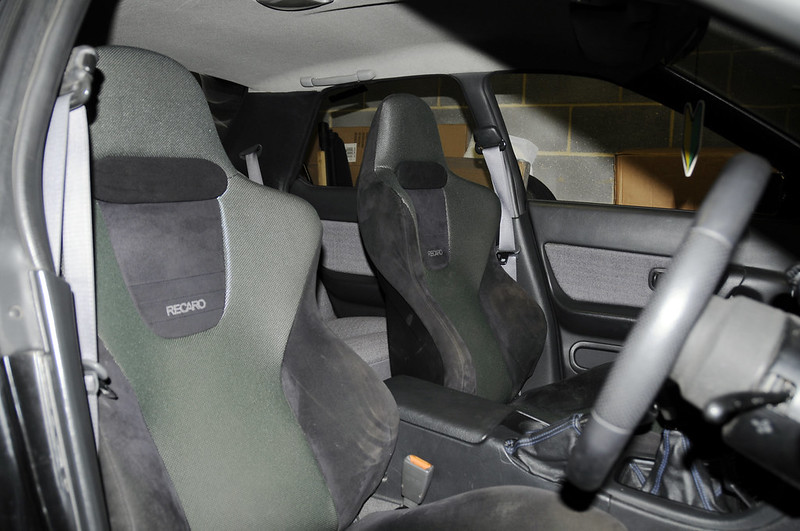
Passenger seat is in:
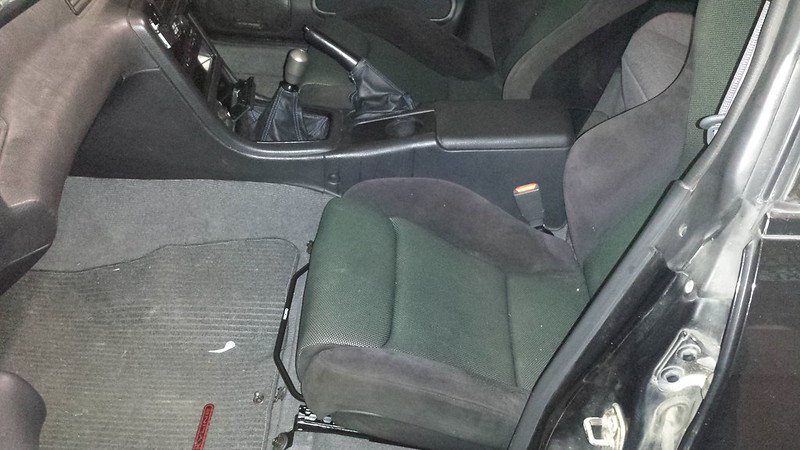
And the after shots:

Next is getting the rear seats re-trimmed to match. Also have parts coming for the headlights. I have an extra set that I'm going to convert for US roads as well as having Bi-Xenon projectors and the original brights switched to HID high beams.
Also got the rear seats finally... either modifying these to fit or getting the covers swapped onto the stock seats.
Front seats before:
Did the Driver's seat first:
Tackled the passenger seat next. With it pulled out, I was able to get a decent picture of the driver's seat install:
Passenger seat is in:
And the after shots:
Next is getting the rear seats re-trimmed to match. Also have parts coming for the headlights. I have an extra set that I'm going to convert for US roads as well as having Bi-Xenon projectors and the original brights switched to HID high beams.

