Dodge Ram 1994-2001: How to Replace Front and Rear Shocks
Shock absorbers keep your Ram's vibrations and movement at a minimum to provide a stable as well as controlled feeling throughout the truck. Shocks absorbers contain a hydraulic fluid that can leak out through seals. Once this occurs, the dampening effect begins to reduce.
This article applies to the Dodge Ram 2nd Generation (1994-2001).
Your shock absorbers help to eliminate the unwanted movement in your truck that occurs while driving. Shocks come in a variety of types, including mono-tube, twin-tube, and gas pressurized. A shock absorber is able to dampen vibrations by compressing a hydraulic fluid through a properly sized orifice. This orifice is part of the piston, and manufacturers change its size to alter a shocks stiffness level.
Shock absorbers see almost constant use while driving. Seals containing fluid may begin to leak, and rubber bushings surrounding the shock mounts can deteriorate. The result is increased bounciness over bumps and more body roll while cornering.

Materials Needed
- 1/2" and 3/8" ratchet
- Air or electric impact wrench
- Breaker bar
- Socket set (13mm-21mm)
- Wrench set (13mm-21mm)
- Vice grip pliers
- Flat head screwdriver
- Jack stands and block of wood
- Floor jack
- Penetrating lubricant
Pro Tip
If your Ram is dirty or has rust, use a penetrating lubricant to reduce the chance of breaking the bolts.
Step 1 – Raise and support front of the truck
- Using an air or electric impact wrench, loosen the wheel lug nuts before raising the wheels off the ground.
- Set the emergency parking brake.
- Using your hydraulic jack, raise one side of the truck and place a jack stand beneath the frame rail. A block of wood can be used to protect the frame rail from damage by the jack stand.

Step 2 – Remove front wheels
Depending on your Ram's model, it may have no center cap or two different styles of center cap. For those with the center cap that covers the lug nuts, you will need to pull or pry the cap off. Look along the edge of the cap for a space where a screwdriver can be inserted to create some leverage. Now remove your wheels.

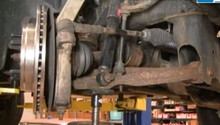
Step 3 – Remove lower shock mounting bolt
One bolt holds the shock to the solid axle. You will need a long extension (6"-10") and a 13/16" socket. This bolt uses a winged nut on the opposite side of the shock, which keeps the nut from rotating on the bolt.
Step 4 – Remove three nuts surrounding the shock tower
You may want to remove the air intake pipe from the airbox for extra room. It can be pulled off the airbox and out of the fender with some force. You will see two tabs on the end of the pipe that need to be squeezed while you pull.
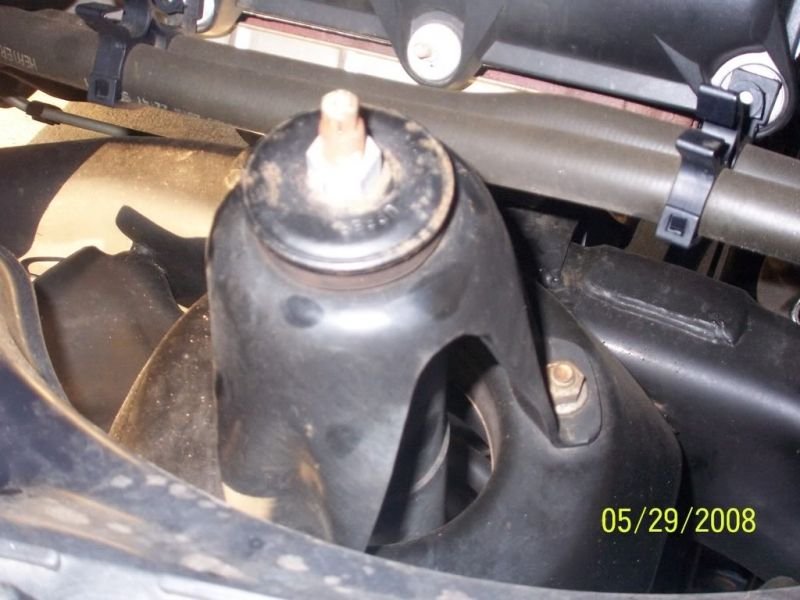
There are three 15mm nuts holding the shock tower to the body. One nut can be accessed from the engine bay (as seen in figure 4) using a deep socket. The others will need to be accessed from the wheel well using a wrench or small socket.

Step 5 – Remove shock from engine bay
Pull the shock out of the engine bay. You may need to twist the shock tower to create enough clearance.
Step 6 – Separate shock tower from the shock
Using an 5/8" wrench, loosen the nut at the center of the shock tower threaded onto the shock. You will need vice grips to latch onto the hexagon shaped area at the top of the threaded shaft. Keep pressure against the vice grips to keep the shaft from turning.
You can also use a 19mm wrench to hold the shock shaft underneath the shock tower instead of using vice grips. This would be the preferred method for someone with a lot of corrosion on their shock.

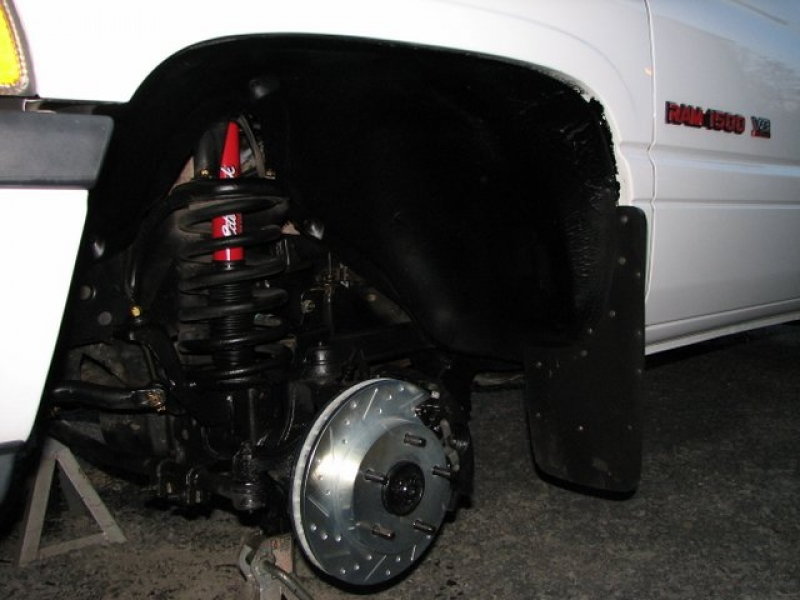
Step 7 – Install new front shocks
- Assemble the new shock with the proper bushings and washers. Install the rubber boot.
- Tighten the shock tower onto the shock by holding the shocks shaft in place while the nut is being tightened. This nut is tightened to 30 ft./lb.
- Before the shock is placed into the vehicle, expand it close to its full travel.
- Slide the new shock down through your coil spring, and line the bottom shock mount hole up with the bolt hole in the metal bracket welded to the axle. You may need to use your hydraulic jack to raise the axle until the holes lines up. Tighten this bolt to about 45 ft./lb.
- Now finish installing the front shocks by tightening the three nuts surrounding the shock tower.
- Before beginning the rear shocks, re-install the front wheels and lower the truck back onto the ground.
Featured Video: How to Install Front Shocks
Step 8 – Remove spare tire
If your Ram is equipped with a spare tire, you will need to lower it down and remove it from the metal wedge that secures it to the bottom of the truck bed. Do this by locating the Hex fitting below the tailgate (to the upper right of the license plate) and inserting the spare tire jack handle into the fitting. As you turn the fitting counterclockwise, you will see the spare tire lower down. Lift the spare tire up off the wedge and slide the wedge through the center of the tire.
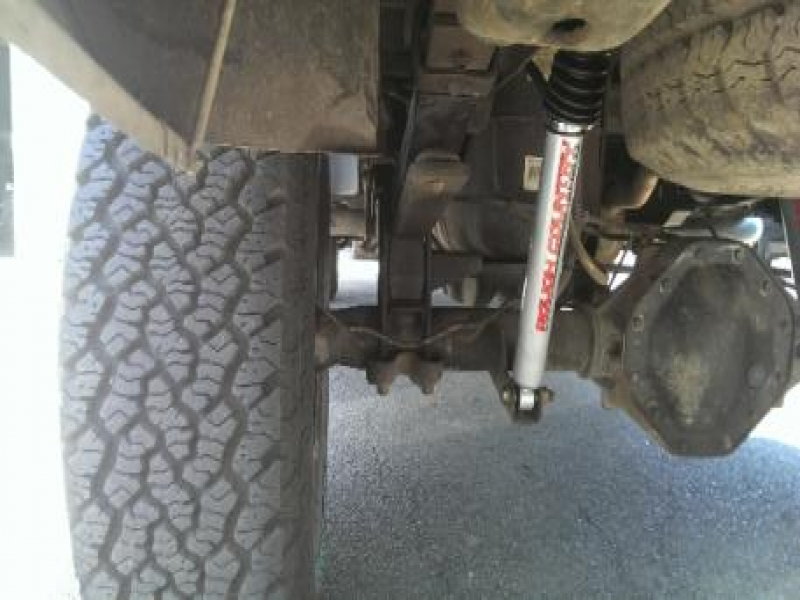
Step 9 – Remove the rear shocks
There is one bolt at the top and bottom of each shock. To remove the bottom bolts, you'll need to hold the nuts in place using a wrench while you turn the bolts counterclockwise. The top bolts are a bit obstructed, but are removed similar to the front shocks (no need to hold the nut). The passenger's side bolt may require a wrench.

Step 10 – Install the rear shocks and check shocks
Install the new shocks in the reverse order of removal. Make sure to install the rubber protective boot and place the winged nut into its correct position in relation to the frame, so it does not rotate. Then, re-install the spare tire if equipped.
If you have found no spare parts or hardware, go for a road test and listen for any new noises while the suspension is being moved about. Examples of noises could be a clunk, squeaks, or rattles. These can indicate your shock has not been properly installed or came defective from the manufacturer.
Featured Video: How to Replace Rear Shocks
Related Discussions and Article
- Replacing Front Shocks - DodgeForum.com
- Installing Front Shocks - Remove Shock Tower? - DodgeForum.com
- Front Shock Install with Pictures - DodgeForum.com
- Front Shock Removal - DodgeForum.com
- Rear Shock Replacement - DodgeForum.com
- Shock Absorber Reviews - DodgeForum.com