Dodge Ram 1994-2001: How to Replace Headlight Multifunction Switch
Bad headlight switches are a common problem in second gen Dodge Rams. If your headlights have gone dark, this article will show you how to fix the problem.
This article applies to the Dodge Ram 2nd Generation (1994-2001).
Bad headlight switches are a common issue in second generation Dodge Rams, and it's a big problem. Oftentimes, owners "discover" this problem when they are driving down the road at night and the headlights suddenly go off. Needless to say, this is a major issue that can quickly turn into a perilous situation. The factory switches were built without a relay, meaning that too much power can lead to melting and malfunctions. Thankfully, replacing the headlight switch is a relatively easy job that anyone can complete in a short amount of time. Keep reading as this article will have the necessary steps.

Materials Needed
- Phillips screwdriver
Step 1 – Remove the dash trim piece
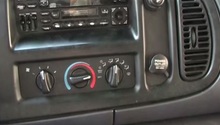
Start by tilting down the steering wheel and lowering the shifter, which will give you more room to remove the dash trim piece. Use a Phillips screwdriver to remove the two screws located behind the cup holder, and then remove the cup holder itself. Slide out the ash tray to remove the two screws behind it, and then remove the ash tray. Use your hands to lift up the upper right-hand corner of the dash trim piece (as shown in Figure 1) and work your way around the piece, finally separating it from the dash. Unplug the power outlet and cigarette lighter on the back of the trim piece, and set it aside.

Step 2 – Remove the headlight switch
Remove the three Phillips screws holding the headlight switch in place, and then pull the switch out of the dash just enough to access its two electrical plugs. Disconnect the two plugs by lifting up on their plastic tabs and pulling them outward. Remove the three screws on the back of the switch holding it to the front of the panel. Pull the plastic piece back, unscrew the pigtail, and then pull the switch out (see Figure 3). Install the metal plate and pig tail onto the new headlight switch.

Figure 2. Remove the screws holding the headlight switch in place. 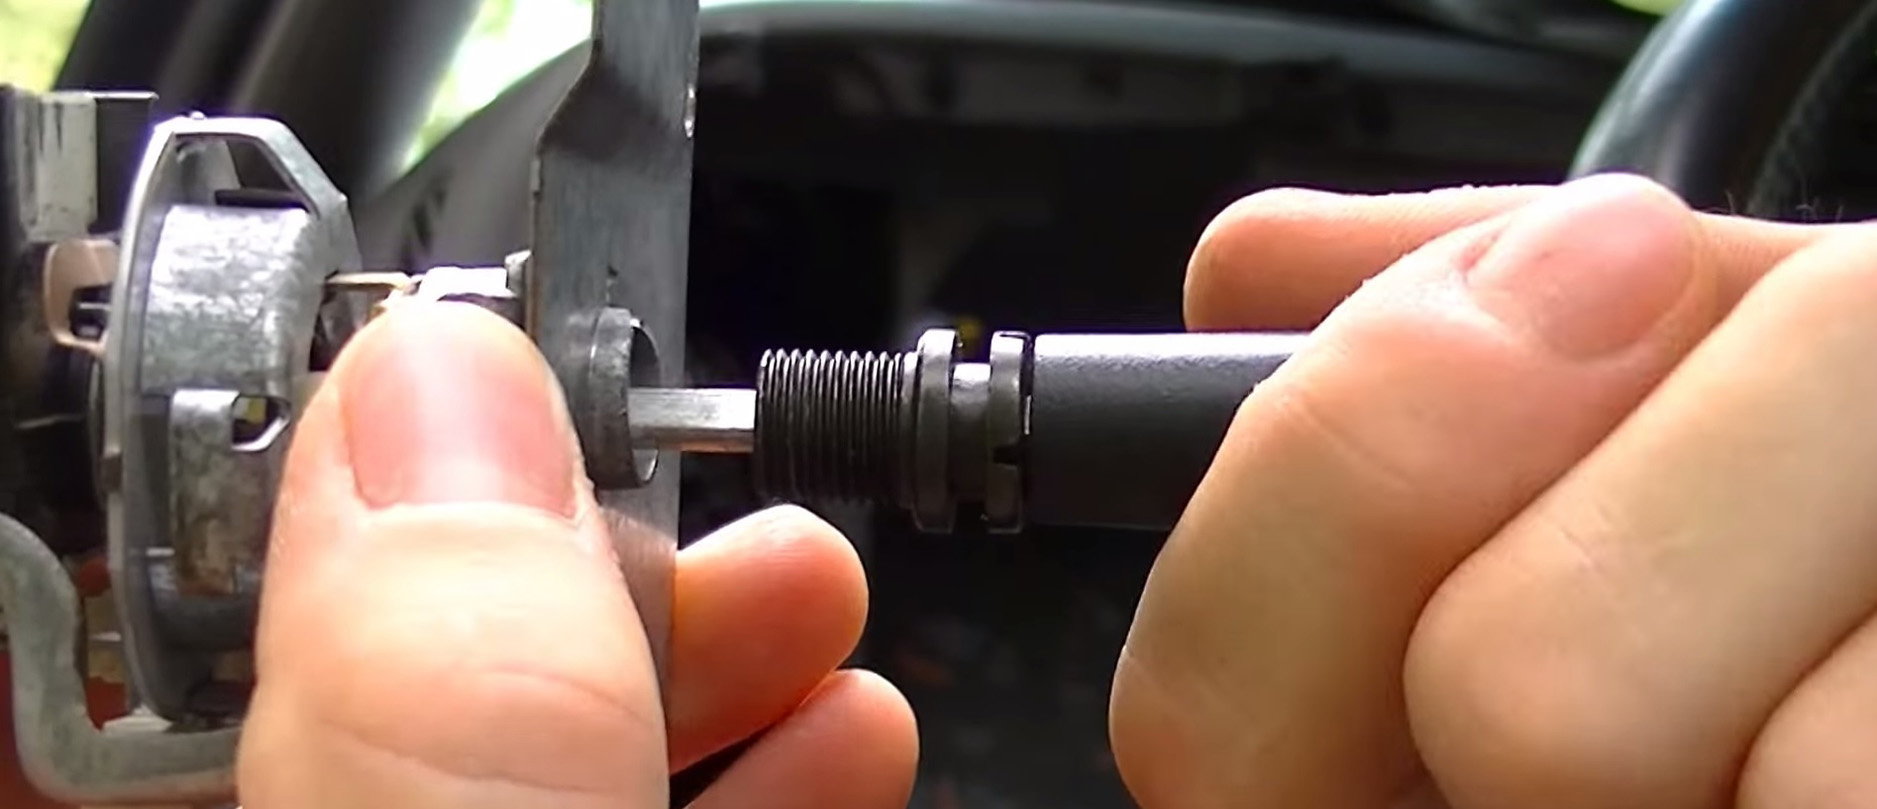
Figure 3. Unscrew and remove the pig tail.
Step 3 – Install the new headlight switch
Before installing the new switch, pull on the pig tail to make sure it works properly. Reconnect the electrical plugs to the new switch. Slide the headlight switch back into the dash and secure it with the three Phillips screws holding it in place. At this point, before re-installing the dash pieces, test the switch to make sure your headlights turn on. Then push the dash cover back in place. Re-install the ash tray and secure it with the two screws, followed by the cup holder and its two screws. Move your shifter and steering wheel back to their original location.
Featured Video: How to Repair Headlight Switch
Related Discussions
- Head Light Switch - DodgeForum.com
- 1997 Ram Headlight Switch Keeps Burning Out... Losing Headlights - DodgeForum.com