Dodge Ram 1994-2001: How to Replace Thermostat
If your temperature gauge is bouncing back and forth, it's time to replace your thermostat.
This article applies to the Dodge Ram (1994-2001).
When your thermostat starts going bad, you are putting your engine at risk. Your thermostat sends a lot of information to the computer which takes that information to make decisions affecting the fan, water pump, and fuel and air mix among other things. If you notice your temperature gauge acting very erratically, your thermostat is likely sticking open or closed. At best, your engine will start running rough and guzzling gas; at worst, it will overheat and blow. Don't risk this damage by trying to avoid a costly repair bill. You can save yourself a lot of money by changing your thermostat yourself in just a couple of hours in your own garage. It is not too difficult a job that a novice wouldn't be able to do it. Just take your time and follow these steps.

Materials Needed
- Ratchet and 9/16, 1/2 sockets with extension
- Flat head screwdriver or nut driver
- Needle nose pliers
- New thermostat
- Shop towels
Before you start, it has been shown to be a very good idea to put your new thermostat into some boiling water to make sure that it opens up properly (all the way) and closes back down properly before you actually start tearing apart your truck.
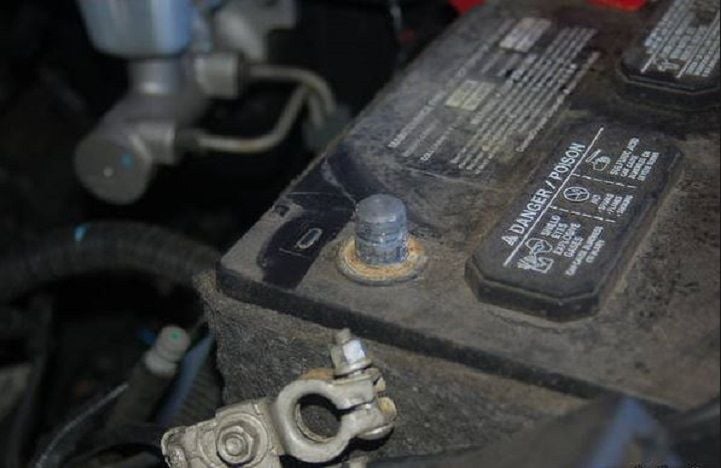
Step 1 – Cool the truck, disconnect the battery
Whenever you are working in your engine compartment, it is always the best practice to disconnect your battery. When you are going to be working in tight quarters like this or working on any cooling system component, make sure that the truck is completely cooled. The radiator is under high pressure, and if the cap is removed or any hoses pulled off, super high heated coolant is going to spray everywhere and can cause severe burn injuries.
Pro Tip
This job gets a little messy with spilled coolant. Have plenty of shop towels on hand to clean up any spills of this highly toxic anti-freeze.
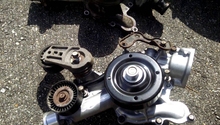
Step 2 – Remove the air filter and box
The airbox comes off pretty easily and then exposes the bracket that is attached to the intake and to the alternator. You have to remove the air cleaner to get access to this black metal bracket. The bracket is held in place with 9/16 inch bolts. Remove these bolts. Carefully pick up the two metal air conditioning lines and move them out of the way in order to get the last bolt out.
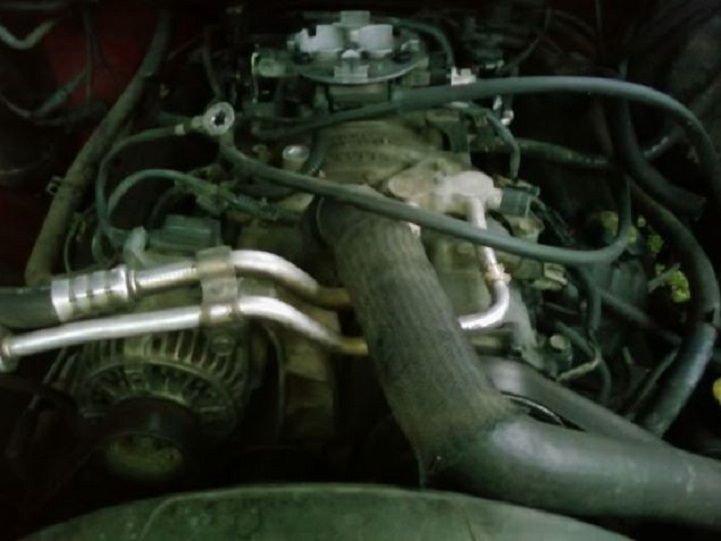
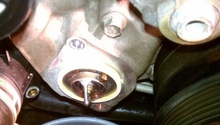
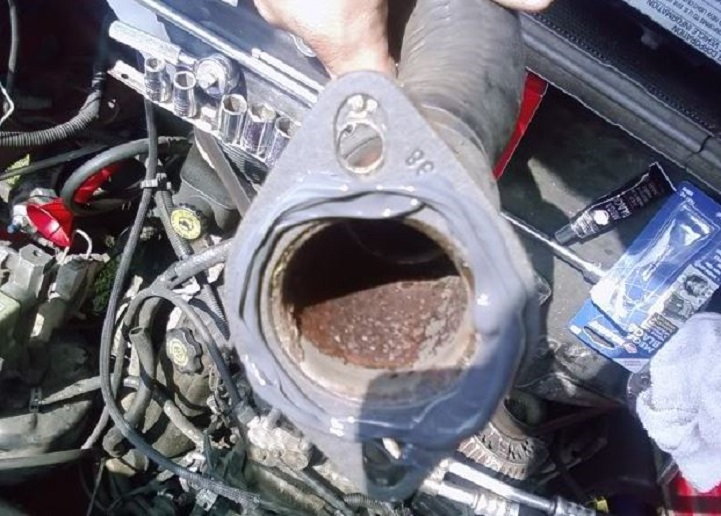
Step 3 – Remove thermostat housing
With the bracket removed, you will now have access to remove the thermostat housing. You will likely have a couple of throttle cables in your way. You can push these out of the way and use a ratchet with 1/2 inch socket and extension to remove the two bolts that secure the thermostat housing. The housing and attached hose can be wiggled and pulled free.
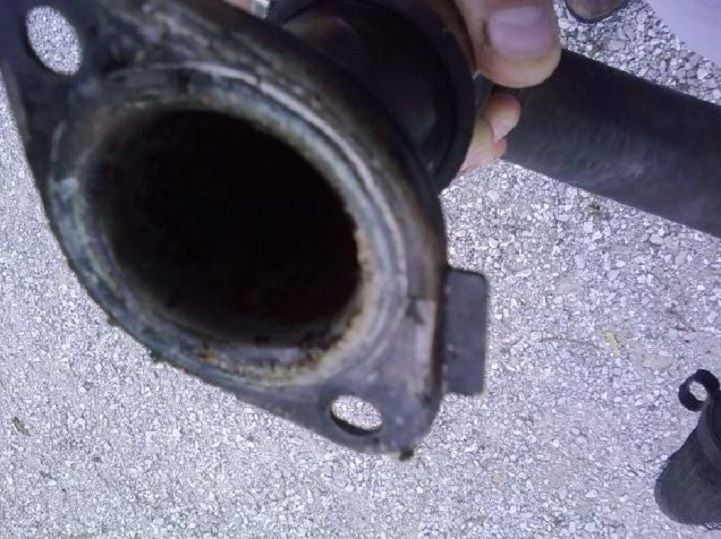
Step 4 – Remove old thermostat
With the housing removed, you can now pop out the old thermostat. You may need some pliers or a flat head screwdriver and to wiggle it a little, but it should come right out.
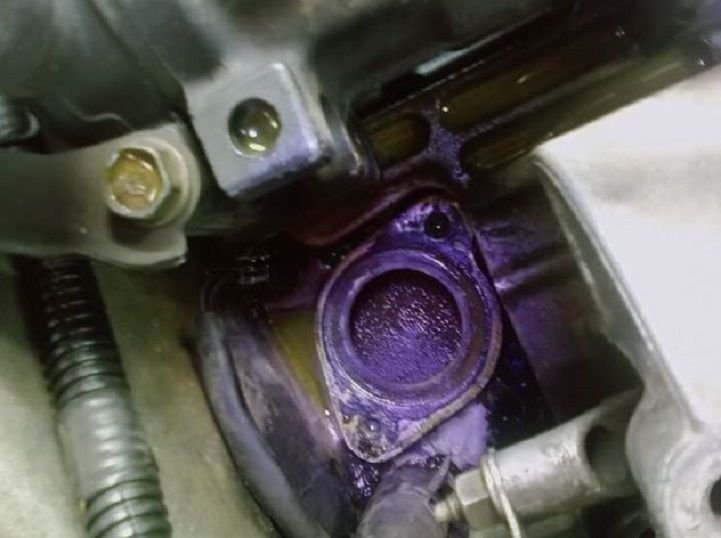
Step 5 – Install new thermostat
The new thermostat should fit right in, spring side down. The thermostat housing needs to be cleaned up before you can reattach. Use a razor blade or a plastic putty knife and a rag to scrape off the old gasket and wipe it clean with a rag. Place a new gasket onto the housing. You may or may not wish to add some RTV sealant to the housing surface first; that is completely optional. Replace the housing and tighten down the 1/2" bolts.
Pro Tip
If you decide to use RTV sealant, you will need to wait about 15 minutes before bolting the housing back down, then another 12 hours before you start the engine.
Step 6 – Re-install the A/C lines, air cleaner and bracket
Before you button it back up (and it has been 12 hours if you used RTV), start the car to check for leaks to make sure that you have the thermostat and housing seated down properly. If all looks good, re-install the bracket and put the A/C lines back in place along with any other cables you moved out of the way. Re-install the air cleaner box and insert your air filter. Close it up and give it another test. Watch the temperature gauge closely to make sure all is well.

Related Discussions and Site
- DIY Thermostat Install - Dodgeforum.com
- Thermostat Replace, What's the Cleanest Way? - Dodgeforum.com
- Overheating - Thermostat? - Dodgeforum.com
- Bad Thermostat? - Dodgetalk.com