Dodge Ram 1994-2001: How to Replace Transfer Case and Seal
The transfer case is the heart of your 4WD Dodge Ram. So if you notice a leak in the component, remedy the problem to avoid chronic heart damage.
This article applies to the 2nd Generation Dodge Ram (1994-2001).
A transfer case controls the front and rear axles of 4WD trucks, and inside of the case are a several moving components such as gears and chains. If the transmission output seal or the transfer case input seal is leaking, the internal parts are more susceptible to grinding from a lack of lubrication. With the proper tools, replacing the transfer case and seals in your Dodge Ram isn't too difficult a job. Keep reading for the DIY guide.

Materials Needed
- Ratchet and socket set
- Ratchet extension and swivel joints
- Torque wrench
- Hydraulic floor jack and block of wood
- Service ramps and wheel chocks
- Bungee cord or rope
- Pry bar
- Drain pan and shop rags
- Channel lock pliers
- Flat head screwdriver
- Seal puller and seal driver
- Paint pen
- Blue Loctite
- ATF+4 fluid (2 quarts)
Step 1 – Lift the truck
Since the transfer case is a large truck component, you will need to give yourself more space to access it.
- Lift the front end of your truck by driving onto the service ramps.
- Engage the parking brake and chock the rear wheels.
(Related Article: How to Jack Up Your Truck - DodgeForum.com)
Step 2 – Remove the drive shafts
You will need to remove both the front and rear drive shafts from the transfer case. It is suggested that you use a bungee cord or some rope to rap them up and keep them from dangling.
- Remove the bolts that secure the straps over the U-joints. You will need to detach the drive shafts connected to the front and rear face of the transfer case.
- Separate the drive shaft from the yoke using a pry bar to break them free.

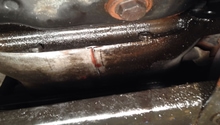
Step 3 – Drain the transfer case fluid
To prevent as much mess as possible, you'll want to drain all the fluid from the transfer case.
- Place an oil catch pan underneath the transfer case.
- Remove the fill bolt followed by the drain bolt.
- Then allow the transfer case fluid to drain into the catch pan.

Step 4 – Remove the transfer case components
- Gently pull off the vacuum lines that are connected to the vacuum switch on the transfer case.
- Then pull off the vent line near the vacuum switch.
- Hold the shift lever and vacuum switch down using a pair of channel lock pliers.
- Then use a pry bar to break the shift lever free.

Step 5 – Remove the transfer case
You'll need to be careful during this next step because the weight in the transfer case isn't evenly distributed, so you'll need to balance it as best as possible. If you have multiple jacks, It is recommended using them.
- Place a floor jack with a block of wood underneath the transfer case to hold its weight.
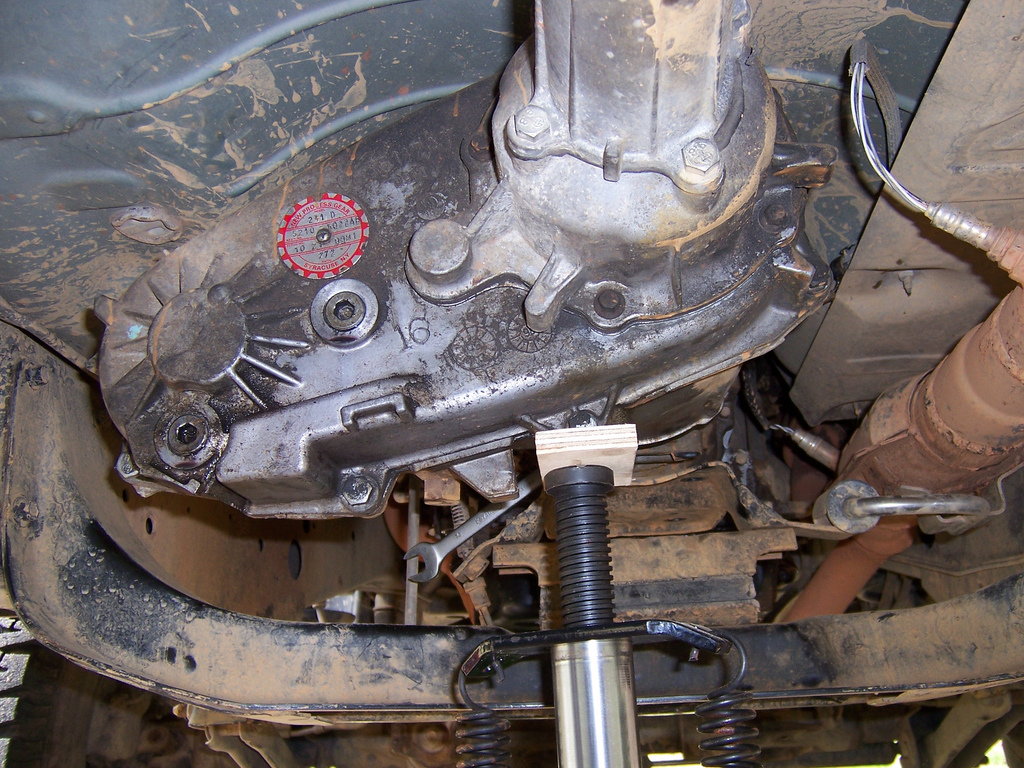
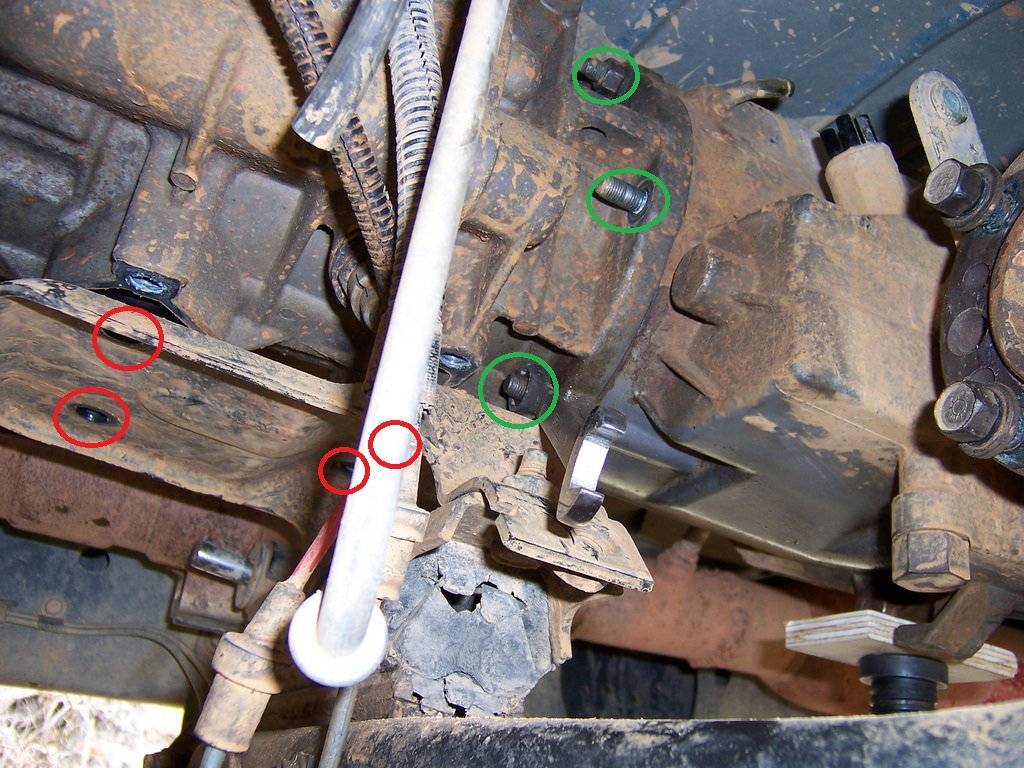
- Remove the four bolts on the transmission mount.
- Carefully jack up the transfer case about an inch.
- Then remove the six bolts securing the transfer case to the transmission. Be careful when removing these bolts because the transfer case is only supported by the jack.
- Lower the transfer case very slowly and remove it. Gain assistance from a friend if you are unable to support the weight of the transfer case yourself. Also, prepare for some fluid to leak out.
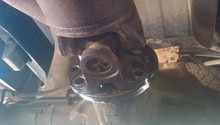
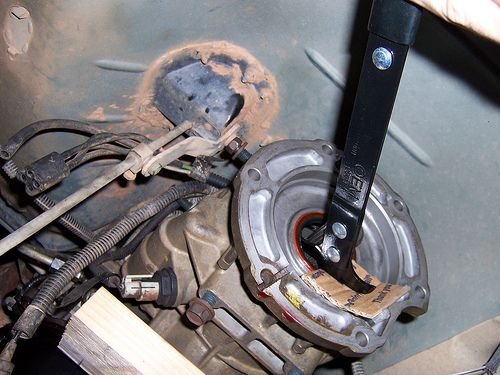
Step 6 – Replace the transmission output seal
- Use a seal puller to remove the transmission output seal. To prevent gouging the aluminum when applying leverage, place a piece of cardboard in between the puller and the transmission.
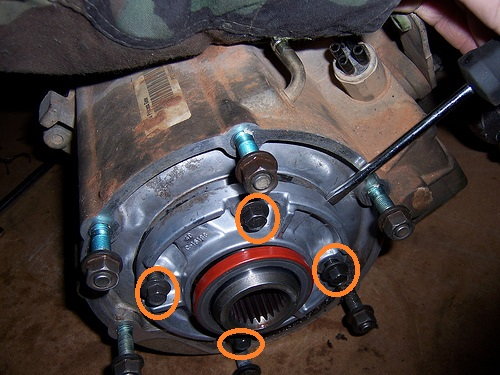
Step 7 – Remove the old transfer case input seal
- Use a paint pen to mark the orientation of the retaining plate on the old transfer case. This will allow you to line it up properly during re-installation.
- Remove the four bolts holding the retaining plate to the transfer case.
- Using a flat head screwdriver, pry off the retaining plate and make sure not to gouge the metal. Hold on to the retaining plate, as it will be used for the new transfer case.
- Then use a seal driver to remove the old seal. Take note of how far in it sits, so you know how far to press the new one in.
Step 8 – Install the new transfer case input seal
- Use the seal driver to press the new seal onto the new transfer case.
- Clean off the Loctite sealant from the retaining plate, and apply a new coat of Loctite 518 anaerobic sealant.
- Use the four bolts to secure the retaining plate.
Step 9 – Install the new transfer case
You will need to apply blue Loctite to all of the bolts to help secure them in place.
- Carefully raise the transfer case up and slide it onto the transmission.
- Place the floor jack underneath the transfer case to support it.
- Secure the transfer case to the transmission using the six bolts. Torque the bolts to about 25 ft-lbs.
- Re-install the bolts on the transmission mount. Torque the bolts to about 30 ft-lbs.
- Re-attach the vent and vacuum lines, then re-install the shift lever.
- Reconnect both the front and rear drive shafts.
- Refill the new transfer case with two quarts of ATF+4 fluid.
Related Discussions
- DIY Transfer Case Removal and Seal Replacement - DodgeForum.com
- Dodge Ram Component Fluid Capacities - DodgeForum.com