Dodge Ram 1994-2001: How to Replace Your Rear Window
Regardless of the reason you want to replace your Dodge Ram's window for, doing it yourself will save you a great amount of money.
This article applies to the Dodge Ram 1500 (1994-2001).
Replacing a rear window may seem like a straightforward task; however, there are a few quirks that can make this somewhat of a difficult task. The backlite/back window serves as part of the structural support for the roof and is bonded with urethane that is hard to cut or clean off of any surface. Purchasing a new backlite will set you back over $400, so take this into consideration beforehand.

Materials Needed
- Wire cutting tool, sharp screwdriver, or pneumatic knife
- Utility knife or razor blade
- Scotchbrite pad
- Clean rag
- Urethane adhesive
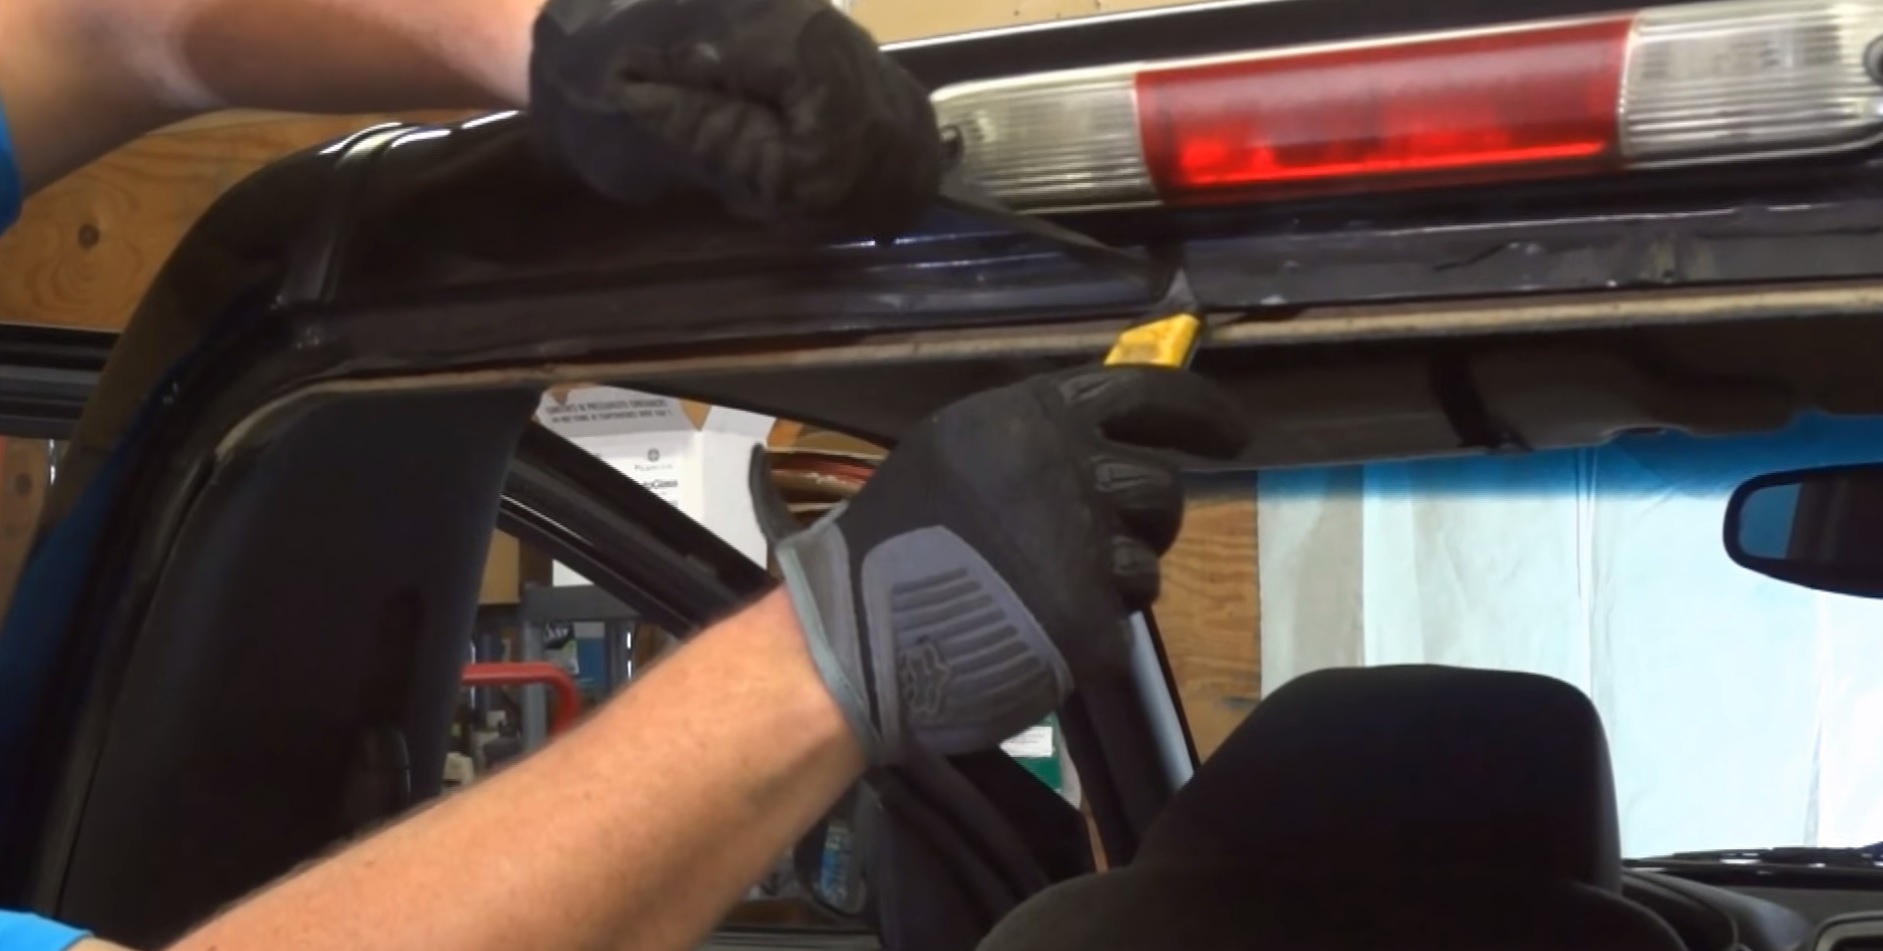
Step 1 – Remove sliding glass/backlite
If your truck is equipped with the sliding glass rear window, this will need to be removed first. Open the sliding glass window, lift up on the retaining trim along the bottom of the sliding window, and pull it out. Pull down on the retaining trim on the top of the sliding glass and lift it out. Lift up on the sliding glass and pull it out.
If your truck is equipped with a backlite window, use a cutting tool such as a pneumatic knife or wire to cut the urethane holding the backlite frame to the glass. Remove it and set aside.

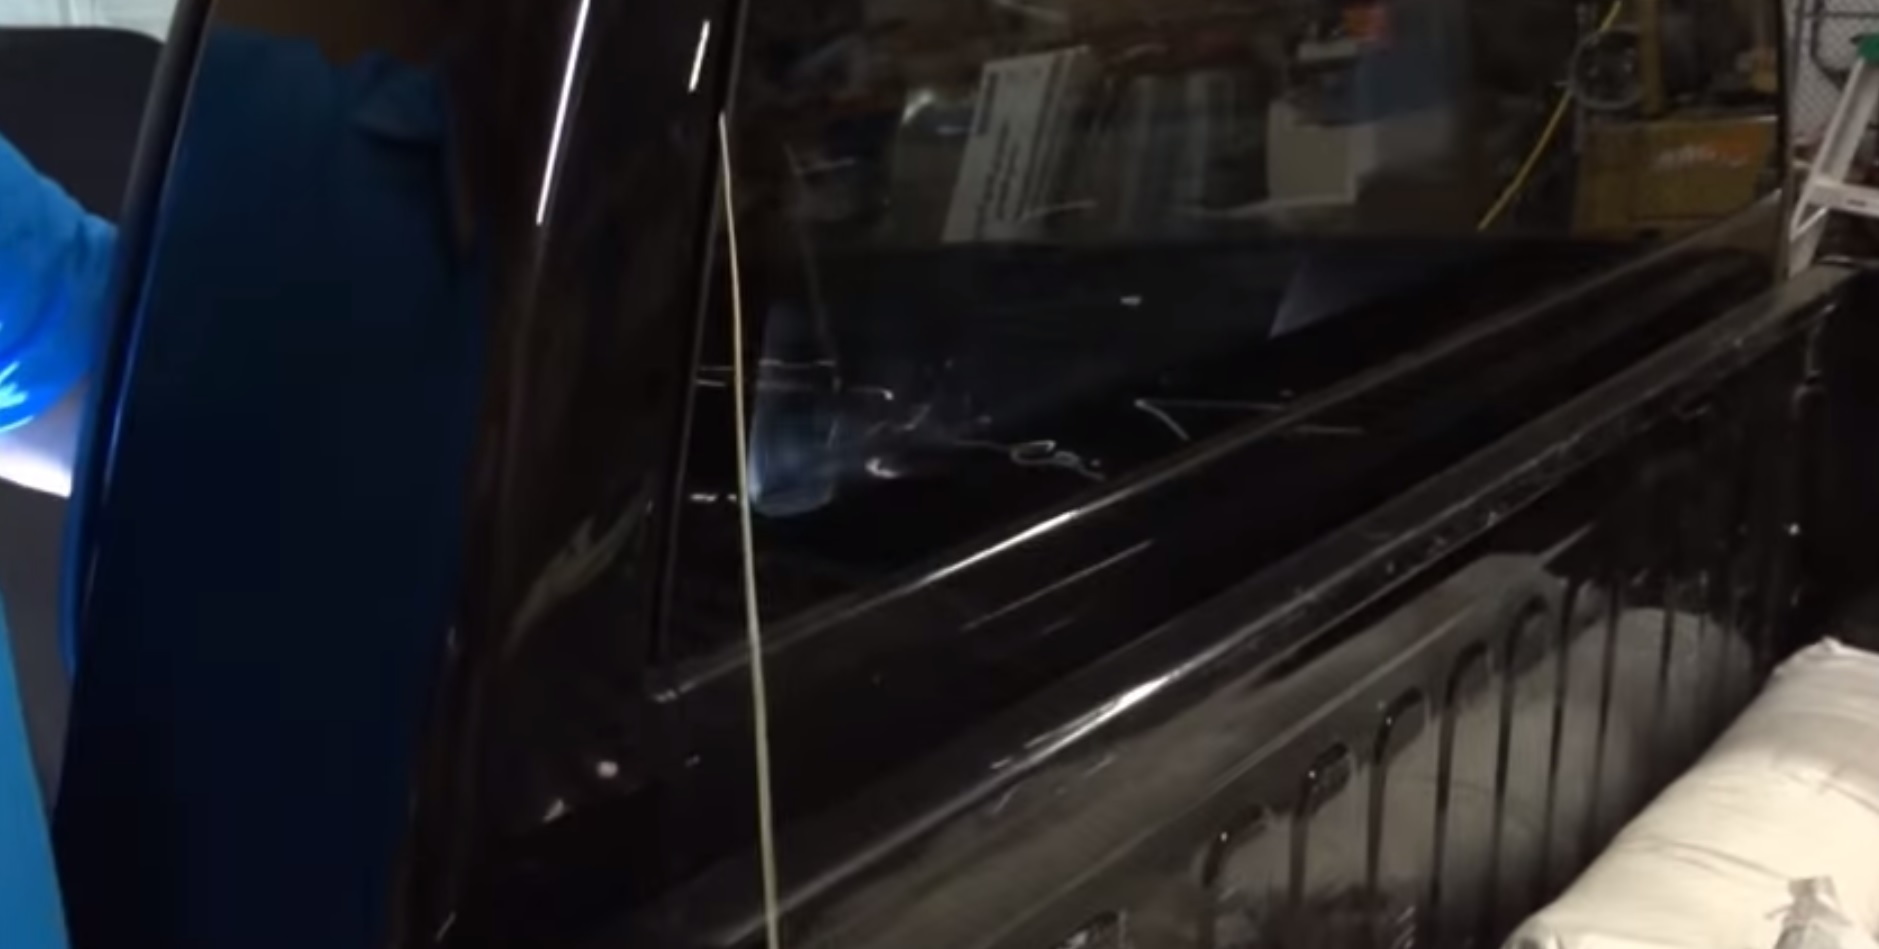
Step 2 – Remove the rear glass
Use a wire cutting tool, a pneumatic knife, or a sharp screwdriver to work your way around the edges of the rear window, and cut the urethane that holds it in place. Once you get almost all the way around, be sure and keep one hand on the outside of the glass to prevent it from falling out. Remove the rear glass carefully.
Step 3 – Prepare surface for new glass
Use a sharp utility knife or razor blade to remove most of the old urethane from inside the window bay. You will need to trim it down to around 1-2 mm. This will allow the new adhesive to bond more effectively and give you a better seal. When finished, use a clean rag to wipe down the remaining urethane and ensure it is contaminant free.
Step 4 – Install new glass
Use a small Scotch Brite pad to prepare the surface of the seal around the new window and remove any imperfections. Test fit the glass to make sure it will fit properly. Apply the urethane adhesive to the glass of the new window. Put a nice, even bead around the window to ensure a proper seal. Have a friend help you carefully and slowly set the window into place, being extra careful not to touch the adhesive. Tape can be used to hold the glass if you need to make minor adjustments to the fit. Press the window firmly into place and allow it to dry completely for around 3-4 hours.

Related Discussions
- Rear Window Replacement - DodgeForum.com
- How Do I Replace the Back Glass - DodgeForum.com
- Replacing Rear Window - DodgeForum.com