Dodge Ram 1994-2008: Why Won't My Parking Lights Turn Off?
Did your battery die due to continuously running parking lights? Diagnose the issue here and prevent another inconvenience.
This article applies to the Dodge Ram (1994-2008).
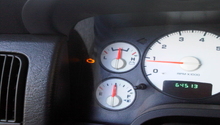
Car manufacturers design and equip their vehicles with all sorts of lighting. Everything from interior to exterior and dash lighting. There is also a feature on most cars called "parking lights" which illuminate the amber bulbs within the corner lamps of most cars when the headlight switch is turned to a specific setting. This is mainly designed so that the car is still visible in the dark if parked on a dark road so other traffic will steer clear of your vehicle. It is a safety and convenience feature. However, there have been instances where this particular setting doesn't turn off. Learn how to diagnose and address this problem. Some common causes of this problem are faulty headlight switches or even a corroded fuse box due to moisture from when owners wash their engine bays.
Materials Needed
- Flathead screwdriver
- Phillips head screwdriver
- Solder
- Ratchet set with various sockets
- Compressed air can
- Dremel with various cutting bits
- Wooden popsicle sticks
- Brittle brush or old toothbrush
- Lint-free cloth
- New headlight switch (optional)
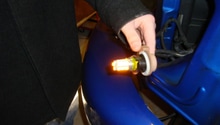
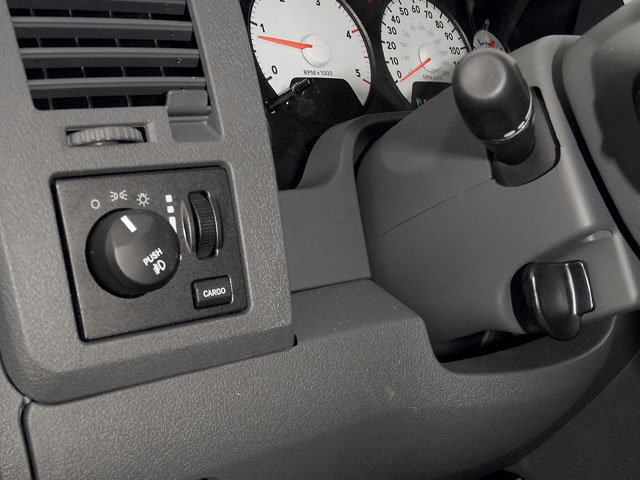
Step 1 – Cycle head light switch
It is possible the headlight switch is the problem.
- Cycle the headlight switch by turning it left and right repeatedly.
- If problems still persist, one can replace the headlight switch.
- Pry the edge of the headlight switch with flat tip screw driver to remove from recess.
- Disconnect the connector at back of switch.
- Inspect switch for damaged connections.
- Swap in new/known good head light switch.
Pro Tip
Borrow a friend's known good switch or buy a new one and keep the receipt handy. As a pre-check, one can certainly check the fuses and related relays before purchasing/borrowing anything in case some are blown. Refer to the owner's manual.
If the headlight switch wasn't the problem, move on to Step 2a.
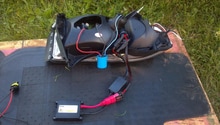
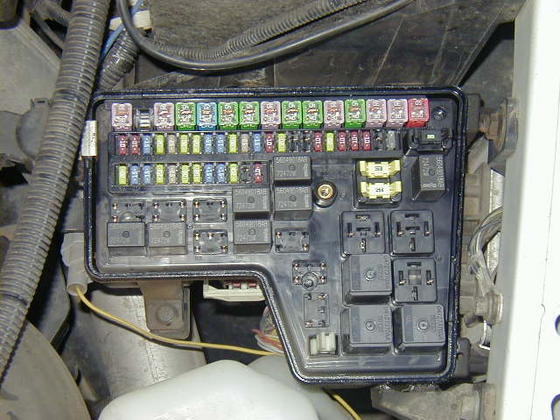
Step 2a – Remove integrated power module
The Power Distribution Center (PDC) is located within the Integrated Power Module (IPM). This is Dodge's reference to what we know as the "fuse box." This is where crucial electrical connections, relays and fuses are housed. If the board has gotten moisture on it, it could have corroded circuit connections. Before you can actually inspect this board for repair or replacement, it will need to be removed from the IPM and safely separated from its housing.
- Disconnect "negative" (black) battery terminal.
- Open cover and remove 13mm nut from B+ terminal.
- Disconnect the gray connector.
- Remove the 13mm retaining bolt and a plastic Phillips screw from the IPM.
- Slide the IPM module to the left and pull assembly towards you to disengage tabs under the battery tray.
- Rotate the module counter clockwise, turning it upside down.
- Disconnect seven color coded connectors by depressing tabs with flat tip screwdriver.
- Remove IPM assembly as a unit
- Place unit on a flat surface and remove four screws holding the Front Control Module (FCM) in place.
- Remove unit by pulling it straight out, leaving the PDC behind.
Pro Tip
Before removing some of the bigger electrical connectors, it is wise to spray the dust off of them so they don't crack or break. Wiggle the connectors as you depress tabs to gain more room to remove them without damage. It is also wise to remove the relays and fuses so they don't fall out or get damaged.
Continue with the procedure in Step 2b, if repairing the board, or skip to Step 4.
Step 2b – Separate PDC from IPM housing
Once you're able to free the IPM from the truck and set the FCM to the side, you are able to work on the PDC itself. It is secured to a housing by three plastic fixtures. You will need to grind off enough of these plastic pieces to free the unit at each post securing the PDC unit to its housing.
- Using a dremel, grind edges of plastic fixtures until you reach the recess where they connect to their respective posts.
- Use a drill on the opposite side of the post to drill through the remaining plastic.
- Use a long Phillips or flat tip screwdriver to push through the post "hole" to observe if the PDC begins to separate from the housing.
- Loosen seven tabs by prying around perimeter of the PDC housing with flat tip screwdriver.
- Use wooden popsicle sticks to further lift the housing apart from the PDC unit.
- Remove the circuit board completely.
Pro Tip
When working on this unit to separate it from its housing, work in an even and gradual manner as to not bend any of the pins on the circuit board.
If corrosion is found, move on to Step 3.
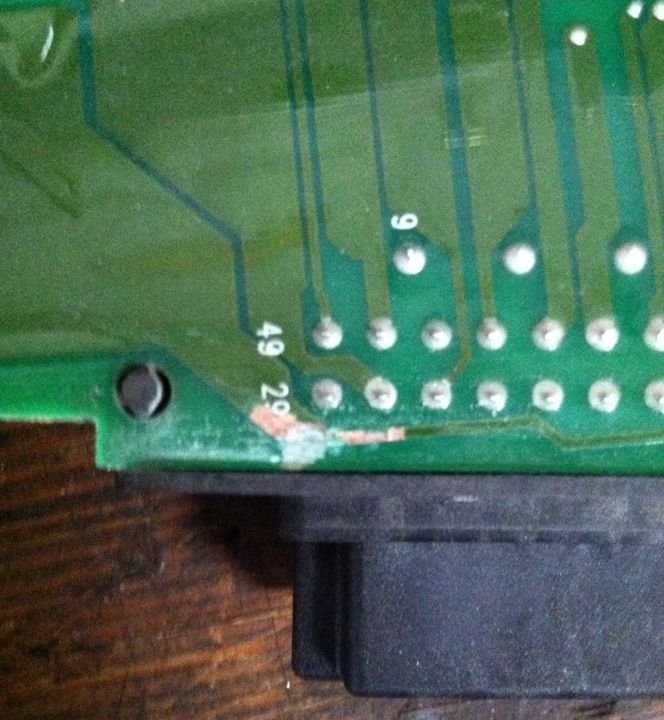
Step 3 – Repair circuit board
If you've removed the board and determine some corrosion, it can be repaired with a good solder job.
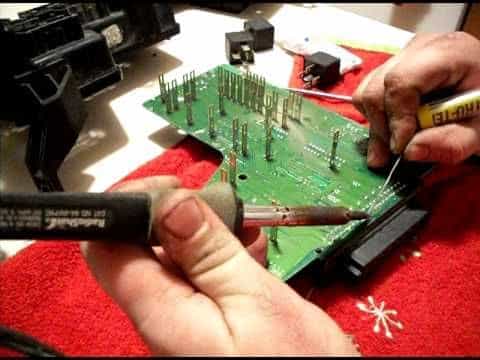
- Lay down circuit board on flat, clean surface.
- Use a tooth brush to clean corrosion and wipe clean with lint-free cloth.
- Solder cleaned area.
- Solder in a small gauge wire to bridge the gap.
Pro Tip
A pencil eraser is also have been said to clean corrosion from circuit boards. Use the compressed air to clean the delicate bits.
If repair to the board doesn't solve issues, move on to Step 4.
Step 4 – Replace PDC
If you have repaired the PDC and put everything back together and still have issues, it might be time to replace the PDC altogether. Follow the same steps as Step 2a, but do not move on to Step 2b.
- Remove old PDC.
- Swap new PDC into housing.
- Reattach FCM to housing.
- Re-install as a unit into IPM.
- Re-install the IPM to truck.
- Reattach electrical connectors.

Step 5 – Test everything
Whether you replaced the headlight switch, repaired the board or replaced the PDC altogether, you should test the system and all functions. But, you'll have to put everything back together first.
- Seat circuit board back into PDC housing.
- Secure seven tabs by pressing down gently on the housing.
- Set top of the housing onto the other half of the housing and secure posts with stainless steel sheet metal screws.
- Secure head of each screw with silicone sealant.
- Reattach the FCM and secure it to the IPM.
- Re-install the IPM to your truck.
- Reconnect the harnesses and the connectors.
- Reconnect negative battery terminal.
- Turn on each function and test all lights.
Featured Video: IPM Repair
Related Sites
- DIY: PDC Removal Part 1 - Dieseltruckresources.com
- DIY: PDC Removal Part 2 - Dieseltruckresource.com
- DIY: Repair PDC Corrosion - Moparts.org