Dodge Ram 2002-2008: How to Replace Brake Fluid
In order to ensure that your brake system operates at peak performance, the fluid must be changed out on a regular basis.
This article applies to the Dodge Ram (2002-2008).
The question of whether or not to change your brake fluid is actually quite a heated debate in the automotive maintenance world. Some people say that because the brake system is a completely sealed hydraulic system, this should make it that contaminants should not be getting into your vehicle's brake system to contaminate the fluid and cause it to be changed. Others say that it should be changed at regular intervals just like all other fluids. What we do know is that brake fluid is hydroscopic, meaning that it is very good at absorbing water. Due to this fact, it's very likely that over time, you're brake fluid will have absorbed water from somewhere and will become contaminated. It can even develop condensation from getting too hot. Absorbing or forming this water will lower the boiling point of the brake fluid and ultimately make it less effective, requiring you to change it out with new, fresh fluid. Here's how to do so.

Materials Needed
- Turkey baster or equivalent tool
- Catch can with clear plastic tube
- Millimeter wrench set sizes 8mm-13mm
- Brake bleeder or willing assistant
- DOT 3 brake fluid
Pro Tip
- The recommended interval for brake fluid change is every 30,000 miles or 24 months.
Step 1 – Remove cap and suck out old fluid from reservoir
Locate the fluid reservoir for the brake master cylinder. It should be in the top right corner of the engine bay as you are looking at the engine head on. Remove the cap and suck out all of the old fluid with your turkey baster or equivalent tool. Make sure to dispose of the old fluid properly.

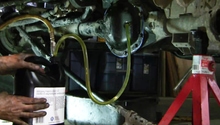
Figure 1. Number 1 points to the brake master cylinder reservoir. 
Figure 2. Remove old fluid.
Step 2 – Add new fluid to reservoir
Making sure to use new fluid, add it to the reservoir until it rises to the base of the filler neck.

Step 3 – Bleed brake system
This is the most important part about changing the brake fluid in your truck. Bleeding the system will allow all of the old fluid to be removed and then new fluid added in its place. When bleeding the system, it is critical that you not let the brake fluid level in the master cylinder reservoir drop below the minimum line. Doing this could allow air to enter the system and require you to start the bleeding process all over again.
The brake bleeding procedure outlined here will be a manual bleeding procedure which is the most basic. This procedure requires an assistant. There are many brake bleeding tools that you can buy that will help you perform this process on your own, and each one works a little bit differently.
Bleed brakes as follows:
- Remove residual vacuum (or hydraulic pressure) by applying brake several times with engine off.
- Remove cap and top off reservoir if necessary.
- Place tube of catch can over bleeder valve on wheel that you are going to be bleeding. Start with farthest corner from master cylinder first and work your way to the closest.
- Have assistant slowly depress and hold it in the depressed position.
- Open the bleeder screw enough to allow a flow of fluid to leave the valve. While doing this, keep an eye on the fluid being removed. It will be a dark color.
- Tighten bleeder screw.
- Have assistant release pedal.
- Repeat steps 4-7 until you see fresh, lighter colored fluid coming out of the bleeder screw tube.

Step 4 – Top off reservoir with new brake fluid
After you have bled the brakes at all four wheels and ensured that all fresh, new brake fluid has filled the system, you will want to top off the brake fluid reservoir to the maximum line and tighten the cap.

Related Discussions
- Changing Brake Fluid - Dodgeforum.com
- Flushing Brake Fluid - Dodgeforum.com
- Brake Fluid Change - Dodgeforum.com