Dodge Ram 2002-2008: How to Replace Front and Rear Shocks
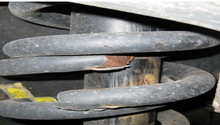
Springs normally do account for how far up or down a truck's suspension can travel. How fast it does that is done with the shock absorbers. If yours are old and worn out, your ride is probably a lot rougher than the day you drove it off the lot!
This article applies to the 3rd generation Dodge Ram (2002-2008).
Shocks help absorb all the imperfections on the road. They make a comfortable ride, and they especially make a safe as well as predictably handling vehicle ride. It's imperative to always ensure yours are not blown and are operating perfectly. If you find yourself in a pickle and they're not, this will help get you and your truck safely back on the road without breaking the bank.

Materials Needed
- 18mm wrench
- 21mm socket with a ratchet
- Adjustable wrench
- Jack and stands
- Penetrating oil (optional)
- Spring compressors
- Impact gun (optional)
Step 1 – Jack the front or rear of the truck up
First things first, break your wheel's lug nuts lose, and then jack the truck up. With your truck safely situated on jack stands, remove the wheels.
(Related Article: How to Jack Your Truck Up - DodgeForum.com)
Step 2 – Use penetrating oil
You will want to spray the top nut for the shock absorber assembly with penetrating fluid. Penetrating fluid ("liquid wrench" or similar) helps break down some of the corrosion on rusted or aged fasteners, and makes this job much easier. It is recommended to spray every nut as well as bolt that is going to be touched, and then wait about 10 minutes for the oil to work its way in. With climates where you don't have salt on the road, harsh snow and your undercarriage isn't riddled with rust, you can likely skip this step.
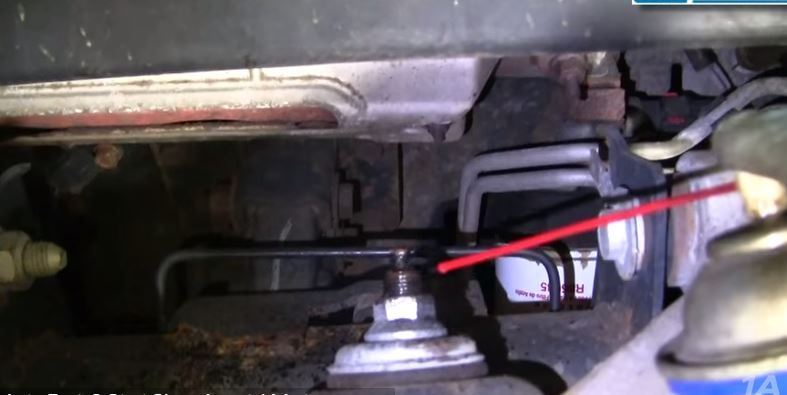
Figure 1. Spraying top shock nut with penetrating oil. 
Figure 2. This makes removing the 18mm nut atop the shock much easier.
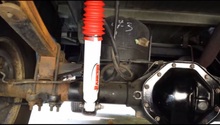
The problem is the whole assembly will twist or spin and the top nut will not loosen. Never fear, here's where your adjustable wrench comes into play. Look carefully at the top of the shock, just beneath the top nut. There is an area that is six-pointed, just for this purpose. Use your adjustable wrench and grab into that portion of the shock while undoing the top nut.
Alternatively, if you have an impact gun or comparable air tools, you can just use your impact on the 18mm top nut. The impact gun puts so much immediate torque on the nut that it will usually break it loose without needing to secure the shock body, as described above. Either way, remove the top nut, and don't lose the washer underneath, you'll be re-using that!

Pro Tip
If you are having a hard time getting it loose, you'll need more leverage. A breaker bar, or pipe extension (think handle from your car jack) works excellent here to give you some extra help. The longer you go from the nut, the more torque you'll apply. Work smarter, not harder.
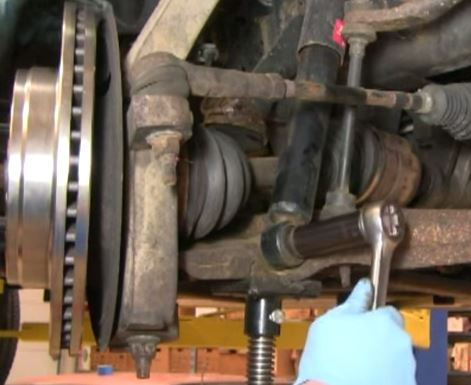
Step 3 – Remove lower shock bolt
Loosen up that big bottom bolt to get the shock out.
Pro Tip
This bottom bolt usually gets a lot of corrosion since it hangs low, and is exposed to the elements. Use the additional leverage trick described in the previous step on this bolt.
Step 4 – The shock is now loose, pull it out!
Pretty easy now: old shock out, new shock in. Be sure to pay attention to the included washers and bushings that sit against the frame. You don't want any extra rattles or creaks! Usually, my preferred method for handling this is loosely thread in all the nuts as well as bolts for the shock to make sure everything is lined up, and then set up at their final torque spec. The top nut should be around 30-40 ft./lb. depending on model, and the bottom bolt closer to 50 ft./lb. or when sufficiently snug.
If you're having trouble lining things up, loosely thread in the bottom shock bolt, compress the shock by hand, and then push it up into the upper shock mounting area.

Pro Tip
You may need to push the shock up slightly to get the threading to appear up top to start the new bolt.
Step 5 – Move on to the rear
Dependent on year, you'll need to get the spare tire out of the way if it's down under the bed of the truck. Lower it and get it out. Now you have access to the two bolts you'll remove the change the rear shocks. Upper one is a 21mm, and the nut is held in place so no worries on getting that one loosened. Again, hit with penetrating fluid if need be.
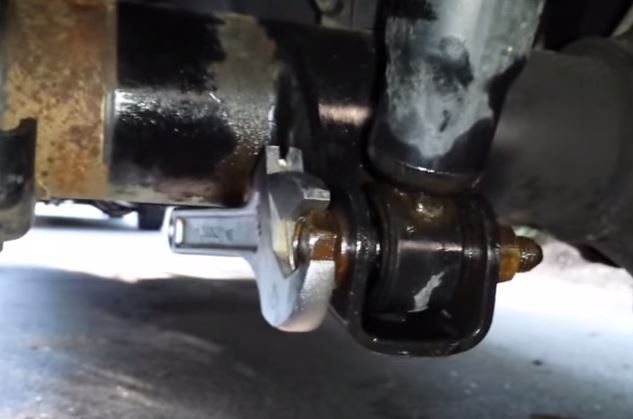
Now the bottom bolt may move with the nut, so you'll need the adjustable wrench, or two sockets and ratchets to hold the spinning nut in place.
Pro Tip
Take your time. There's shade under the truck, so put on some music and go to your happy place. The less of a rush you're in, the less likely to make any mistakes.
Step 6 – Reassemble
By this point, everything should be re-installed. Carefully double check your work to ensure that all fasteners are snug and nothing is lose. Re-install all four wheels, and lower your truck off the stands. Double check your wheel lugs once the truck is on the ground, and then take the truck for a test drive around the block. Listen for any unusual noises that could indicate something being loose, or improperly installed. If everything checks out, take your truck in for a wheel alignment. Then, pat yourself on the back because you just saved a lot of money, and taught yourself something new.
Featured Video: How to Replace Front Shocks
Related Discussions
- Rear Shock Installation Hard? - DodgeForum.com
- Shock Installation of '07 Ram 1500 - DodgeForum.com
- Installing Shocks - DodgeForum.com