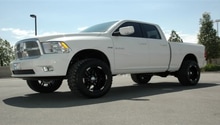
Dodge Ram 2002-Present: How to Replace Ball Joints
Worn ball joints will cause much frustration in the way of quick and uneven tire wear and alignment issues.
This article applies to the Dodge Ram (2002-present).
If you have any kind of play at all between the upper or lower control arms and the linkages where the ball joints sit against the knuckle, then you have bad ball joints. If you're unsure how to inspect or check this, don't worry; busted ball joints will make your suspension sound "broken" and the steering feel will notably change for the worse. They will need to be replaced sooner rather than later. Bad ball joints will cause uneven wear on your tires and premature replacement. Changing your ball joints out is not a cheap job for use of a professional. You can save a ton of money by doing the replacement yourself, and it's not too difficult. You will just need to give yourself plenty of time. You will also need to take your truck to have it realigned after you replace these joints.
Materials Needed
- Impact wrench or ratchet with 11/16" and various other sockets with 1/2" drive
- Torque wrench
- Pickle fork and ball joint press with adapter
- 1/2 to 1 inch pipe coupler
- 5mm Allen socket set
- 1/2 inch drive extension
- Snap ring pliers
Step 1 – Jack up your truck
Make sure that you are using the manufacturer's jacking location and jack stand locations. Use variable height jack stands because you will want to have the working side about three inches higher than the non working side. This will prevent any differential fluid from pouring out. Then, remove the wheels.

(Related Article - How to Jack Up Your Truck - Dodgeforum.com)
Step 2 – Remove steering linkage and braking components
- Disconnect the steering linkage from the steering knuckle.
- Disconnect the brake calipers and hang then up and out of the way to prevent stretching or breaking the brake lines.
- Disconnect the brake line support bracket.
- Remove the brake rotors.
- Remove the Cotter pin from the axle nut and then remove the nut (This will be a PAIN without an impact wrench).
- Disconnect the ABS sensor and its wiring and move out of the way.
(Related Article - How to Replace Brake Pads, Calipers, and Rotors - Dodgeforum.com)

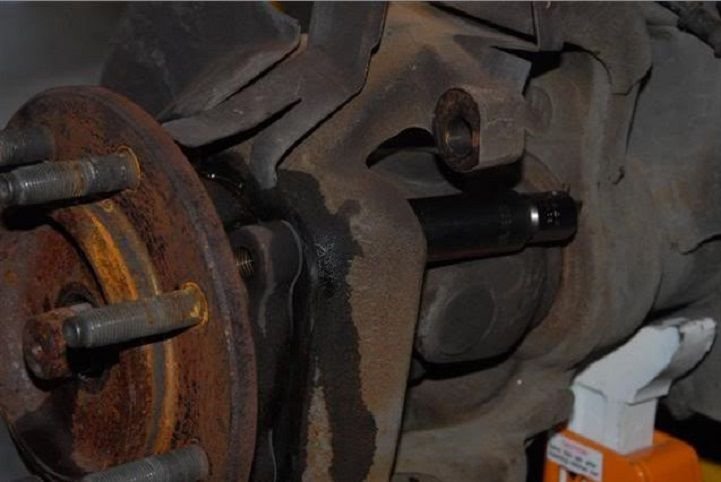
Step 3 – Pull hub
There are four long bolts that hold the hub onto the axle. These bolts need to be removed so that the hub can be pulled away. There is likely a ton of rust and this part of the job isn't easy. Some folks use a rubber mallet, big hammer, or similar, and beat it out of there. There is a dust shield that you must be careful with so you do not break it.
Another method is to put a long socket onto the back of the bolts and start the truck. Turn the steering wheel very delicately until the socket contacts the axle yolk and starts breaking the hub free. This will be done on all four bolts with either method fine. However, the most popular method is beating it with brute force. You could also rent or borrow a hub removal tool to make this job easier.
Step 4 – Break free the ball joints
- Loosen the retaining nut on the upper ball joint until it is almost to the end of that bolt. Leave it just on the end of the bolt.
- Do the same for the lower ball joint. You will need to remove the cotter pin first before you can start to loosen that nut.
- Break free the upper and lower ball joints using a pickle fork.
- Remove both of the nuts.
- Remove the steering knuckle.

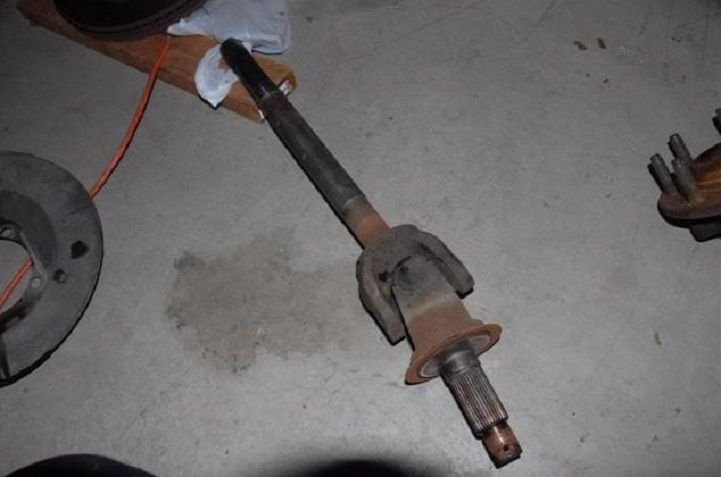
Step 5 – Remove axle
Get a large flat head screwdriver to pop the axle. Wedge the blade into the axle shaft and push outward on the axle yolk where it sits up next to the differential housing. It should come out fairly easily.
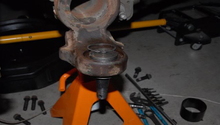
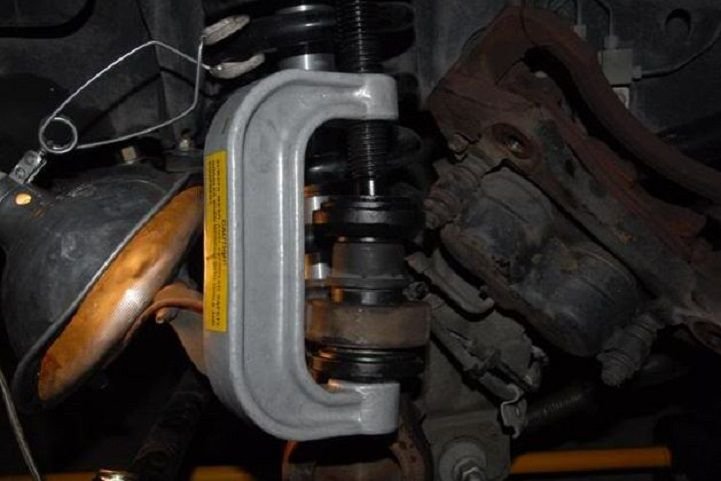
Step 6 – Remove upper and lower ball joints
- Remove the snap ring from the lower ball joint using a pair of snap ring pliers.
- Use the ball joint press to pop the upper ball joint out. It will come out from the top. If the ball joint press does not clear the entire ball joint, you can use a pipe extension of a smaller diameter to go in through the bottom and pop that upper ball joint all the way out.
- Do the same with the ball joint press to the lower ball joint; however, the lower ball joint will come out from the bottom.

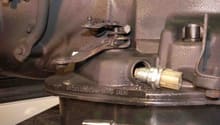
Step 7 – Install new ball joints
Use the ball joint press to install your new ball joints. Make sure that you are installing them in the correct position. On the lower joint, the zerk fitting should point toward the front of your truck. Re-install that snap ring on the lower ball joint. The upper ball joint is considerably more difficult to install. Be careful when using the press.
Step 8 – Put it back together
- When re-installing the axle, be careful not to break the seal and seat it all the way into the gears. You may have to turn it a little to get the splines to line up properly, but it should go all the way in with little to no difficulty.
- Replace the dust boot over the lower ball joint.
- Replace the steering knuckle over the upper and lower ball joints and torque them to proper specifications.
- Reinstall the cotter pin into the lower ball joint bolt.
- Install the hub and dust boot.
- Put the ABS system back in place (top) of hub, and torque the hub bolts to specification.
- Install the axle nut and torque it.
- Spin the hub back and forth to re-seat the bearing.
- Re-torque the axle nut.
- Reinstall the rotors and calipers and replace the wheel.
- Lower the working side and raise the non working side to check for any leaks on the side you just worked on.
- Repeat the entire process for the other side of your truck.
- Take it for a test drive in a low traffic area such as an empty parking lot, to ensure that steering is tight and suspension is quiet.
- Have your truck aligned.
Featured Video: Dodge Ram 1500 Ball Joint Replacement
Related Discussions
- DIY Ball Joint Replacement - Dodgeforum.com
- Ball Joint Replacement - Dodgeforum.com
- Ball Joints - Dodgeforum.com
- Ball Joint Recall - Dodgeforum.com
- Ball Joint and Tie Rod Lifespan - Dodgeforum.com