Dodge Ram 2009-Present: How to Replace Spark Plugs
Changing the spark plugs on your Dodge Ram is easier than it sounds. Here's how to do it.
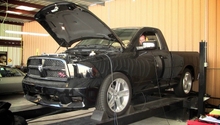
This article applies to the Dodge Ram 1500 (2009-present).
One of the easier maintenance jobs is changing the spark plugs. Although the Dodge Ram isn't the easiest automobile to do this on, it shouldn't be a reason to neglect it or get discouraged. You will need to give yourself a few hours to do this task, as some other components' removal is required. Some of the plugs are tricky to get to and you'll have a tight squeeze, but you can do it with a few extensions to your ratchet. The rear plugs that are closest to the firewall on both sides will be the most difficult to work with. A professional will charge a premium for plugs and labor, but you can save a lot of money by taking the time to replace them on your own. If you have patience and can follow instructions, you can do this in a matter of an hour or two.
Materials Needed
- Standard ratchet, 3/8 and 1/4 will work
- 1", 3" and 12" extensions needed
- 5/8" plug socket and deep well socket needed as well as a 10 mm
- Flat head screwdriver
- Anti-seize (optional)
- Plug gapper (optional, but highly suggested)
The 12" extension will work on the plugs near the front, but the ones near the firewall are too tight to get it in there, so you'll need the shorter extension along with the shorter sockets to get the plugs in and out.
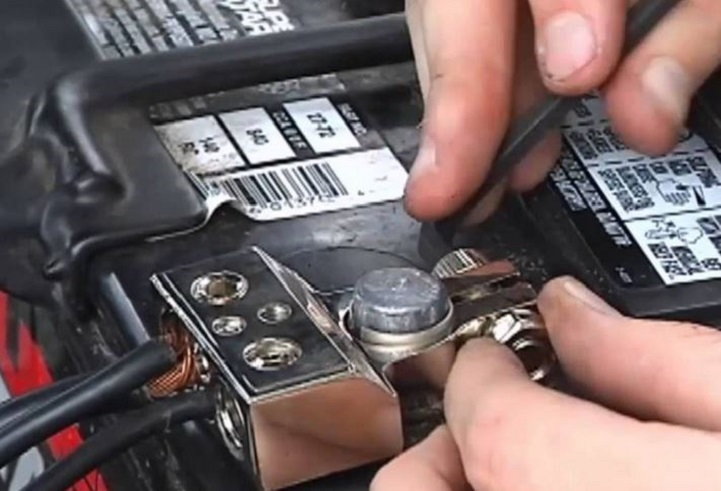
Step 1 – Disconnect your battery
- Disconnect your negative battery terminal (black) any time you are working in the engine compartment. The old saying of "better safe than sorry" is highly applicable here.
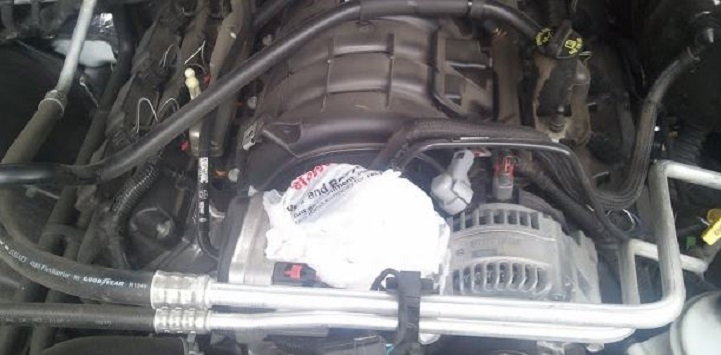
Step 2 – Remove air filter and housing
- Disconnect the mass air flow sensor.
- Use a flat head screwdriver to loosen the elbow clamps on the air cleaner hose.
- Remove the air filter housing and the intake elbow.
- Stuff a rag into the throttle body hole to prevent dirt from going in there.
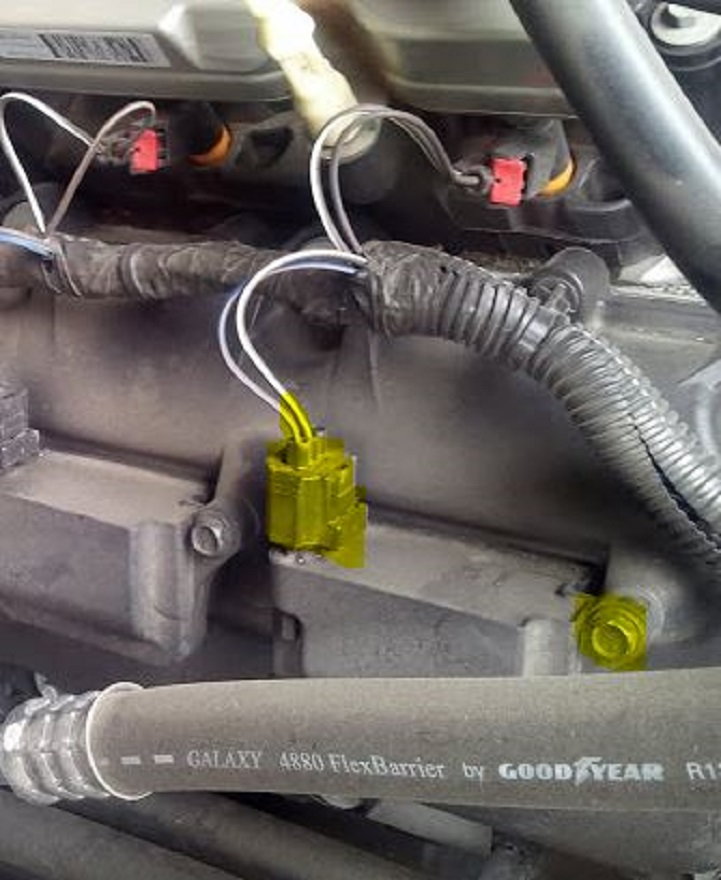
Step 3 – Remove coil packs
- Un-clip the wiring harness from the coil pack.
- Remove the two 10 mm bolts holding the coil packs to the block (diagonal from each other).
- Pull out the coil packs, which will have two inches of rubber tubing that comes out of the spark plug hole with it. Set them aside.
Pro Tip
Coil packs do not have to be replaced as often as spark plugs. Check your owner's manual for proper time frame for replacement. If it is near the time to replace them, you might as well replace them now.
Step 4 – Remove spark plugs
- Each coil pack covers two spark plugs.
- There are 16 spark plugs total.
- For most plugs, especially near the firewall, you will have to put in your socket first.
- Depending on clearance, drop in your one inch or two inch extension.
- Connect your ratchet.
- Loosen your spark plug by turning it to the left.
- Pull out one of the extensions first, break it loose, then pull out the next extension with the socket and plug attached to it.

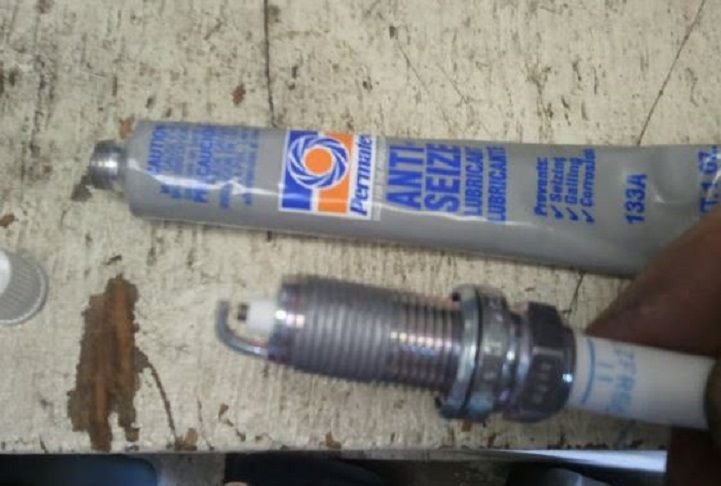
Step 5 – Install new plugs
- You may wish to use the anti-seize compound on the threads of the new plugs, though this isn't required.
- Plugs will have to be re-installed in the same multi-piece fashion as when they were removed.
- You may want to check the gap on the plugs for correct spacing (0.043).
- Tighten the plug. Torque to 20 ft/lb.
Pro Tip
Be cautious to not over-tighten your plugs or cross-thread them in the holes. This will be very costly and a major pain to rectify.
Step 6 – Re-install coil packs
- If you are replacing your coil packs, install the new ones now; otherwise, re-install the old ones.
- Once you feel the ends of the packs clip onto the new plugs, tighten the bolts back onto the packs. Hand-snug only.
- Replace the wiring harness.

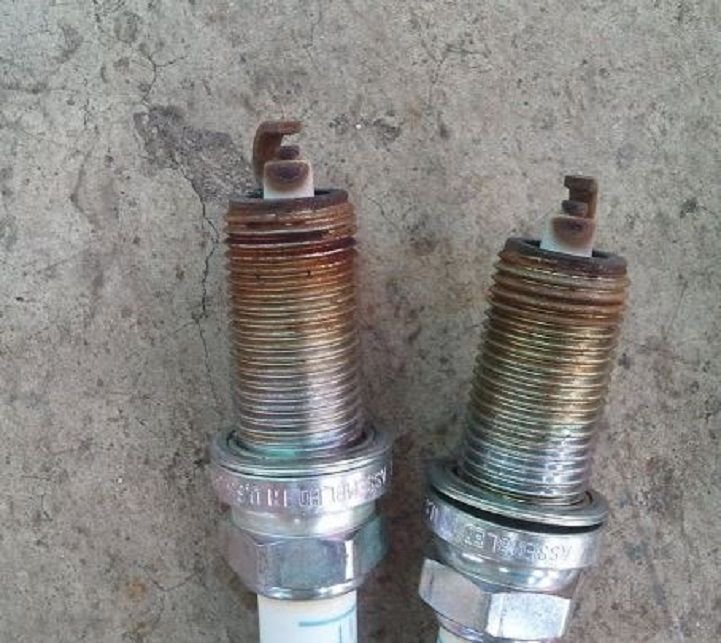
Step 7 – Inspect the old plugs
- This step is not required but should be done every time your plugs are replaced.
- Check for lean or rich burning conditions on the end of each plug.
- They should be golden-brown, not wet with oil or anti-freeze, and not burnt to a white/ashy look.
Pro Tip
The choices are nearly endless for your replacement plugs. The E3 plugs have had many complaints about performance and longevity. If the OEM plugs worked well, why not use them again? Other plugs such as NKG, Iridium and Platinum have received stellar reviews from other owners. Prices vary widely from source, so look for sales and rebates before spending your hard earned money.
Related Discussions
- 2010 5.7 Spark Plug Change - Dodgeforum.com
- Changing Spark Plugs and Wires '09 Hemi - Dodgeforum.com
- Best Spark Plug? - Dodgeforum.com