Dodge Ram: Why is My ABS Light On?
The ABS light being on could mean that there is a problem with the ABS system.
This article applies to the Dodge Ram (1994-present).
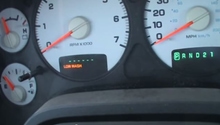
The ABS (Anti-lock Brake System) light should only come on when you turn your key to "On" as a way to check that the light works or when the ABS system is activated. It also stays on when there is an issue with the system. While the light being on does not mean that you do not have any brake functionality, it does mean that you need to discover what the problem is. Sometimes the fix is simple and cheap while other times not. You still need to have full confidence in your braking system; check out this simple way to fix the light being on.

Materials Needed
- Vehicle speed sensor
- 3/8" ratchet
- 13mm and 14mm deep socket
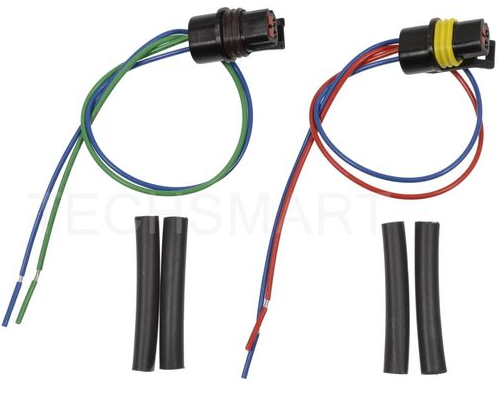
- Speed sensor connector repair kit
- dielectric grease
Step 1 – Reset lights on instrument panel
If just the ABS, brake, and possibly check engine light are staying on do the following for a reset.
- Disconnect the negative battery terminal.
- Put the key in the ignition and turn to "on position;" wait 30 seconds.
- Step on the brake pedal and hold for another 30 seconds (this puts a current drain on the computer system to erase the memory).
- Release the brake pedal.
- Remove key from the ignition.
- Reconnect the negative battery terminal.
- Re-calibrate the ABS and speed sensors by driving the vehicle over 15 mph for at least 10 seconds.
- Park vehicle, turn off ignition, start the vehicle, wait five seconds, and go for a test drive at various speeds.
Now the lights should be off and stay off. If they are still on, continue to Step 2.
Step 2 – Replace wires if necessary (optional)
If the lights still remain on or only come on at certain speeds, continue below.
- Disconnect the negative battery terminal again.
- Unplug the harness from the top of the rear differential.
- Closely inspect the wires for damage. If they are damaged, you can replace them with a kit from your local auto supply.
- Inspect harness plug for corrosion.
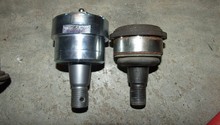
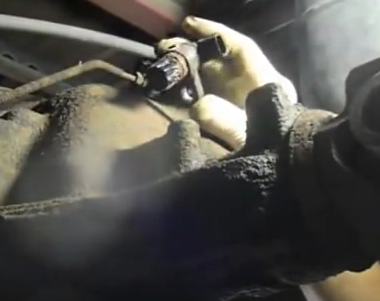
- Remove old speed sensor.
- Now remove the nut on top of the bolt that holds it in to release the cables that are attached with a 13mm socket.
- Next, remove the actual bolt that holds the sensor in with a 14mm deep socket.
- The sensor will be free now but, more than likely, road gunk has sealed it on pretty well. Spray some penetrating fluid around where it goes into the axle.
- Carefully break it free by rotating it with pliers (if necessary). Once it rotates, you can gently pry up on it to pull it out.
- Put oil on o-ring of new sensor.
- Put dielectric grease on harness connections.
- Install new sensor and reattach harness.
- Repeat the first steps 2 through 6 in Step 1 above to reset the lights.
Pro Tip
The RWAL sensor and wiring live in a nasty environment. It is a good idea to be sure that all of the wiring is in good condition and all of the connector plugs are tight and free of corrosion.
Related Discussions
- ABS and Brake Light On - Dodgeforum.com
- TBrake ABS Light On - Dodgeforum.com
- ABS Light and Brake Light On, Already Checked the Obvious - Dodgeforum.com