

Homemade Mesh (gutter guard) Grill DIY


Alright cool. Send me a PM and let me know how you like it. You may want to pick up some k&n filter oil for it, but not an emergency right away. I cleaned it pretty good.

Legend


Joined: Feb 2005
Posts: 8,058
Likes: 184
From: Fort Worth, TX
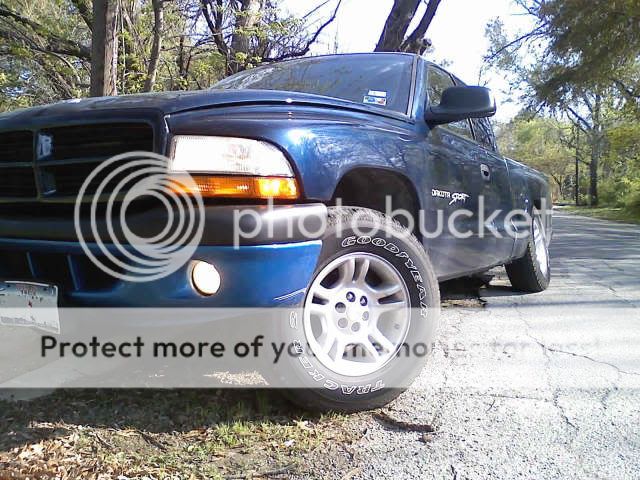
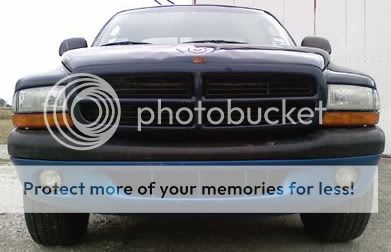
okay, now I'm getting the bug. Not sure how it would look with the blue. Keep in mind that everything is patroit blue (what it should be) right now, give or take the flakes. These are just the only shots I have of the nose. The bottom one is when I first got it.

IMG_5628.jpg
IMG_5628.jpg
Last edited by magnethead; Aug 19, 2010 at 05:22 PM.
Legend
Joined: Feb 2005
Posts: 8,058
Likes: 184
From: Fort Worth, TX
AndI'm not sure whether or not I should leave the slats, I like Rantz's, but his is chrome.
I tried to do a photochop, but I don't have a decent enough picture.
The fins created too much shadow to notice anything else. I cut them out and I definitely do NOT regret it. Regardless of your lighting choices, the fins have got to go lol. Seriously though, I considered mounting the mesh in front of the fins. It would have the mesh out there and more visible, but I didn't have the patience to tackle the conundrum of handling the edge of the mesh up against the chrome grill. A bead of rubber along it would probably do the trick if you went this route.
Lights: I really like the factory location. Sometimes behind the grill can be cool too, but I would suggest making the holes larger in the mesh (in front of the lights) if you went that route. Personally I don't like to see them anywhere else unless they are on a brush guard or something.
As for the hanger. There is just enough room when you pop the hood to reach your finger in the side and grab the hanger. I have rather "manly" hands and there is still plenty of room to reach in there to get one finger in the loop to grab the hanger to open it. Get your hanger set up before you put your mesh-filled grill back on (to hash it out). I had to re-bend it a couple of times to get the length correct.
For me, I ran my hanger down the support bar in the middle of the grill. So I didn't need to make any cut outs in the mesh, or run it out the side, which I found to be a bit awkward to grab.
I used a couple zip ties to hold the hanger to the bar, and made a loop at the bottom. now I just need to reach under the grill after poppin' the hood. This made the whole mechanism much easier to me.

I need to redo the whole process though, I'm not 100% happy with my results. Decent, and not bad for my first time, but I'm a perfectionist in some respect... so I'll have to redo the whole thing sometime down the road.
Legend
Joined: Feb 2005
Posts: 8,058
Likes: 184
From: Fort Worth, TX
For me, I ran my hanger down the support bar in the middle of the grill. So I didn't need to make any cut outs in the mesh, or run it out the side, which I found to be a bit awkward to grab.
I used a couple zip ties to hold the hanger to the bar, and made a loop at the bottom. now I just need to reach under the grill after poppin' the hood. This made the whole mechanism much easier to me.
I need to redo the whole process though, I'm not 100% happy with my results. Decent, and not bad for my first time, but I'm a perfectionist in some respect... so I'll have to redo the whole thing sometime down the road.
Professional
Joined: Sep 2012
Posts: 167
Likes: 2
From: PNW
I just love DIY mods like these...Thanx to Theeplaymaker.
Latch release using a 1/8" steel rod.

I drilled a hole through the latch for the rod's fancy bend.

At the bottom of the grill I used a self taping screw and a 1/4" cable clamp.

Now for the bumper. It just didn't look right seeing the radiator compared to the new grill inserts...Time to continue the mod.
I dug through my nuts & bolts until I found the right size for my idea. Wedge a nut in between the the plastic groove. Once you find the correct size remove it...It will be installed later.

Put the mesh in place then force the bolt and washer through the mesh while turning the bolt...It will thread itself into the mesh. Do this for all 3 grooves making sure your dead center in each groove. Now slide the mesh to one side so you can thread the nut onto the end of the 1" bolt.

Place the mesh into position and work the nuts into the plastic. Push them into the groove as far you can without cracking the plastic...Tighten the bolt until the mesh is flush with the inside of the bumper. If you crank on it the bolt you'll just pull the nut out of the plastic. As for the ends I couldn't come up with anything better than the zip ties.


Latch release using a 1/8" steel rod.
I drilled a hole through the latch for the rod's fancy bend.
At the bottom of the grill I used a self taping screw and a 1/4" cable clamp.
Now for the bumper. It just didn't look right seeing the radiator compared to the new grill inserts...Time to continue the mod.
I dug through my nuts & bolts until I found the right size for my idea. Wedge a nut in between the the plastic groove. Once you find the correct size remove it...It will be installed later.
Put the mesh in place then force the bolt and washer through the mesh while turning the bolt...It will thread itself into the mesh. Do this for all 3 grooves making sure your dead center in each groove. Now slide the mesh to one side so you can thread the nut onto the end of the 1" bolt.
Place the mesh into position and work the nuts into the plastic. Push them into the groove as far you can without cracking the plastic...Tighten the bolt until the mesh is flush with the inside of the bumper. If you crank on it the bolt you'll just pull the nut out of the plastic. As for the ends I couldn't come up with anything better than the zip ties.