
DIY - Electric Fan Setups
#1
 07-11-2011, 07:17 PM


Join Date: Jun 2011
Location: California
Posts: 325
Likes: 0
Received 0 Likes
on
0 Posts
A word from the moderator:
Method #1, ready to go kit: Totally Cool Performance (TCP) has an entire kit ready to go for you, about $555 + shipping.
One stop shop: http://www.tcpperformance.com/2068736.html
Other methods of installing electric fans are in additional posts after this one.
---------------------------------------------------------------------------------------
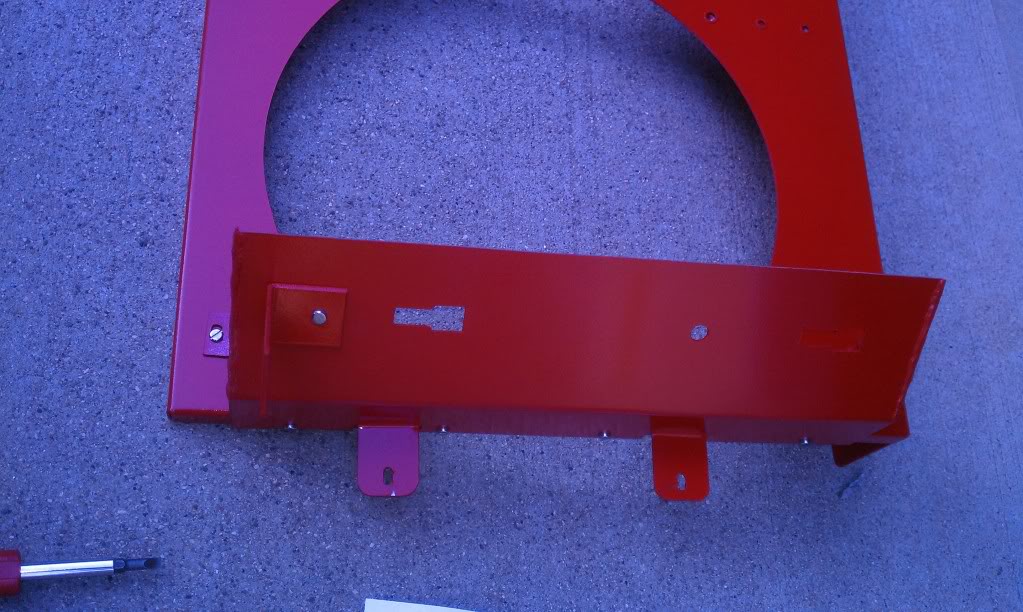
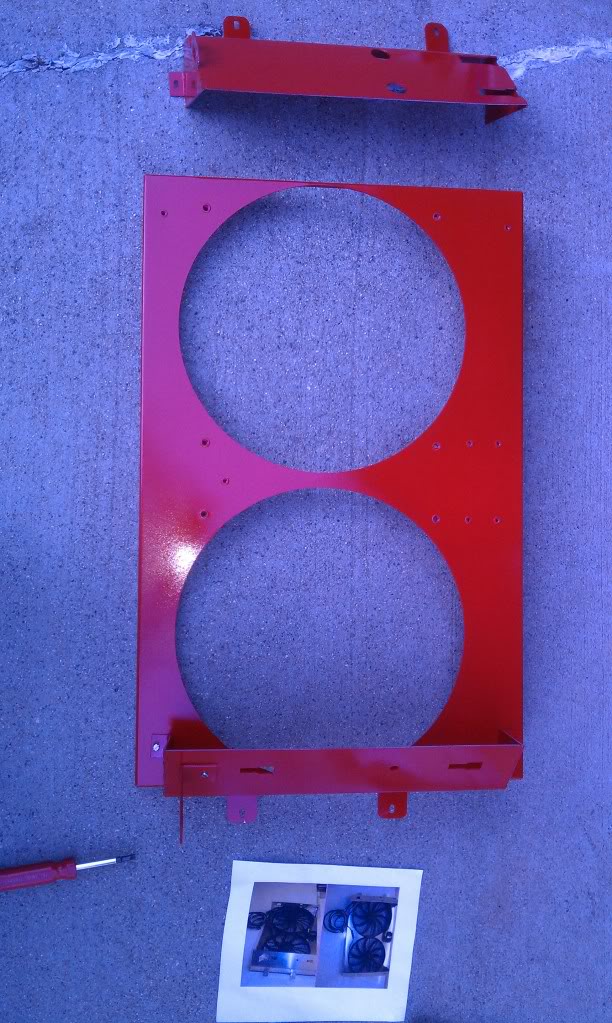
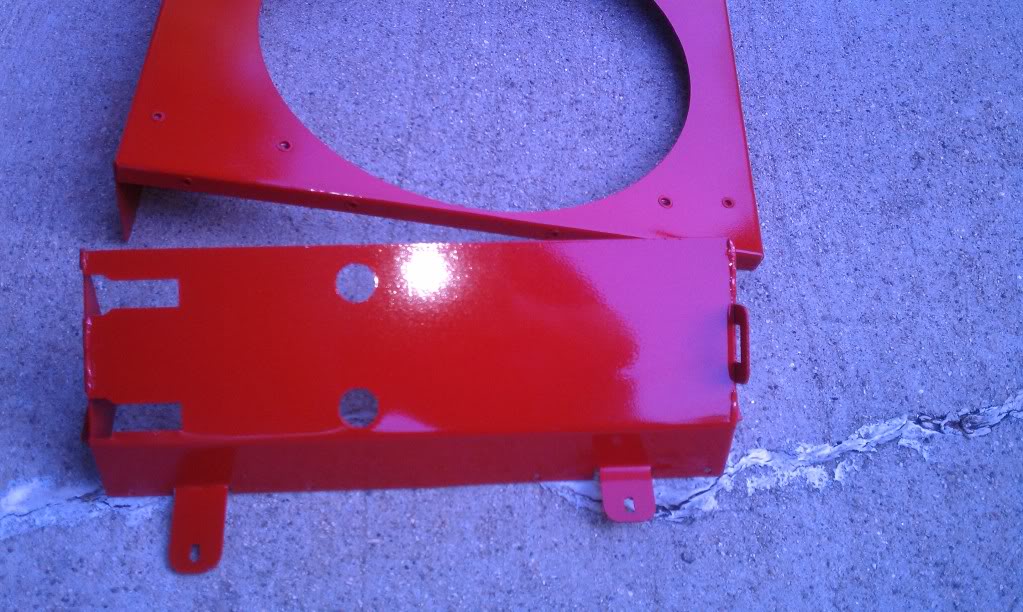
� Get everything ready to assemble
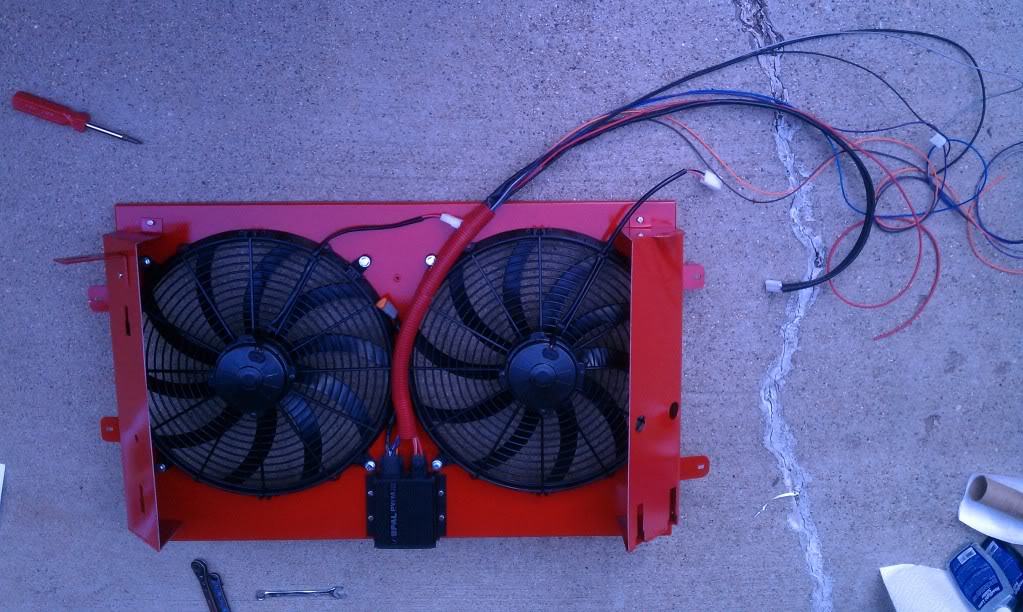
� Put on both fans with attachment clips FIRST, on to FLAT surface, and make sure bolts with included washers and lock washers are TIGHT
� Screw on both drivers side and passengers side aluminum flares that hole engine coolant and windshield washer reservoirs
� Screw on controller and relay for secondary fan as shown below in pictures

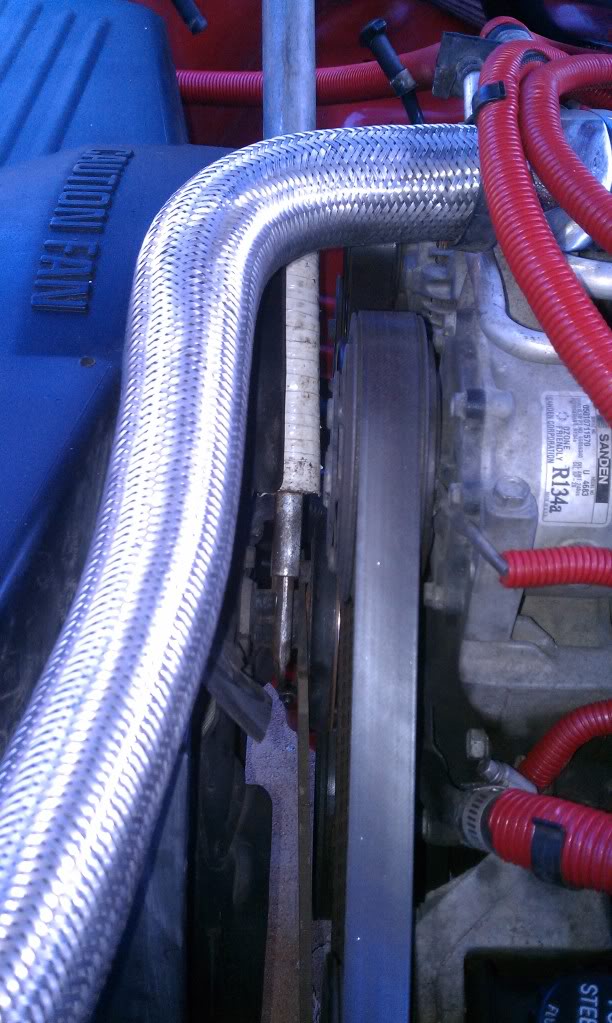
� Now you have to remove the old fan. I used a metal File in-between the two screws to hold the clutch while a friend unscrewed the fan assembly see below
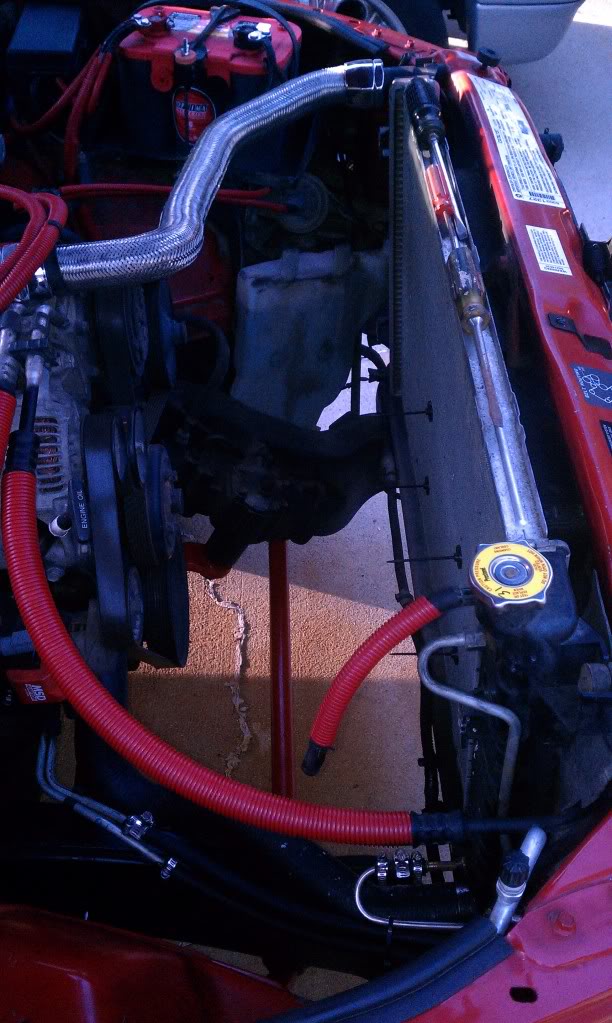
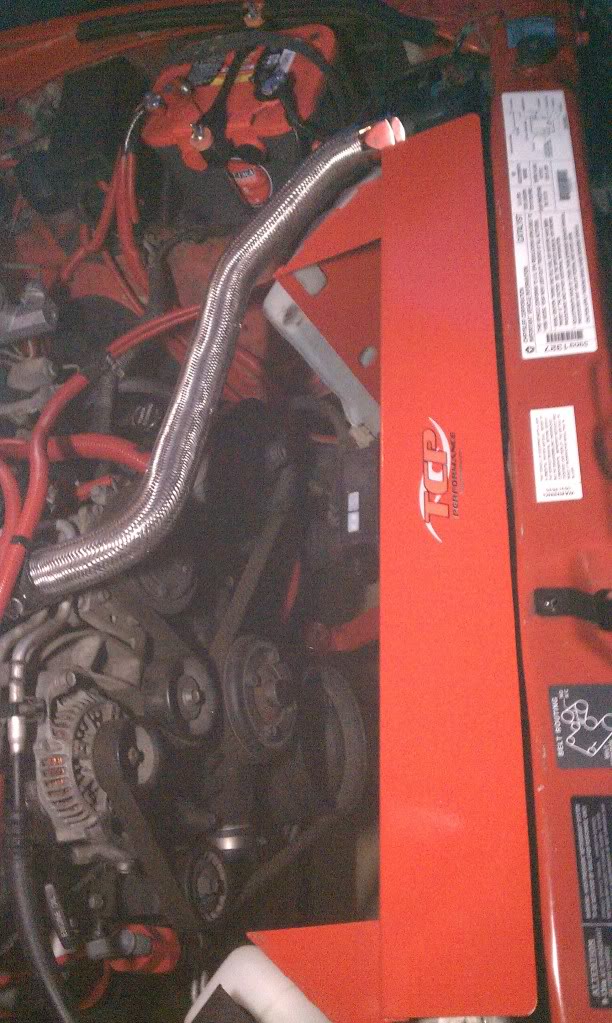
� Now, after its been removed, get your new setup all ready to go. Move the two reservoir tanks to the sides and put the new assembly in (just drop all wires down), bolting in the four bolts. Re-attach the coolant tanks and yours should look like below:
� A/C line gets attached to the positive side of the A/C plug, my switched ignition I ran into the front fuse box and attached onto my cigarette lighter. This is so when I turn the turn off everything turns off. Some people will attach to their battery so when they turn off the fan must get it below a set temp before the fans turned off. Really your choice if you want to hear the fan or not after vs quicker cool down.
� Follow the instructions for the controller Dual OEM fans. Only thing not completely explanatory is the Engine Temperature Sensor. In The Dodge ram it is right behind the thermostat housing. Long needle nose will be able to pull it out so you can hook onto it.
� Last is programming, I held PRG till it blinked amber then hit enter. If you hit enter 1 more time 160 degree thermostat 2 more times 180 3 more 195.You will see the fan light blink the number of the program and then hit PRG to exit.
� Viola! You now have an E-Fan! Thanks to SPAL and TCP Performance and HeyYou! for making this possible!
Method #1, ready to go kit: Totally Cool Performance (TCP) has an entire kit ready to go for you, about $555 + shipping.
One stop shop: http://www.tcpperformance.com/2068736.html
Other methods of installing electric fans are in additional posts after this one.
---------------------------------------------------------------------------------------
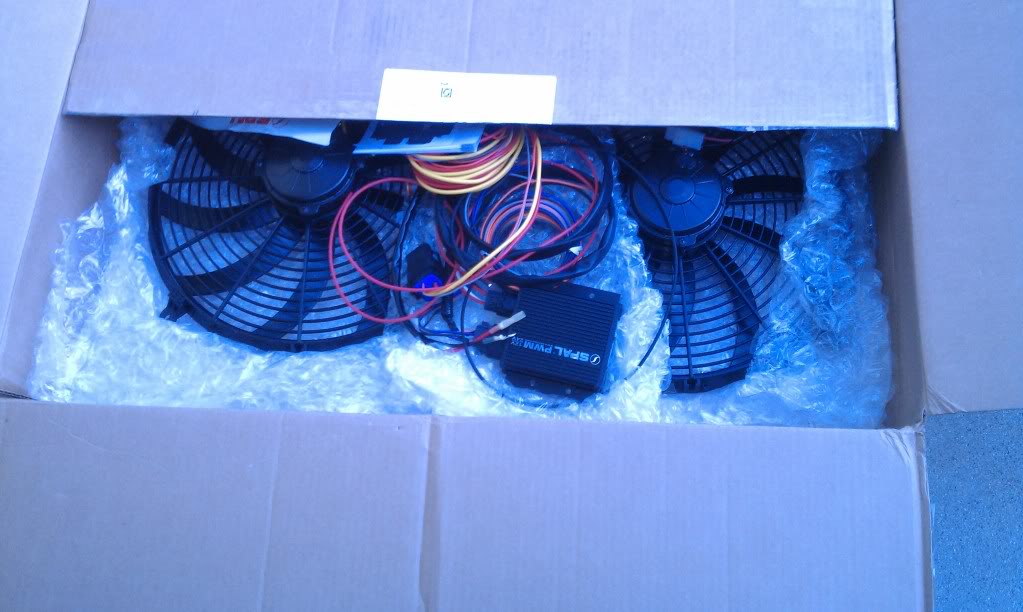
- Unpack box and make sure all equipment on packing list is included
- Sit out all of your necessary parts and check for damages
- If painting grind and clean all weld seams
- Hang and paint aluminum shroud (high heat and optional) – See Below
� Get everything ready to assemble
� Put on both fans with attachment clips FIRST, on to FLAT surface, and make sure bolts with included washers and lock washers are TIGHT
� Screw on both drivers side and passengers side aluminum flares that hole engine coolant and windshield washer reservoirs
� Screw on controller and relay for secondary fan as shown below in pictures
� Now you have to remove the old fan. I used a metal File in-between the two screws to hold the clutch while a friend unscrewed the fan assembly see below
� Now, after its been removed, get your new setup all ready to go. Move the two reservoir tanks to the sides and put the new assembly in (just drop all wires down), bolting in the four bolts. Re-attach the coolant tanks and yours should look like below:
� A/C line gets attached to the positive side of the A/C plug, my switched ignition I ran into the front fuse box and attached onto my cigarette lighter. This is so when I turn the turn off everything turns off. Some people will attach to their battery so when they turn off the fan must get it below a set temp before the fans turned off. Really your choice if you want to hear the fan or not after vs quicker cool down.
� Follow the instructions for the controller Dual OEM fans. Only thing not completely explanatory is the Engine Temperature Sensor. In The Dodge ram it is right behind the thermostat housing. Long needle nose will be able to pull it out so you can hook onto it.
� Last is programming, I held PRG till it blinked amber then hit enter. If you hit enter 1 more time 160 degree thermostat 2 more times 180 3 more 195.You will see the fan light blink the number of the program and then hit PRG to exit.
� Viola! You now have an E-Fan! Thanks to SPAL and TCP Performance and HeyYou! for making this possible!
Last edited by jasonw; 07-15-2011 at 12:54 AM. Reason: Repackaging.
#2
07-15-2011, 12:53 AM
Method #2:
Things you need:
-Aluminum Shroud from TCP Performance, about $150 (or you can build your own if you have the means)
-Two 16" FF Dynamics Fans, $160 per fan (best fans I've found yet)
-Electric Fan Controller, $40 or less (available at most Auto Parts stores)
-Various miscellaneous screws or bolts to install the fans/controller into the shroud
You can buy the shroud from TCP Performance here: http://www.tcpperformance.com/index.html
If you call them, they can sell you just a shroud. Mine was $150, as of March/April, 2011.
The FF Dynamics fans are the best fans I've been able to find that are reliable. The FFD165 pushes out 3000 CFM, and only pulls 9 amps when running. The most I've seen it spike up to at startup (when below freezing) was about 13 amps. You can buy them here: http://www.ffdynamics.com/products_ultracoolingfans.htm
Step 1: Unpackage everything, make sure you have everything you need. Basic hand tools are all that is needed for this job, but power tools help a lot.
Step 2: If you want to paint the shroud, do so at this time. Grind and clean all welds, hang and paint (recommend high heat paint). Since this shroud is the same one used in the first method, see first method above for pictures.
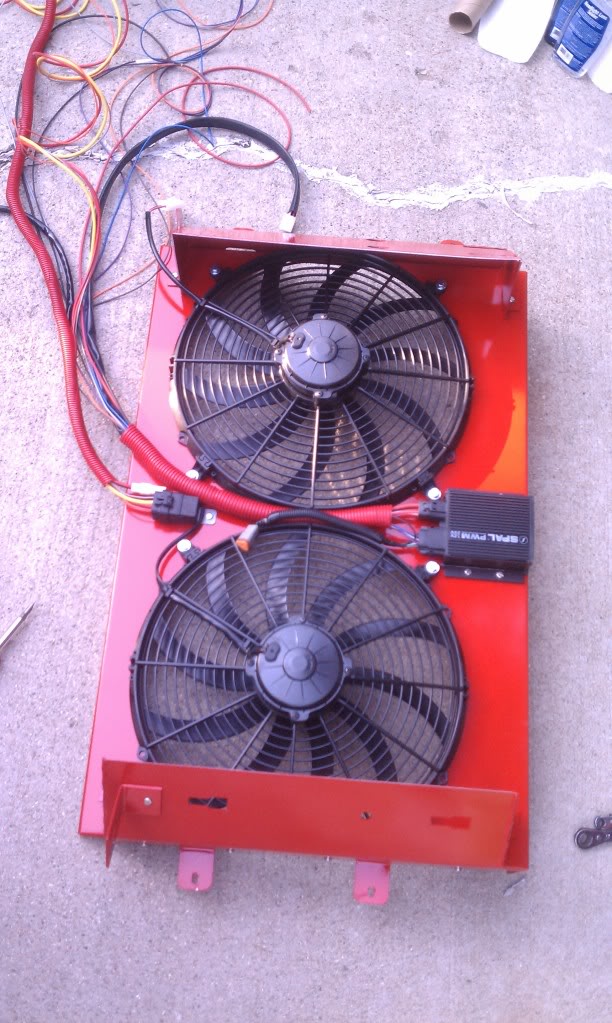
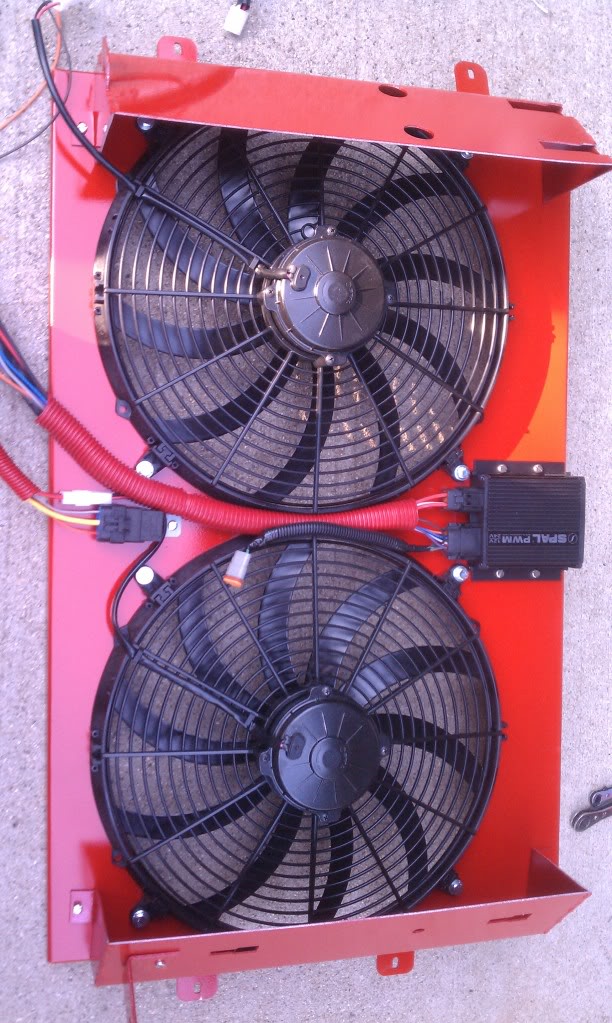
Step 3: Put on both fans with attachment clips FIRST, on to FLAT surface, and make sure bolts with included washers and lock washers are TIGHT. Screw on both flares that hold the engine coolant reserve tank and windshield washer fluid reservoir. Screw on the controller/relay for the fans. Wire them all up appropriately with the appropriate gauge of wire. The controller will have instructions, but I recommend the largest gauge wire as possible, at least 12 gauge. See first method above for pictures.
Step 4: Remove the old fan and fan shroud. See first method above for instructions on that.
Step 5: Put the whole setup into place and screw it into the four holes in the radiator, just reverse the method you used to remove the factory shroud. Connect the controller to a power source, I recommend the a 30A fused connection straight to the battery. Connect the controller to the A/C (if you so desire) and a manual switch (if you so desire, some controllers do not have these options). You may also see method one above for additional install tips.
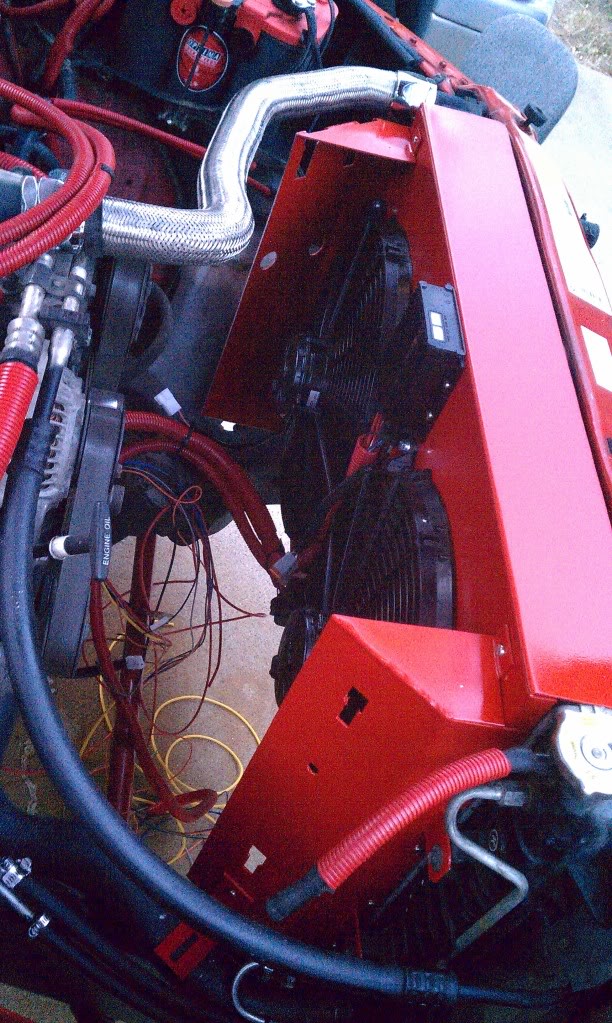
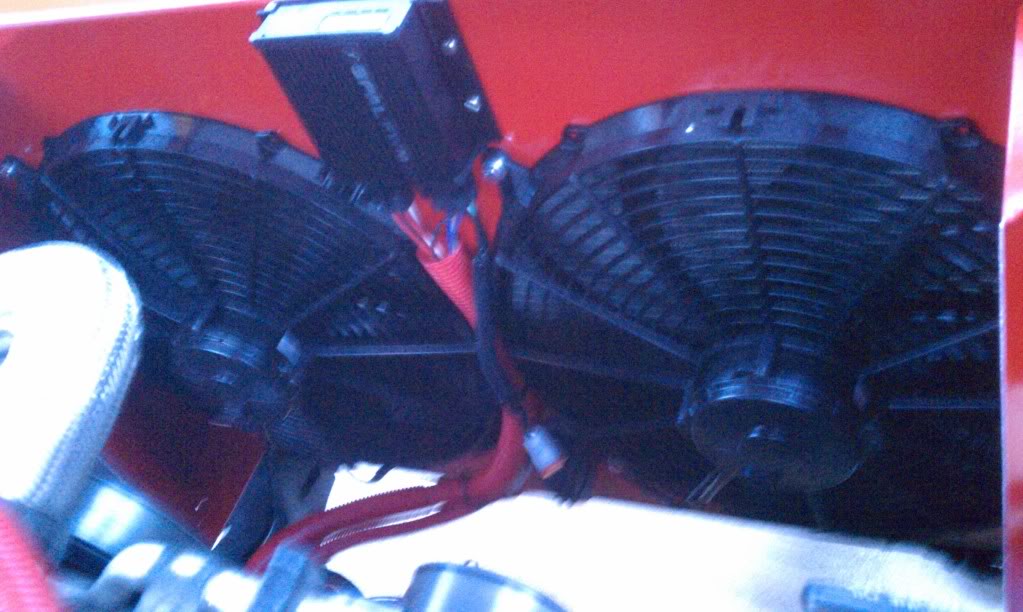
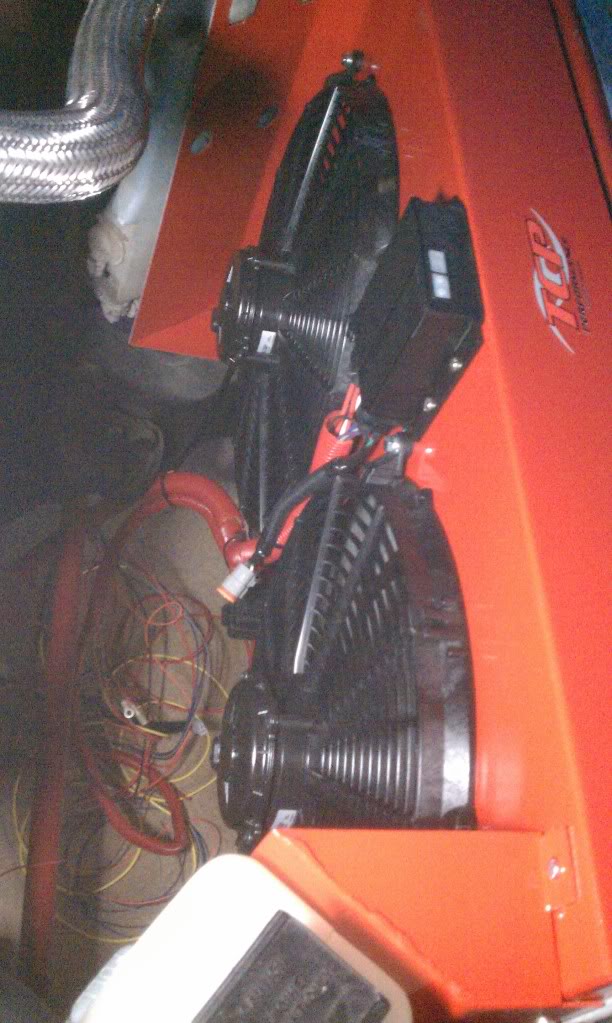
Here is the completed product. I chose not to paint the shroud at this time, as I installed it when it was below zero outside and did not want to spend much time in my unheated garage. The picture was taken at night with a cell phone, so even though its not the best picture, it definitely gives you a really good idea of what yours should look like when finished.

Things you need:
-Aluminum Shroud from TCP Performance, about $150 (or you can build your own if you have the means)
-Two 16" FF Dynamics Fans, $160 per fan (best fans I've found yet)
-Electric Fan Controller, $40 or less (available at most Auto Parts stores)
-Various miscellaneous screws or bolts to install the fans/controller into the shroud
You can buy the shroud from TCP Performance here: http://www.tcpperformance.com/index.html
If you call them, they can sell you just a shroud. Mine was $150, as of March/April, 2011.
The FF Dynamics fans are the best fans I've been able to find that are reliable. The FFD165 pushes out 3000 CFM, and only pulls 9 amps when running. The most I've seen it spike up to at startup (when below freezing) was about 13 amps. You can buy them here: http://www.ffdynamics.com/products_ultracoolingfans.htm
Step 1: Unpackage everything, make sure you have everything you need. Basic hand tools are all that is needed for this job, but power tools help a lot.
Step 2: If you want to paint the shroud, do so at this time. Grind and clean all welds, hang and paint (recommend high heat paint). Since this shroud is the same one used in the first method, see first method above for pictures.
Step 3: Put on both fans with attachment clips FIRST, on to FLAT surface, and make sure bolts with included washers and lock washers are TIGHT. Screw on both flares that hold the engine coolant reserve tank and windshield washer fluid reservoir. Screw on the controller/relay for the fans. Wire them all up appropriately with the appropriate gauge of wire. The controller will have instructions, but I recommend the largest gauge wire as possible, at least 12 gauge. See first method above for pictures.
Step 4: Remove the old fan and fan shroud. See first method above for instructions on that.
Step 5: Put the whole setup into place and screw it into the four holes in the radiator, just reverse the method you used to remove the factory shroud. Connect the controller to a power source, I recommend the a 30A fused connection straight to the battery. Connect the controller to the A/C (if you so desire) and a manual switch (if you so desire, some controllers do not have these options). You may also see method one above for additional install tips.
Here is the completed product. I chose not to paint the shroud at this time, as I installed it when it was below zero outside and did not want to spend much time in my unheated garage. The picture was taken at night with a cell phone, so even though its not the best picture, it definitely gives you a really good idea of what yours should look like when finished.
Last edited by jasonw; 07-15-2011 at 01:25 AM.
#3
07-15-2011, 01:25 AM
Reserved for future methods.
If you have an electric fan setup different than the above two methods in your 2nd gen and wish to do a DIY guide, go ahead and make one, post it in the general discussion area and PM me.
If you have an electric fan setup different than the above two methods in your 2nd gen and wish to do a DIY guide, go ahead and make one, post it in the general discussion area and PM me.
Last edited by jasonw; 08-21-2011 at 01:05 AM.