

TQ Converter Install Tutorial

Thread Starter
|
Record Breaker
Joined: May 2007
Posts: 1,854
Likes: 2
From: Oceanside, CA
This is a quick tutorial on installing a Torque Converter. The vehicle shown is a 2004 Ram 2500 Hemi 2WD. The install should be very similar to most other Rams as well.
Step One: Gather all required parts, supplies, and tools. Having access to a lift is highly advised. Some things you will need: Torque Converter, at least 17 quarts of ATF +4, tranny filter kit, RTV sealant, impact wrench/sockets, swivel adapter, a really long extension (i used a 36"), socket/wrench sets, torx drivers/bits, transmission jack, screw drivers, and a buddy or two to help.
Step Two: Get your truck up on the lift. Get it high enough so you can stand underneath it and work comfortably.
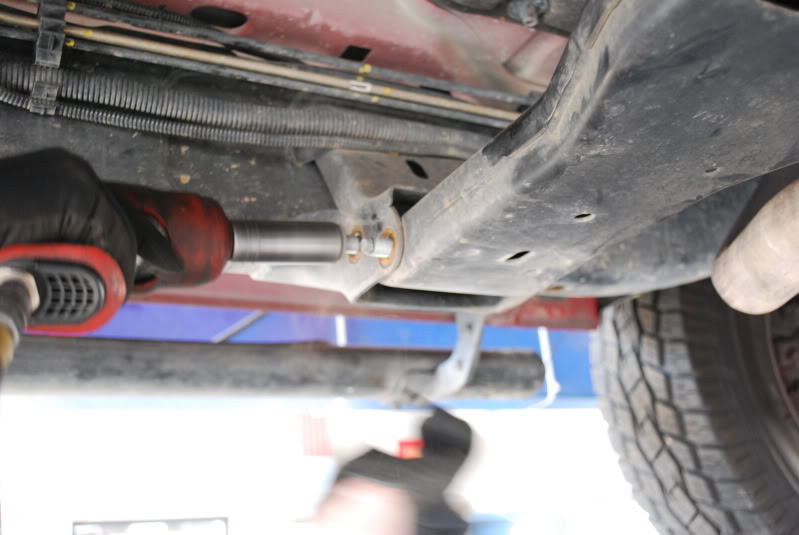
Step Three: Remove Drive Shaft. This was very easy. It can be accomplished by removing the 4 bolts that hold it onto the rear axle, then sliding it out of the transmission. (I am not positive, but this could be different for 4WD or half ton trucks)
Step Four: Drain Fluid from pan. (this step is optional. you can install a new converter without changing the fluid. this is totally up to you though) Having a drain plug helps tremendously. If you aren't fortunate enough to have one, then loosen up the pan until you can drop one corner and begin pouring the fluid out.

Step Five: Get your exhaust out of the way. I chose to totally remove my exhaust so I would have as much room to work as possible. To do this, just remove the 4 bolts attaching your Y pipe to your headers, then slide it off all the hangers. This is optional though.
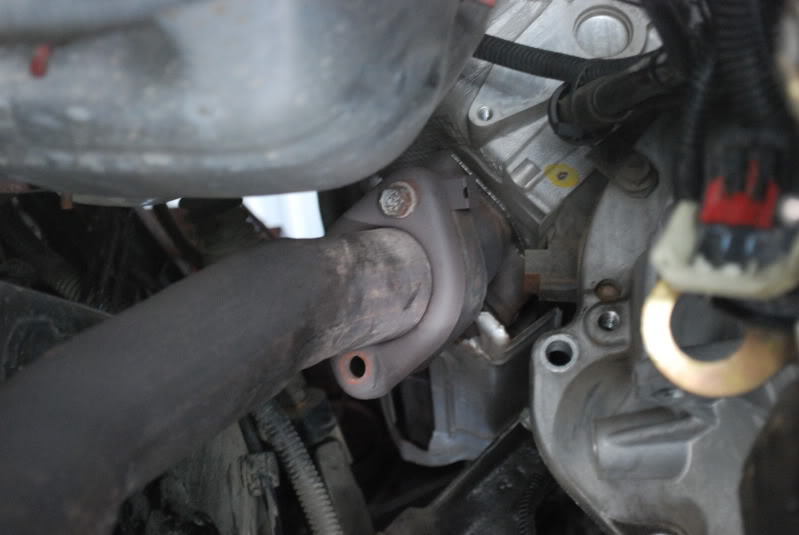
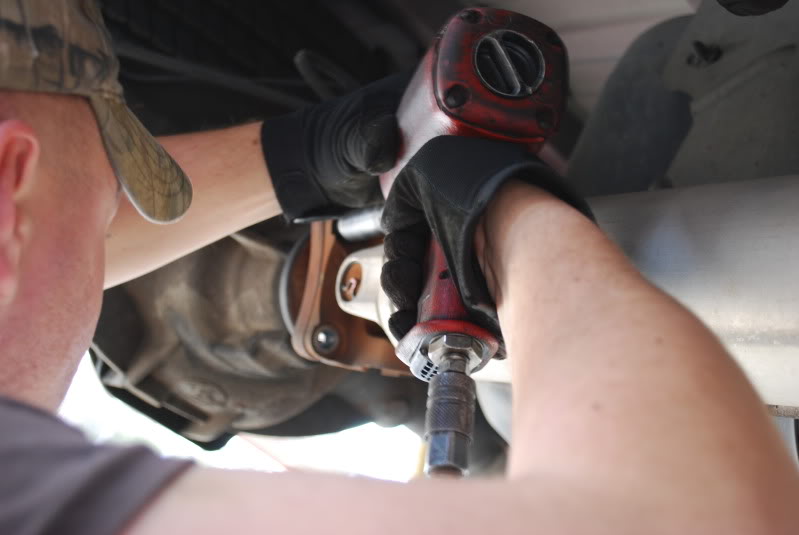
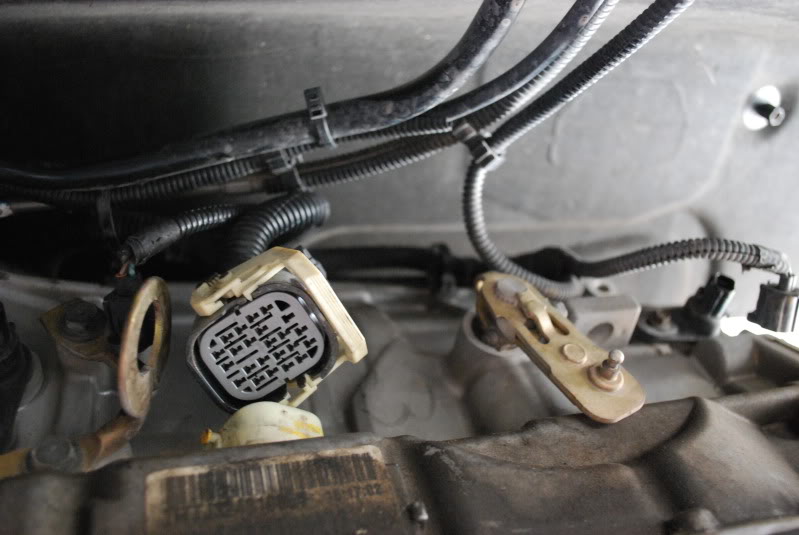
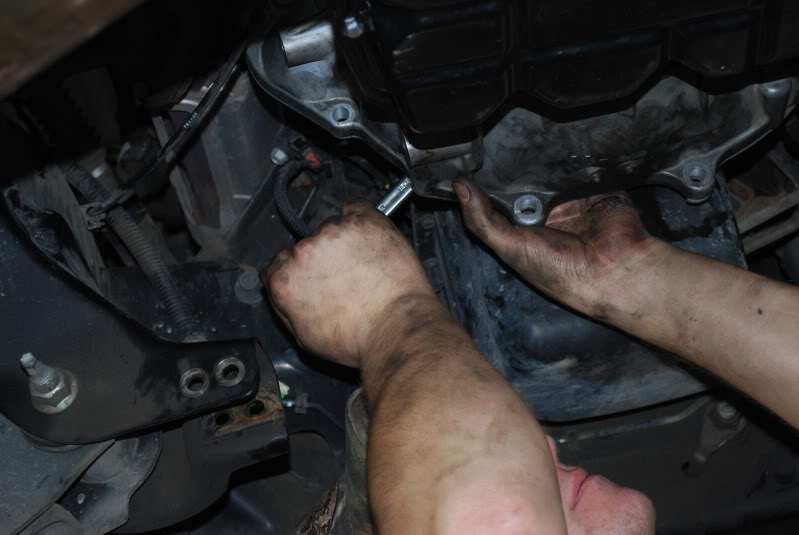
Step Six: Remove all electrical connections, fluid lines, and dip stick tube. You can mark the wires with tape and a marker if you need to, but its pretty obvious which connecter goes where when reassembling. Next loosen the fluid lines that send and receive from the tranny cooler. just loosen the smaller nut with a wrench, and slide the tube out. (note, these will leak fluid). To take the dip stick off of the tranny, you will need to take two bolts out, one holding the tube above the pan, and the other holding it to the bell housing.
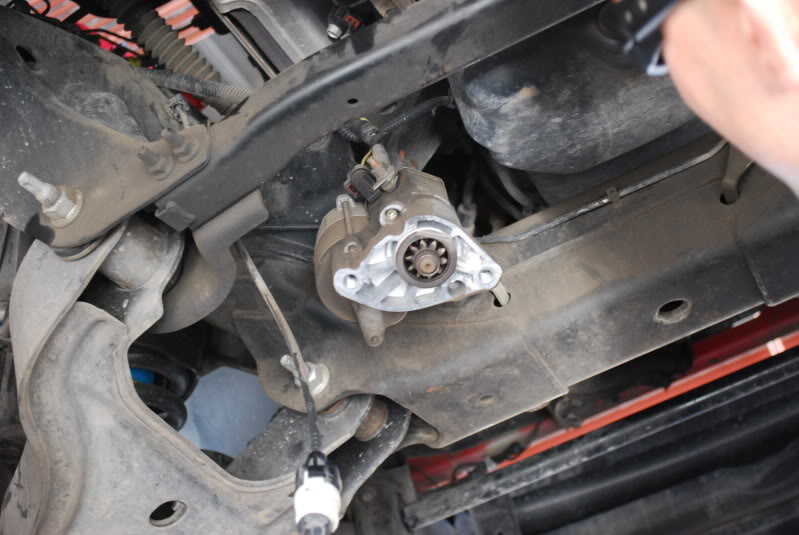
Step Seven: Remove Starter. It is attached to the bell housing on the driver's side. it is held in by two bolts. remove it, and secure it out of the way. I zip tied it to the frame.
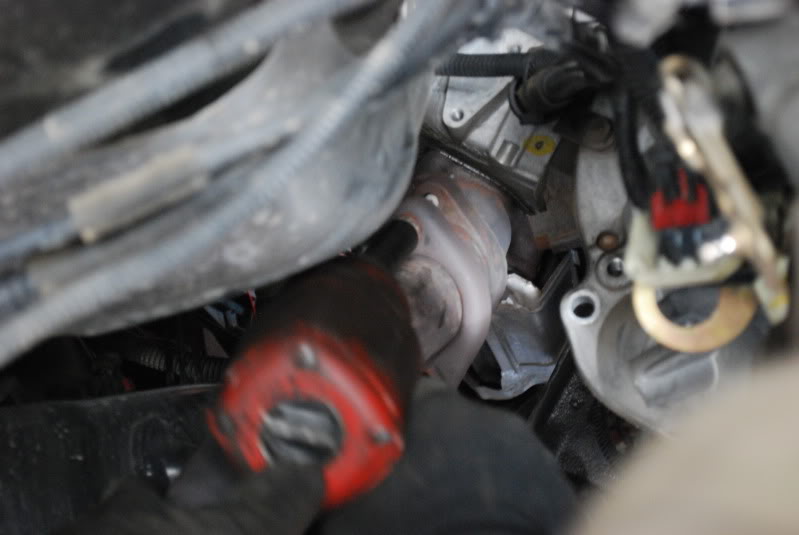
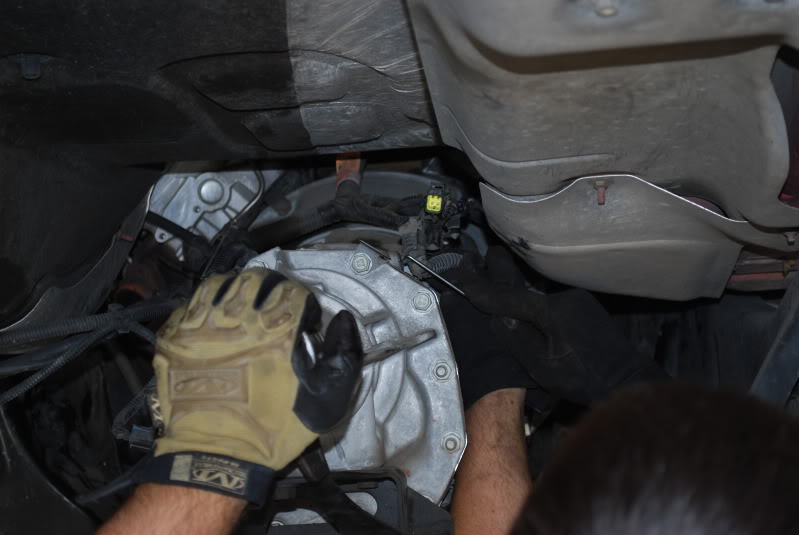
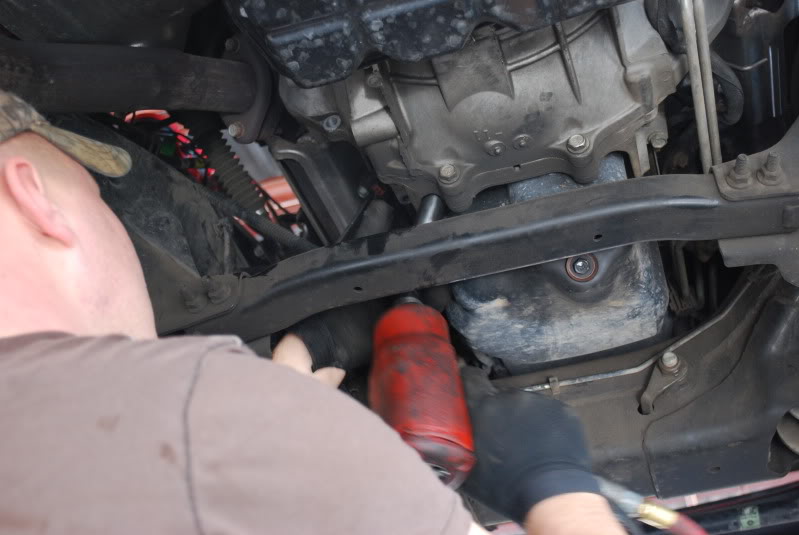
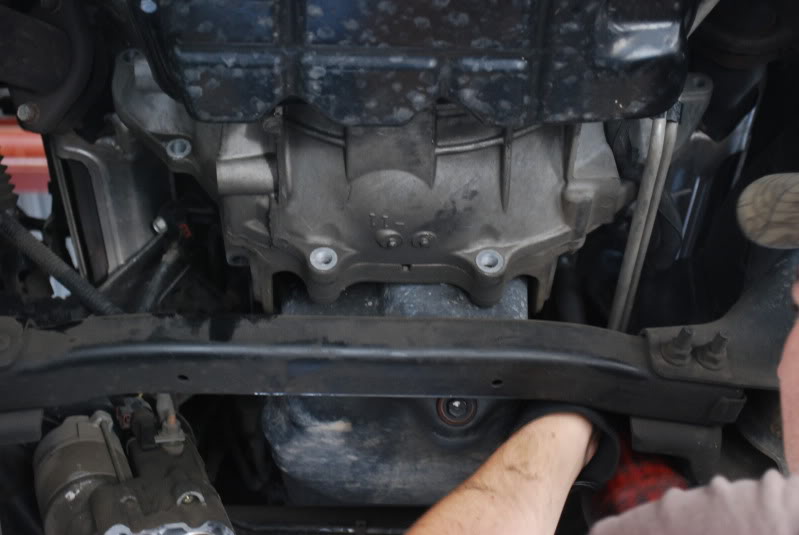
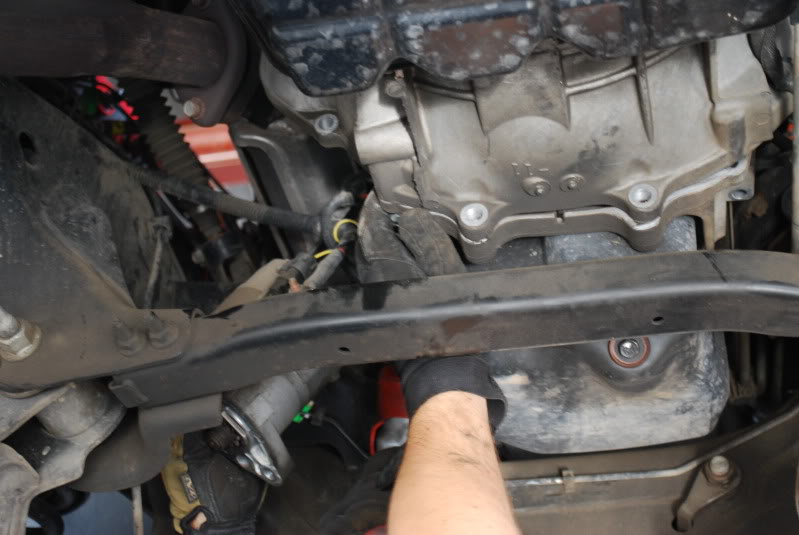
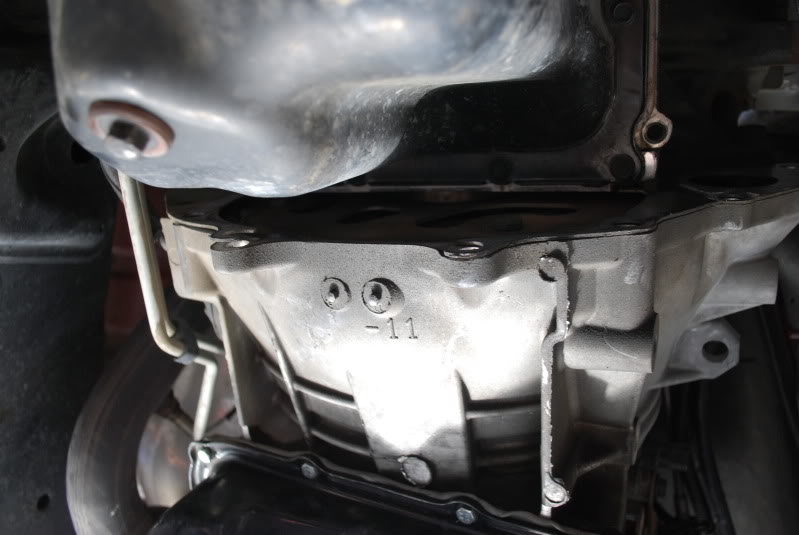
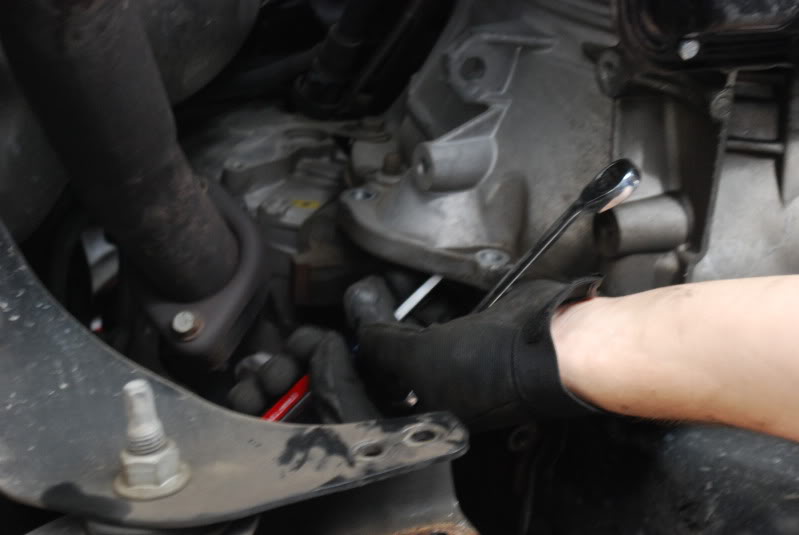
Step 8: Remove the "structural dust cover" between the engine oil pan, and transmission. this will give you a little bit of access to remove the 4 bolts attaching the torque converter to the fly wheel. Then, using a large screw driver, or something of the sort, spin the fly wheel so you can take off each bolt.
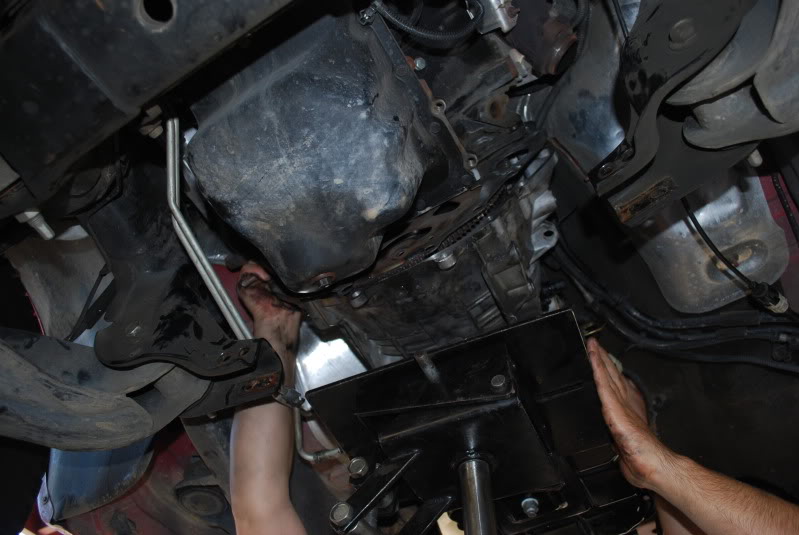
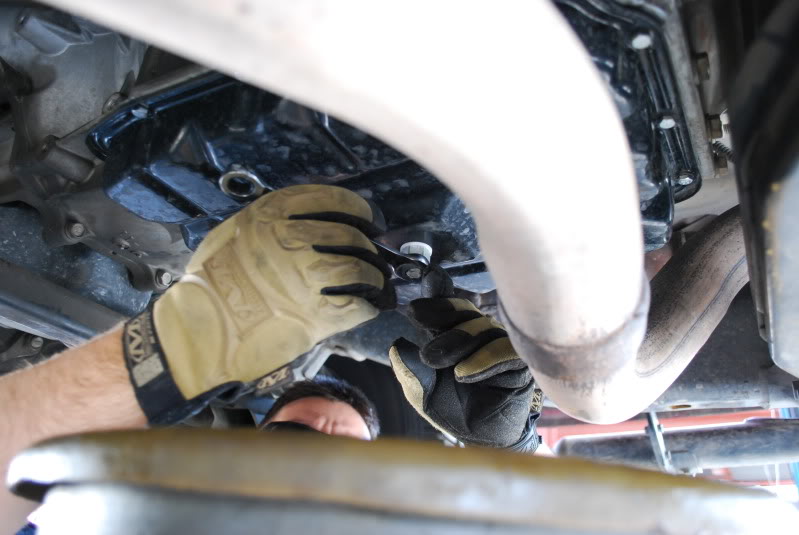
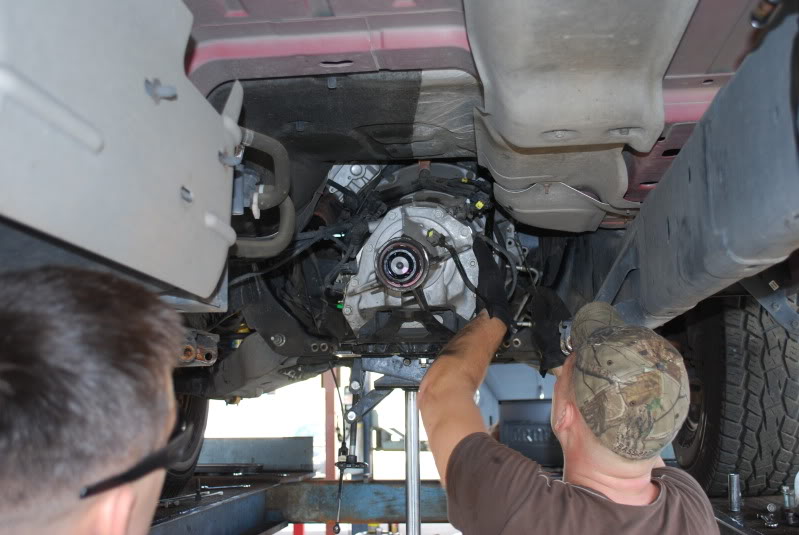
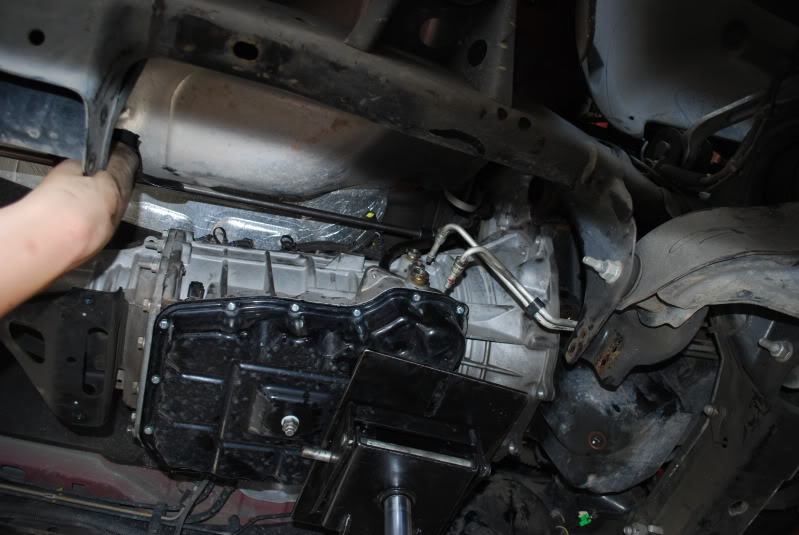
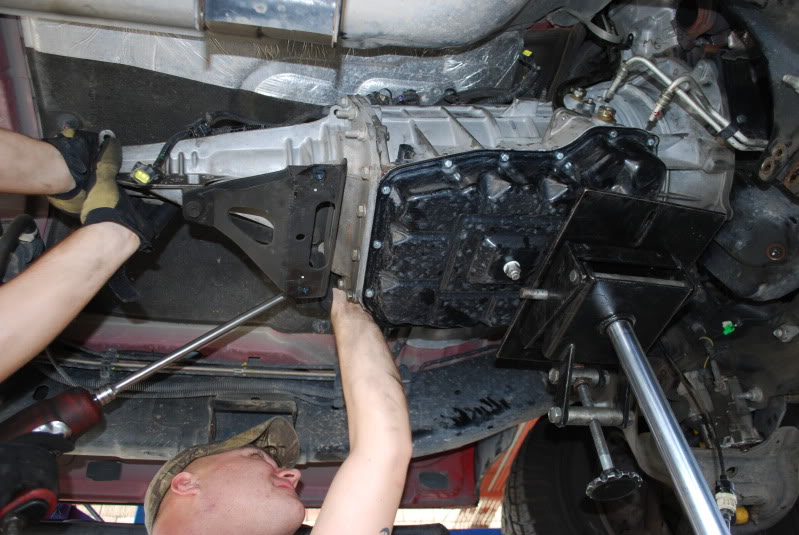
Step 9: Support tranny with a tranny jack, and remove both cross members. This is fairly self explanatory, if you cannot figure this out, you probably should not be doing this procedure. It helps having an impact wrench to remove the cross members.
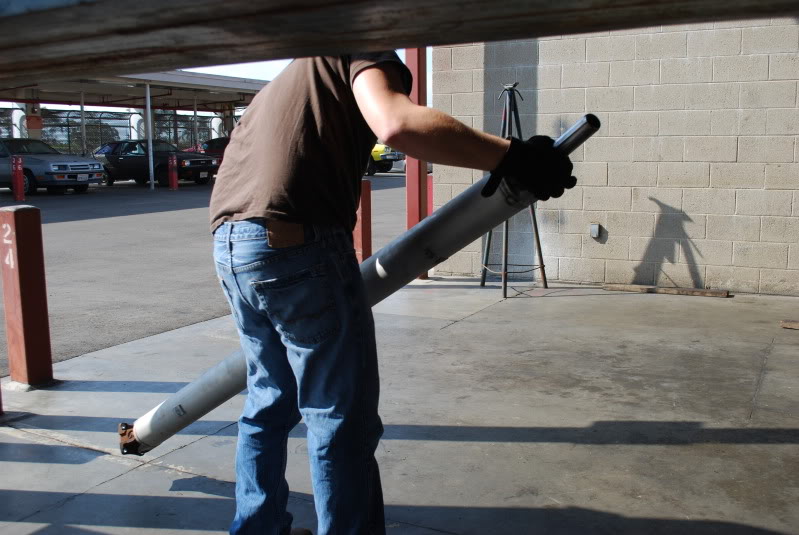
Step 10: Unbolt tranny from the engine. You are going to need a very long extension to do this. I used a 36" extension.


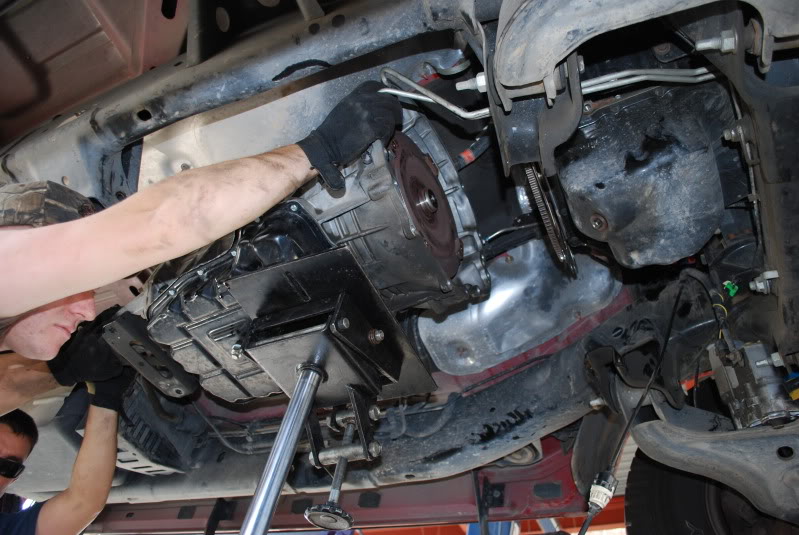
Step 11: Slide tranny back and out. Hopefully your tranny jack is on wheels.
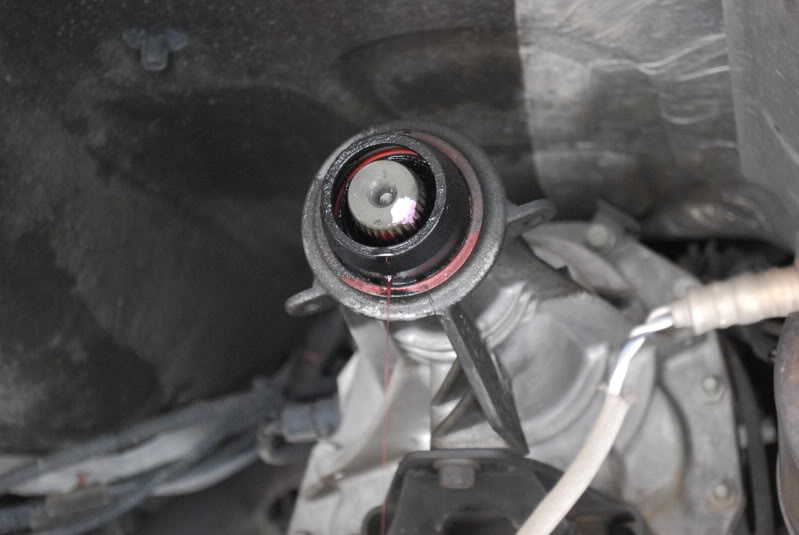
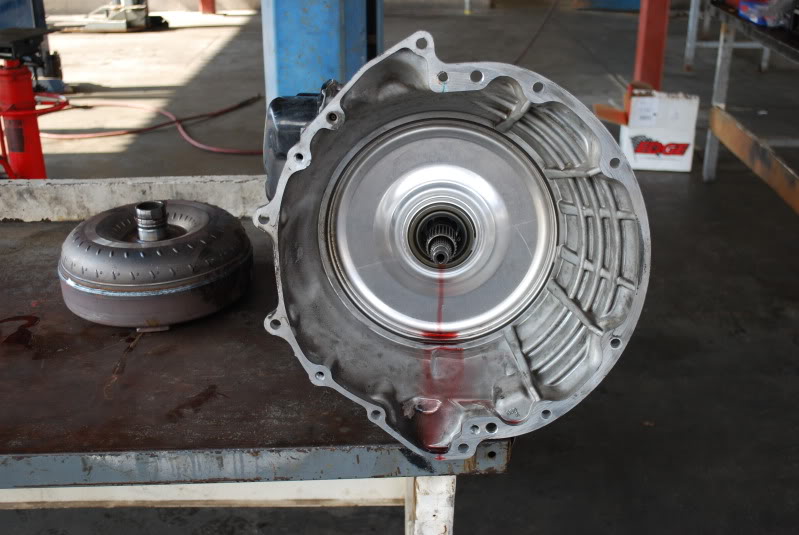
Step 12: Slide off your stock torque converter. Watch out though, its pretty heavy for its size, and its going to leak fluid everywhere.
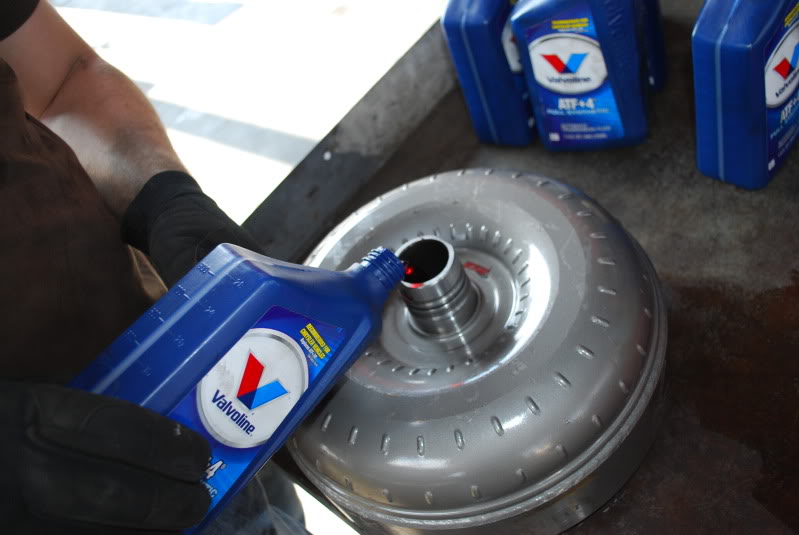
Step 13: Fill your new torque converter with a few quarts of fluid (I used 4) It goes in very slowly, so its going to take a while. I found that pouring in fluid, then spinning the converter helped the process move along a little quicker.
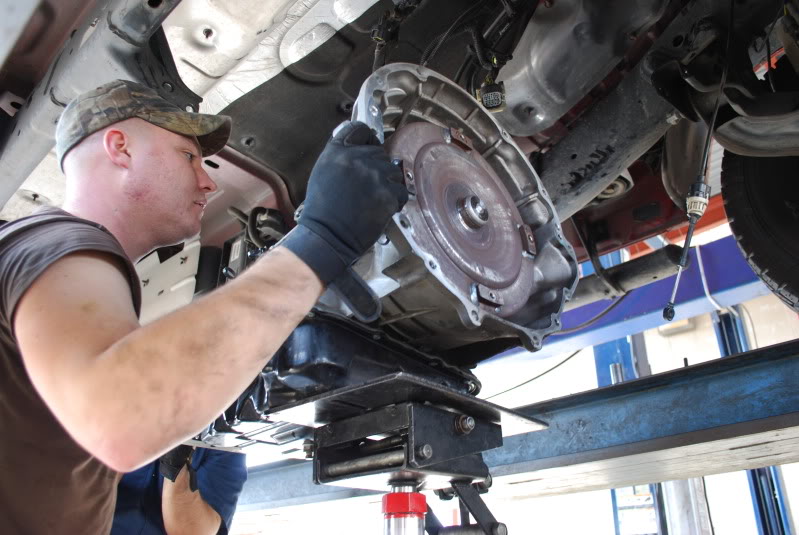
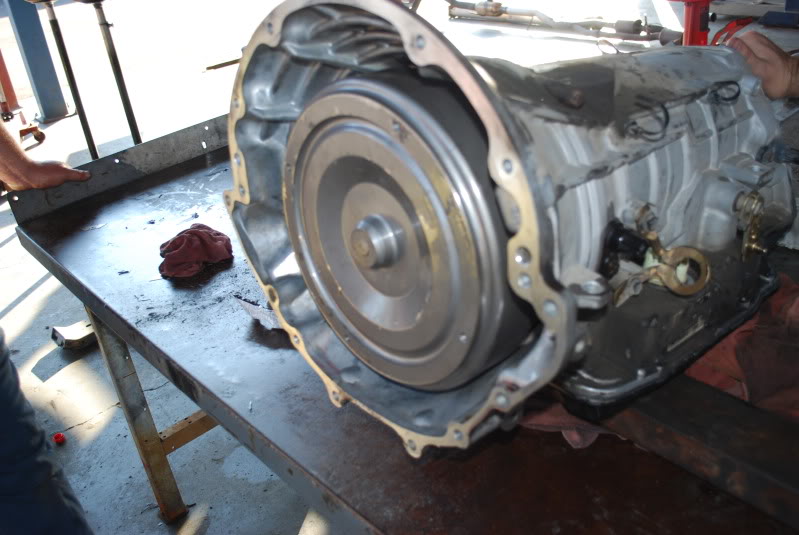
Step 14: Slide your new torque converter onto the input shaft. You will need spin the converter while sliding it on to make sure it lines up with and goes onto both sets of splines. Once it is all the way in, it should be about a half of an inch in from the edge of the bell housing. You can measure this with a straight edge across the housing and a ruler.
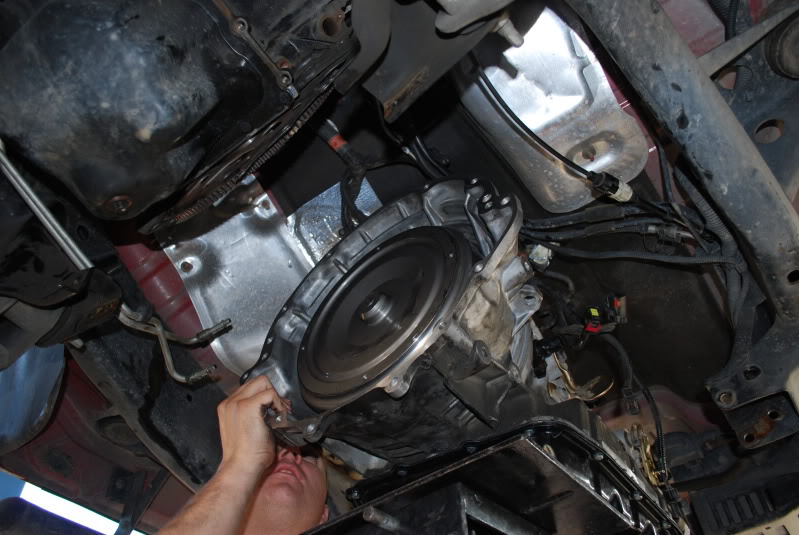
Step 15: Repeat all steps in reverse order to reinstall tranny.
Step 16: Fill up transmission with fluid through the dip stick tube.
Also, here is a PDF of a very nice manual for the 545RFE transmission. This will come in very handy if you are going to do anything with the transmission. http://www.megaupload.com/?d=DK0NSJYO
And if you need further explanation, or more detailed pics of any step, please let me know.
Step One: Gather all required parts, supplies, and tools. Having access to a lift is highly advised. Some things you will need: Torque Converter, at least 17 quarts of ATF +4, tranny filter kit, RTV sealant, impact wrench/sockets, swivel adapter, a really long extension (i used a 36"), socket/wrench sets, torx drivers/bits, transmission jack, screw drivers, and a buddy or two to help.
Step Two: Get your truck up on the lift. Get it high enough so you can stand underneath it and work comfortably.
Step Three: Remove Drive Shaft. This was very easy. It can be accomplished by removing the 4 bolts that hold it onto the rear axle, then sliding it out of the transmission. (I am not positive, but this could be different for 4WD or half ton trucks)
Step Four: Drain Fluid from pan. (this step is optional. you can install a new converter without changing the fluid. this is totally up to you though) Having a drain plug helps tremendously. If you aren't fortunate enough to have one, then loosen up the pan until you can drop one corner and begin pouring the fluid out.
Step Five: Get your exhaust out of the way. I chose to totally remove my exhaust so I would have as much room to work as possible. To do this, just remove the 4 bolts attaching your Y pipe to your headers, then slide it off all the hangers. This is optional though.
Step Six: Remove all electrical connections, fluid lines, and dip stick tube. You can mark the wires with tape and a marker if you need to, but its pretty obvious which connecter goes where when reassembling. Next loosen the fluid lines that send and receive from the tranny cooler. just loosen the smaller nut with a wrench, and slide the tube out. (note, these will leak fluid). To take the dip stick off of the tranny, you will need to take two bolts out, one holding the tube above the pan, and the other holding it to the bell housing.
Step Seven: Remove Starter. It is attached to the bell housing on the driver's side. it is held in by two bolts. remove it, and secure it out of the way. I zip tied it to the frame.
Step 8: Remove the "structural dust cover" between the engine oil pan, and transmission. this will give you a little bit of access to remove the 4 bolts attaching the torque converter to the fly wheel. Then, using a large screw driver, or something of the sort, spin the fly wheel so you can take off each bolt.
Step 9: Support tranny with a tranny jack, and remove both cross members. This is fairly self explanatory, if you cannot figure this out, you probably should not be doing this procedure. It helps having an impact wrench to remove the cross members.
Step 10: Unbolt tranny from the engine. You are going to need a very long extension to do this. I used a 36" extension.
Step 11: Slide tranny back and out. Hopefully your tranny jack is on wheels.
Step 12: Slide off your stock torque converter. Watch out though, its pretty heavy for its size, and its going to leak fluid everywhere.
Step 13: Fill your new torque converter with a few quarts of fluid (I used 4) It goes in very slowly, so its going to take a while. I found that pouring in fluid, then spinning the converter helped the process move along a little quicker.
Step 14: Slide your new torque converter onto the input shaft. You will need spin the converter while sliding it on to make sure it lines up with and goes onto both sets of splines. Once it is all the way in, it should be about a half of an inch in from the edge of the bell housing. You can measure this with a straight edge across the housing and a ruler.
Step 15: Repeat all steps in reverse order to reinstall tranny.
Step 16: Fill up transmission with fluid through the dip stick tube.
Also, here is a PDF of a very nice manual for the 545RFE transmission. This will come in very handy if you are going to do anything with the transmission. http://www.megaupload.com/?d=DK0NSJYO
And if you need further explanation, or more detailed pics of any step, please let me know.