

DIY Tranny Line Pressure Booster

Thread Starter
|
Record Breaker
Joined: May 2007
Posts: 1,854
Likes: 2
From: Oceanside, CA
This is a DIY on how to make/wire in a tranny line pressure booster. This is very similar to a power wire, and will increase the line pressure in your tranny giving you slightly firmer shifts. In my case with the Sharadon Stage II tranny/VB, it turned my crazy firm shifts into neck jerking shifts. I like it. I like it a lot. There are a number of different ways you can do this, and there is even a pre-made one sold online ($40+shipping).
Parts used:
5-Pack 2.2k Ohm resistors - $0.99
2x Electrical connectors - $3.98
a foot or so of 16-20awg wire
Heat Shrink tubing - $3.99
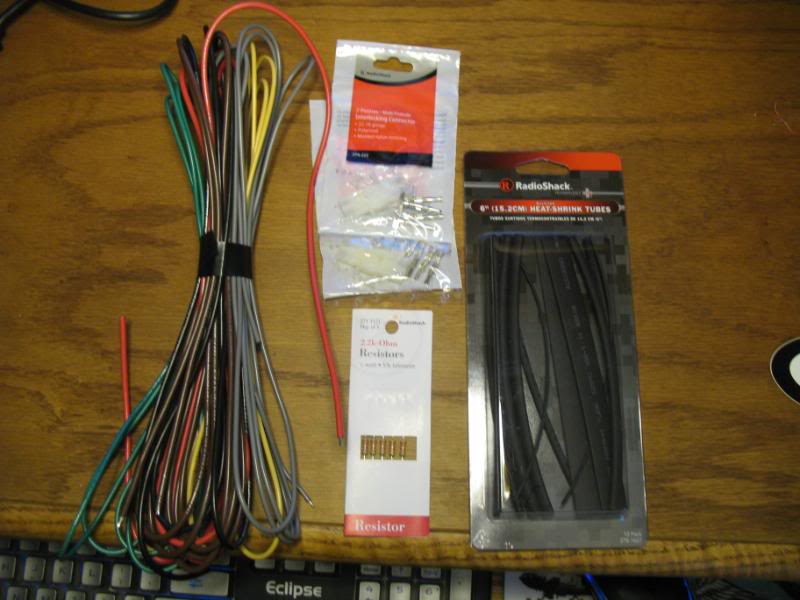
Tools used:
Wire stripper/crimper
Soldering Iron/solder
Heat gun
Knife
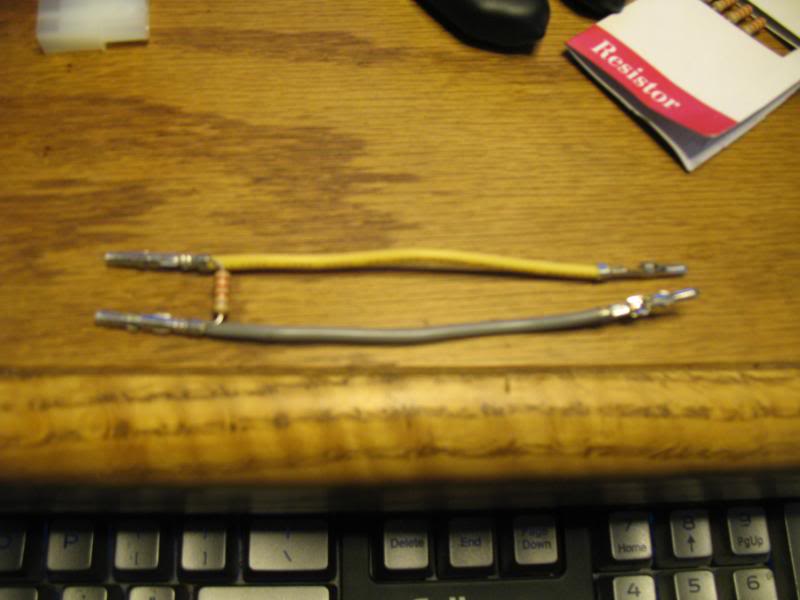
Step One:
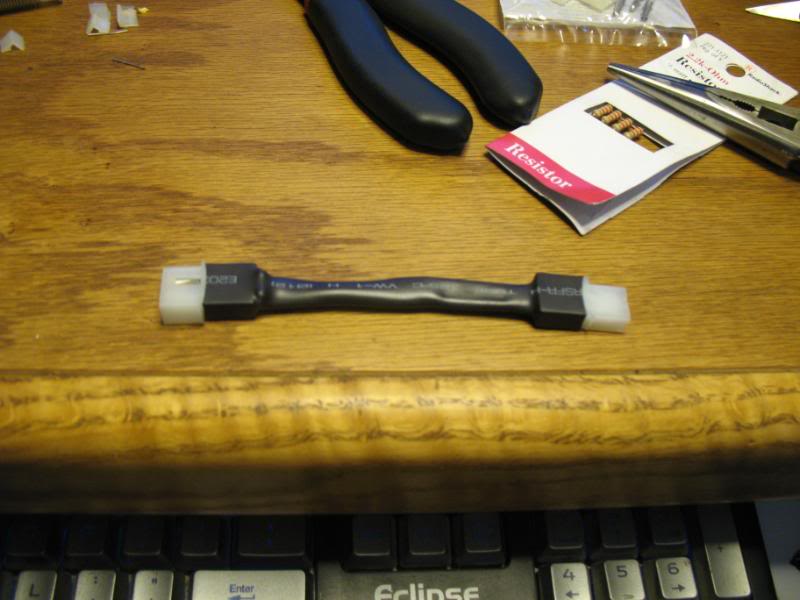
Cut two 6" lengths of wire. Strip the ends/tin them. (note, soldering the connections is optional, but highly advised). crimp/solder on the male prongs onto one end of each wire. On the other end of the wires, crimp/solder on the female receptacles and the 2.2k ohm resistor bridging the two wires together. your end result should look like this:
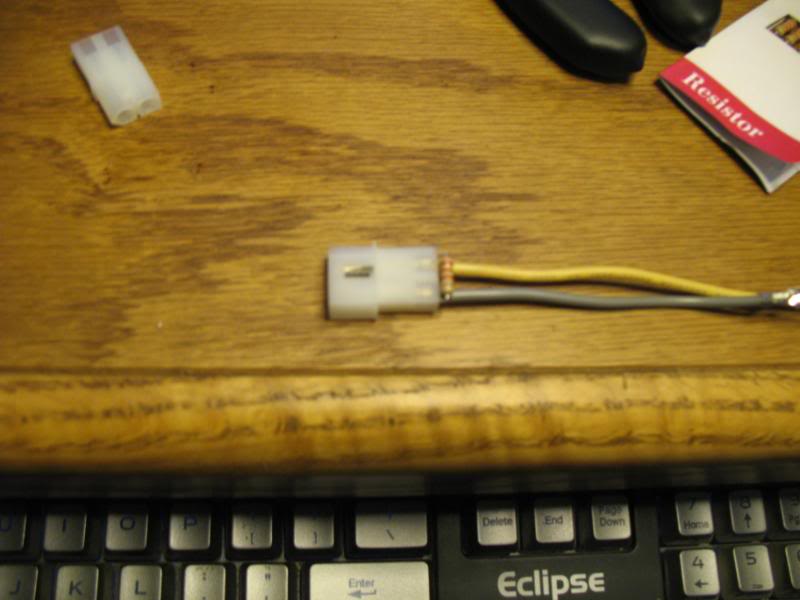
Step Two:
Insert female receptacles into female connector.
Step Three:
Cut heat shrink tubing to length. Slide over wires and connector. Insert male prongs into male connector.
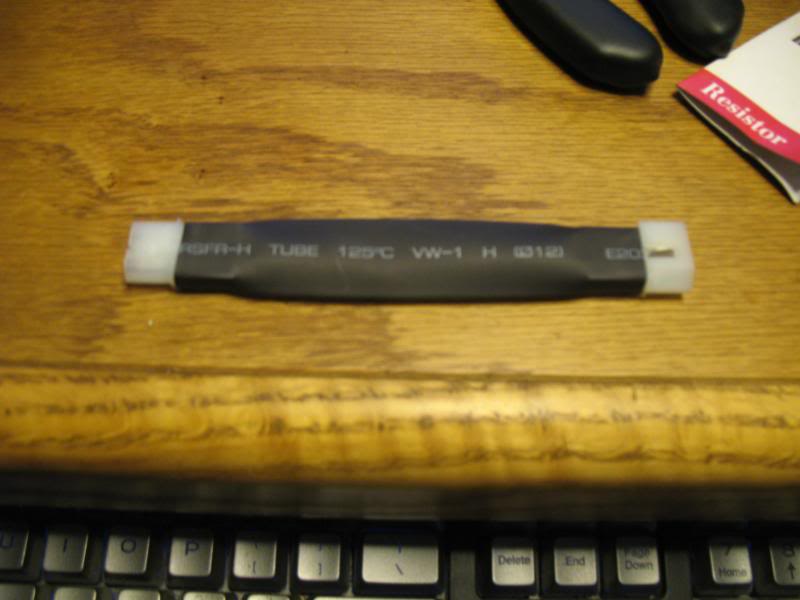
Step Four:
Use heat gun to shrink the tubing. this is what we will be wiring into the line pressure sensor on the tranny.
Step Five:
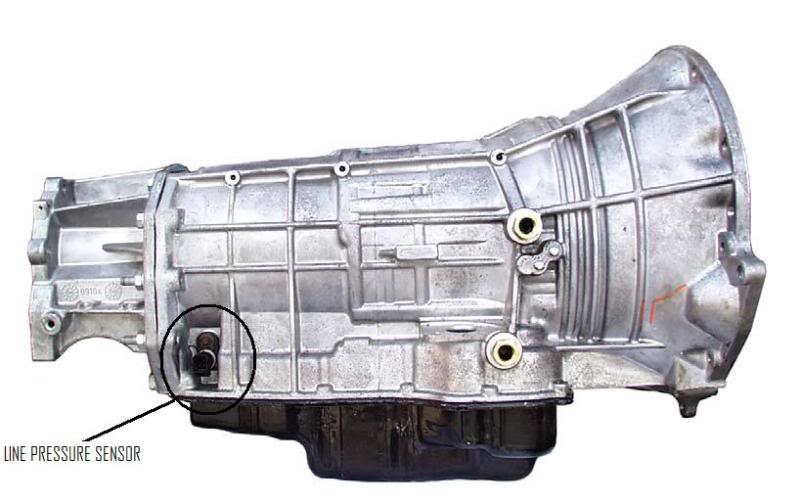
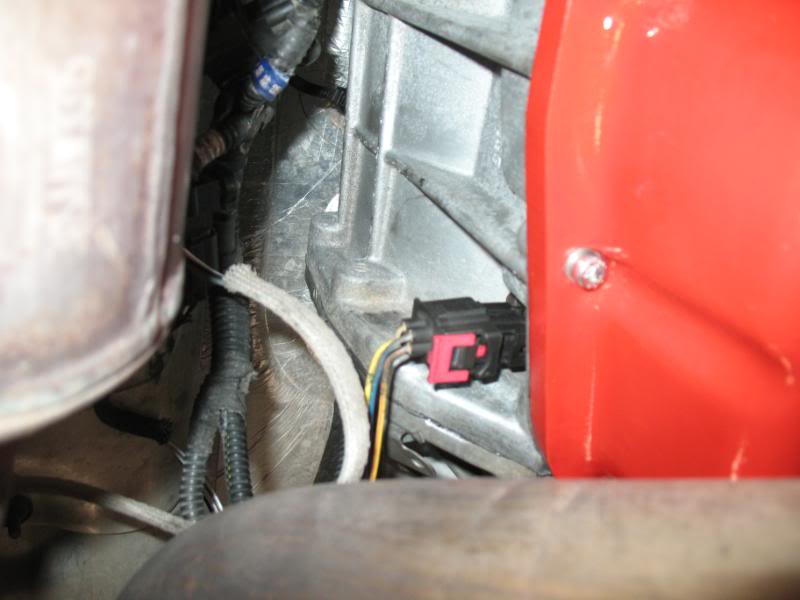
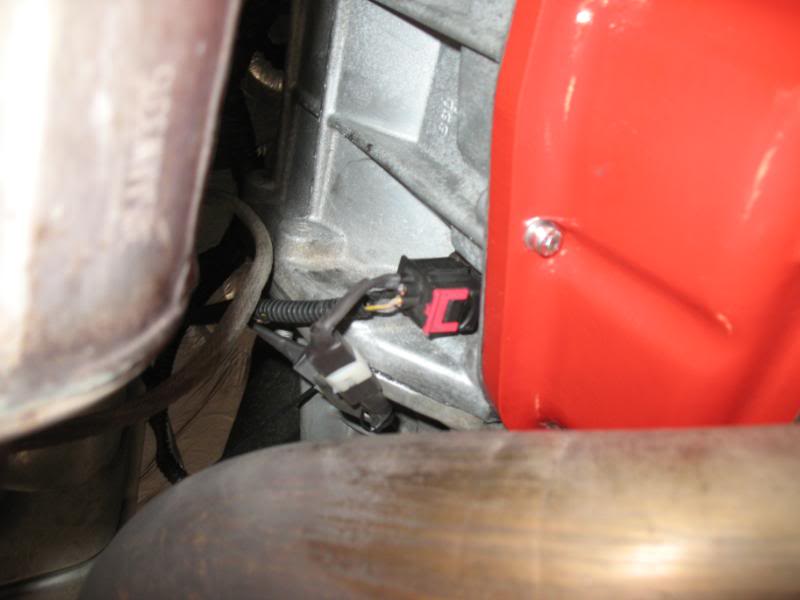
Locate and unplug the line pressure sensor. It is located on the rear passenger side of the tranny.
Step Six:
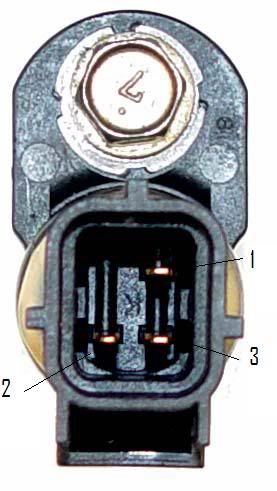
Locate the two wires on the sensor you will be working with. The sensor uses 3 wires, the two that are one on top of the other towards the front of the vehicle are the ones you want. wires 1 and 3 in the following pic.
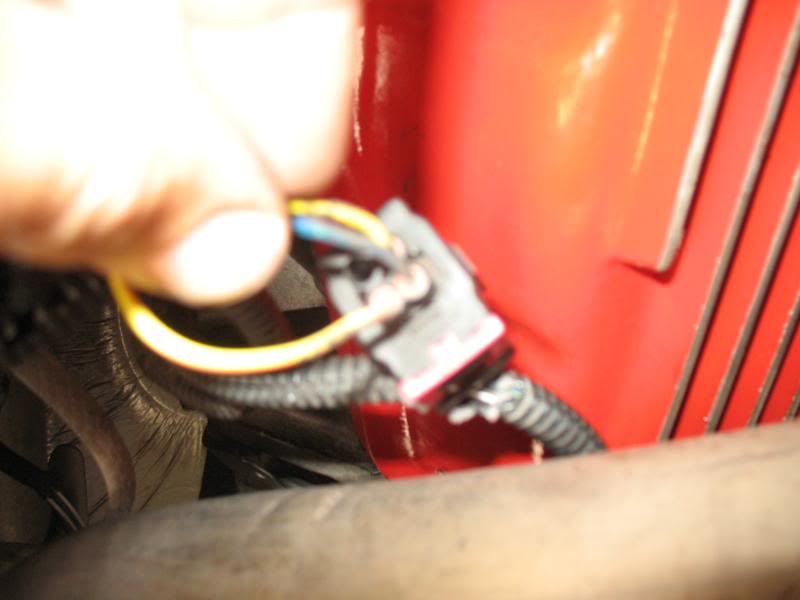
Once you have the correct wires, cut them a few inches back from the sensor, and crimp/solder on the male/female prongs.
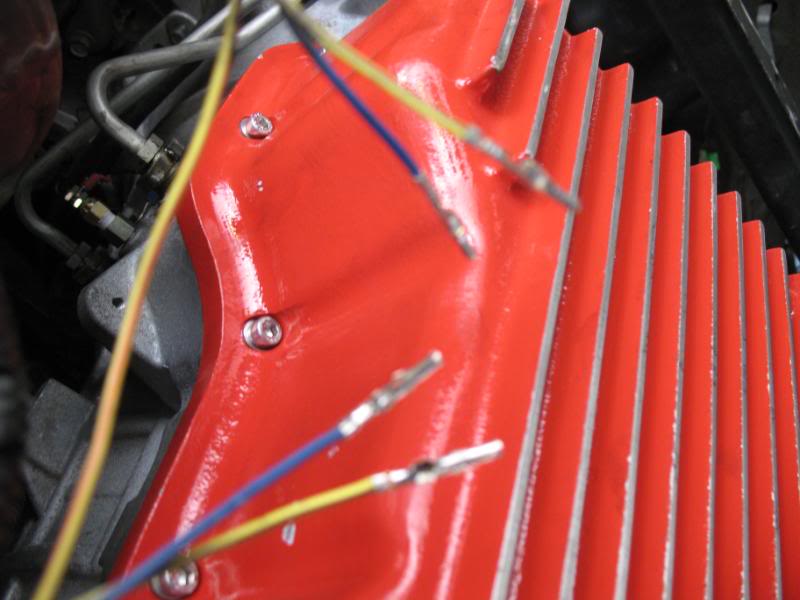
Step Seven:
Slide heat shrink tubing over the wires, and plug them into the male/female connectors. use heat gun to shrink the tubing.

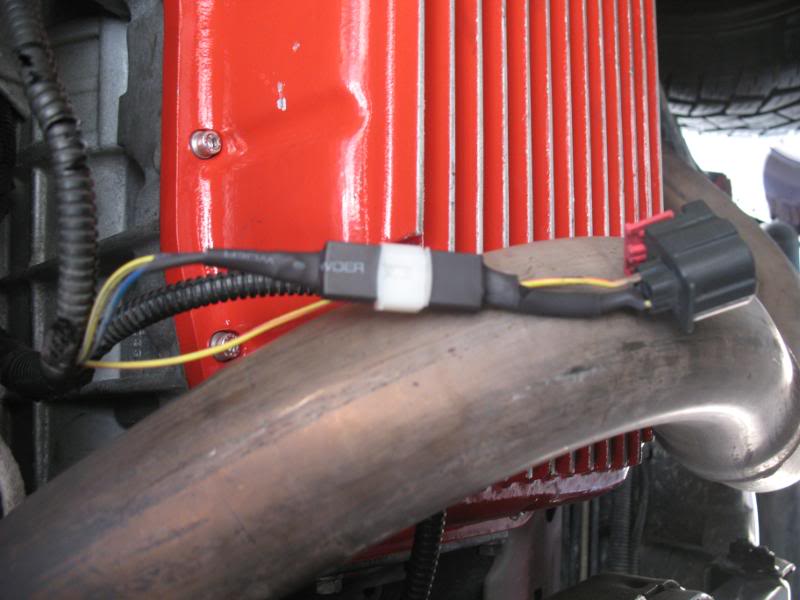
thats it! you are all done. now you can plug the resistor connector we made earlier into your new connectors on the sensor. or if you want to take it out, just plug the 2 connectors into each other, and you are back to stock.
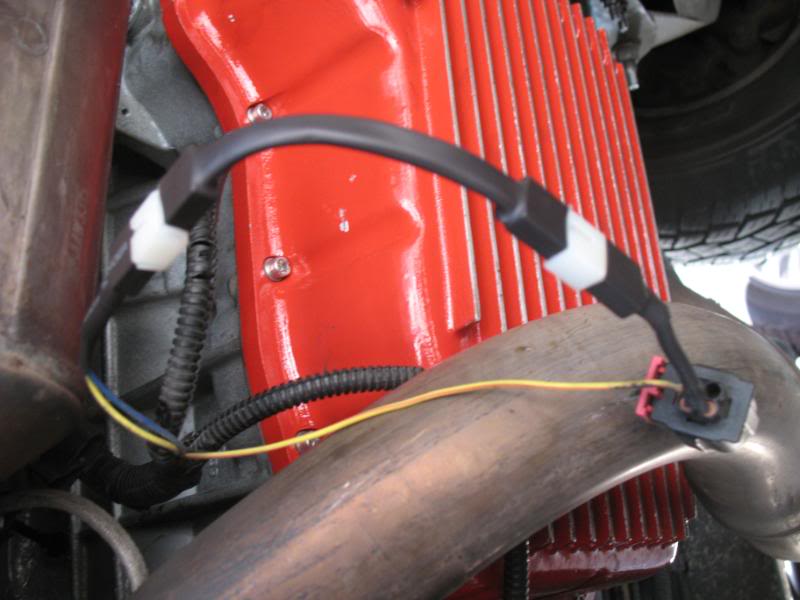
and here it is, plugged back into the tranny with the resistor in place.
Parts used:
5-Pack 2.2k Ohm resistors - $0.99
2x Electrical connectors - $3.98
a foot or so of 16-20awg wire
Heat Shrink tubing - $3.99
Tools used:
Wire stripper/crimper
Soldering Iron/solder
Heat gun
Knife
Step One:
Cut two 6" lengths of wire. Strip the ends/tin them. (note, soldering the connections is optional, but highly advised). crimp/solder on the male prongs onto one end of each wire. On the other end of the wires, crimp/solder on the female receptacles and the 2.2k ohm resistor bridging the two wires together. your end result should look like this:
Step Two:
Insert female receptacles into female connector.
Step Three:
Cut heat shrink tubing to length. Slide over wires and connector. Insert male prongs into male connector.
Step Four:
Use heat gun to shrink the tubing. this is what we will be wiring into the line pressure sensor on the tranny.
Step Five:
Locate and unplug the line pressure sensor. It is located on the rear passenger side of the tranny.
Step Six:
Locate the two wires on the sensor you will be working with. The sensor uses 3 wires, the two that are one on top of the other towards the front of the vehicle are the ones you want. wires 1 and 3 in the following pic.
Once you have the correct wires, cut them a few inches back from the sensor, and crimp/solder on the male/female prongs.
Step Seven:
Slide heat shrink tubing over the wires, and plug them into the male/female connectors. use heat gun to shrink the tubing.
thats it! you are all done. now you can plug the resistor connector we made earlier into your new connectors on the sensor. or if you want to take it out, just plug the 2 connectors into each other, and you are back to stock.
and here it is, plugged back into the tranny with the resistor in place.