

2WD Coil spacer leveling kit, 3rd Gen Ram by TXST8tj

Thread Starter
|
Admin formally known as 94rt10ohio
Joined: Apr 2005
Posts: 9,025
Likes: 3
From: Curtice, OH
Vehicle: 2003 Dodge Ram 1500 2wd regular cab, 3.7L V6, 5spd
Product: Daystar 2" Coil Spacer Leveling Kit $85 shipped

Tools/Supplies:
socket wrench/ratchet
MM sockets (13mm-22mm)
open ended adjustable wrenches (unless you have all the correct sized boxed wrenches)
pitman arm puller - rented from autozone (i should own one of these by now)

floor jack
jack stand
a FRIEND!!
Overview of the Product
Here is the kit as shipped from the supplier (Daystar product in a California Super Trucks box, shipped by PerformanceLifts...go figure. it's just a bit of insight that these spacers are all made by the same company and repackaged by different companies. they are all the SAME):
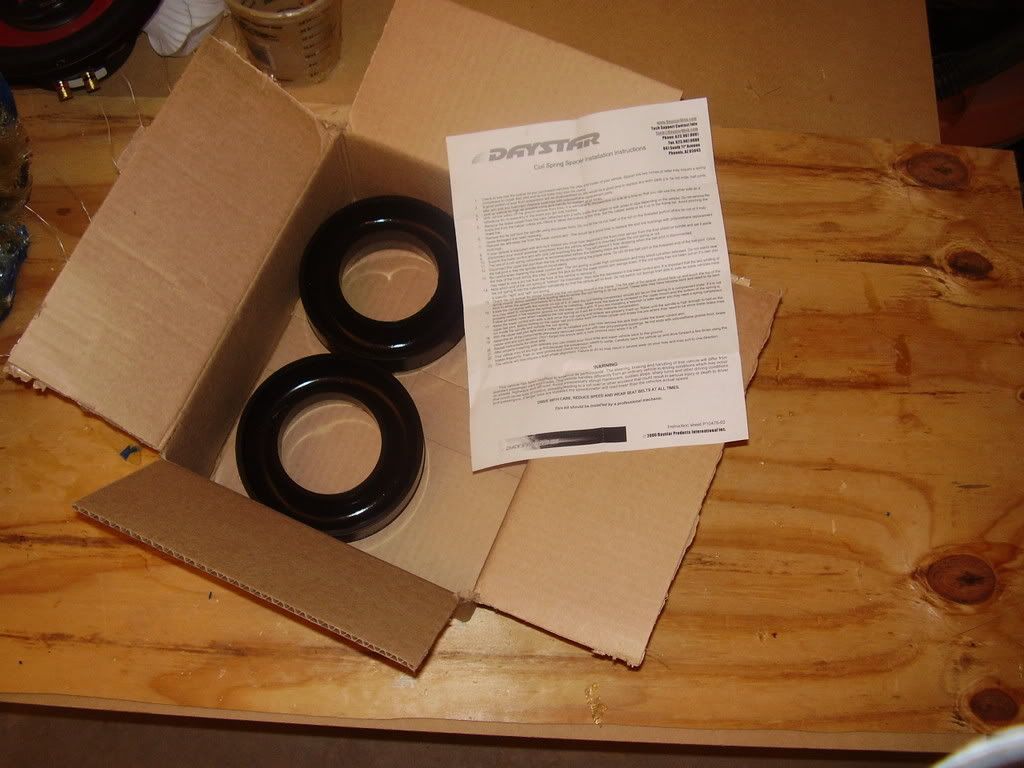
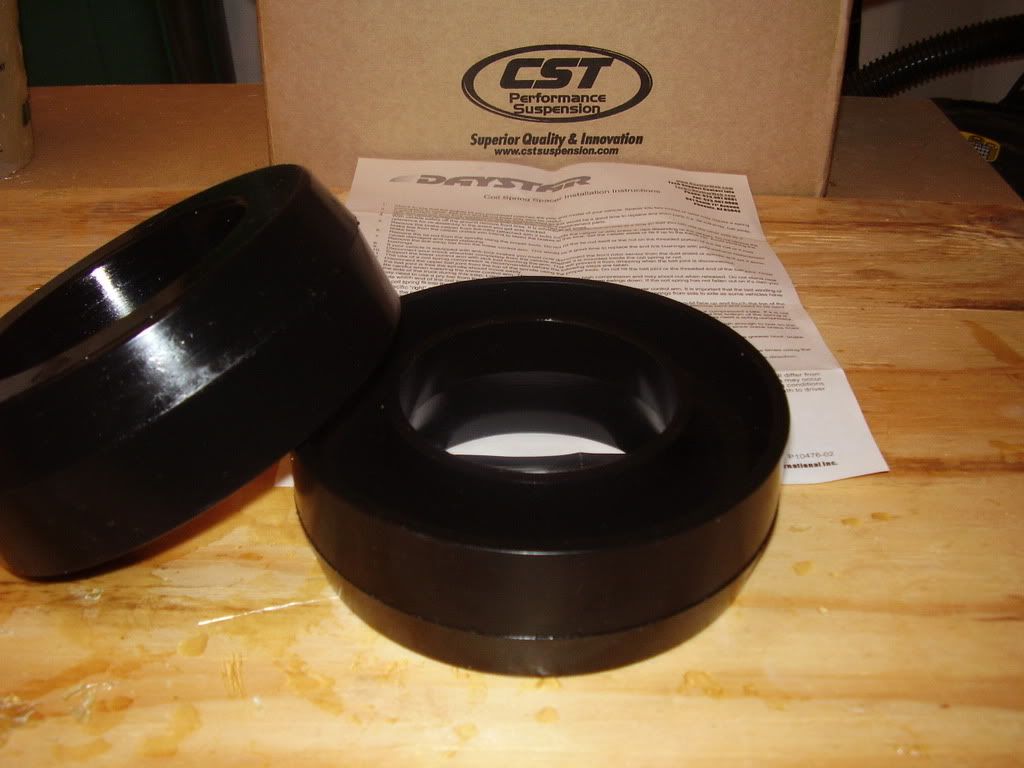
The spacer itself is a solid 2" tall. all of that is not actual lift though....more later.

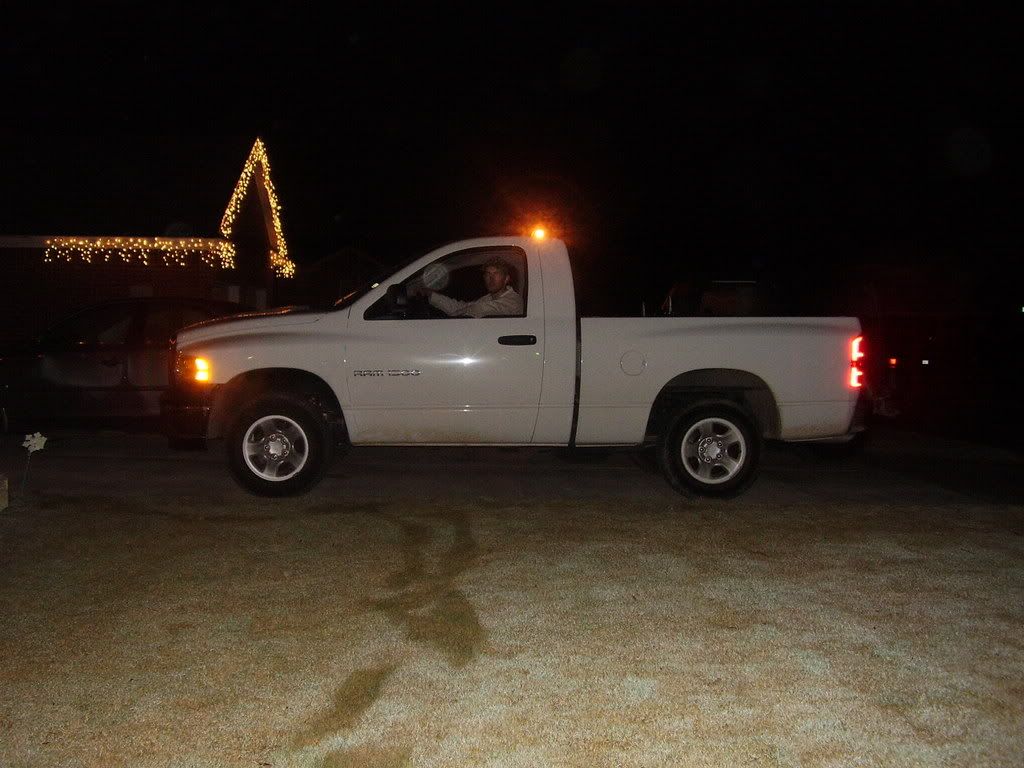
Before Picture
i'll have to get the far away whole truck shots off the other computer

On to the Installation
-start on one side and complete that side before moving to the next.
-while the weight of the truck is still on the ground, loosen the lug nuts
-jack the front of the truck up on the side you are working on. the best place to jack the truck up is from under the front suspension crossmember.
-have your buddy place the jack stand under the frame as far forward as you can.
-remove the tire.

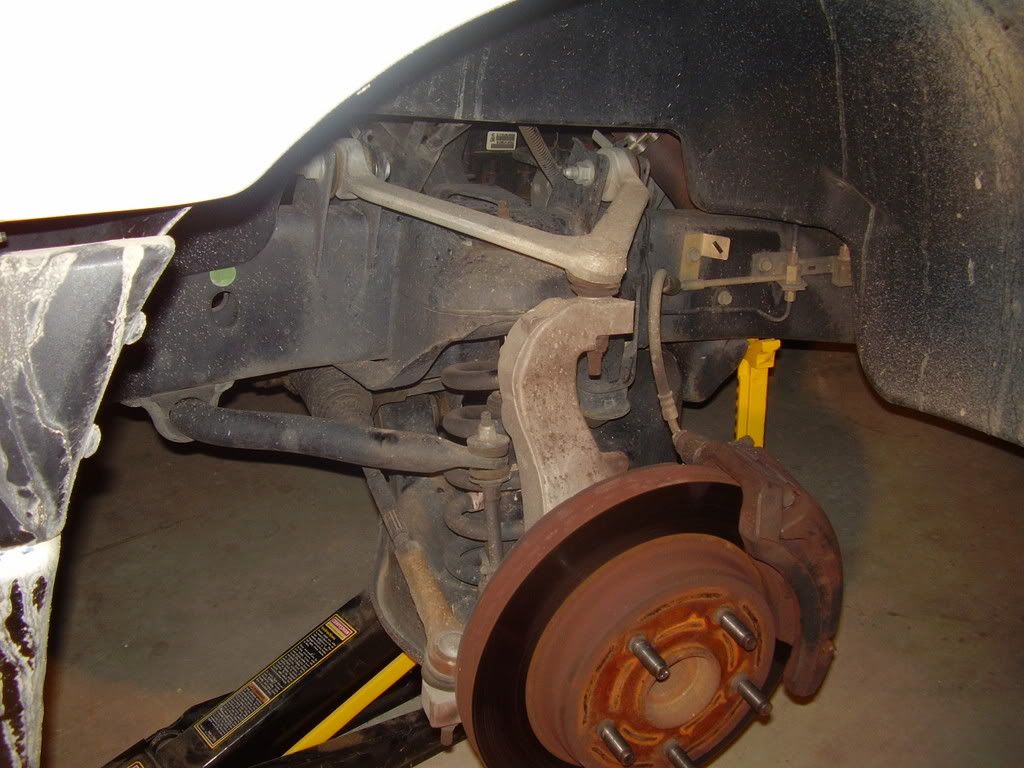
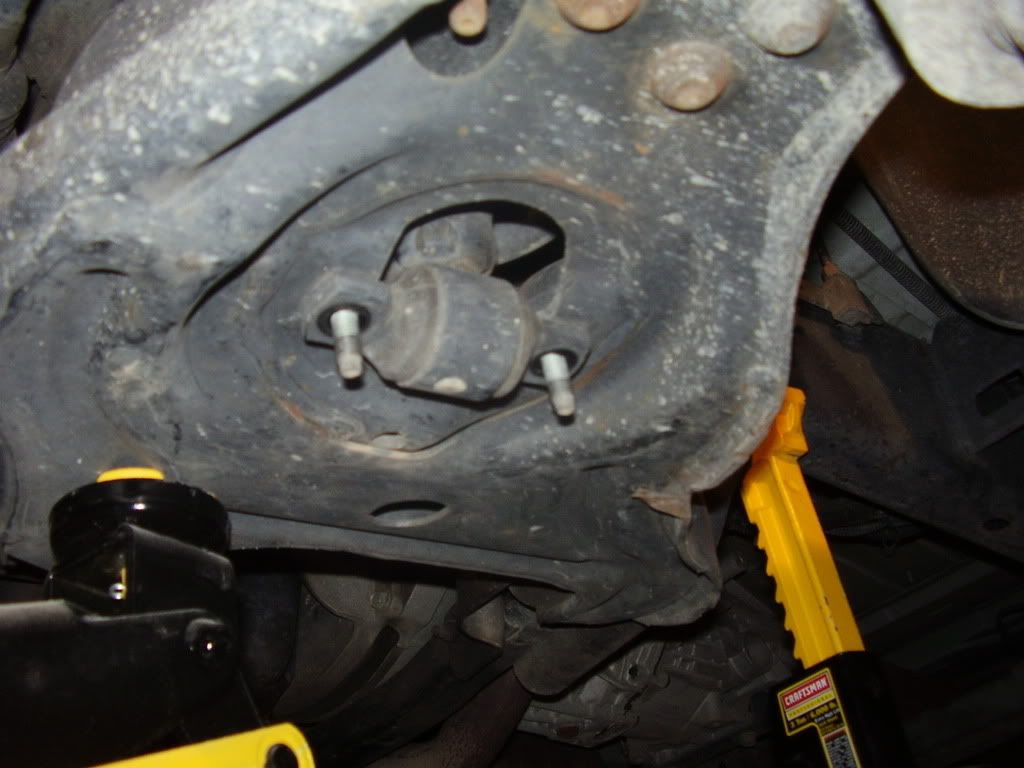
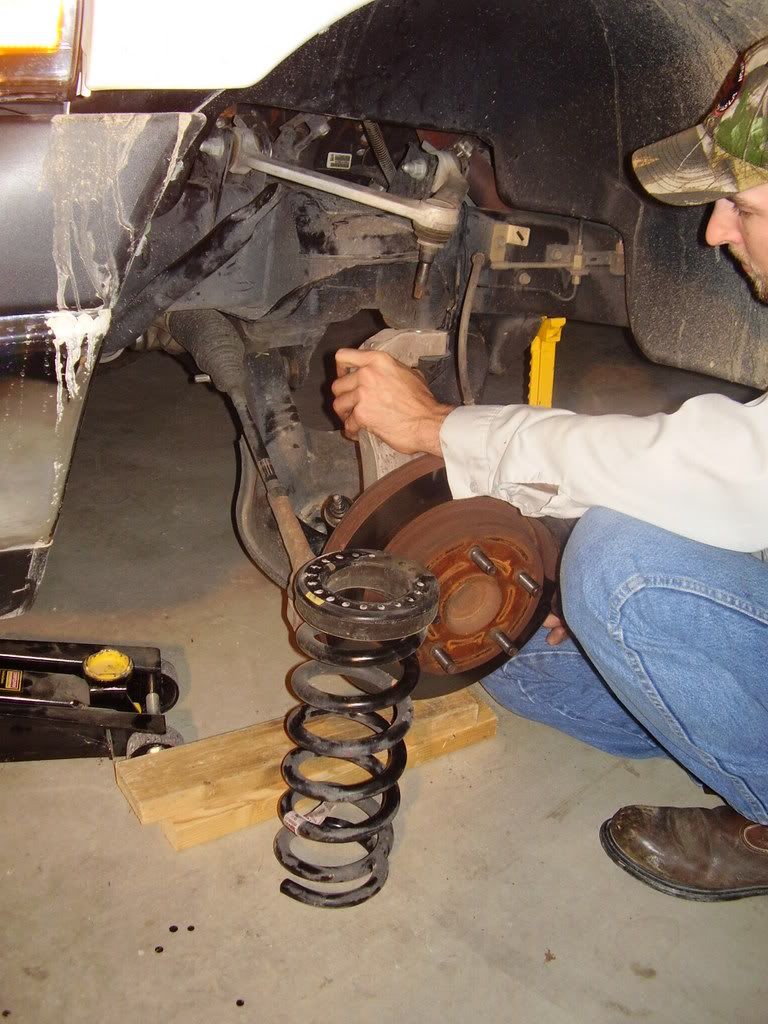
-place the jack under the lower control arm and apply enough pressure to it so the jack will not move. once you start unbolting everything, you really can't be too careful when dealing with the highly compressed coils. we found the best location (after some time) for the jack is the farthest to the edge of the lower control arm. you will see four round headed studs there.
-unbolt the swaybar from its link on both sides of the truck. this will allow you to lift/swing the swaybar out of the way.
-remove the shock. there are two bolts on the underside of the lower control arm, and one bolt at the top of the upper coil bucket. you will need one adjustable wrench to hold the very tip of the shock in place while your other adjustable or correct sized boxed wrench loosens the nut.
-at this point, i would recommend hooking some straps to the coil and to the frame to keep the coil from popping out. it is not 100% necessary, but as mentioned before, you really can't be to careful, and it only takes a couple seconds to put them on there. admittedly, we did this the first go-round, but not on the second.
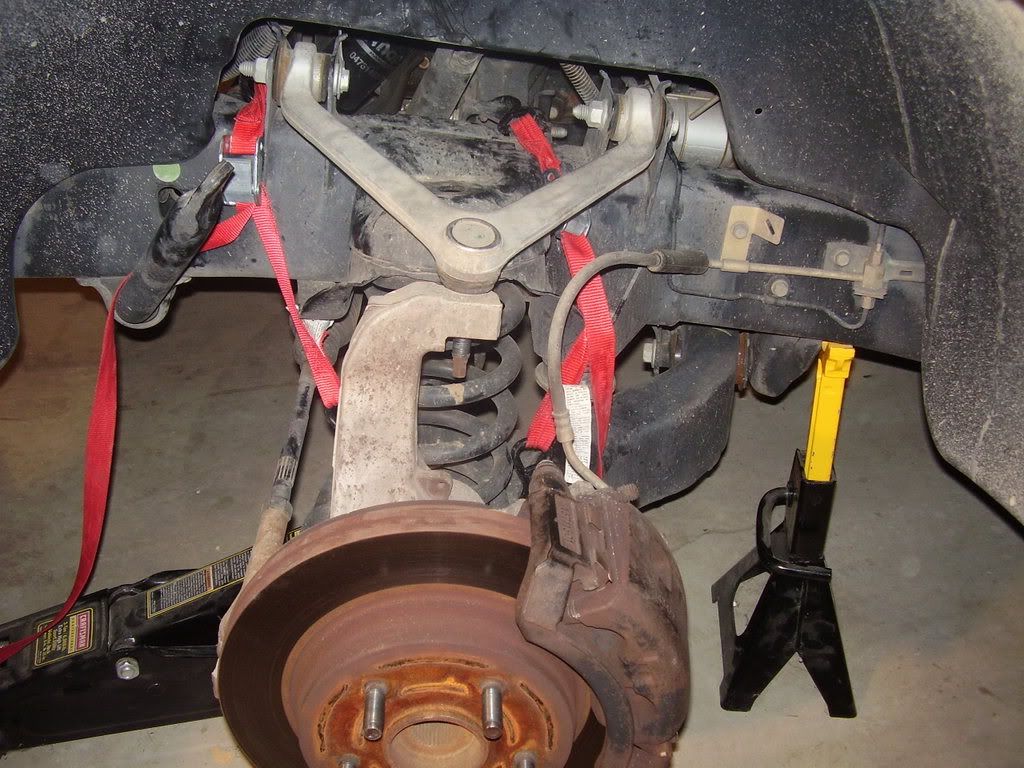
-we found, after our first go at it, that it is much easier and safer to remove the brake caliper and rotor. once you are trying to remove and reinstall the coil, you will need as much stretch room to do so, and you risk breaking the brake line if the caliper is still connected as it does not have much slack to move. (don't worry, you're not doing a "brake job" here. no bleeding the brakes or anything.) just remove the two bolts from the back of the caliper and hang it out of the way with another strap or some zip ties.
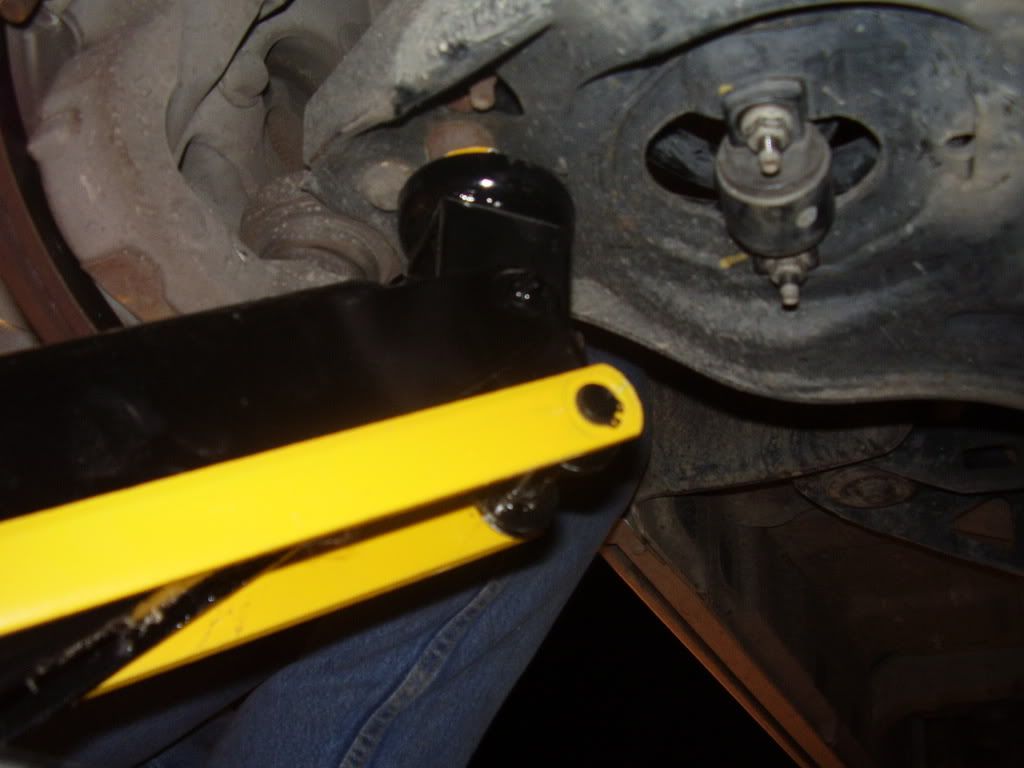
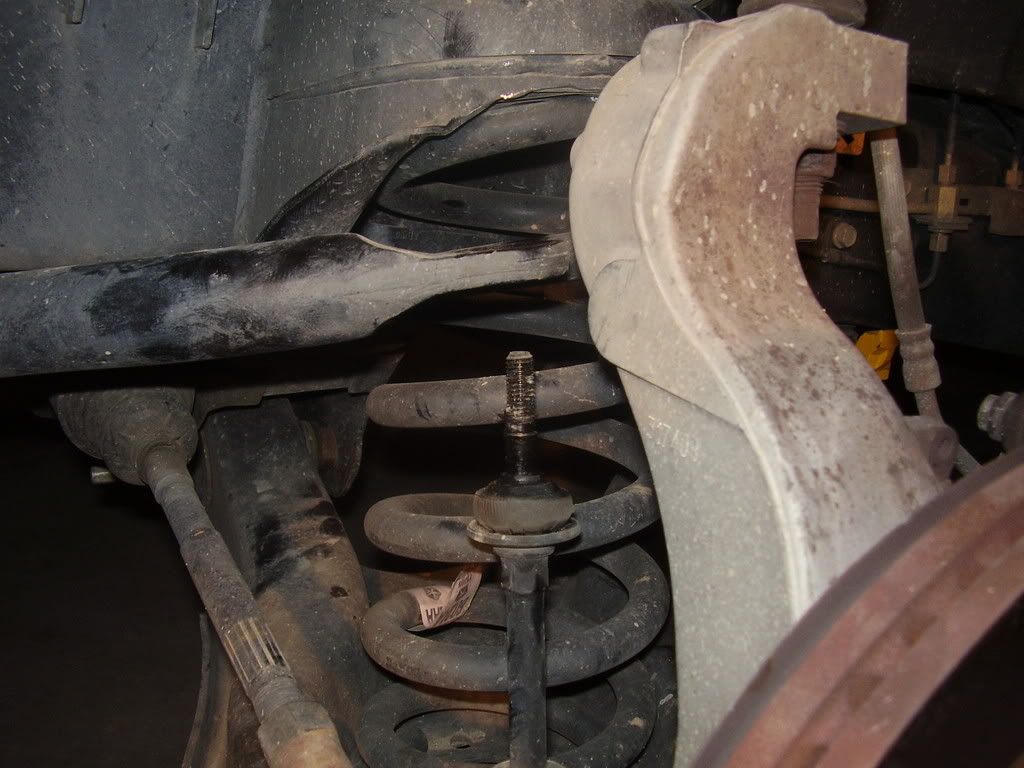
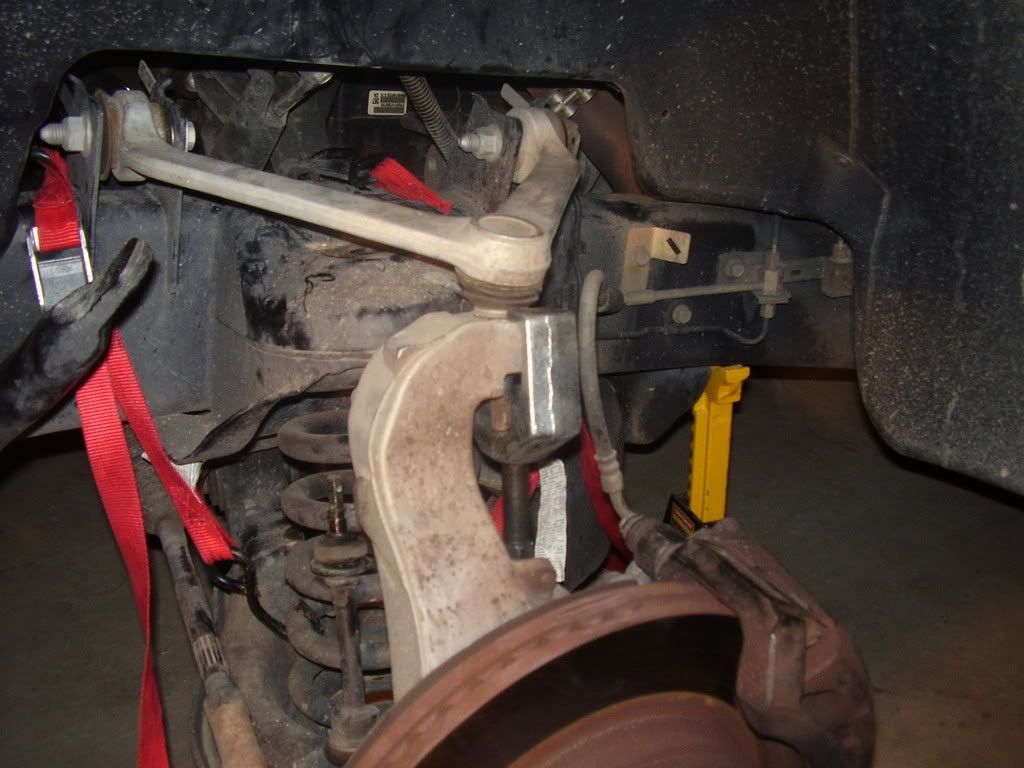
-remove the bolt from the upper balljoint/control arm. use the pitman arm puller to pop the bolt out. do not bother with the old fashion BFH method. you risk damaging the bolt and knocking your truck off the jack stand. not to mention it takes 10 seconds to get it out with the PAP.
-once the upper control arm is seperated from the spindle, SLOWLY lower the jack releasing the tension from the coil. once the jack is out of the way, you will still need help pushing down on the control arm to get the coil out. here it is once out, with the stock rubber coil isolator on top....keep that handy, you're going to need it.
-here is the coil isolator next to one of the spacers
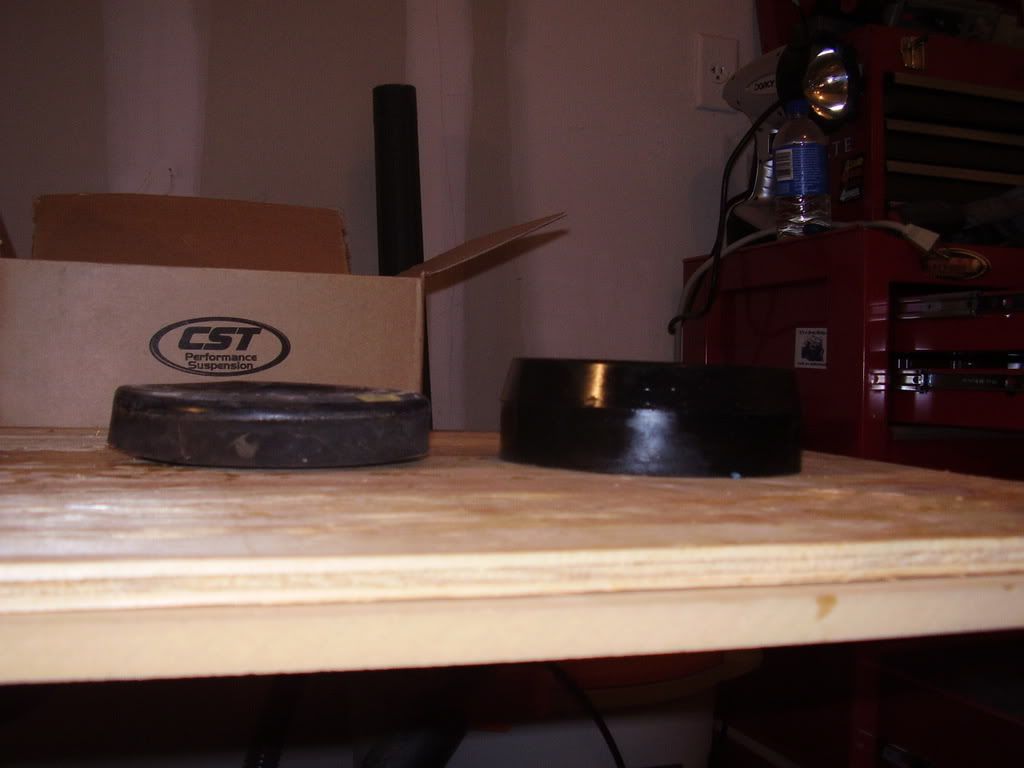
-the spacer on the top of the coil
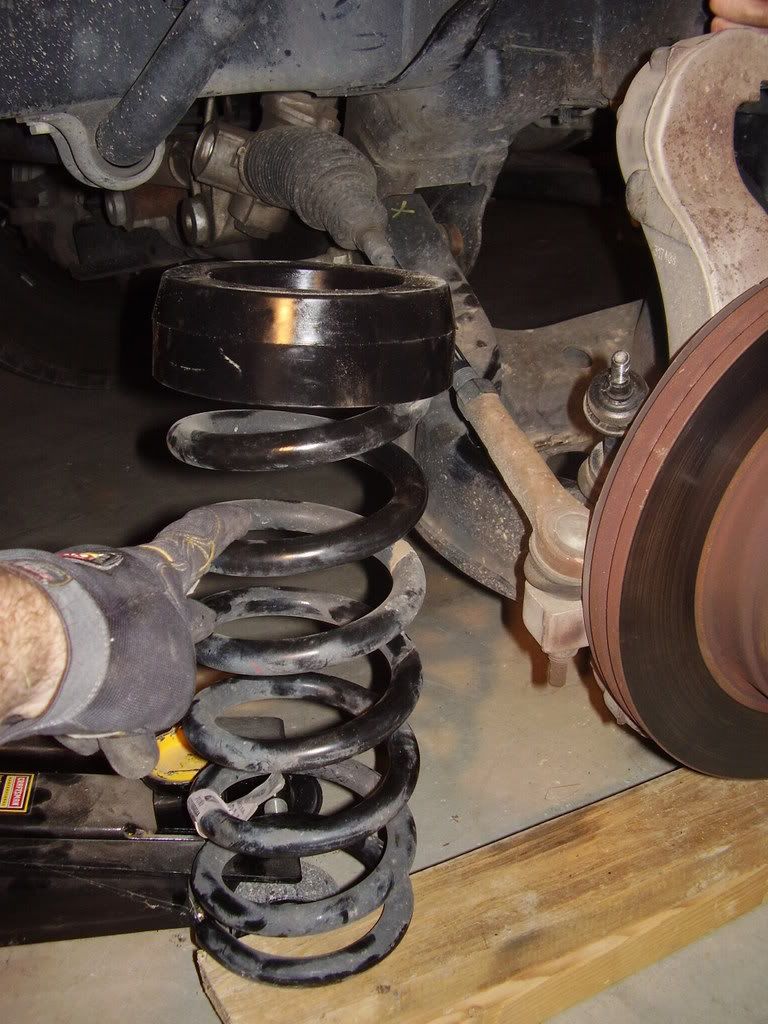
-the stock isolator on top of the spacer on top of the coil. the groove in the stock isolator fits over the beveled top of the spacer.
-we found that it helps to just shove the stock isolator and spacer up into the bucket and then put the coil in (the bucket will hold them in place).
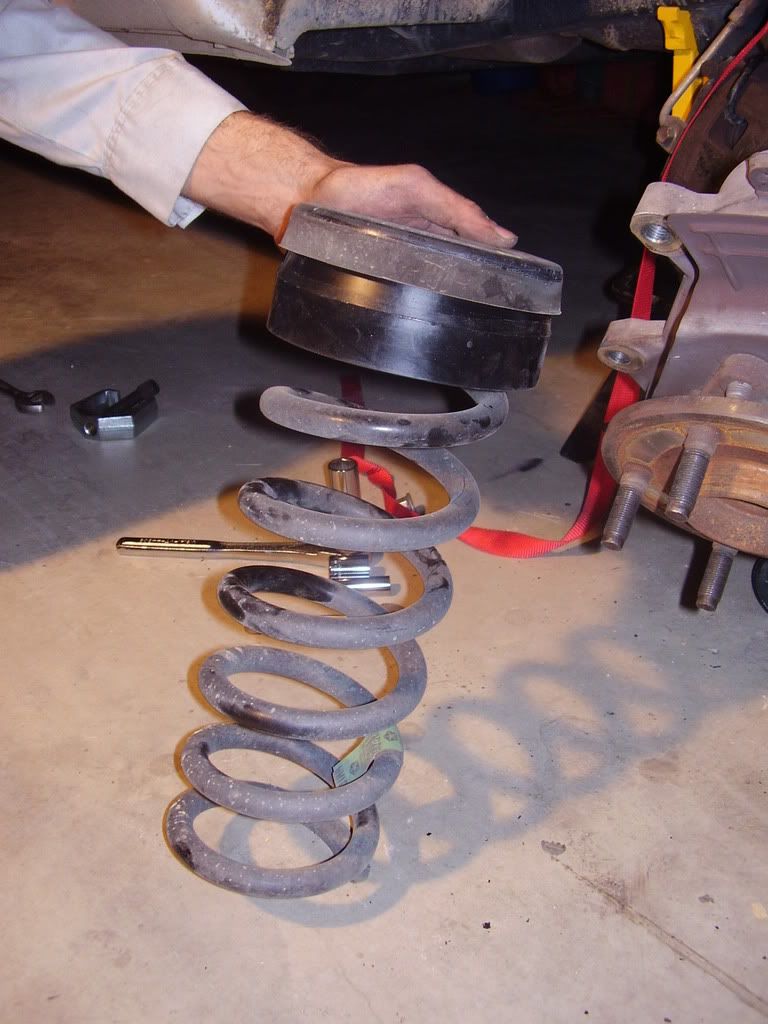
-this is where it gets fun. if you didn't use your buddy before, you'll need him now. while one pushes down on the lower control arm, the other will slip the coil into place.
reflection: if you use a coil compressor, slipping the coil in and out would be a bit easier. it is not necessary, but may help if you have to do this install by yourself. additionally, if you were able to disconnect the steering rod from the spindle, it would free the lower control arm freely and allow as much room as you need. because of the depth of the pitman arm puller, we were not able to use the tool to get the rod off.
-once the coil is reseated in position, jack the lower control arm back up to secure it in place.

-replace the ball joint bolt through the spindle and rebolt. this will assure everything will stay in place.
-from there, reattach everything but the swaybar (you will still need that loose for the other side). we started next with reattaching the rotor and caliper, and finished with the shock. you may need to jack up the lower control arm to get the top bolt on.
-put the tire back on, bolt it up
-remove the jack stand and lower the truck on the ground
-retighten lugs
-repeat on other side.
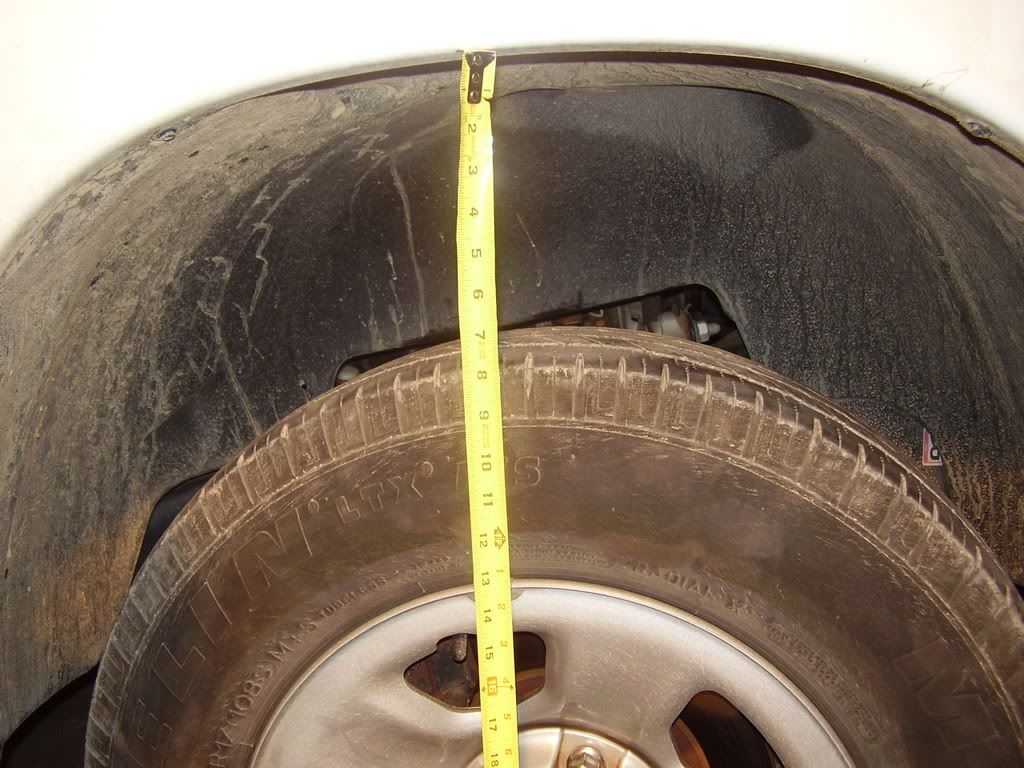
After


Ram3rdGen
Product: Daystar 2" Coil Spacer Leveling Kit $85 shipped
Tools/Supplies:
socket wrench/ratchet
MM sockets (13mm-22mm)
open ended adjustable wrenches (unless you have all the correct sized boxed wrenches)
pitman arm puller - rented from autozone (i should own one of these by now)
floor jack
jack stand
a FRIEND!!
Overview of the Product
Here is the kit as shipped from the supplier (Daystar product in a California Super Trucks box, shipped by PerformanceLifts...go figure. it's just a bit of insight that these spacers are all made by the same company and repackaged by different companies. they are all the SAME):
The spacer itself is a solid 2" tall. all of that is not actual lift though....more later.
Before Picture
i'll have to get the far away whole truck shots off the other computer
On to the Installation
-start on one side and complete that side before moving to the next.
-while the weight of the truck is still on the ground, loosen the lug nuts
-jack the front of the truck up on the side you are working on. the best place to jack the truck up is from under the front suspension crossmember.
-have your buddy place the jack stand under the frame as far forward as you can.
-remove the tire.
-place the jack under the lower control arm and apply enough pressure to it so the jack will not move. once you start unbolting everything, you really can't be too careful when dealing with the highly compressed coils. we found the best location (after some time) for the jack is the farthest to the edge of the lower control arm. you will see four round headed studs there.
-unbolt the swaybar from its link on both sides of the truck. this will allow you to lift/swing the swaybar out of the way.
-remove the shock. there are two bolts on the underside of the lower control arm, and one bolt at the top of the upper coil bucket. you will need one adjustable wrench to hold the very tip of the shock in place while your other adjustable or correct sized boxed wrench loosens the nut.
-at this point, i would recommend hooking some straps to the coil and to the frame to keep the coil from popping out. it is not 100% necessary, but as mentioned before, you really can't be to careful, and it only takes a couple seconds to put them on there. admittedly, we did this the first go-round, but not on the second.
-we found, after our first go at it, that it is much easier and safer to remove the brake caliper and rotor. once you are trying to remove and reinstall the coil, you will need as much stretch room to do so, and you risk breaking the brake line if the caliper is still connected as it does not have much slack to move. (don't worry, you're not doing a "brake job" here. no bleeding the brakes or anything.) just remove the two bolts from the back of the caliper and hang it out of the way with another strap or some zip ties.
-remove the bolt from the upper balljoint/control arm. use the pitman arm puller to pop the bolt out. do not bother with the old fashion BFH method. you risk damaging the bolt and knocking your truck off the jack stand. not to mention it takes 10 seconds to get it out with the PAP.
-once the upper control arm is seperated from the spindle, SLOWLY lower the jack releasing the tension from the coil. once the jack is out of the way, you will still need help pushing down on the control arm to get the coil out. here it is once out, with the stock rubber coil isolator on top....keep that handy, you're going to need it.
-here is the coil isolator next to one of the spacers
-the spacer on the top of the coil
-the stock isolator on top of the spacer on top of the coil. the groove in the stock isolator fits over the beveled top of the spacer.
-we found that it helps to just shove the stock isolator and spacer up into the bucket and then put the coil in (the bucket will hold them in place).
-this is where it gets fun. if you didn't use your buddy before, you'll need him now. while one pushes down on the lower control arm, the other will slip the coil into place.
reflection: if you use a coil compressor, slipping the coil in and out would be a bit easier. it is not necessary, but may help if you have to do this install by yourself. additionally, if you were able to disconnect the steering rod from the spindle, it would free the lower control arm freely and allow as much room as you need. because of the depth of the pitman arm puller, we were not able to use the tool to get the rod off.
-once the coil is reseated in position, jack the lower control arm back up to secure it in place.
-replace the ball joint bolt through the spindle and rebolt. this will assure everything will stay in place.
-from there, reattach everything but the swaybar (you will still need that loose for the other side). we started next with reattaching the rotor and caliper, and finished with the shock. you may need to jack up the lower control arm to get the top bolt on.
-put the tire back on, bolt it up
-remove the jack stand and lower the truck on the ground
-retighten lugs
-repeat on other side.
After
Ram3rdGen