


 08-05-2015, 12:13 PM
Last edit by: IB Advertising
See related guides and technical advice from our community experts:
Browse all: General Overview
- Dodge Ram 2nd, 3rd, 4th Gen Top Comfort Modifications
Overview of popular modifications to customize your Ram.
Browse all: General Overview

Driver's side seat foam problems? I have the cure!
#11
06-04-2009, 09:46 PM

Record Breaker
Join Date: Oct 2005
Location: Las Vegas
Posts: 1,276
Likes: 0
Received 0 Likes
on
0 Posts
 .
.
#12
06-08-2009, 07:52 AM
I did the passenger side seat for good measure.
Although there wasn't anything wrong with the seat, I went ahead and, shall we say, performed preventative maintanance on it.
My original post on this topic was from another forum by another author.
The following post is from my truck with my pictures.
Enjoy.

Amazingly enough, it was in perfect shape. But I just bought this babee in September of 2008 and I want it to last me through the long haul. So I went to work on it just as I'd done the driver's side.
Important Note:
The initial post and pictures are from cntryby of the Dodge Diesel Forum. They are his pictures and his truck. The pictures to follow are from my project on my truck.
The tools you'll need:
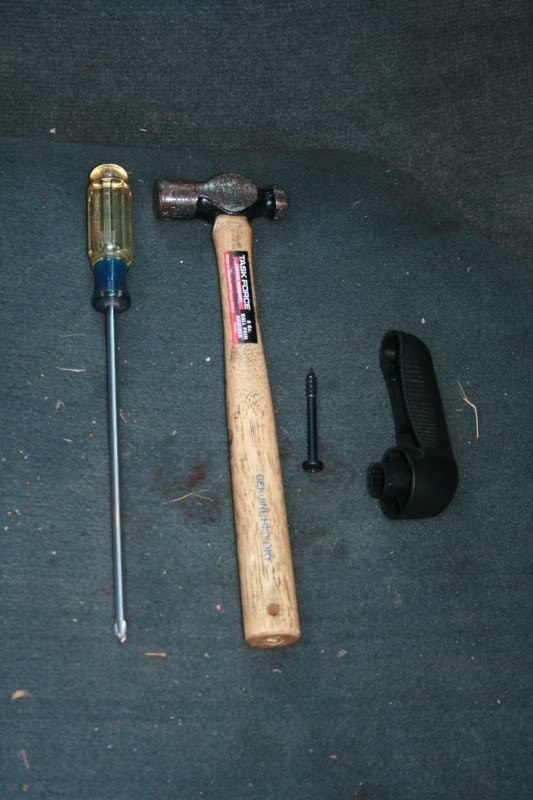
Ball Peen Hammer and Phillips Head Screw Driver.
I don't have heated or motorized seats so the upholstery removal was quite easy.
If you have either, it may involve more screws or a bit more intense and detailed parts removal.
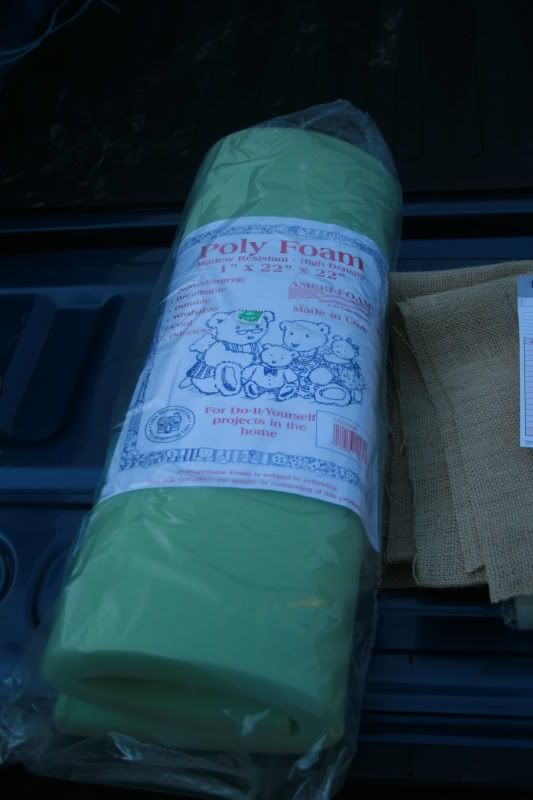
The Materials:

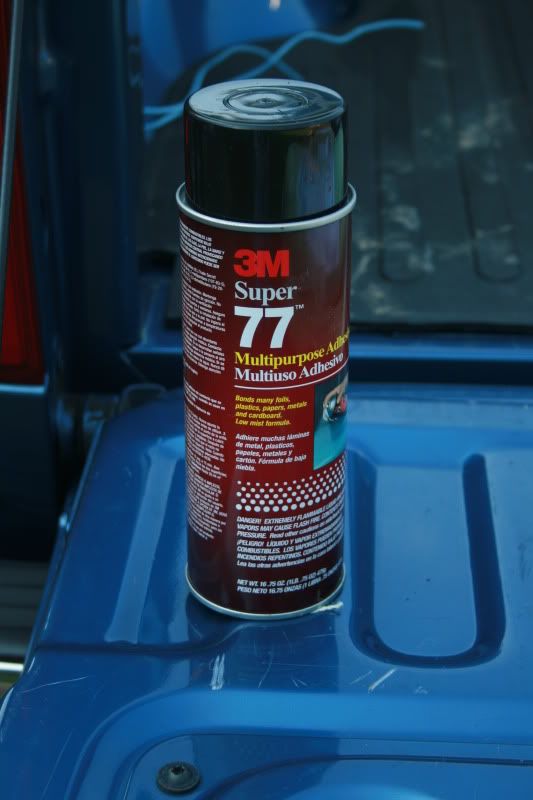
3M Super 77 (washes off your hands with soap & water)

1"x22"x22" Green Foam from Hobby Lobby (approx. $5.99)
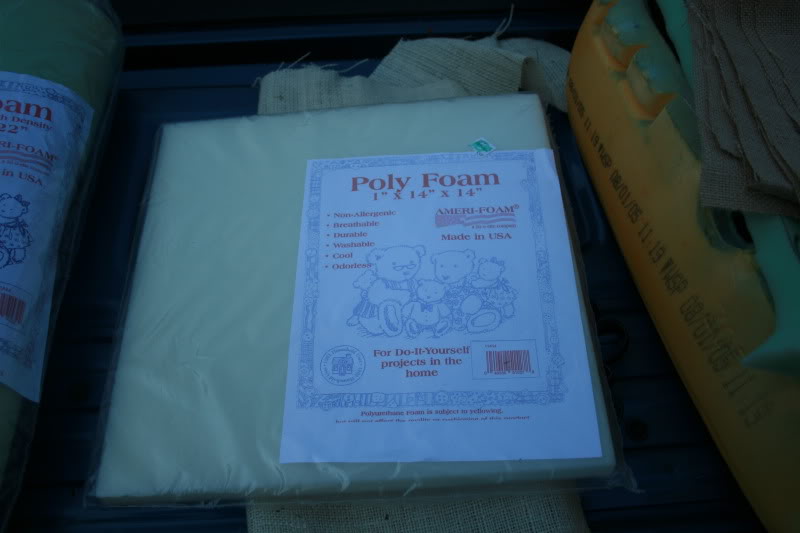
1"x14"x14" White Foam from Hobby Lobby (approx. $3.99)
I used 2" on my driver's side and I like it better.
But, the store was out and i settled for 1".
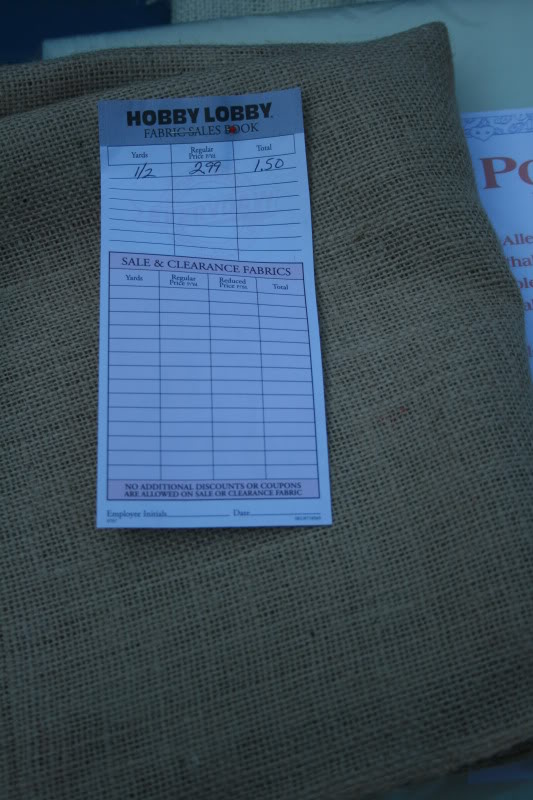
1 - Half Yard of Burlap from Hobby Lobby (approx. $2.99)
If you cut your pieces right, you can use 1/2 yd for both seats.
It all depends on the condition of the foam. Get 1 yrd for good measure.
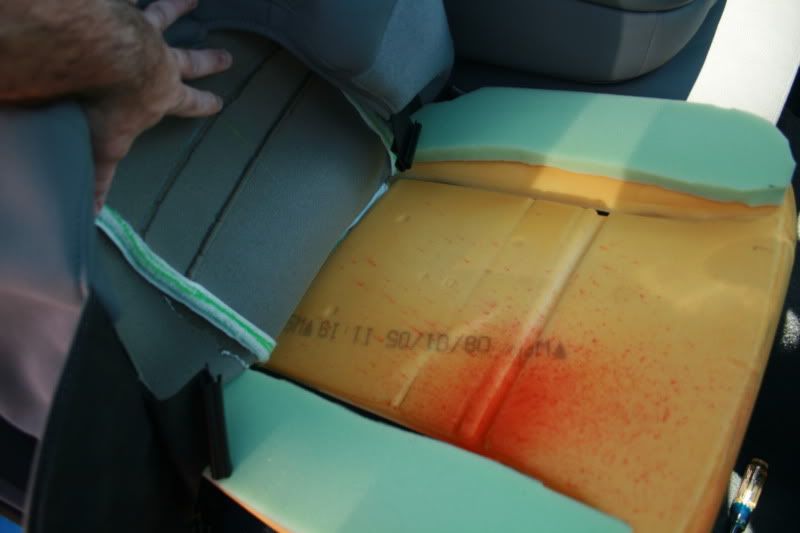
Removal of the upholstery is pretty easy, except for the front hook. The nice thing about this is Dodge no longer uses the old hog rings. The plastic hooks are sewn right in. It can get tricky. Push down on the seat cushion for slack in the material and the hooks won't give you much problem.
Here's what you'll have after you unhook the seat cover and remove the cushion.

Take your ball peen hammer and knock down any slag, sharp metal edges and so on.
You can glue burlap over the edges if you'd like.
I didn't on either seat, but it can't hurt.
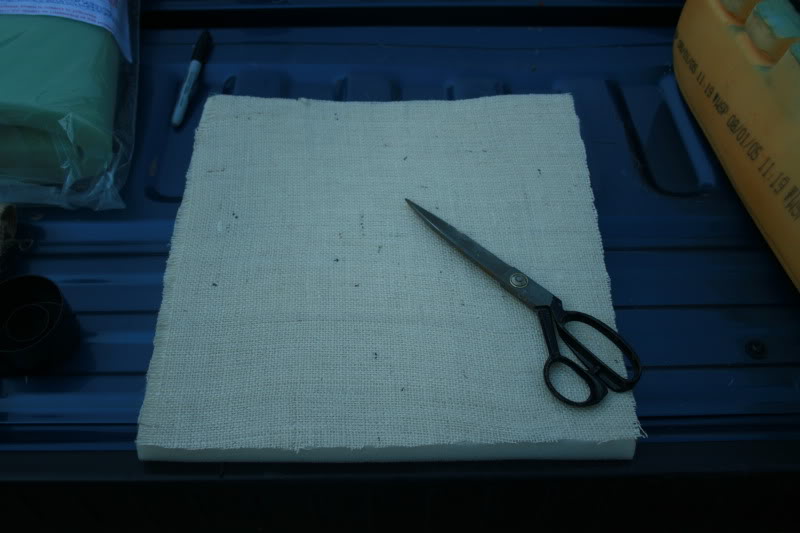
Glue the burlap to the bottom of the foam to prevent snowing under the seat as age and wear sets in.
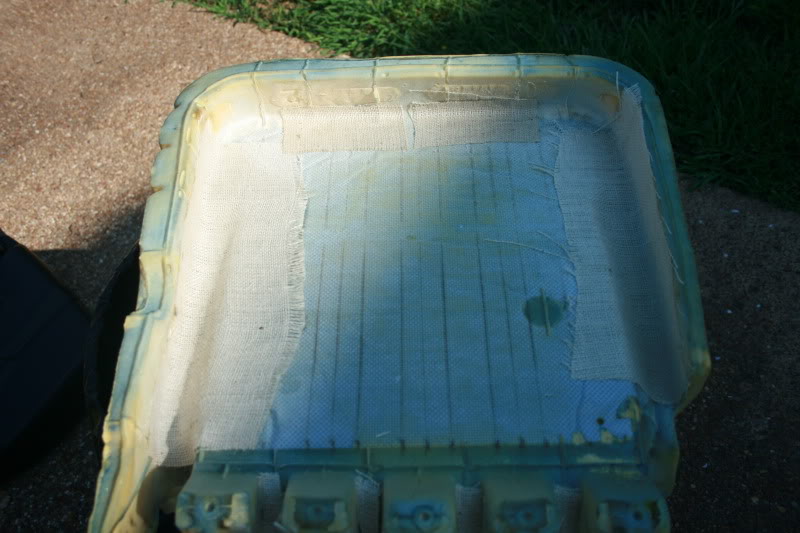
Although nothing was wrong with this cushion, I went in and reinforced it with extra burlap for good measure.
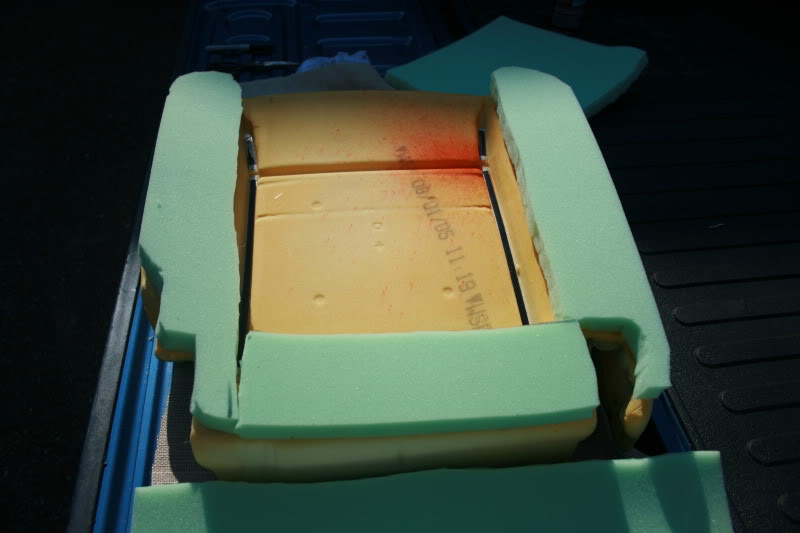
Use the 1" green Foam on the top of the cushion.
I'm not a professional at this as you can tell.
Thank goodness the seat cover will help the foam conform to the right shap.
Also, if you can find 1/2" foam, it'll probably do you better.

The knuckle buster of it all is getting the cushion back in position.
There's a tab that has to be pulled over the back part of the seat.
Once you've got the seat in position and aligned with the recliner adjustment arm, you're ready to take it home.
BE SURE to match up and attach the velcro parts of the seat cover to keep definition in the seat.
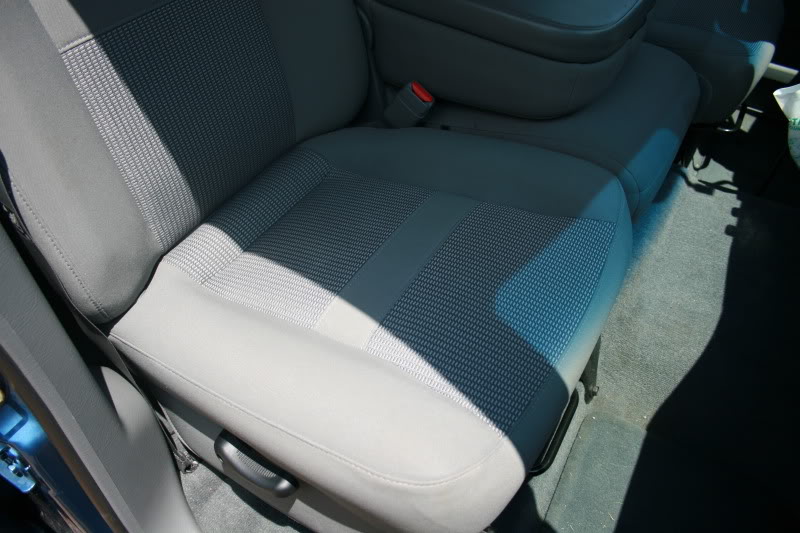
Viola! Ready for the road.
The passenger side seat isn't as POOFY as my driver's side, because I only used the 1" foam under the base of the seat. If you use the 2", be prepared to ride in luxury
and a little higher than usual until the seat settles in. My passenger seat won't be used as much as some others, so I'm not concerned with the difference. It just looked really flat along side my newly repaired driver's side. I had to attempt to make them match....and they do to the unknowing rider.
Hope you guys like and approve this thread.
I hope you get your seats back in shape as easily as I did.
Although there wasn't anything wrong with the seat, I went ahead and, shall we say, performed preventative maintanance on it.
My original post on this topic was from another forum by another author.
The following post is from my truck with my pictures.
Enjoy.
Amazingly enough, it was in perfect shape. But I just bought this babee in September of 2008 and I want it to last me through the long haul. So I went to work on it just as I'd done the driver's side.
Important Note:
The initial post and pictures are from cntryby of the Dodge Diesel Forum. They are his pictures and his truck. The pictures to follow are from my project on my truck.
The tools you'll need:
Ball Peen Hammer and Phillips Head Screw Driver.
I don't have heated or motorized seats so the upholstery removal was quite easy.
If you have either, it may involve more screws or a bit more intense and detailed parts removal.
The Materials:
3M Super 77 (washes off your hands with soap & water)
1"x22"x22" Green Foam from Hobby Lobby (approx. $5.99)
1"x14"x14" White Foam from Hobby Lobby (approx. $3.99)
I used 2" on my driver's side and I like it better.
But, the store was out and i settled for 1".
1 - Half Yard of Burlap from Hobby Lobby (approx. $2.99)
If you cut your pieces right, you can use 1/2 yd for both seats.
It all depends on the condition of the foam. Get 1 yrd for good measure.
Removal of the upholstery is pretty easy, except for the front hook. The nice thing about this is Dodge no longer uses the old hog rings. The plastic hooks are sewn right in. It can get tricky. Push down on the seat cushion for slack in the material and the hooks won't give you much problem.
Here's what you'll have after you unhook the seat cover and remove the cushion.
Take your ball peen hammer and knock down any slag, sharp metal edges and so on.
You can glue burlap over the edges if you'd like.
I didn't on either seat, but it can't hurt.
Glue the burlap to the bottom of the foam to prevent snowing under the seat as age and wear sets in.
Although nothing was wrong with this cushion, I went in and reinforced it with extra burlap for good measure.
Use the 1" green Foam on the top of the cushion.
I'm not a professional at this as you can tell.
Thank goodness the seat cover will help the foam conform to the right shap.
Also, if you can find 1/2" foam, it'll probably do you better.
The knuckle buster of it all is getting the cushion back in position.
There's a tab that has to be pulled over the back part of the seat.
Once you've got the seat in position and aligned with the recliner adjustment arm, you're ready to take it home.
BE SURE to match up and attach the velcro parts of the seat cover to keep definition in the seat.
Viola! Ready for the road.
The passenger side seat isn't as POOFY as my driver's side, because I only used the 1" foam under the base of the seat. If you use the 2", be prepared to ride in luxury
and a little higher than usual until the seat settles in. My passenger seat won't be used as much as some others, so I'm not concerned with the difference. It just looked really flat along side my newly repaired driver's side. I had to attempt to make them match....and they do to the unknowing rider.
Hope you guys like and approve this thread.
I hope you get your seats back in shape as easily as I did.
#13
06-08-2009, 07:42 PM
Record Breaker
#14
08-02-2009, 01:16 PM

Great thread. I did my seat last night. It's fairly straightforward as this post shows. My main issue was with power seats there isn't much room to get my meat hooks (hands) in there. Removing the front clip was an exercise in frustration. I finally modified a door panel removal tool to hook the top of the clip and pull it off. I got a 1 1/2" foam mattress pad topper from Walmart for $12, as well as the burlap. And then before clipping the cover back on I sat in it to test, and added one more layer of foam.
I now have a proper throne for my Ram!
Thanks for the photos and inspiration to "get r done".
o.r.
I now have a proper throne for my Ram!
Thanks for the photos and inspiration to "get r done".
o.r.
#15
09-14-2009, 04:07 PM

hey great info, thanks for posting it. i have a dakota which had the same problem. i called all over and apparently they stopped making the cushion replacement for my truck. you inspired me to tackle it and it was actually surprisingly easy to fix. i'm sitting level on a comfortable seat again for under $30. thanks again!!!!!
#16
11-02-2010, 06:20 PM

I did the passenger side seat for good measure.
Although there wasn't anything wrong with the seat, I went ahead and, shall we say, performed preventative maintanance on it.
My original post on this topic was from another forum by another author.
The following post is from my truck with my pictures.
Enjoy.

Amazingly enough, it was in perfect shape. But I just bought this babee in September of 2008 and I want it to last me through the long haul. So I went to work on it just as I'd done the driver's side.
Important Note:
The initial post and pictures are from cntryby of the Dodge Diesel Forum. They are his pictures and his truck. The pictures to follow are from my project on my truck.
The tools you'll need:

Ball Peen Hammer and Phillips Head Screw Driver.
I don't have heated or motorized seats so the upholstery removal was quite easy.
If you have either, it may involve more screws or a bit more intense and detailed parts removal.
The Materials:
3M Super 77 (washes off your hands with soap & water)
1"x22"x22" Green Foam from Hobby Lobby (approx. $5.99)

1"x14"x14" White Foam from Hobby Lobby (approx. $3.99)
I used 2" on my driver's side and I like it better.
But, the store was out and i settled for 1".

1 - Half Yard of Burlap from Hobby Lobby (approx. $2.99)
If you cut your pieces right, you can use 1/2 yd for both seats.
It all depends on the condition of the foam. Get 1 yrd for good measure.
Removal of the upholstery is pretty easy, except for the front hook. The nice thing about this is Dodge no longer uses the old hog rings. The plastic hooks are sewn right in. It can get tricky. Push down on the seat cushion for slack in the material and the hooks won't give you much problem.
Here's what you'll have after you unhook the seat cover and remove the cushion.
Take your ball peen hammer and knock down any slag, sharp metal edges and so on.
You can glue burlap over the edges if you'd like.
I didn't on either seat, but it can't hurt.

Glue the burlap to the bottom of the foam to prevent snowing under the seat as age and wear sets in.

Although nothing was wrong with this cushion, I went in and reinforced it with extra burlap for good measure.

Use the 1" green Foam on the top of the cushion.
I'm not a professional at this as you can tell.
Thank goodness the seat cover will help the foam conform to the right shap.
Also, if you can find 1/2" foam, it'll probably do you better.
The knuckle buster of it all is getting the cushion back in position.
There's a tab that has to be pulled over the back part of the seat.
Once you've got the seat in position and aligned with the recliner adjustment arm, you're ready to take it home.
BE SURE to match up and attach the velcro parts of the seat cover to keep definition in the seat.

Viola! Ready for the road.
The passenger side seat isn't as POOFY as my driver's side, because I only used the 1" foam under the base of the seat. If you use the 2", be prepared to ride in luxury
and a little higher than usual until the seat settles in. My passenger seat won't be used as much as some others, so I'm not concerned with the difference. It just looked really flat along side my newly repaired driver's side. I had to attempt to make them match....and they do to the unknowing rider.
Hope you guys like and approve this thread.
I hope you get your seats back in shape as easily as I did.
Although there wasn't anything wrong with the seat, I went ahead and, shall we say, performed preventative maintanance on it.
My original post on this topic was from another forum by another author.
The following post is from my truck with my pictures.
Enjoy.
Amazingly enough, it was in perfect shape. But I just bought this babee in September of 2008 and I want it to last me through the long haul. So I went to work on it just as I'd done the driver's side.
Important Note:
The initial post and pictures are from cntryby of the Dodge Diesel Forum. They are his pictures and his truck. The pictures to follow are from my project on my truck.
The tools you'll need:
Ball Peen Hammer and Phillips Head Screw Driver.
I don't have heated or motorized seats so the upholstery removal was quite easy.
If you have either, it may involve more screws or a bit more intense and detailed parts removal.
The Materials:
3M Super 77 (washes off your hands with soap & water)
1"x22"x22" Green Foam from Hobby Lobby (approx. $5.99)
1"x14"x14" White Foam from Hobby Lobby (approx. $3.99)
I used 2" on my driver's side and I like it better.
But, the store was out and i settled for 1".
1 - Half Yard of Burlap from Hobby Lobby (approx. $2.99)
If you cut your pieces right, you can use 1/2 yd for both seats.
It all depends on the condition of the foam. Get 1 yrd for good measure.
Removal of the upholstery is pretty easy, except for the front hook. The nice thing about this is Dodge no longer uses the old hog rings. The plastic hooks are sewn right in. It can get tricky. Push down on the seat cushion for slack in the material and the hooks won't give you much problem.
Here's what you'll have after you unhook the seat cover and remove the cushion.
Take your ball peen hammer and knock down any slag, sharp metal edges and so on.
You can glue burlap over the edges if you'd like.
I didn't on either seat, but it can't hurt.
Glue the burlap to the bottom of the foam to prevent snowing under the seat as age and wear sets in.
Although nothing was wrong with this cushion, I went in and reinforced it with extra burlap for good measure.
Use the 1" green Foam on the top of the cushion.
I'm not a professional at this as you can tell.
Thank goodness the seat cover will help the foam conform to the right shap.
Also, if you can find 1/2" foam, it'll probably do you better.
The knuckle buster of it all is getting the cushion back in position.
There's a tab that has to be pulled over the back part of the seat.
Once you've got the seat in position and aligned with the recliner adjustment arm, you're ready to take it home.
BE SURE to match up and attach the velcro parts of the seat cover to keep definition in the seat.
Viola! Ready for the road.
The passenger side seat isn't as POOFY as my driver's side, because I only used the 1" foam under the base of the seat. If you use the 2", be prepared to ride in luxury
and a little higher than usual until the seat settles in. My passenger seat won't be used as much as some others, so I'm not concerned with the difference. It just looked really flat along side my newly repaired driver's side. I had to attempt to make them match....and they do to the unknowing rider.
Hope you guys like and approve this thread.
I hope you get your seats back in shape as easily as I did.

#18
11-04-2010, 09:05 AM
So, I'd say about 2 years on average. I guess it would depend on the usage and seating habits of the truck owner.
I'm happy to report as of November 4, 2010, my seats are still seating me and my passengers comfortably.
#19
11-04-2010, 09:26 AM