

DIY Radar Detector Dash Mount (Pics + Write up)
#1
 11-11-2009, 12:48 PM


Join Date: Nov 2009
Location: South Carolina
Posts: 42
Likes: 0
Received 0 Likes
on
0 Posts
How’s it going guys. I just got my ’09 1500 Hemi Crew Cab 4x4 SLT on Friday, and have picked up a TON of good info from this site in the past few days. I figured I would do a write-up on my DIY radar detector mount in case someone else wanted to copy my project. I used the flat, smooth area above the center vents as the suction cup mounting point for my GPS and thought that it might make a good place for my radar detector too in order to get it off the windshield and make it easier to reach. I’ve seen some production mounts like mine, but I picked up the mount at the flea market for $2 and had all of the other odds and ends sitting in my garage so it was really cost efficient.
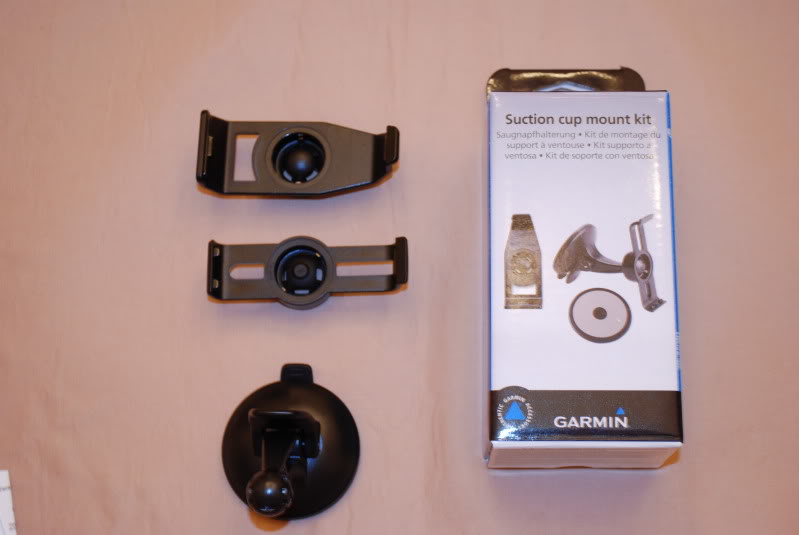
Parts List:
1 – GPS suction cup mount (mine happened to fit a Garmin Nuvi 200 and some others depending on what bracket you use)
1 – Sheet of scotch double sided foam tape or similar designed for putting posters on the wall
1 – Sheet or Strips of adhesive backed Velcro
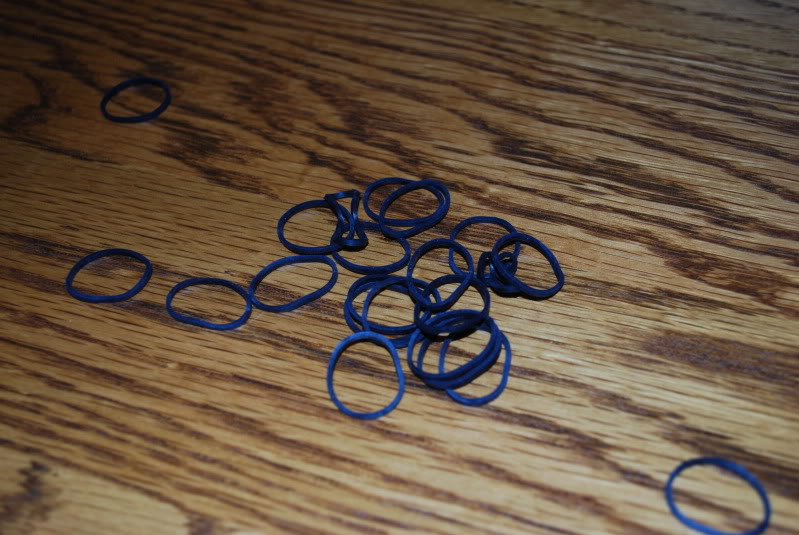
2 – Small rubber bands (optional) - I got mine at the dollar store...they are packaged as hair rubber bands (for dreads, corn rows, etc)
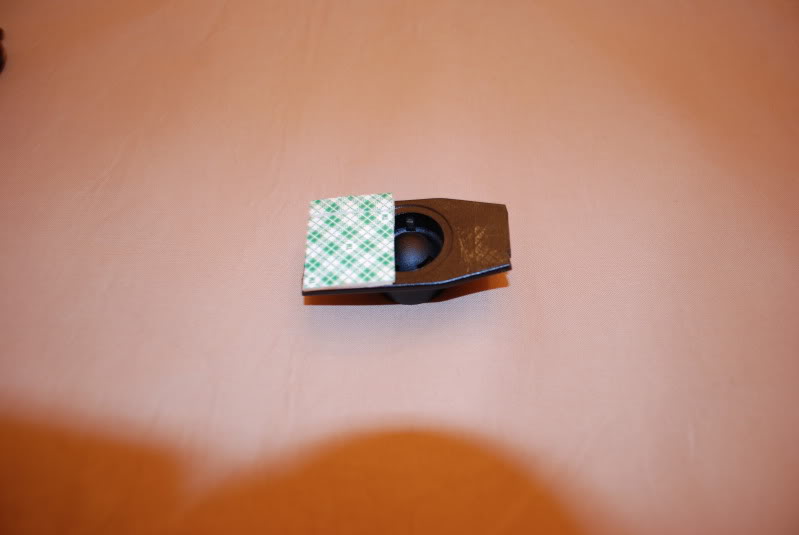
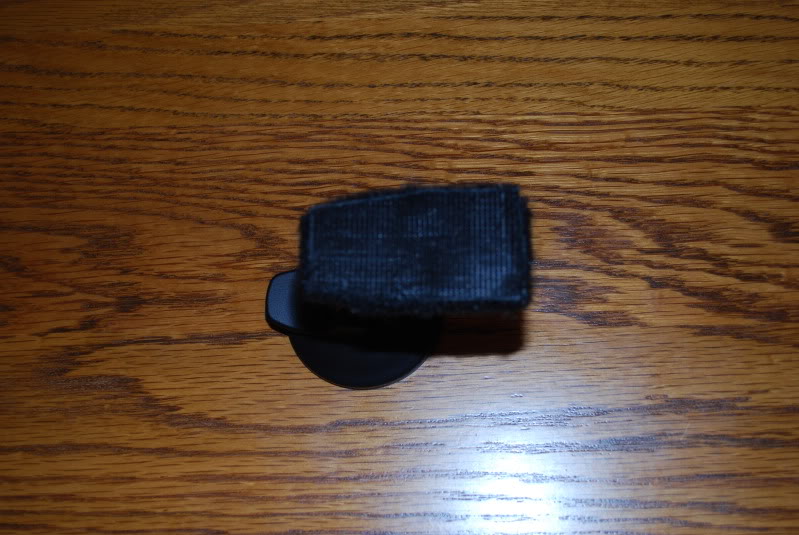
Step 1: I used the larger of the two brackets pictured below and used my dremel tool to cut off the “arms”. (note: My escort radar detector actually fit nicely between the arms out of the box, but I like the way that it works and functions better with the way I modified it.)
I cut the “arms” off of the mount that is located at the top in this picture

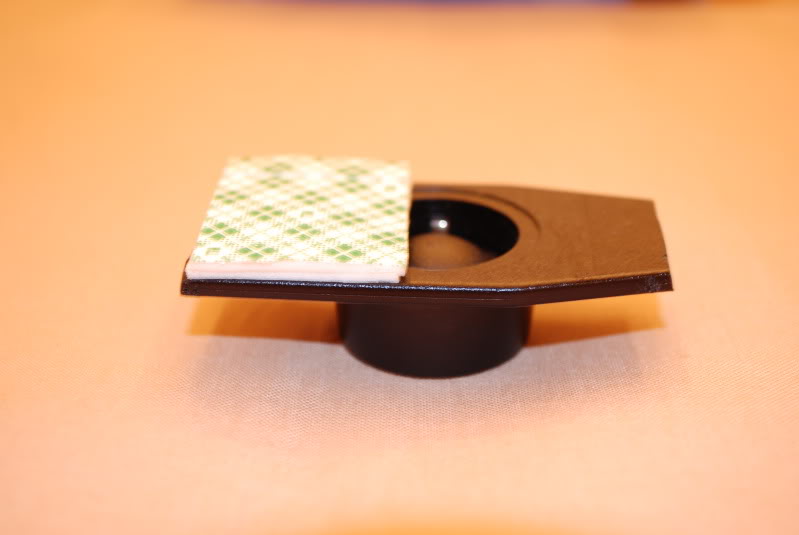
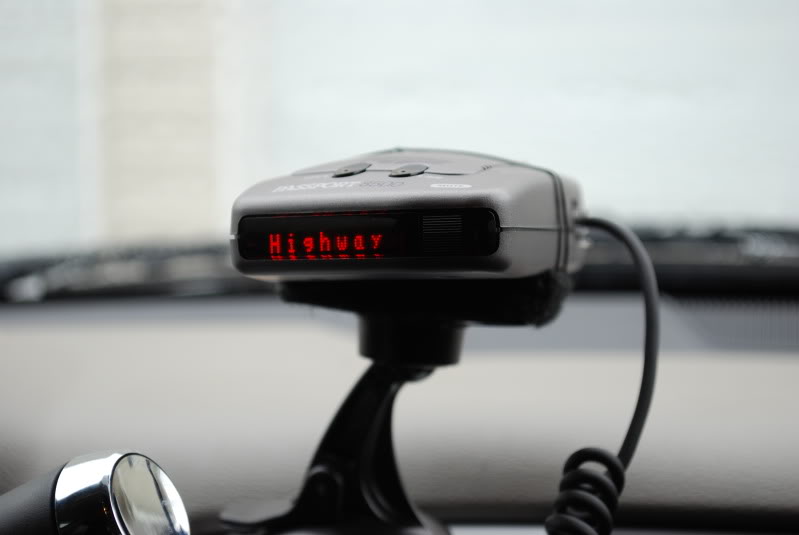
Step 2: Use the double sided foam tape and “build up” one side of the modified bracket. The reason for doing this is b/c the mount, when suction cupped down in a vertical position, “leans” a little to one side. I used the tape to build up one edge so that when the radar detector was placed on the mount, it would sit level.
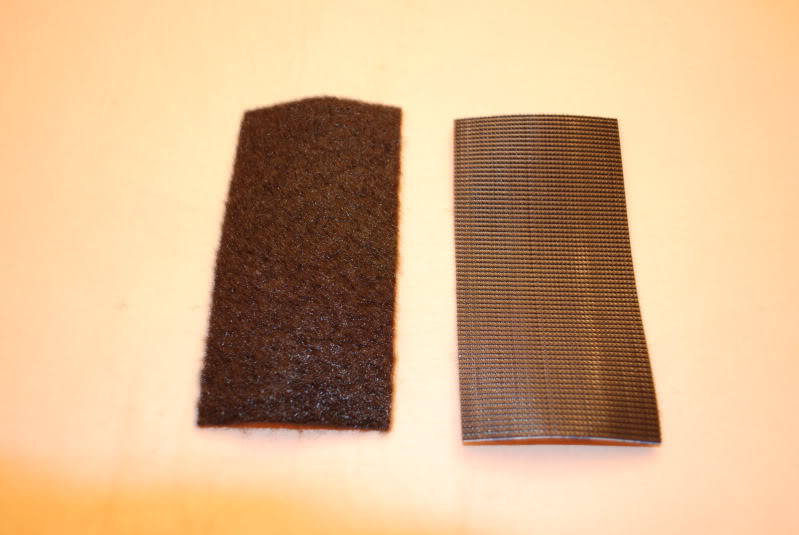
Step 3: Cover the mount with Velcro and put Velcro on the bottom of the radar detector.
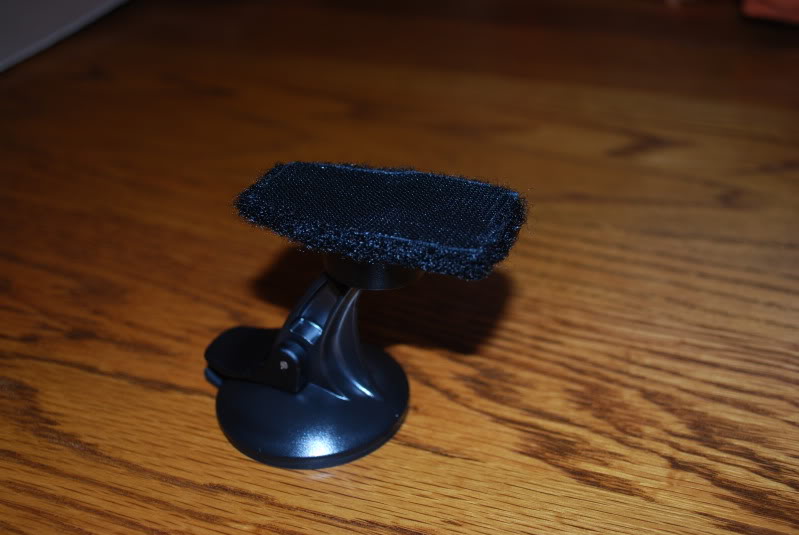
You can really see how I “built up” one side of the mount with the tape in these pictures so that the radar detector will sit level.
Step 4: (OPTIONAL): Connect 2 of the small rubber bands together and loop them to the base of the mount. The radar detector mount does not need this, but it just firms up the whole connection when driving on dirt roads of rough highways and keeps it from moving at all under the worst of conditions.
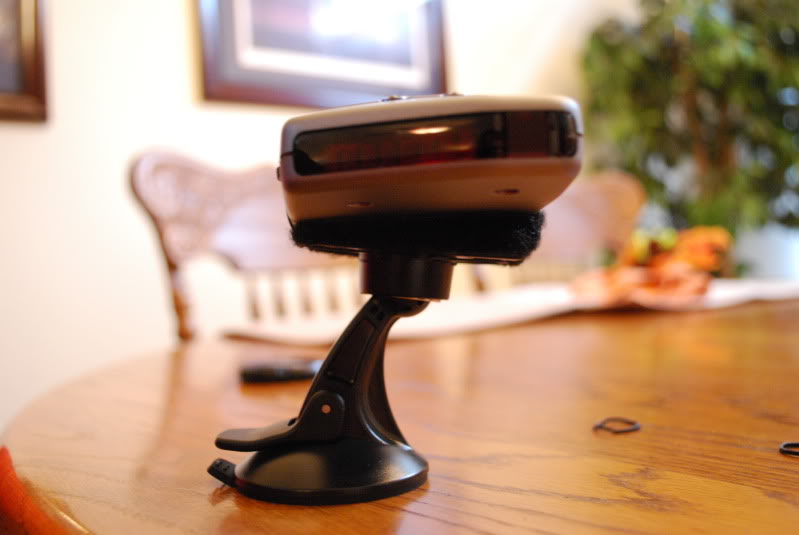
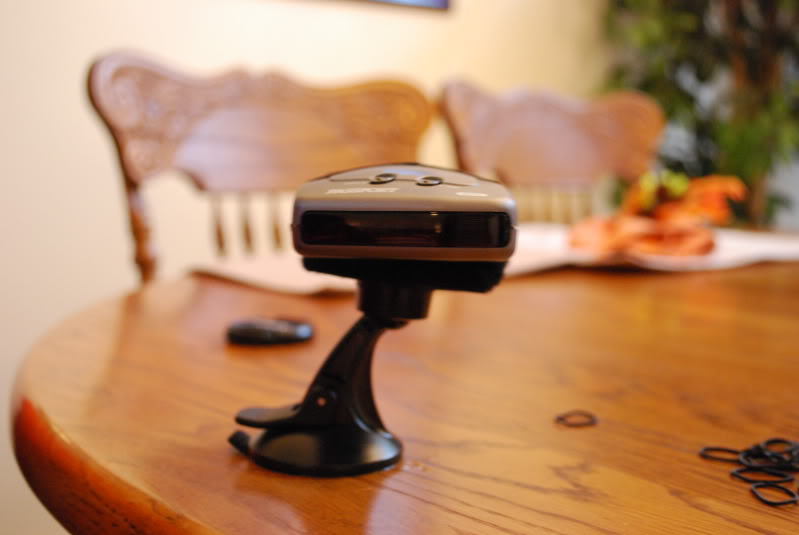
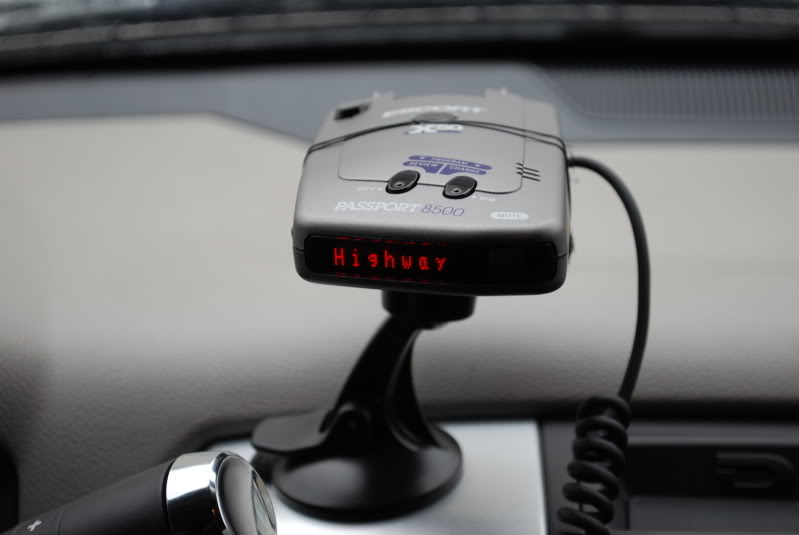
Step 5: Suction cup it above the center vents…DONE!
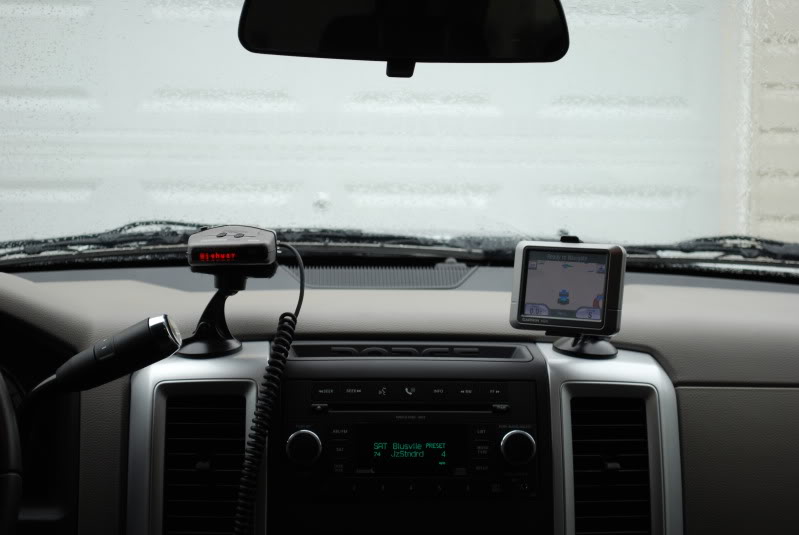
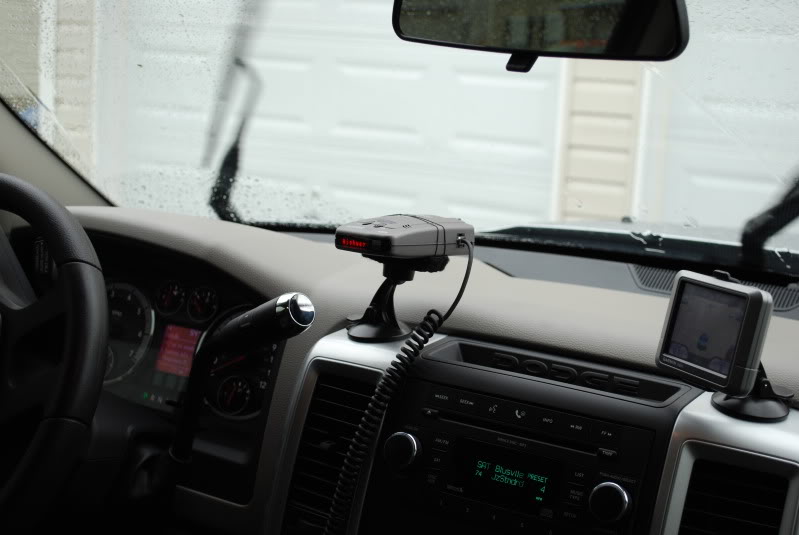
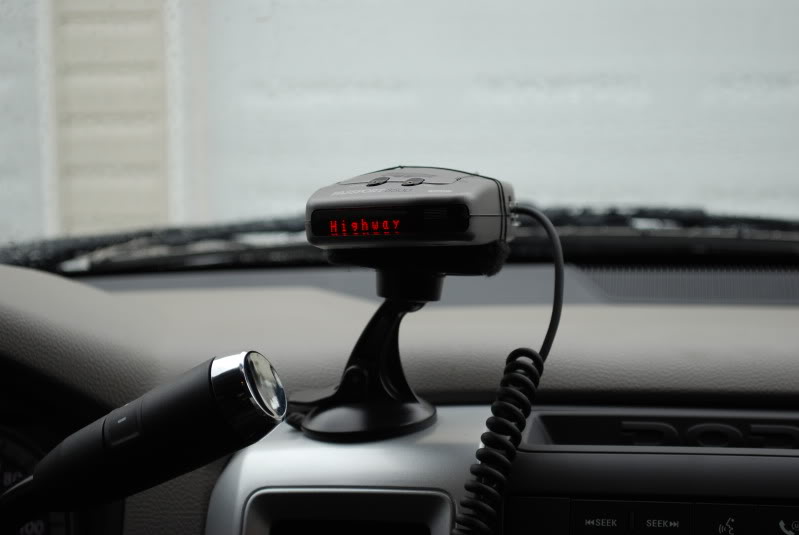
This is a really simple idea, but I just like building stuff out of what I have laying around in the garage when I can. I still occasionally use my windshield mount, but I prefer my modified one when I drive through Virginia (radar detectors are illegal there) because it gets it off the windshield.
Parts List:
1 – GPS suction cup mount (mine happened to fit a Garmin Nuvi 200 and some others depending on what bracket you use)
1 – Sheet of scotch double sided foam tape or similar designed for putting posters on the wall
1 – Sheet or Strips of adhesive backed Velcro
2 – Small rubber bands (optional) - I got mine at the dollar store...they are packaged as hair rubber bands (for dreads, corn rows, etc)
Step 1: I used the larger of the two brackets pictured below and used my dremel tool to cut off the “arms”. (note: My escort radar detector actually fit nicely between the arms out of the box, but I like the way that it works and functions better with the way I modified it.)
I cut the “arms” off of the mount that is located at the top in this picture
Step 2: Use the double sided foam tape and “build up” one side of the modified bracket. The reason for doing this is b/c the mount, when suction cupped down in a vertical position, “leans” a little to one side. I used the tape to build up one edge so that when the radar detector was placed on the mount, it would sit level.
Step 3: Cover the mount with Velcro and put Velcro on the bottom of the radar detector.
You can really see how I “built up” one side of the mount with the tape in these pictures so that the radar detector will sit level.
Step 4: (OPTIONAL): Connect 2 of the small rubber bands together and loop them to the base of the mount. The radar detector mount does not need this, but it just firms up the whole connection when driving on dirt roads of rough highways and keeps it from moving at all under the worst of conditions.
Step 5: Suction cup it above the center vents…DONE!
This is a really simple idea, but I just like building stuff out of what I have laying around in the garage when I can. I still occasionally use my windshield mount, but I prefer my modified one when I drive through Virginia (radar detectors are illegal there) because it gets it off the windshield.
Last edited by tallpaul; 11-11-2009 at 12:57 PM.
#4
11-11-2009, 02:18 PM
Join Date: Nov 2009
Location: South Carolina
Posts: 42
Likes: 0
Received 0 Likes
on
0 Posts
Thanks Bullram...the write up took longer than the build, lol. Oldjeep, are you "wetting" the suction cup at all before you mount it to that spot? For me (so far) I haven't had it fall off yet and the connection is strong. In my old Tacoma, I used to use the supplied mounting disk that comes with the gps and my Nuvi would occasionally fall of of the disk (mostly in the summer). Wetting the suction cup seemed to alieviate the problem, but I would resuction it about once a week just to be sure. I'll report back here if I have any problems, but both units have been holding strong.
#5
11-11-2009, 02:36 PM
Yes, it gets some spit and the dash is clean 
I'm switching to the type of mount that just sits on the flat part of the dash.
http://www.amazon.com/Garmin-010-112.../dp/B001S2RCWI
I'm switching to the type of mount that just sits on the flat part of the dash.
http://www.amazon.com/Garmin-010-112.../dp/B001S2RCWI
#6
11-11-2009, 03:00 PM
Professional
Join Date: Sep 2006
Location: Santa Fe, Texas
Posts: 160
Likes: 0
Received 0 Likes
on
0 Posts
Sound kinda like that gal I met a couple weekends ago, she said "Lick and stick" was always her motto!!! 
BTW Looks like the reason you done all that was so that the radar detector would sit level in its mount, wouldnt just sticking the suction cup mount on there at a diferent angle and tilting the radar mount a little more in the ball socket swivel accomplished the same task?
BTW Looks like the reason you done all that was so that the radar detector would sit level in its mount, wouldnt just sticking the suction cup mount on there at a diferent angle and tilting the radar mount a little more in the ball socket swivel accomplished the same task?
Last edited by Hdcowboy; 11-11-2009 at 03:17 PM.
#7
11-11-2009, 07:02 PM

Trending Topics
#8
11-11-2009, 07:17 PM
Join Date: Nov 2009
Location: South Carolina
Posts: 42
Likes: 0
Received 0 Likes
on
0 Posts
BTW Looks like the reason you done all that was so that the radar detector would sit level in its mount, wouldnt just sticking the suction cup mount on there at a diferent angle and tilting the radar mount a little more in the ball socket swivel accomplished the same task?
#9
11-11-2009, 07:24 PM
Join Date: Nov 2009
Location: South Carolina
Posts: 42
Likes: 0
Received 0 Likes
on
0 Posts
I spent $2 on the entire project...I had all the materials except for the GPS mount before I started. Also as I mentioned previously in the post, I drive to Va. quite often (I grew up there), so it is nice to be able to quickly get the thing off my dash. Again, spare time a couple of beers and $2 in build costs....works for me.

