Dodge Ram: How to Install Sirius XM Satellite Radio
Are you bored of all the local radio stations found in your area? Installing Sirius radio into your truck will give you access to hundreds of stations from around the world and can easily be done in the comfort of your own home.
This article applies to the Dodge Ram (1994-present).
Sirius changed the way the the avid music enthusiast or news connoisseur listened to the radio. It allows you to not only pick up local radio shows, but also stations from around the world. It's no wonder people love to upgrade from their standard radios to satellite systems. Even though it's easy to install Sirius into your radio, only certain head units are able to connect to satellite radio. Before attempting to install Sirius radio into your head unit, be sure to check whether or not it can play it. Once you are certain the head unit will work, use the following instructions to install Sirius radio into your Dodge Ram.

Materials Needed
- Phillips screwdriver
- Pry tool
- Silicone
- Sirius radio kit
- Zip ties
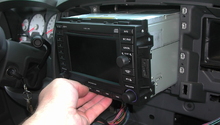
Step 1 – Remove the center console cover
The center console cover is clipped in place around most of the controls. However, there may be a screw that holds the right lower left portion of the console, next to a small hook.
- Use the screwdriver to remove it.
- Take the pry tool and gently pop out the trim around the center console.
- Use the pry tool to remove the trim piece next to the knee bolster and steering column.
- Pull off the center console cover.

Step 2 – Begin routing the Sirius radio antenna wires
In order for the satellite radio to receive the best reception, the antenna needs to be mounted on the outside body of the car. Sirius supplies extra feet of antenna wire so you have more flexibility on deciding where to install it. However, the most common place is on the roof near the driver side windshield.
- Use a pry tool to pull against the door's weather stripping.
- Place a rubber grommet to allow space for the cable to fit.
- Slide the cable throughout the driver side door's weathering stripping.
- Bring it down through the A pillar and into the dashboard.
- Continue to route it through the cabin harness until you reach the radio wires.
While routing the Sirius wires, be sure to zip tie them to a nearby harness to keep them from dangling.

Step 3 – Mount the antenna to the roof
Although the standard Sirius radio receiver is magnetic, the antenna will require additional support to stay stuck on the truck, while experiencing the elements.
- Dab some silicone under the receiver.
- Place the antenna onto the roof of the truck.

Step 4 – Connect the Sirius receiver into the head unit
As previously mentioned, the head unit must be able to connect to a satellite receiver. After routing the wires behind the dashboard, connect each plug to the head unit.
- Connect the antenna to the Sirius module.
- Connect the module to the head unit.

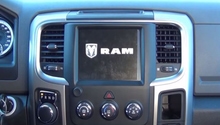
Step 5 – Install the head unit
- Take the module and hide it behind the center console.
- Place the head unit back into the center console.

Step 6 – Install the center console cover
- Once all the wires are situated, take the center console cover and install it.
- Push each side so that it clips on and re-install both pieces of trim.
- Use the Phillips screwdriver to tighten to screw on the right side of the dash panel.

Featured Video: How to Install Sirius XM SXv200v1 Tuner
Related Discussion
- How Do I Know if I Have Sirius Satellite Radio? - Dodgeforum.com