Dodge Ram 1994-2001: How to Install Transfer Case Saver
Your 4WD transfer case adjusts the distribution of torque between the four wheels. When you're off-roading or otherwise giving your truck a workout, wear and tear can occur. For some Ram owners, this has resulted in stripped gears in the box, and getting locked out of 4WD entirely. Fortunately, we can rebuild the t-case with sturdier components to prevent future failures.
This article applies to the 2nd Generation Dodge Ram (1994-2001).
A common issue with the transfer case in these trucks is the snap ring on the main shaft will break or become dislodged from its position. When this happens, it allows for excessive play in the main shaft, which can wreck the bearings and the gears in the transfer case. The transfer case saver replaces that snap ring with a beefier collar, so that you don't have to worry about the snap ring breaking or coming loose.
Materials Needed
- 5/16" socket
- 1/2" socket
- Socket extensions
- Flat head screwdriver
- Snap ring pliers or something similar
- RTV silicon sealant
- Shop rags
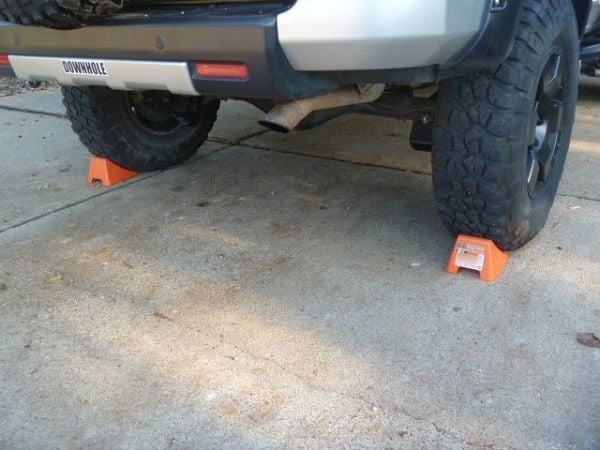
- Drive-on car ramps (if you can't fit comfortably under the truck)
- Wheel chocks
- Shop rags
- Red Loctite
Step 1 – Preparation
- If you can't fit comfortably under your truck, it is recommended using a set of drive-on car ramps or parking over a ditch to allow yourself more room.
- Try to park on as leveled ground as possible. Obviously if you're using car ramps, this doesn't apply to you.
- Put the truck in neutral, as this will allow you to rotate the drive shaft freely to ease both the removal and install.
- Set the parking brake.
- Chock both sides of the rear wheels; you'll be disconnecting the rear drive shaft, so you want to make sure there's as little chance as possible for the truck to roll.
Step 2 – Remove the drive shaft
- Using a 5/16" socket, remove the four bolts on the U-joint straps.
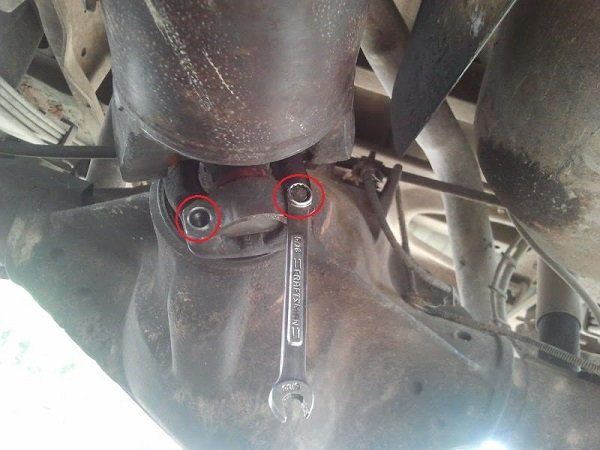
- Pull the drive shaft towards the front of the truck to free it from the pinion yoke.
- Then pull it towards the back of the truck to free it from the transfer case. Take care not to damage either end of the drive shaft.
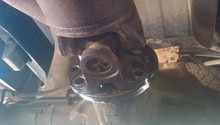
Step 3 – Remove the tail housing
- Using a 1/2" socket, remove the four bolts holding the tail housing to the transfer case.
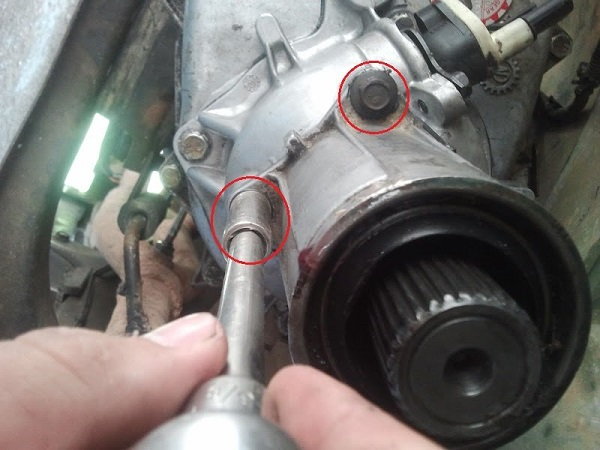
- The tail housing is still attached with a good amount of sealant. You can either carefully pry it off using a flat head screwdriver, or you can just use brute force to pull it off.
Step 4 – Install transfer case saver
Now, you'll be able to see the snap ring.
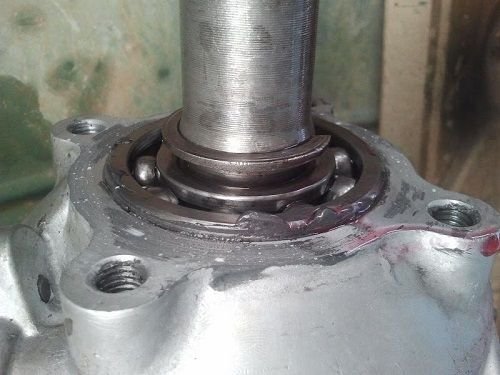
Figure 4. Dislodged snap ring. 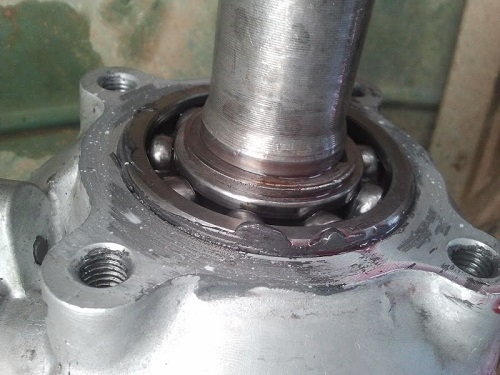
Figure 5. Snap ring in correct position.
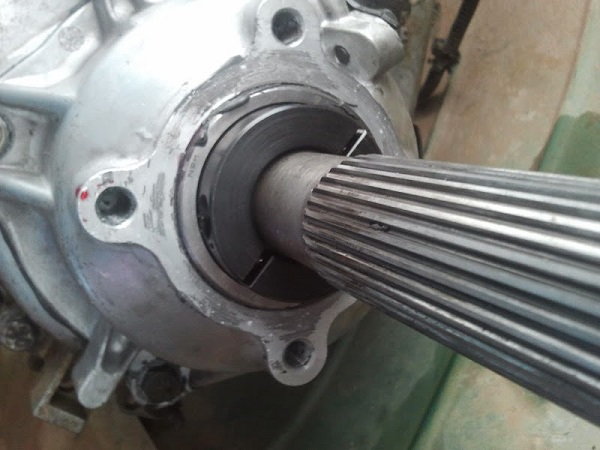
- Using a pair of pliers, pry the old snap ring apart to get it off.

- Install the new transfer case saver by putting both halves around the main shaft, and then tightening the Allen bolts on both sides. It is recommended putting some Red Loctite on the threads of the Allen screws to keep them from backing out.
Step 5 – Finishing up
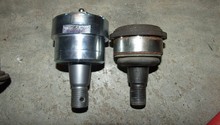
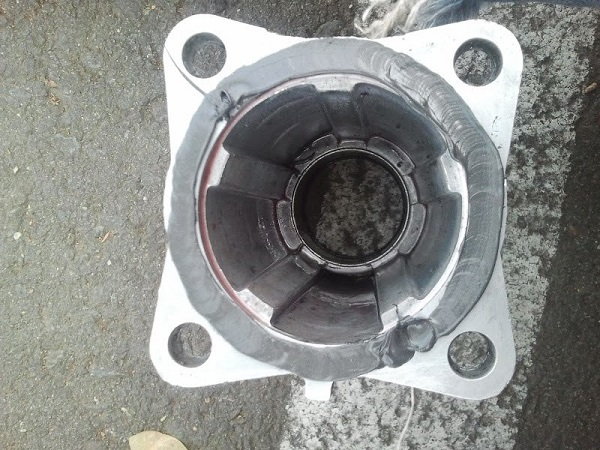
- Clean up all the old sealant from the tail housing cap and where it mounts.
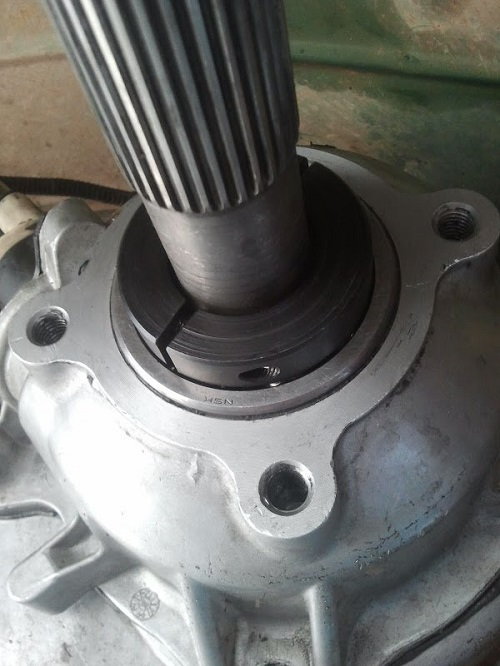
Figure 8. Clean mounting point. 
Figure 9. Clean tail housing cap.
- Apply a bead of RTV silicon sealant to the tail housing cap.
- Re-install the tail housing cap using your 1/2" socket.
- Re-install the drive shaft.
- Re-install the U-joint straps using your 5/16" socket.
- Wait an hour before driving for the sealant to cure.
Related Discussions
- DIY Transfer Case Saver Install - DodgeForum.com
- Transfer Case Saver - DodgeForum.com