Dodge Ram 1994-2001: How to Replace Distributor Cap and Rotor
The distributor cap and rotor on the Dodge Ram are wear items that occasionally need replacing. No only do these components wear from regular use, but they are made of plastic that can become brittle and fail with age. With the cap and rotor being such important parts of the ignition system, regular maintenance is recommended to keep your Ram truck running at it's best.
This article applies to the Dodge Ram 1500 (1994-2001).
The distributor cap and rotor on the second generation Dodge Ram 1500 are crucial components of the ignition system. Voltage from the ignition coil is sent directly to the spinning rotor inside of the distributor, which then transfers the voltage to each contact point of the distributor cap. The electrical charge is then sent from the distributor cap to each of the engine's spark plugs via spark plugs wires at the precise time for combustion to occur. Over time, the contact points on the distributor cap and rotor can wear, have excessive carbon buildup, or even break. Typically, these issues will cause reduced engine performance; however, in severe cases, a failed distributor cap or rotor will prevent your engine from running at all. Maximize your engine's efficiency by installing new a distributor cap and rotor.

Materials Needed
- Flat head screwdriver
- Phillips screwdriver, 7mm wrench, or 7mm socket with 1/4" ratchet and extension
- Painter's tape and pen/marker
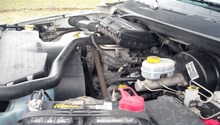
Step 1 – Remove airbox assembly
The distributor is located underneath the airbox assembly and behind the throttle body. To gain access to the distributor, the airbox assembly needs to be removed.
- First, remove the air intake tube off of the airbox. Applying gentle force, slide the tube away from the airbox and position it out of the way.
- Remove the rubber breather hose. Depending on engine model, this hose may be located on the left or right side of the airbox. This tube simply slides on and off of the airbox nipple.
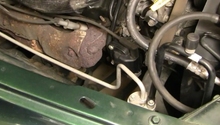
- On the underside of the airbox, loosen the hose clamp securing the airbox to the throttle body.
- With all fittings disconnected, lift up on the airbox assembly and remove it from the engine bay.
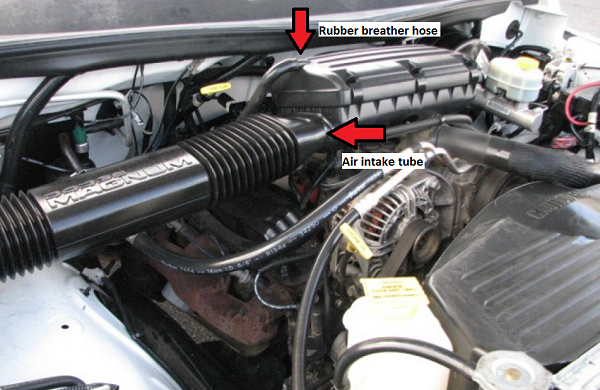
Figure 1. Airbox removal points. 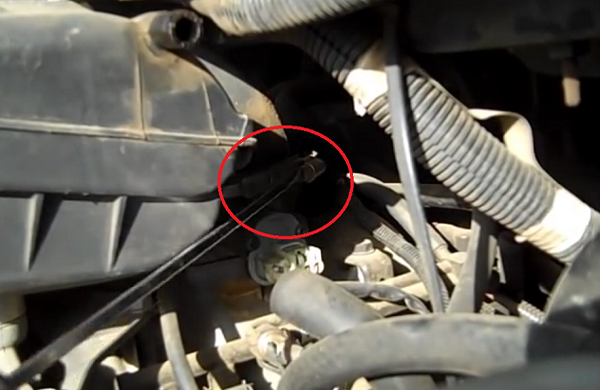
Figure 2. Loosening hose clamp securing airbox to throttle body.
Step 2 – Label and remove spark plug wires
With the airbox assembly removed, the distributor is now accessible.

- Located behind the throttle body, the distributor cap has each spark plug wire attached to a designated position on the cap. Using the diagrams located in Figure 4, label each spark plug wire with its associated cylinder number. Starting with spark plug wire #1, follow the engine firing order and label each successive spark plug wire by moving around the distributor in a clockwise motion. The remaining wire in the center of the distributor cap is the coil wire. Labeling the spark plug wires will ensure they are reinstalled in their correct positions upon reassembly. Failure to correctly identify and install the spark plug wires can result in engine misfiring.
- With the spark plug wires labeled, remove all wires from the distributor cap. Wiggling and slightly twisting the wire boots while pulling upwards will aid in removal.

Pro Tip
It is a good idea to trace the spark plug wires from each cylinder back to the distributor cap when labeling the wires.
Step 3 – Replace distributor cap and rotor
Now that the spark plug wires and coil wire are removed from the distribitor cap, the cap can be removed from the distributor.
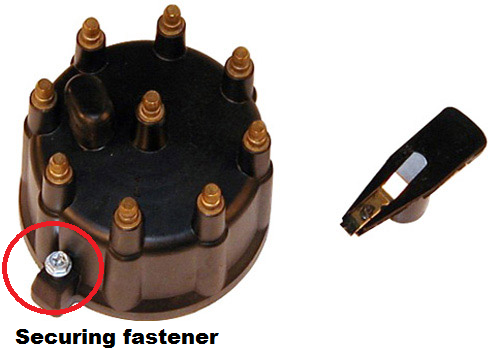
- Using a a 7mm wrench, socket & ratchet, or Phillips screwdriver, loosen the two distributor cap fasteners. The fasteners are located at the 3 & 9 o'clock positions at the base of the cap. After loosening the fasteners, remove the distributor cap by simply lifting it up. A bit of maneuvering may be required to remove the cap from the engine bay as the fit is a bit tight at the back of the engine.
- After removing the cap, the rotor can be removed by simply giving it firm tug upwards. Do not worry about marking its orientation as the distributor shaft has a small groove to allow the rotor to only be installed one way.
-
Next, install the new rotor in the distributor. As previously mentioned, there is a groove in the distributor shaft to ensure correct positioning of the rotor.
-
Install the new distributor cap onto the distributor. Note that one of the fastener mounts in the cap is square, while the other is rounded to prevent the cap from being incorrectly installed. Additionally, the distributor cap should have a #1 stamped on it to indicate the position of the cap which should, depending on engine configuration, face towards the 7 or 9 o'clock position when installed (See Figure 5 for the number "1" stamped into the cap). Be certain that the cap is properly seated in place on the distributor and tighten the fasteners. A misaligned cap will interfere with the transfer of electrical voltage from the rotor to the distributor cap and prevent proper combustion from occurring.
Pro Tip
It is always a good idea to compare the new distributor cap and rotor to the old components to ensure your have the correct parts. If either component is incorrect, your truck will likely not run for lack of spark being delivered to the engine.
Step 4 – Reinstall spark plug wires and start truck
- After the new cap and rotor have been installed, reattach the spark plug wires and coil wire to the distributor cap. The labeling of the wires completed in Step 2 will come in handy and allow you to reinstall the wires in the correct position on the cap. Press down firmly on each wire boot until an audible "click" is heard to ensure the wires are properly seated on the cap.
- With all wires correctly in place on the cap, start the truck and check that the engine is running properly. If the engine is misfiring or backfiring, shut the truck off and check that the spark plug wires are installed in their correct positions.
Step 5 – Reinstall airbox assembly
If the truck checks out okay after a test start, proceed with reinstalling the airbox assembly. Be sure the base of the airbox is seated properly over the throttle body before tightening the hose clamp. Install the intake tube and rubber breather hose.

Pro Tip
If your truck is ready for a new air filter, it is an ideal time to replace it as the airbox assembly has already been removed from the vehicle and the filter can be quickly and easily replaced.
Featured Video: How to Replace Distributor Cap and Rotor on Dodge Truck
Related Discussions
- DIY- Distibutor, Cap, and Rotor R&R - DodgeForum.com
- Any Tricks to Replacing Distributor Cap?- DodgeForum.com
- Distributor Cap and Rotor - DodgeForum.com
- Need Tips on Distributor Cap and Rotor Change - DodgeForum.com