Dodge Ram 1994-2008: How to Repair Foam Seats
Over time, it's hard to ignore seats that are downright uncomfortable due to wear and tear. Learn how to repair your foam seats here.
This article applies to the Dodge Ram (1994-2008).
In terms of interior elements of your Dodge Ram, the seats are perhaps the most important when speaking of day-to-day comfort. If your seats are ripped or the foam is coming apart, then completing this simple DIY job is well worth the effort. With a few inexpensive materials and a little time, you can repair them and improve your daily driving experience. Don't let an uncomfortable seat ruin your ride!

Materials Needed
- Replacement supportive foam (2 inches of foam; 1 inch of 20 lb. & 1 inch of 40 lb.)
- Ball peen hammer
- Burlap (1 yard)
- Vinyl fabric material
- Weldwood Landau Top Adhesive
- 3M Super 77 Multipurpose Adhesive Aerosol
- 1" green foam (for seat side panels)
Take a trip to Lowe's Home Improvement store or a Hobby Lobby to find the materials needed for this DIY. A new foam seat from the dealer will cost around $150 in comparison.
Step 1 – Peel back the upholstery
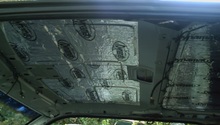
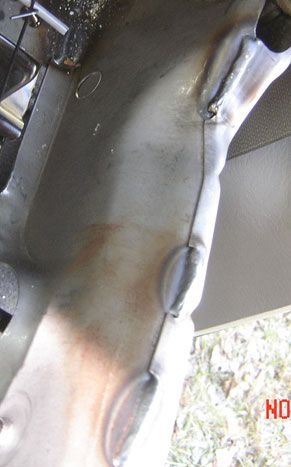
Remove the seat upholstery and foam. The Dodge Ram seats have boxed frames with exposed sheet metal edges. These edges, as well as the gradual wear from sliding into and out of your truck, can cause the foam in the seats to tear over time. If you do notice that the welds have sharp or uneven edges, take the ball peen hammer and file down any visible bumps or rocky protrusions.
Step 2 – Prepare seat
With the old foam removed, place the burlap over the wires held by the springs. Using the 3M aerosol, glue the burlap over and around the edges of the frame to secure it.
Next, take a piece of vinyl and place it on top of the burlap. This prep will prevent the springs from tearing into the new foam.

Pro Tip
One yard of burlap (which costs about $2.99) will be enough to cover two seats.
Step 3 – Add new foam to seat
Glue another piece of burlap to the bottom of the piece of foam that is 1 inch/40 lb. This will also help prevent shredding of the foam. Place this piece on the seat.
Next, place the second piece of foam that is 1 inch/20 lb. on top of the first piece of foam. It's softer which is why it's placed on top.

Step 4 – Repair old factory foam cushion (optional)
Take the old factory seat cushion and repair any rips you see in the foam. Use glue to bond the ripped foam, and seal the damaged areas with vinyl.
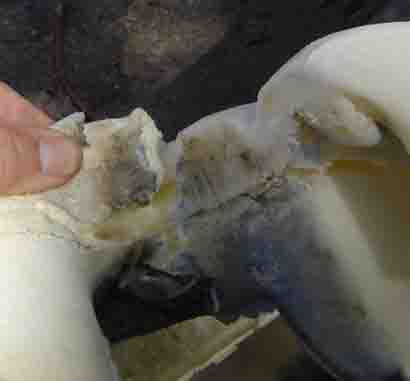
Figure 4. Damaged foam. 
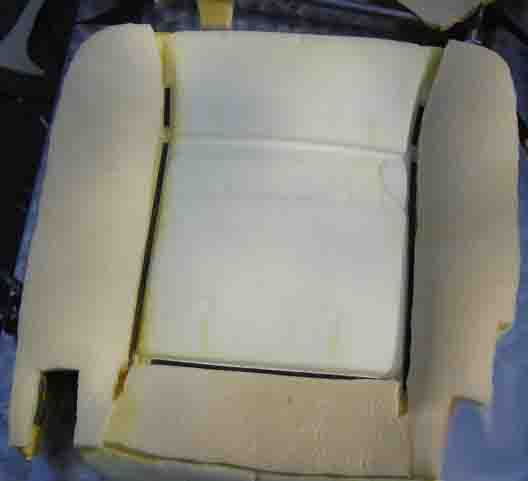
Figure 5. Seat repaired with vinyl.
Pro Tip
It's recommended to use Weldwood Landau Top Adhesive to repair the foam.
Step 5 – Add foam to outer and back panels
With the foam added between the frame and factory foam you just repaired (if necessary), the end result will mean that the center of the seat will be more supportive. The factory foam is molded to fit around the frame's thin edges, so the side and back panels will remain the same as they were before this additional foam was added. To help offset this discrepancy, add a ½ inch of foam to the outer and back panels.
Pro Tip
It's recommended to add the 1" green foam, available at Hobby Lobby, to the panels.
Step 6 – Reassemble seat
Once the factory foam cushion is repaired and placed back on top of the seat frame, cover it with the seat upholstery.
You'll find that your seats will last longer with the non-factory foam replacements added under the seat frame. All that's left to do is go on a ride and enjoy the comforts of your labor!
Related Discussion
- Driver's Seat Foam Problems? I Have the Cure! - Dodgeforum.com