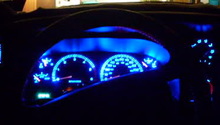
Dodge Ram 2002-2008: How to Repair/Replace Gauge Cluster
Are none of the gauges or lights working on your dash? Replacing your gauge cluster is a lot easier than you think and will save you a lot of money.
This article applies to the Dodge Ram (2002-2008).
The gauge cluster houses all the information you need to make sure your truck is running at its full potential. Each gauge has a specific purpose, ranging from displaying the engine's temperature, amount of fuel and tire pressure, to alerting you of oil pressure or battery issues. The cluster itself is connected to a special module which controls are of the gauges in your truck. If this module fails, auto repair shops will often charge you upwards of several hundred dollars to buy the module separately and then replace it on the existing cluster. However, you can quickly replace the entire cluster assembly yourself in less than an hour just by using the following instructions.

Materials Needed
- Phillips screwdriver
- Replacement cluster
Prior to attempting this installation, you need to order a cluster with the correct mileage reading on it, which is done by contacting a local dealership's parts department. Their agent will then check the original VIN and mileage so it can be properly coded into the replacement cluster. The dealership will also require a core, which they will rebuild.
Step 1 – Disconnect the negative battery cable
Before proceeding with anything, pop the hood and disconnect the negative battery cable to avoid shock.

Step 2 – Remove the knee bolster and center console panels
Grab your Phillips screwdriver and begin to loosen the screws that hold the knee bolster in place; there are two located on either side. Next, grab the bolster by hand and remove it. Grab the center console panels by hand and pull them outward.

Figure 2. Loosen the knee bolster screws. 
Figure 3. Pull off the center console cover.
Step 3 – Remove the gauge cluster
- Loosen the five screws located around the cluster that hold the bezel in place.
- Pull the gauge cluster bezel out.

Figure 4. Remove the instrumental cluster bezel screws. 
Figure 5. Remove the cluster bezel.
- Remove the four screws from around the gauge cluster.
- Pull the cluster out and disconnect the three wire plugs.

Figure 6. Remove the gauge cluster screws. 
Figure 7. Unplug the gauge cluster connectors.
Step 4 – Install the new cluster
- Mount the new cluster and reconnect the wire plugs.
- Tighten the four screws in place.
After mounting the cluster in place, take the time to test the new cluster, in order to make sure everything is working as it should. Then proceed to mounting the gauge and radio bezel, along with the knee bolster.

Featured Video: 2006 Dodge Ram Tachometer Fix
Related Discussion
- Instrument Cluster Replacement - Dodgeforum.com


