
How to remove door lock cylinder?
#1
 07-04-2015, 06:46 PM

Hey friends. I got a replacement driver's door for my '93. I need to switch the lock from my door to the new one. I have the FSM. It says to remove the lock rod and then remove the door handle retaining clip. It doesn't mention how to do either of these things and I don't want to break anything. I've got the door card off and the window all the way up.
Any wisdom?
Any wisdom?
#3
07-04-2015, 08:01 PM
Thanks man. I'll do that. The other thing is that the FSM indicates a nut on top of the retaining clip. I'm sure there is a nut there, but there's a large plastic shroud thing over it and I've no idea how it is removed...but it does have flats on it...maybe the plastic bit is a nut. Lol no.
#5
07-05-2015, 10:54 AM
#6
07-05-2015, 10:31 PM
Okay, I got it all set. As it turns out, that plastic piece which I thought was a cap of some sort was actually the nut, even though it doesn't look anything like the nut shown in the FSM.
I figured I'd do a little write-up. Two major things I did here. I got a new door because I'd backed up with my door open and destroyed it. The original door was full manual; the donor had auto locks/window.
So,
1. swap door exterior handle/lock cylinder to new door
2. swap manual guts from old door to new door.
For the first one.
1. Remove the door card
2. Peel back water shield to access back of handle
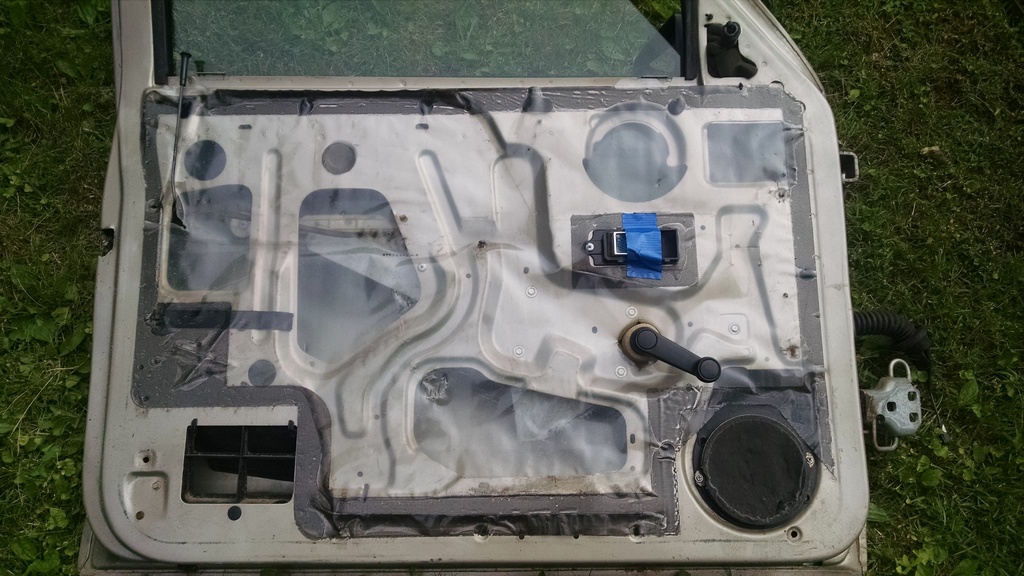
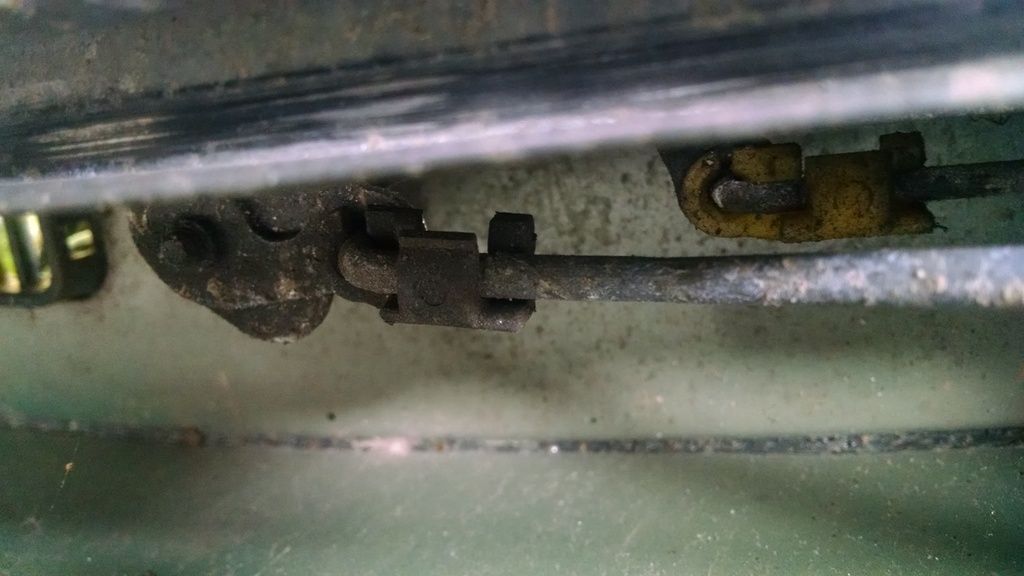
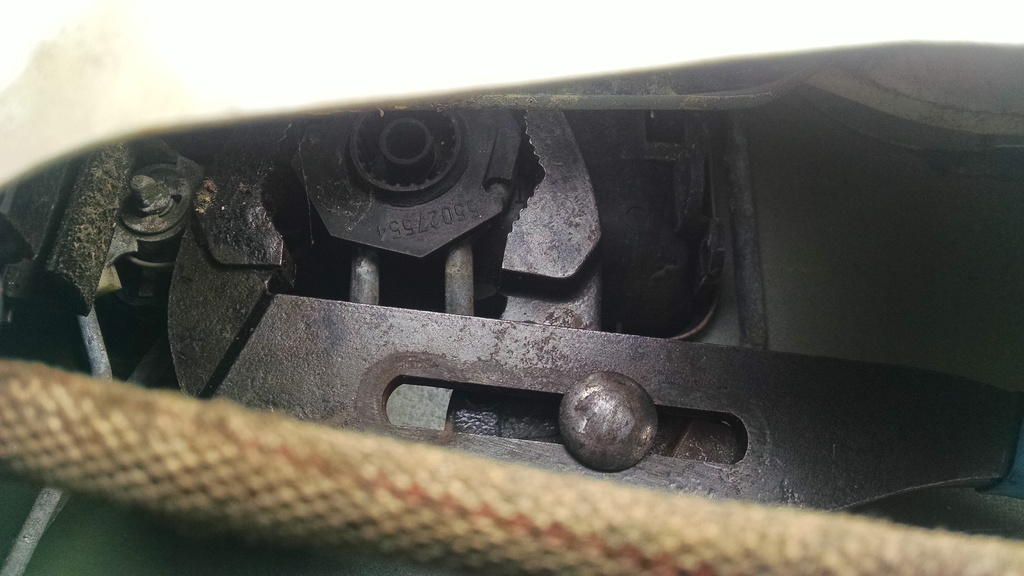
3. Unclip the handle-to-latch rod and the lock-to-latch rod from the latch side. Use a screwdriver to snap loose the plastic retainers as shown. They don't need much force.
Handle rod on left (lower), lock rod on right (upper)
Released handle-to-latch plastic retainer
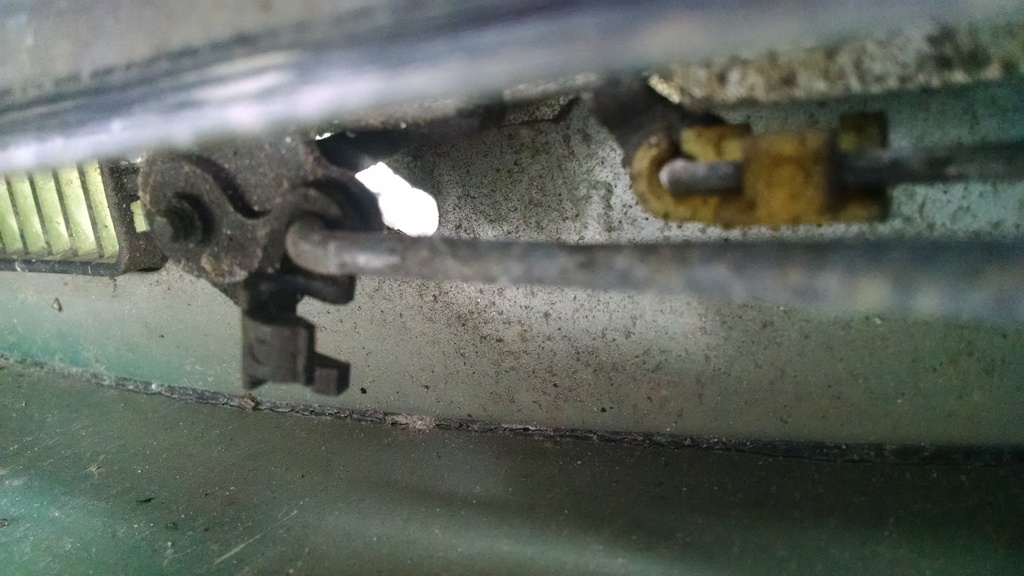
Once the retainer is loose, the rod will come free with a light pull.
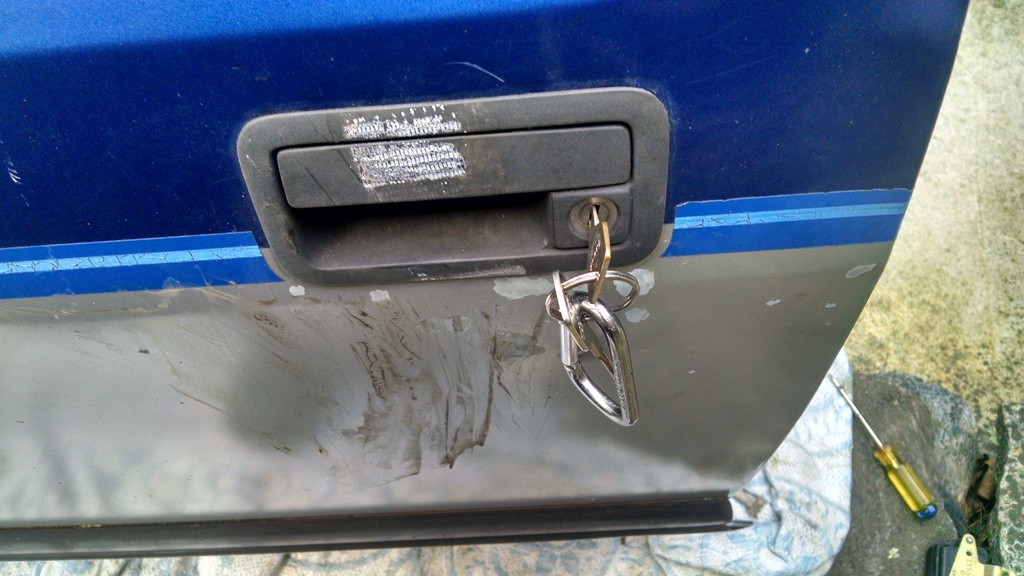
Loosen the top nut on the back of the handle. I used some channel locks. It is not very tight, but it will be a little bit of a pain because you can only loosen it a few degrees at a time.
Once the nut is removed the wire lock/retainer will lift free. The handle can then be removed from the outside of the door.

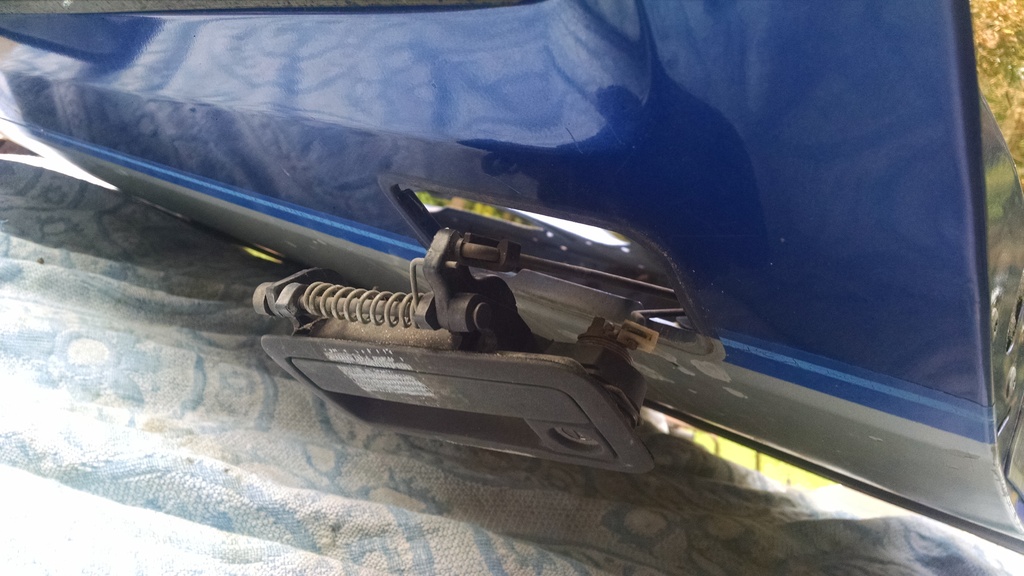
Reverse the procedure to install the new latch. If you got the old one out, that's the hard part. You'll be able to get the new one in with no problem. One thing I will say is don't overtighten the plastic nut. If it's about flush with the center threaded "pillar", that's good. Give her a test when you're done.
I figured I'd do a little write-up. Two major things I did here. I got a new door because I'd backed up with my door open and destroyed it. The original door was full manual; the donor had auto locks/window.
So,
1. swap door exterior handle/lock cylinder to new door
2. swap manual guts from old door to new door.
For the first one.
1. Remove the door card
2. Peel back water shield to access back of handle

3. Unclip the handle-to-latch rod and the lock-to-latch rod from the latch side. Use a screwdriver to snap loose the plastic retainers as shown. They don't need much force.
Handle rod on left (lower), lock rod on right (upper)

Released handle-to-latch plastic retainer

Once the retainer is loose, the rod will come free with a light pull.

Loosen the top nut on the back of the handle. I used some channel locks. It is not very tight, but it will be a little bit of a pain because you can only loosen it a few degrees at a time.

Once the nut is removed the wire lock/retainer will lift free. The handle can then be removed from the outside of the door.


Reverse the procedure to install the new latch. If you got the old one out, that's the hard part. You'll be able to get the new one in with no problem. One thing I will say is don't overtighten the plastic nut. If it's about flush with the center threaded "pillar", that's good. Give her a test when you're done.

Last edited by tbugden; 07-05-2015 at 10:42 PM.
#7
07-05-2015, 10:39 PM
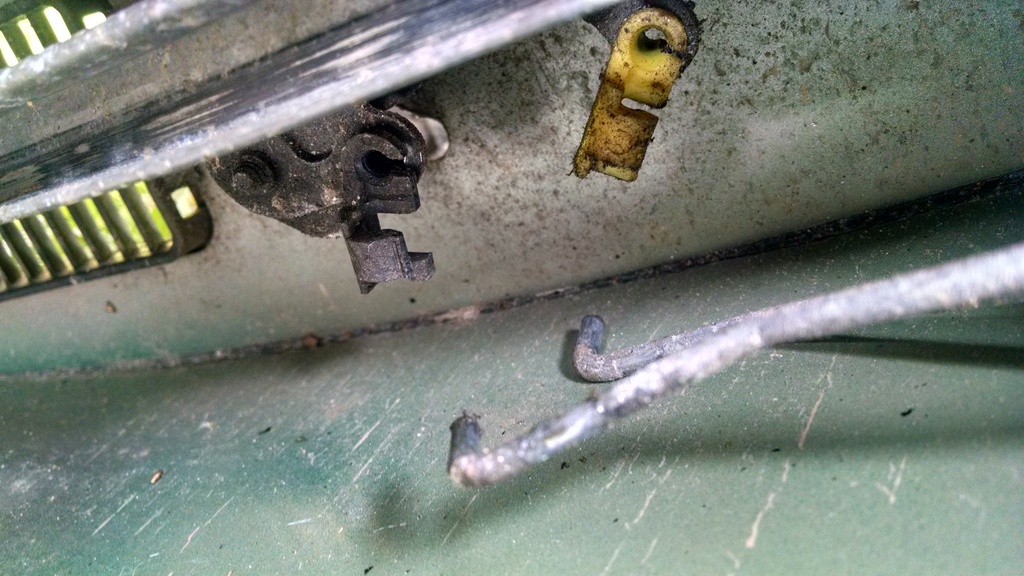
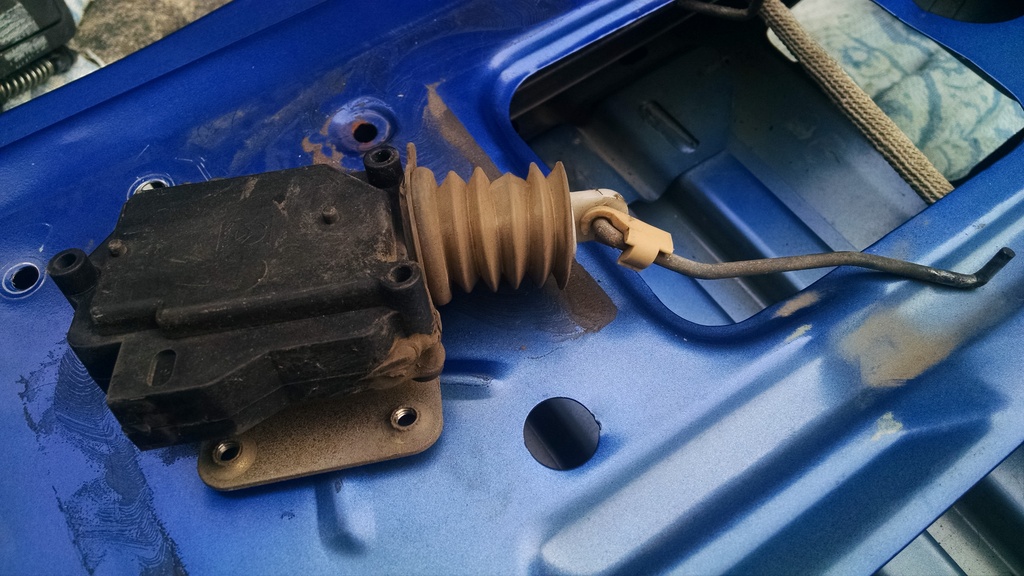
As I had mentioned, I'm swapping the door from auto to manual. The latches are identical; the auto door just has an extra motor on the lower part of the door connected by a rod to the latch. The manual latch has the provision for this same rod, but of course there is no lock motor so the hole for the rod is empty. Here is the latch from the backside of the auto donor door. On the left (lower) there is the rod to the lock motor. This rod and the motor were removed for my purposes. On the right (upper) there is the rod that goes to the lock plunger thing on top of the door card.
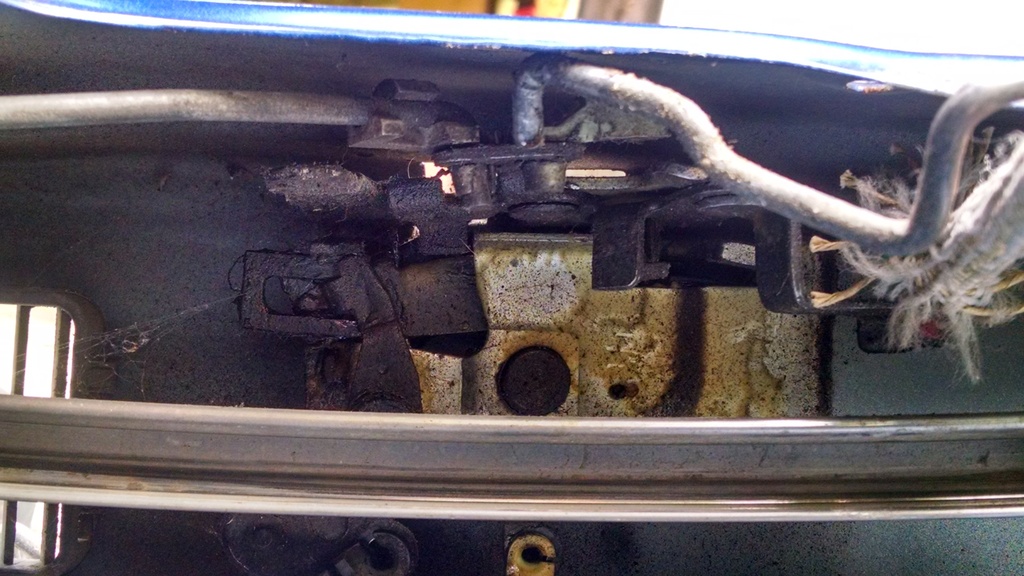
Old motor and rod.
From here I have no pictures. However the procedure is very simple to convert the rest of the door to manual. To convert an auto door to manual you need to:
-Fully remove the water shield
-Remove all associated wiring (as you go through the steps)
-Remove lock motor and rod (above)
-Remove power window regulator and motor (no need to swap the window)
-Remove speaker and disconnect harness plug
-Remove wiring harness and boot that goes between cab and door.
-Install the manual window regulator with crank.
-Install manual door wiring harness and boot (lol not really a harness...it's just the speaker wires...)
-Plug the speaker back in and you're good to go.
-Before you reinstall the water shield, take yer blowgun and clean out the crap at the bottom of the door.

Old motor and rod.

From here I have no pictures. However the procedure is very simple to convert the rest of the door to manual. To convert an auto door to manual you need to:
-Fully remove the water shield
-Remove all associated wiring (as you go through the steps)
-Remove lock motor and rod (above)
-Remove power window regulator and motor (no need to swap the window)
-Remove speaker and disconnect harness plug
-Remove wiring harness and boot that goes between cab and door.
-Install the manual window regulator with crank.
-Install manual door wiring harness and boot (lol not really a harness...it's just the speaker wires...)
-Plug the speaker back in and you're good to go.
-Before you reinstall the water shield, take yer blowgun and clean out the crap at the bottom of the door.
The following users liked this post:
Jay Evans (07-04-2023)