Crash repair

Registered User
Joined: Mar 2009
Posts: 34
Likes: 0
From: Philippines
The following guide is MY way in doing this and is done at at YOUR own risk. I am not responsible if you have something go wrong. This information should be used along with a service manual and always stay within your skill level, don't go tearing down the transmission if your only experience is changing the brakes another words. Start off slow and gain skills and knowledge to expand you abilities
Lots of effort u seem to put updating this thread.
Good job for me..
Thread Starter
|
All Star
Joined: Jul 2008
Posts: 882
Likes: 3
From: Lebanon, IN
Window regulator/motor replacement/Repair
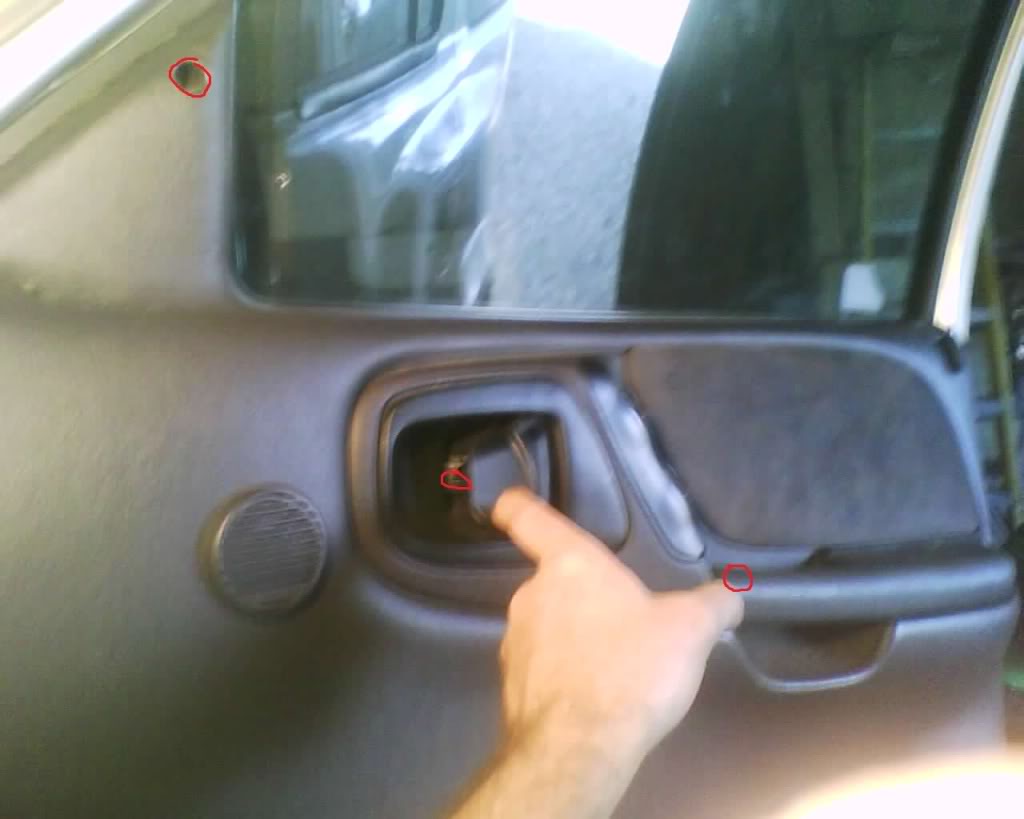
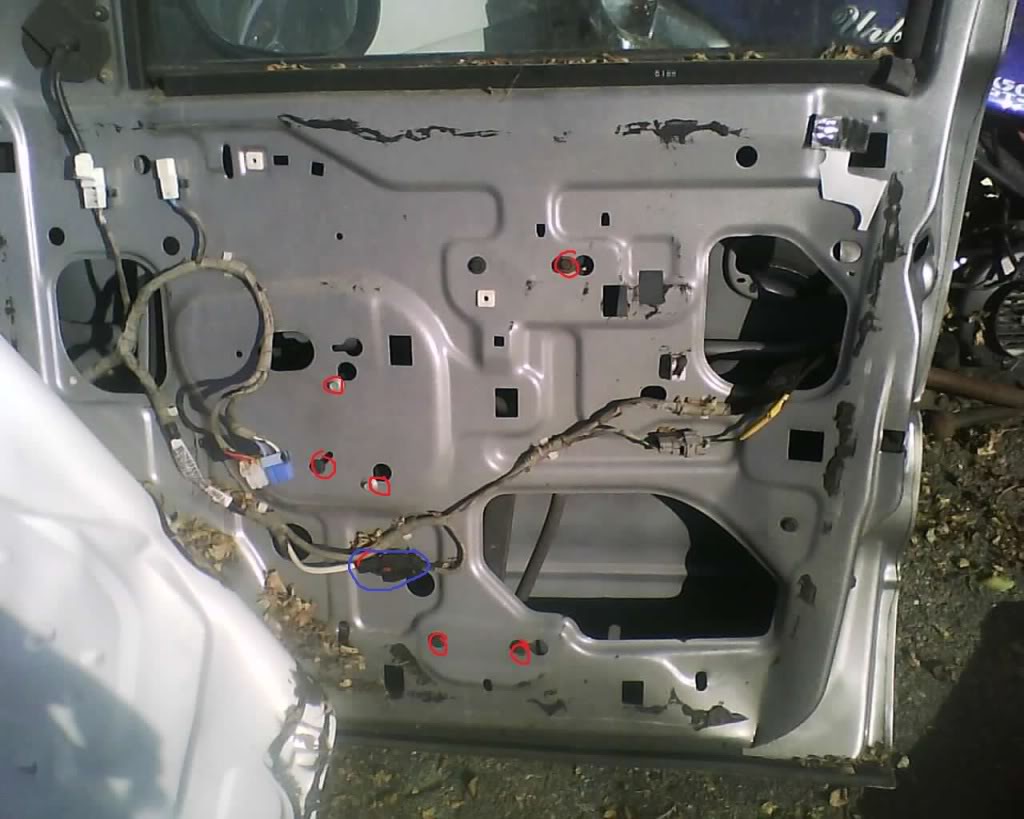
Remove the door panel, remove the screws shown here in the red circles
pic
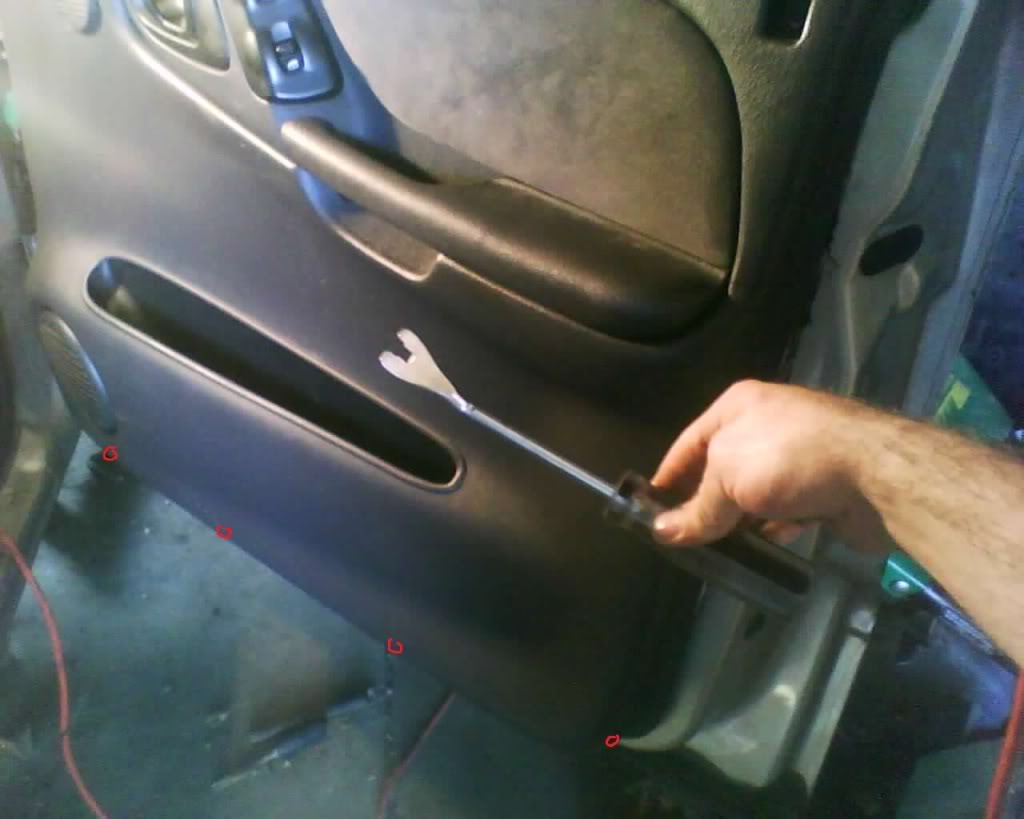
now remove the bottom screws shown in the red circles and having a tool like this makes it nice to remove the plast clips. basically a pry bar with a slot to pry out the clips. Don't have to have this, can use a simple screw driver but u may break a clip and thats not really a big deal. pick up a pack at the parts store for a few buck.
pic
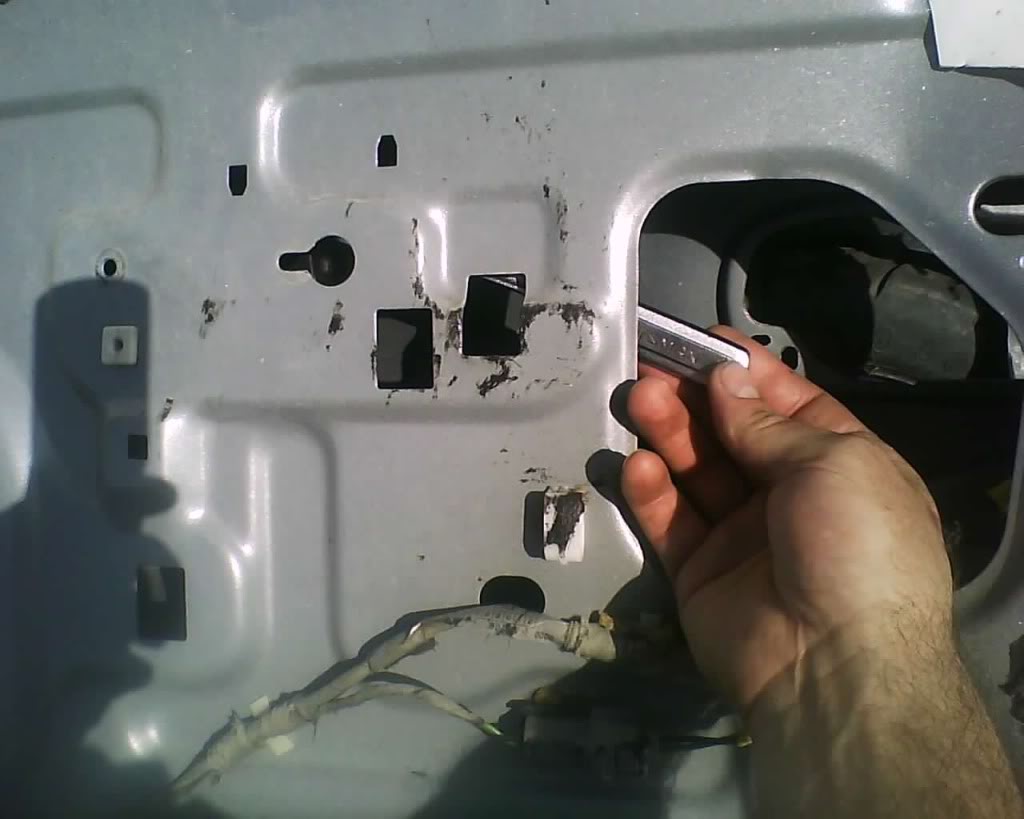
Remove the bolts circled here and unplug the connector circled in blue
pic
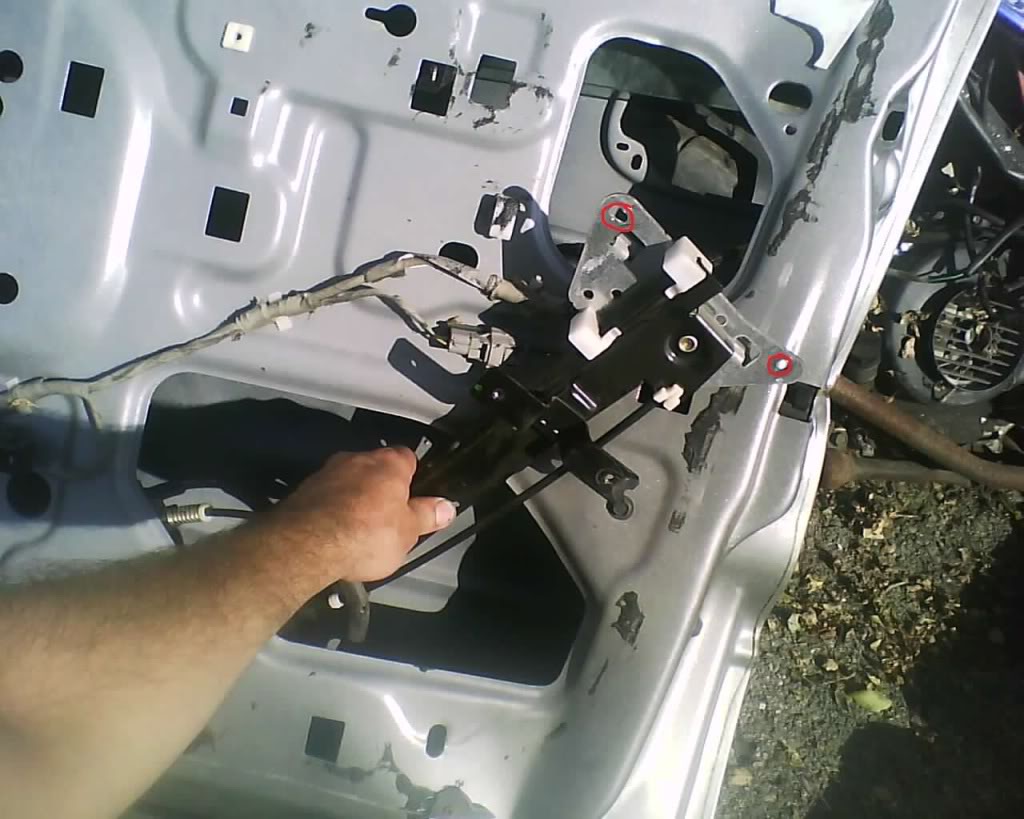
Remove the 2 bolts holding the window to the regulator, now be careful that the window does not slide down.. Something you may want to do is take duct tape and put a piece at the top keeping the window from falling. the rear bolt you will need to use a 10mm wrench
pic
Remove the regulator, you can see the two bolt holes circled here that was holding the window.
pic
From this point you can just install a new regulator that cost around $60 or more, then reversing the process to reinstall the new regulator.. Do you like to mess with things? do you like to see what really causes these motors to go bad? do you want to be able to fix this CHEAP? talking under $10 and even cheaper if u already have a can of WD-40?
Okay well then here is how,
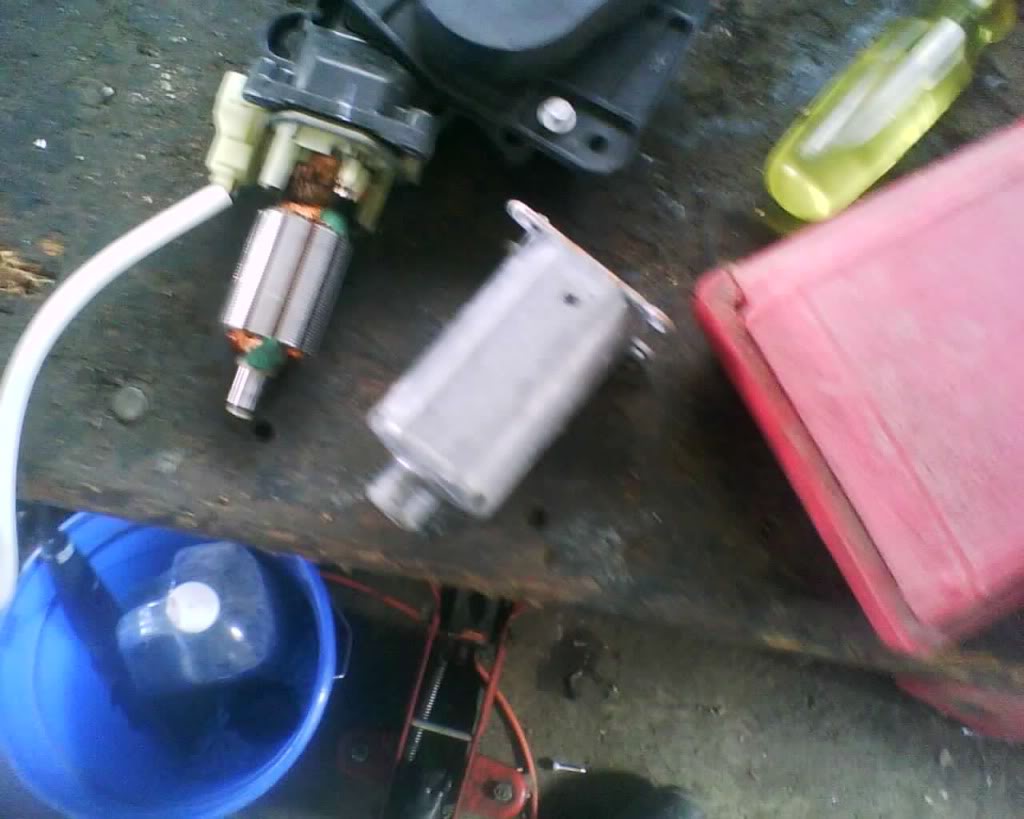
open the motor like so,
pic
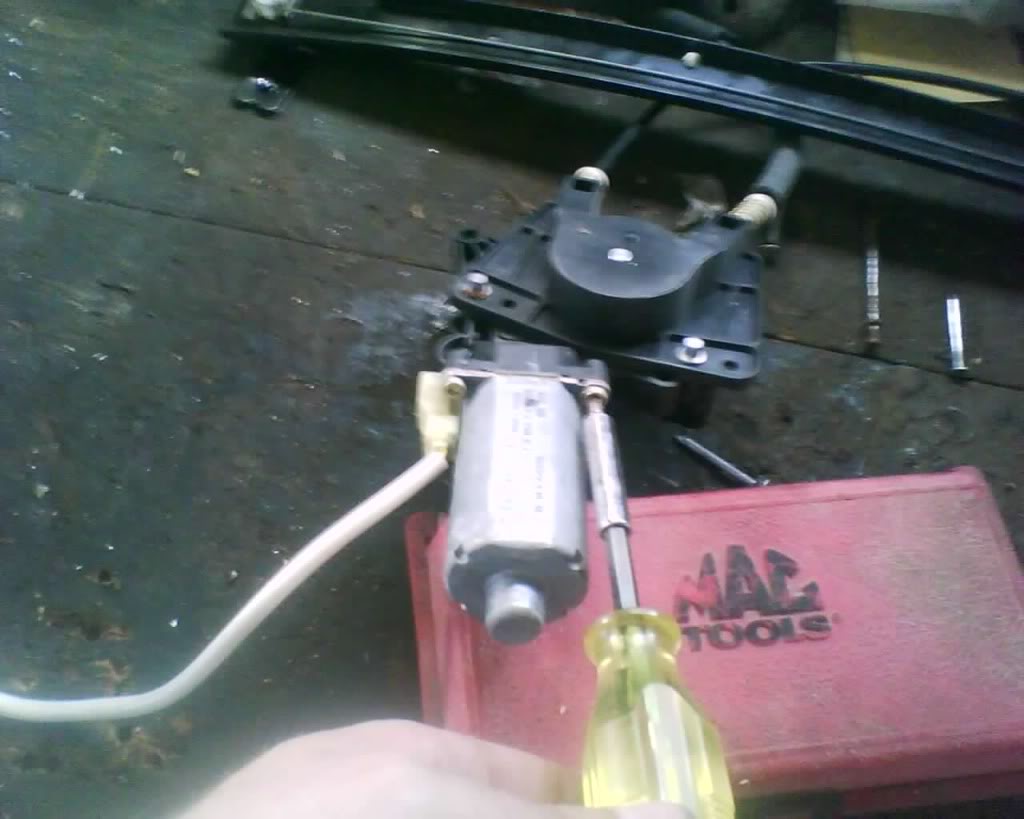
now you will see this, i need to tell you at this point that i am working with two motors here, the other one you will see later. This is actually the motor from the passenger door that i replaced with a new door and was hoping i could get the brushes out of this motor and put in the drivers door, come to find out this is a replacement regulator and is made by a different manufacture (made in Mexico)
pic
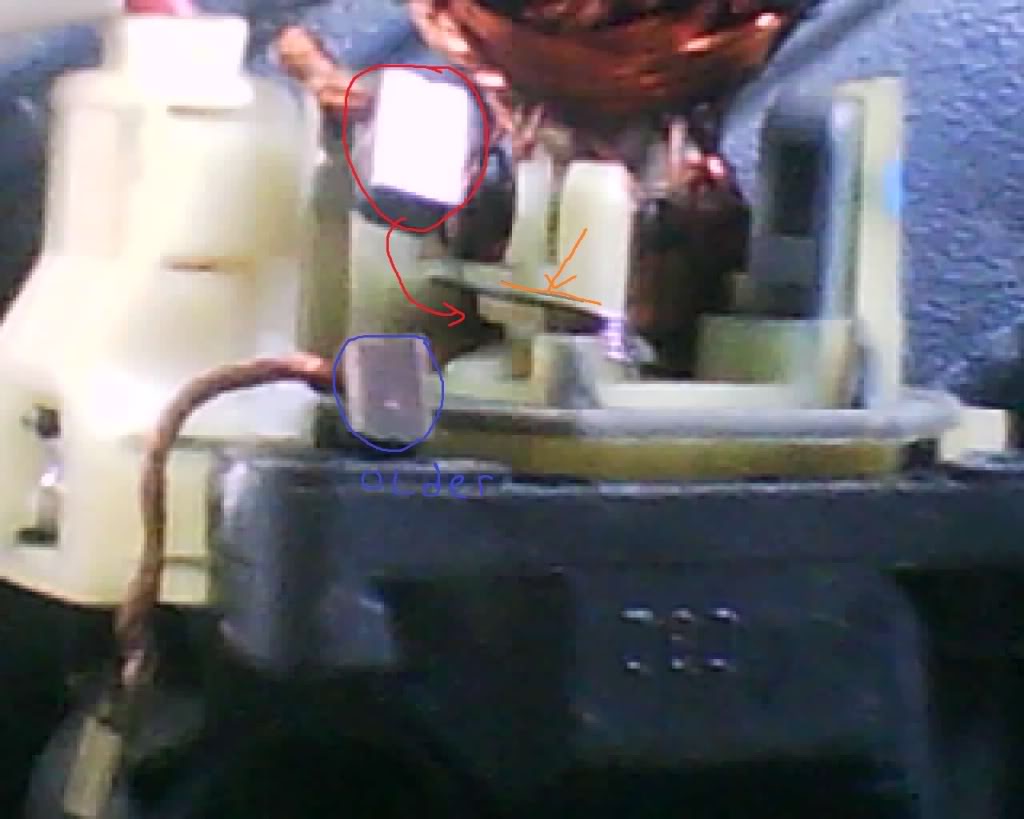
Here is why they go bad, as you can see here the 2 brushes. The one circled in red is the one that goes to this newer motor, the one circled in blue is the brush that goes to the driver door being the older motor, the orange line is the retaining clip that holds the brush into the slot that the red arrow is pointing to. Now yo can see that the newer brush is bigger then the older brush so i was not able to swap them. lets talk about whats wrong with the brush and why it is bad. looking at the older motor brush circled in blue you will see the bottom end is rounded/wore pretty bad. Well this is supposed to be almost square or starts off that way. The brushes touch the middle shaft while it spins, over time they simply wear away and lose contact. this is almost always the reason the motor gets slower and slower and the seems to have no power. okay lets take a look here.
pic
Now it did not work out like i was hoping and was not able to swap brushes. if you look here it is possible to swap these out cable and all but i have done this before and it is not fun. For me it is just easier to get new brushes for the older style motor. (in order to swap them you have to open the cable section of the motor and reroute ext.. no fun at all and just much easier to buy new brushes or even just buy a new one)
pic
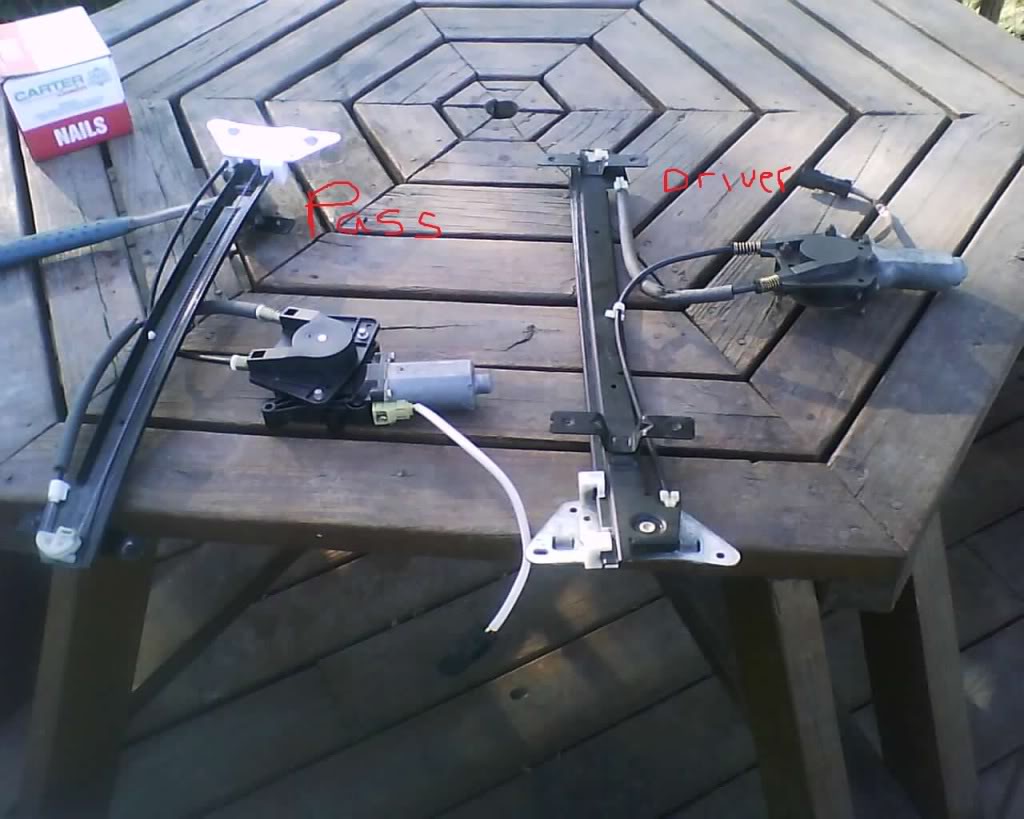
So now lets take a look at the older style here
pic
pic
take a look here, red is the slot where the brush goes in (the smaller brush shown in the pic before circled in blue) and the orange is the clip that holds it in.
pic
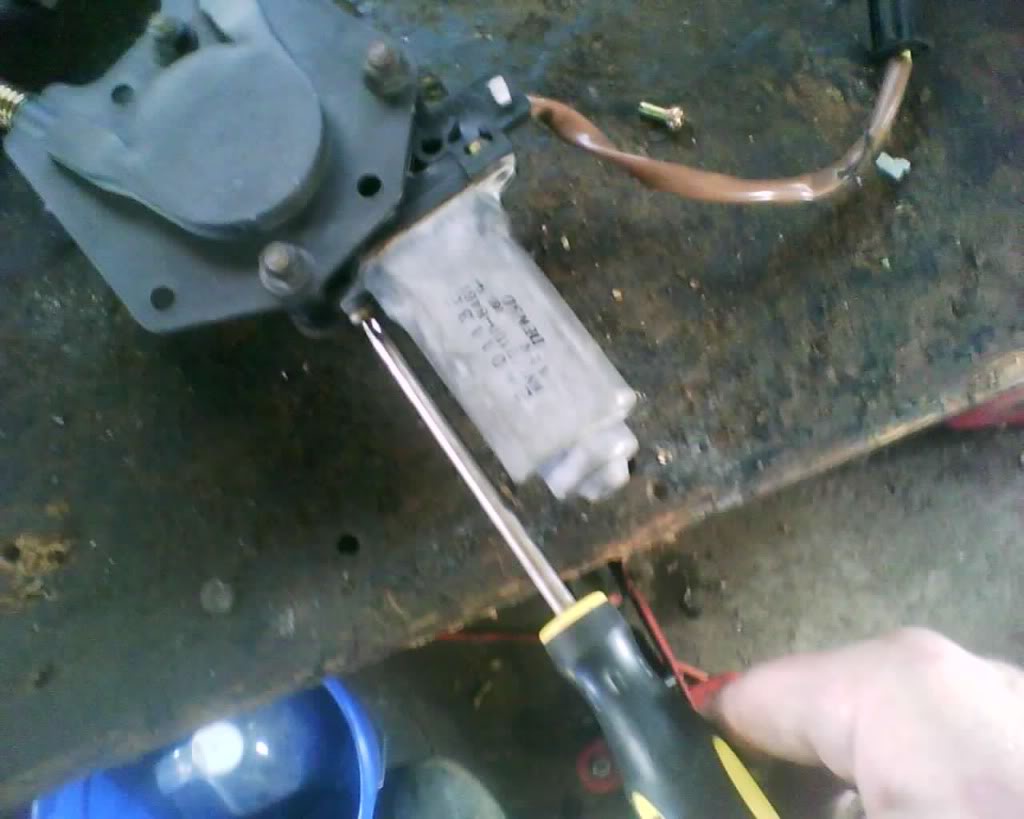
on these older style motors the shaft is not all exposed like the newer model was, when u pull these open they WILL BE DIRTY, this one already has been cleaned with WD-40. You will want to pull the shaft all the way out and clean real well before reinstalling.
pic
Where do you get brushes? well people i am not going to lie to ya they are not as easy as they once was to get. You used to be able to get them from NAPA and possible u may be able to get them from there where u live, i don't know. NAPA here just seems to be going down the drain far as the parts they carry anymore. You may get lucky and find them at a hardware store. Where you will find them is at a hobby shop such as Hobby Lobby or some other type of hobby store that sales electric motors for those little RC racing cars/trucks. 2 of them should be around $4 to 6.. to replace them you simply heat the old one up with a solder iron and then solder the old wire to the new one.
I will have pics on the reinstall of the brushes when i get time to to go into Indy to the hobby lobby
The following guide is MY way in doing this and is done at at YOUR own risk. I am not responsible if you have something go wrong. This information should be used along with a service manual and always stay within your skill level, don't go tearing down the transmission if your only experience is changing the brakes another words. Start off slow and gain skills and knowledge to expand you abilities
pic
now remove the bottom screws shown in the red circles and having a tool like this makes it nice to remove the plast clips. basically a pry bar with a slot to pry out the clips. Don't have to have this, can use a simple screw driver but u may break a clip and thats not really a big deal. pick up a pack at the parts store for a few buck.
pic
Remove the bolts circled here and unplug the connector circled in blue
pic
Remove the 2 bolts holding the window to the regulator, now be careful that the window does not slide down.. Something you may want to do is take duct tape and put a piece at the top keeping the window from falling. the rear bolt you will need to use a 10mm wrench
pic
Remove the regulator, you can see the two bolt holes circled here that was holding the window.
pic
From this point you can just install a new regulator that cost around $60 or more, then reversing the process to reinstall the new regulator.. Do you like to mess with things? do you like to see what really causes these motors to go bad? do you want to be able to fix this CHEAP? talking under $10 and even cheaper if u already have a can of WD-40?
Okay well then here is how,
open the motor like so,
pic
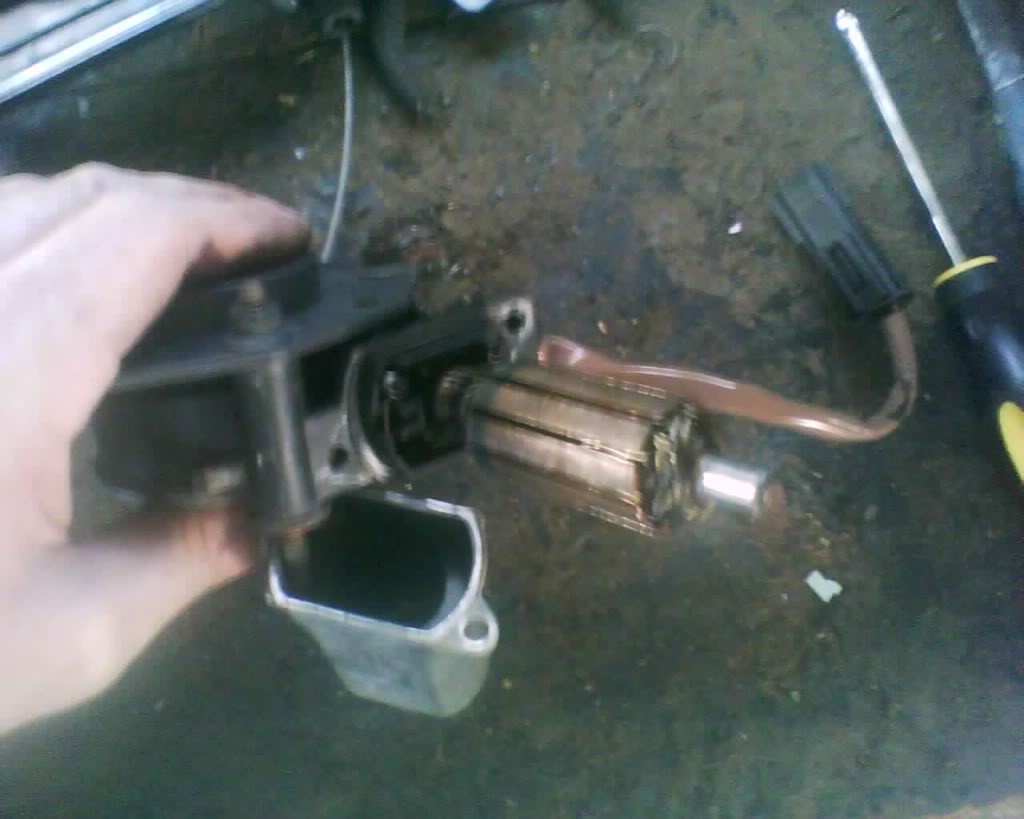
now you will see this, i need to tell you at this point that i am working with two motors here, the other one you will see later. This is actually the motor from the passenger door that i replaced with a new door and was hoping i could get the brushes out of this motor and put in the drivers door, come to find out this is a replacement regulator and is made by a different manufacture (made in Mexico)
pic
Here is why they go bad, as you can see here the 2 brushes. The one circled in red is the one that goes to this newer motor, the one circled in blue is the brush that goes to the driver door being the older motor, the orange line is the retaining clip that holds the brush into the slot that the red arrow is pointing to. Now yo can see that the newer brush is bigger then the older brush so i was not able to swap them. lets talk about whats wrong with the brush and why it is bad. looking at the older motor brush circled in blue you will see the bottom end is rounded/wore pretty bad. Well this is supposed to be almost square or starts off that way. The brushes touch the middle shaft while it spins, over time they simply wear away and lose contact. this is almost always the reason the motor gets slower and slower and the seems to have no power. okay lets take a look here.
pic
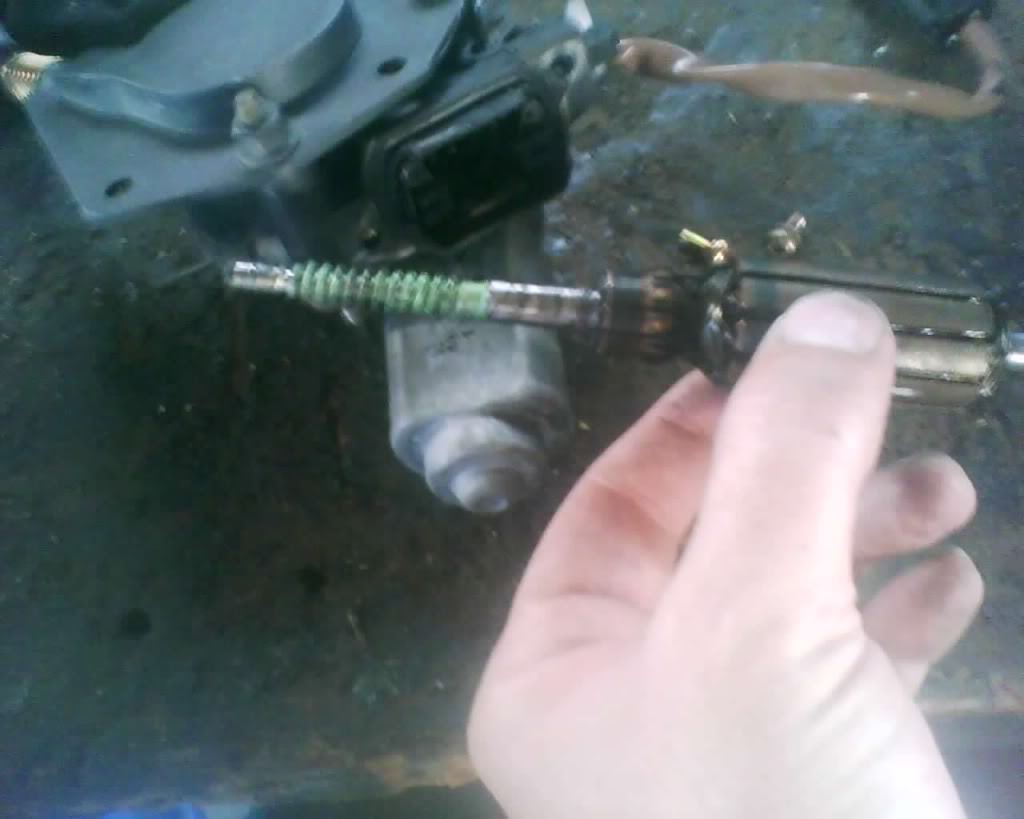
Now it did not work out like i was hoping and was not able to swap brushes. if you look here it is possible to swap these out cable and all but i have done this before and it is not fun. For me it is just easier to get new brushes for the older style motor. (in order to swap them you have to open the cable section of the motor and reroute ext.. no fun at all and just much easier to buy new brushes or even just buy a new one)
pic
So now lets take a look at the older style here
pic
pic
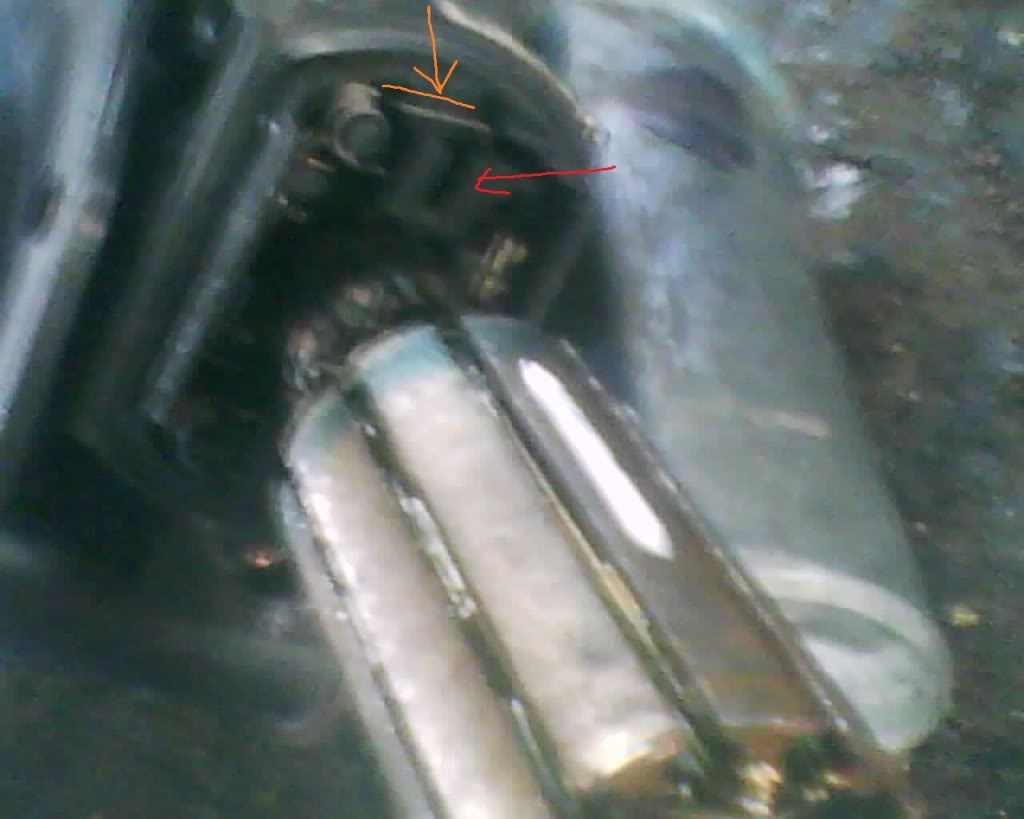
take a look here, red is the slot where the brush goes in (the smaller brush shown in the pic before circled in blue) and the orange is the clip that holds it in.
pic
on these older style motors the shaft is not all exposed like the newer model was, when u pull these open they WILL BE DIRTY, this one already has been cleaned with WD-40. You will want to pull the shaft all the way out and clean real well before reinstalling.
pic
Where do you get brushes? well people i am not going to lie to ya they are not as easy as they once was to get. You used to be able to get them from NAPA and possible u may be able to get them from there where u live, i don't know. NAPA here just seems to be going down the drain far as the parts they carry anymore. You may get lucky and find them at a hardware store. Where you will find them is at a hobby shop such as Hobby Lobby or some other type of hobby store that sales electric motors for those little RC racing cars/trucks. 2 of them should be around $4 to 6.. to replace them you simply heat the old one up with a solder iron and then solder the old wire to the new one.
I will have pics on the reinstall of the brushes when i get time to to go into Indy to the hobby lobby
Last edited by schusterjo; Sep 19, 2009 at 10:01 PM.
Thread Starter
|
All Star
Joined: Jul 2008
Posts: 882
Likes: 3
From: Lebanon, IN
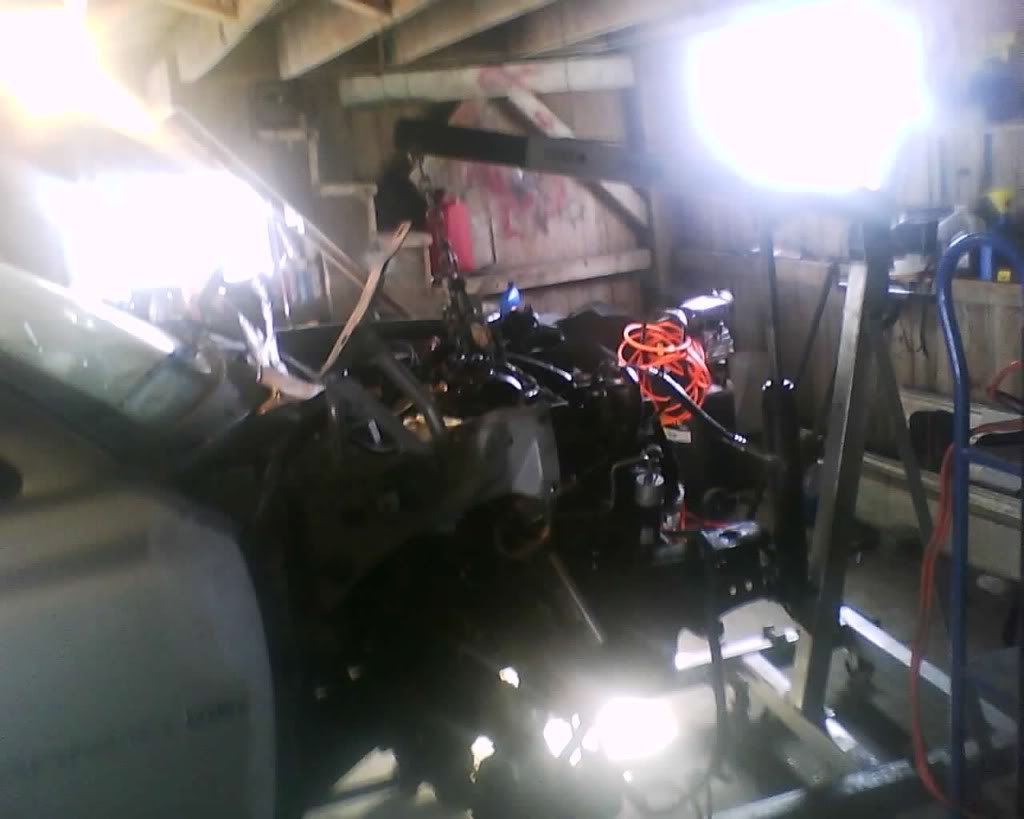
Well this is a pic of pulling the engine and installing the converter. not going to pull it all the way out just enough to be able to get converter out (this i already have done) and put a new one in (this i have not finished cause i am waiting for the correct converter.. stupid parts stores)
Thread Starter
|
All Star
Joined: Jul 2008
Posts: 882
Likes: 3
From: Lebanon, IN
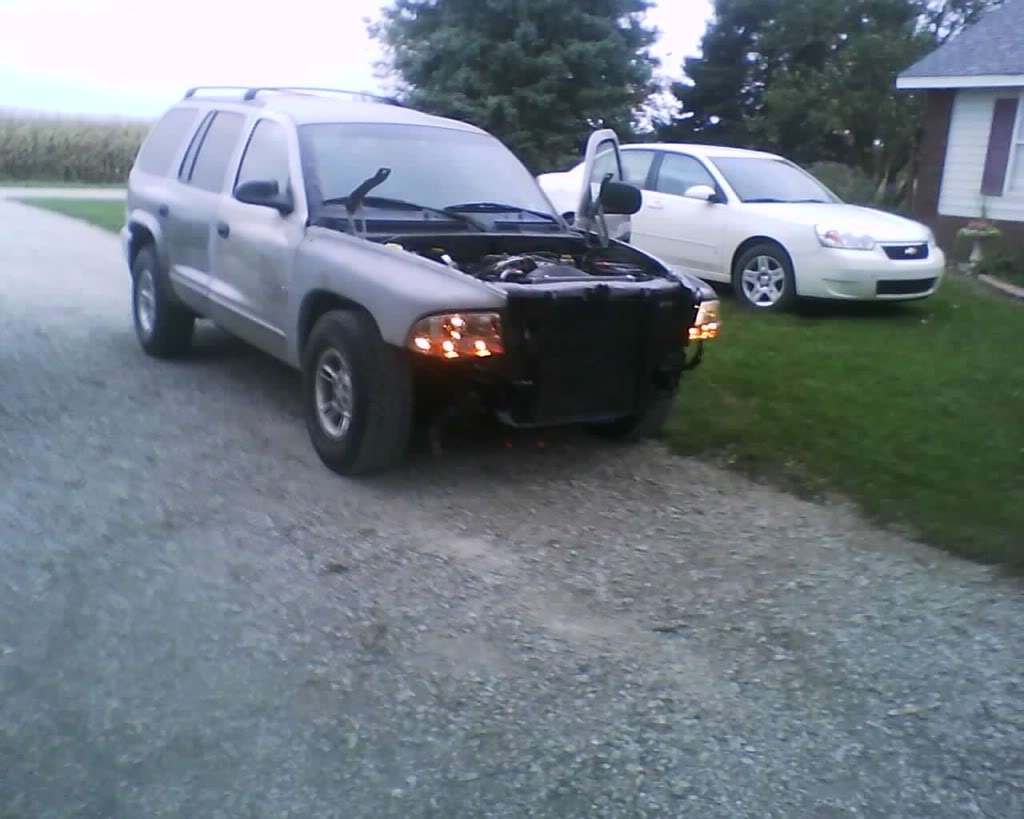
Well I am still waiting on parts, I am waiting on the torque converter and the headlights.
I bought the headlights off of ebay and has been my first slow shipping experience. I had to email them to find out if they had shipped it, they had not at that point, they shipped the item and gave me a tracking number.. Well come to find out they shipped it basic shipping when i had paid $40 for shipping. Not very happy with this purchase at all and would leave a neg feedback but whats the point? Ebay will just remove it at the sellers request anyways. That the bad thing about ebay, you can not get the honest experiences of the customers, only the good ones u are able to see. the negative ones ebay practically erases almost all of them.
I also had a issue with some other parts i got off ebay, the upper rad support did not have the jack nuts in it, if you have not looked for metric jack nuts let me tell ya they are not easy to find at all. Dealer could not even get them( so they say) I also had big time issue in finding wire loom clips.. I kid you not i had to of gone to 20-25 stores before i found some, then they only had 1 pack so i had to drive all away across indy to the sister parts store to get another pack of them. Ya dealer said they could not get those as well... what a joke.
Anyways had a bit of an issue locating the correct torque converter. Finally found the one i need but had to be shipped. was supposed to be here today lol but ya it will not be here till Monday along with the headlights as well.
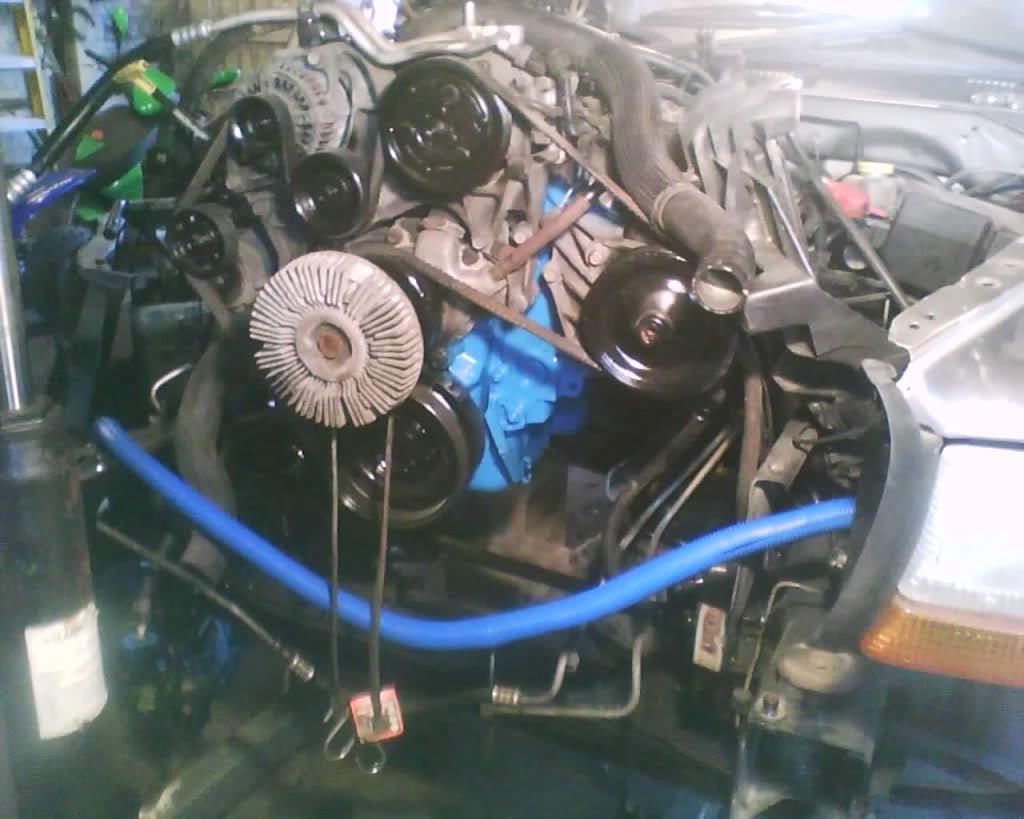
So, here I am, Bored and wanting to make this engine look a little better CHEAP. I already painted the engine along with the pulleys with engine high temp paint (500F), did my best to sand the engine, ya i know it will not last very long but it does look decent for now. I plan on putting in a 5.9L later and will do that engine up right.
So, i am looking at this and see that the front here looks pretty ugly. Thinking about painting it all black up front here or perhaps all blue.
So i need opinions, all blue or black up front here? or perhaps another ideal? (the brackets up front) (yes i know the valve covers are not painted yet, waiting to pull those here in a few weeks after i get it running)
I bought the headlights off of ebay and has been my first slow shipping experience. I had to email them to find out if they had shipped it, they had not at that point, they shipped the item and gave me a tracking number.. Well come to find out they shipped it basic shipping when i had paid $40 for shipping. Not very happy with this purchase at all and would leave a neg feedback but whats the point? Ebay will just remove it at the sellers request anyways. That the bad thing about ebay, you can not get the honest experiences of the customers, only the good ones u are able to see. the negative ones ebay practically erases almost all of them.
I also had a issue with some other parts i got off ebay, the upper rad support did not have the jack nuts in it, if you have not looked for metric jack nuts let me tell ya they are not easy to find at all. Dealer could not even get them( so they say) I also had big time issue in finding wire loom clips.. I kid you not i had to of gone to 20-25 stores before i found some, then they only had 1 pack so i had to drive all away across indy to the sister parts store to get another pack of them. Ya dealer said they could not get those as well... what a joke.
Anyways had a bit of an issue locating the correct torque converter. Finally found the one i need but had to be shipped. was supposed to be here today lol but ya it will not be here till Monday along with the headlights as well.
So, here I am, Bored and wanting to make this engine look a little better CHEAP. I already painted the engine along with the pulleys with engine high temp paint (500F), did my best to sand the engine, ya i know it will not last very long but it does look decent for now. I plan on putting in a 5.9L later and will do that engine up right.
So, i am looking at this and see that the front here looks pretty ugly. Thinking about painting it all black up front here or perhaps all blue.
So i need opinions, all blue or black up front here? or perhaps another ideal? (the brackets up front) (yes i know the valve covers are not painted yet, waiting to pull those here in a few weeks after i get it running)
Last edited by schusterjo; Sep 19, 2009 at 09:43 PM.

Thread Starter
|
All Star
Joined: Jul 2008
Posts: 882
Likes: 3
From: Lebanon, IN
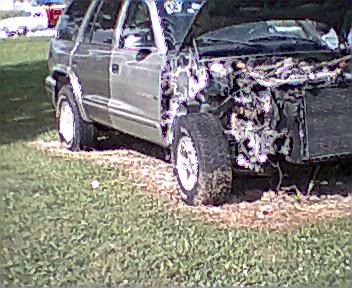
Well ya live and learn. As Indy said it is just not worth trying to save $10 a month by dropping the un insured motorist policy. I was at the time trying to save every penny could and thought i could do without it for a few months to make ends meet. Well it landed my truck in the back yard nearly a year an driving a clunker.
Thanks for the compliment on the DIY, I just hope it helps people to be able to accomplish the job or answer some questions they may of had.