


Blower motor pigtail assembly help


Thread Starter
|
Registered User
Joined: Jan 2011
Posts: 1
Likes: 0
First, I have searched repeatedly, and found several posts that come close but nothing that actually states clearly how to assemble the dealer replacement wiring harness for the front blower motor resistor, part # 5017124AC. Basically, how do I get the wires into the connector? I tried to push one wire through to thread it, but the hole is too small...and this was one of the small purple wires, not even the large gauge green one. Can somebody help, or at least point me to a guide or a how-to on assembling Dodge harnesses?
Thanks in advance
Thanks in advance


Registered User
Joined: Jan 2011
Posts: 1
Likes: 0
From: Ohio
I just installed the replacement harness in my 03, but didn't think to take pictures of the process. This is how I replaced mine, but you may want to ask a pro to verify it for you.
- Disconnect the battery.
- At the connector end that has the small holes, gently pry the four small latches that hold the end cap on. These are circled in red, there are two identical ones on the opposite side. Work slowly and carefully on both sides of the connector so you don't break anything.

- Remove the end cap and the rubber seal.
- Insert the metal terminal ends into the main connector, into the square slots. You will hear them snap into place. I only used the heavy green wires.
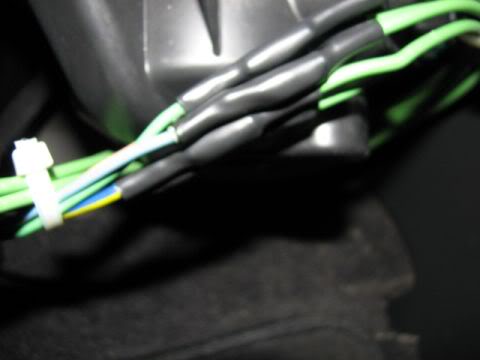
- Slide the rubber seal over the wires until you can seat it back into the connector. Slide the small plastic cap, the one you removed in item 1, back on until it snaps back into place. Slide on a shrink tube over each wire.
- I stripped and tinned the ends of the wires with solder, crimped butt connectors on, then soldered them. I had removed the plastic insulation from the butt connectors since I was going to use shrink tubing to cover them.. These butt connectors were not supplied in the kit.
- Compare this new harness with the original and mark the green wires so you know which wire from the original harness matches up. I used masking tape and simply marked them green, tan, light blue, blue with yellow and black with tan. Compare your old resistor and harness with the new ones to make sure you match them up properly!
- Cut the existing connector out of the vehicle. Cut this as close to the old original connector as possible. I had to cut a little extra wire off mine because of melted insulation.
- I tinned the wires in the vehicle before crimping the replacement wires onto them. Again, make sure your wires are marked properly! I crimped mine and then soldered them afterwards just to make sure I had a good connection.
- Slide shrink tubes over the connectors and heat to seal. I then tied up the wire with nylon zip ties to keep it out of t he way of people's feet.
- Test to make sure everything works.