


lock sticking - rear hatch

Thread Starter
|
THE ULTI-MOD


Joined: Jan 2007
Posts: 19,797
Likes: 36
From: Union NJ
The problem, the locking mechanism in the rear liftgate actuates (you can hear it working when you push the button) but wont lock unless you hit the button a couple of times, but unlock is fine, or mostly fine.
NOTE:: this is NOT a how to on replacing the actuator if it is not working.
DISCLAIMER::
I am not responsible for any mishaps while you are wrenching, knuckle busting, throwing tools, kicking vehicles, stomping, whining, drinking, or possession of you or your rig by any entity....... Always consult a manual before attempting any wrenching and I advise you to stay within your skill set. If you’re expanding your skills, work on the easy stuff 1st to gain skills and the necessary scars on the hands to fall into the "working man/woman" category.
ok so here we go!!!
first; tool/supplies list
1) phillips head screw driver (that fits the screws in the liftgate handles)
2) spray on lubricant (WD-40 is NOT a lubricant)
to begin pull the interior plastic molding off the interior hatch, starting with the top piece, you can start at one of the ends, or the middle, i started at the middle where the third brake light sits, this piece is just on with plastic clips which SHOULD (they were in my case) be resuable.

after that piece is off it becomes necessary to remove the 6 screws holding the lower portion of this plastic liner.


two each in the handle cutouts, and two near the top which were covered by the top piece of plastic.
now be careful that you dont just drop the liner, the hatch light is still plugged in and the wire wont let this drop easily, but dont worry but plug is easy to get loose, simply slid the red locking clip (it will only slide one way at this point) and then push down on the same side of the clip near where the wire goes in and pull the plug off the back of the light

you can safely set all the plastic pieces aside (i put them on the lawn, but anyplace out of your way is fine)
now you are left with this obnoxious black lining which was glued on in the factory, i believe it is a weatherproofing/insulation layer, but im not really sure, i was careful to do as little damage as possible to this just in case.
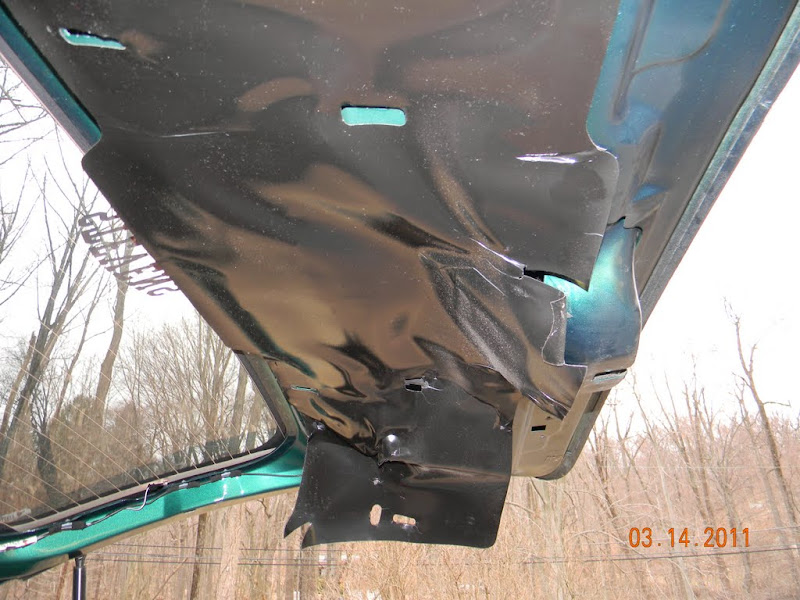
this liner should peel off (very carefully of course) from either side, im sure one side will be easier than the other, in my case the passenger side of the truck came off easier, so that is the one i worked from. you dont need to pull it all off, just enough so that you can see the locking mechanism, the wiper motor and the wiring up in there, a little more than 1/2 way across.

you cant see the liner, but you can see where it was clearly removed from, its the best picture i have to go with this step
now that the liner is out of the way you have a clear view of what is going on inside your door, and how the lock mechanism works.

this is the locking mechanism, as you can see VERY VERY SIMPLE, yet still effective. the slider bar slides back and forth and has a profile cut so that the tab on the handle (which is on the outside of the gate) will only engage the slider in one of the two positions. This means that if the slider mechanism sticks that black tab on the lower right in the picture will still be able to apply a force to the slider which will allow the bar (which is hooked up to the release) to pull on the lock (i have a video of it working later, which should make it easier to understand).
the problem is that the bar is NOT sliding as it is intended to, therefore not moving out of range of the handle and NOT securing my (your) belongings inside the truck. PROBLEM!!!!!!!
SOLUTION!!!!!!!
spray the mechanism with a lubricant, we use a combination lubricant which is a mixture of light DDT (industrial pneumatic tool lubricant) and WD-40, the wd-40 will work in and clear out any corrosion present on the latch, while the DDT is a long lasting water resistant lubricant so hopefully i can go another 9 years w/o doing this again.
the two points that need to be sprayed are cirlced here

i also used an old paintbrush to work the lubricant into the system a little bit, im sure it also served to clean some of the dirt off the system.
now press the lock and unlock button a couple of times to make sure that the system slides all the way back and forth to the ends of the slot circled above, you should also notice the white clip in that picture fits nicely into the two spots in the profile at either extreme of the bar movement.

(sorry about the shaky video, i was alone trying to film and work the latch mechanism at the same time, as you can see its not an easy thing to do.
now that your lock mechanism is working properly, it is time to put the black liner back in place, mine was sticky enough to stay on its own, if yours isnt just use a couple drops of glue in the corner, just about any quick drying glue should work, just dont use anything too permanent (NO JBWELD OR OTHER EPOXIES) and i would only put it onto key places to hold the liner up.
(i dont think you need a picture no know how this looked before you started
now its time to put the lower plastic piece back on, this can be accomplished rather easily w/o dealing with the light issue again by simply snapping the light out of the panel, there are 4 tabs, gently push them towards the center in pairs until the light slides out, set it aside.


now simply snap the plastic snaps from the bottom panel back into their places, (making sure that the wiring for the light is hanging out the hold in the panel) pushing firmly to do this all round the panel, put the 6 screws shown above back in, then plug the light back in (the light should come on at this point, unless you took a beer break) and push the locking slide back to the position it was in when you found it(unless you sat around playing w/ the slider it will only go in one direction and then lock) now simply snap the light back into its position, and do the same w/ the top half of the interior plastic lining

and now its time to go for a ride and relax knowing that everything is locked up nice and safe in the truck
(or you could get a beer, but i finished this before lunch time so beer seemed a bit odd to me)
if you have any questions about this or any details let me know i will do my best to answer your questions
NOTE:: this is NOT a how to on replacing the actuator if it is not working.
DISCLAIMER::
I am not responsible for any mishaps while you are wrenching, knuckle busting, throwing tools, kicking vehicles, stomping, whining, drinking, or possession of you or your rig by any entity....... Always consult a manual before attempting any wrenching and I advise you to stay within your skill set. If you’re expanding your skills, work on the easy stuff 1st to gain skills and the necessary scars on the hands to fall into the "working man/woman" category.
ok so here we go!!!
first; tool/supplies list
1) phillips head screw driver (that fits the screws in the liftgate handles)
2) spray on lubricant (WD-40 is NOT a lubricant)
to begin pull the interior plastic molding off the interior hatch, starting with the top piece, you can start at one of the ends, or the middle, i started at the middle where the third brake light sits, this piece is just on with plastic clips which SHOULD (they were in my case) be resuable.
after that piece is off it becomes necessary to remove the 6 screws holding the lower portion of this plastic liner.
two each in the handle cutouts, and two near the top which were covered by the top piece of plastic.
now be careful that you dont just drop the liner, the hatch light is still plugged in and the wire wont let this drop easily, but dont worry but plug is easy to get loose, simply slid the red locking clip (it will only slide one way at this point) and then push down on the same side of the clip near where the wire goes in and pull the plug off the back of the light
you can safely set all the plastic pieces aside (i put them on the lawn, but anyplace out of your way is fine)
now you are left with this obnoxious black lining which was glued on in the factory, i believe it is a weatherproofing/insulation layer, but im not really sure, i was careful to do as little damage as possible to this just in case.
this liner should peel off (very carefully of course) from either side, im sure one side will be easier than the other, in my case the passenger side of the truck came off easier, so that is the one i worked from. you dont need to pull it all off, just enough so that you can see the locking mechanism, the wiper motor and the wiring up in there, a little more than 1/2 way across.
you cant see the liner, but you can see where it was clearly removed from, its the best picture i have to go with this step
now that the liner is out of the way you have a clear view of what is going on inside your door, and how the lock mechanism works.
this is the locking mechanism, as you can see VERY VERY SIMPLE, yet still effective. the slider bar slides back and forth and has a profile cut so that the tab on the handle (which is on the outside of the gate) will only engage the slider in one of the two positions. This means that if the slider mechanism sticks that black tab on the lower right in the picture will still be able to apply a force to the slider which will allow the bar (which is hooked up to the release) to pull on the lock (i have a video of it working later, which should make it easier to understand).
the problem is that the bar is NOT sliding as it is intended to, therefore not moving out of range of the handle and NOT securing my (your) belongings inside the truck. PROBLEM!!!!!!!
SOLUTION!!!!!!!
spray the mechanism with a lubricant, we use a combination lubricant which is a mixture of light DDT (industrial pneumatic tool lubricant) and WD-40, the wd-40 will work in and clear out any corrosion present on the latch, while the DDT is a long lasting water resistant lubricant so hopefully i can go another 9 years w/o doing this again.
the two points that need to be sprayed are cirlced here
i also used an old paintbrush to work the lubricant into the system a little bit, im sure it also served to clean some of the dirt off the system.
now press the lock and unlock button a couple of times to make sure that the system slides all the way back and forth to the ends of the slot circled above, you should also notice the white clip in that picture fits nicely into the two spots in the profile at either extreme of the bar movement.
(sorry about the shaky video, i was alone trying to film and work the latch mechanism at the same time, as you can see its not an easy thing to do.
now that your lock mechanism is working properly, it is time to put the black liner back in place, mine was sticky enough to stay on its own, if yours isnt just use a couple drops of glue in the corner, just about any quick drying glue should work, just dont use anything too permanent (NO JBWELD OR OTHER EPOXIES) and i would only put it onto key places to hold the liner up.
(i dont think you need a picture no know how this looked before you started
now its time to put the lower plastic piece back on, this can be accomplished rather easily w/o dealing with the light issue again by simply snapping the light out of the panel, there are 4 tabs, gently push them towards the center in pairs until the light slides out, set it aside.
now simply snap the plastic snaps from the bottom panel back into their places, (making sure that the wiring for the light is hanging out the hold in the panel) pushing firmly to do this all round the panel, put the 6 screws shown above back in, then plug the light back in (the light should come on at this point, unless you took a beer break) and push the locking slide back to the position it was in when you found it(unless you sat around playing w/ the slider it will only go in one direction and then lock) now simply snap the light back into its position, and do the same w/ the top half of the interior plastic lining
and now its time to go for a ride and relax knowing that everything is locked up nice and safe in the truck
(or you could get a beer, but i finished this before lunch time so beer seemed a bit odd to me)
if you have any questions about this or any details let me know i will do my best to answer your questions
Last edited by shrpshtr325; Jul 2, 2011 at 04:06 PM. Reason: typo

Record Breaker
Joined: Dec 2006
Posts: 1,508
Likes: 4
From: NY NY
Trending Topics

Captain

Joined: Feb 2011
Posts: 542
Likes: 2
From: Ohio
Awesome write up, pictures make everything better. My lock wasn't sticking but I been there before tearing the liftgate apart because the palstic handle has a little plastic pin sticking out of the back that pushes down on the metal bar. Well the plastic pin would keep slipping behind the metal bar and not do anything, it was a real PITA.

Veteran
Joined: Jan 2008
Posts: 427
Likes: 0
From: NE Iowa
Great writeup sharp.
As for the plastic liner, you definitely want to keep it in place. I've made the mistake of removing it from the front doors of a car once when I was installing speakers, and let me tell you, it only took about half a mile of driving on gravel to regret it!
As for sticking it back on, I've found that Blackjack (roofing tar in a caulking tube) works perfectly. Holds it on great, but still makes it easy to peel off in the future if you need to.
If you do any driving in dusty conditions, it's definitely worth a little effort to keep those plastic liners sealed up well....

