


broken lumbar support

Thread Starter
|
THE ULTI-MOD


Joined: Jan 2007
Posts: 19,797
Likes: 36
From: Union NJ
ok well i went out and did it this morning, including the time to get the tools out, and clean up, and having to drag out the impact gun(one of the bolts holding the seat in was in there too damn good) it took me just over an hour (including quite a few coffee breaks  )
)
so i thought it give you a nice write up for anyone else looking to try it
the problem: the lumbar support is not functioning, and the adjustment **** spins stop to stop without any resistance
the procedure
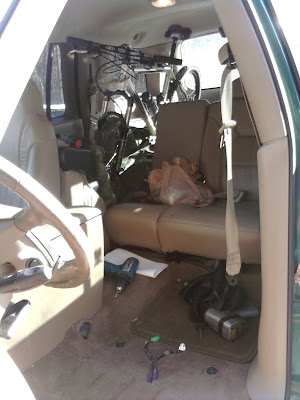
first, park the truck someplace where you can easily and safely open the drivers (or passenger depending) door open ALL THE WAY, and the back door being open helps too.
first grab your tools
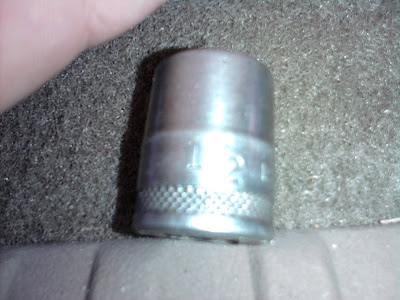
1/2 inch socket for the front of the seat
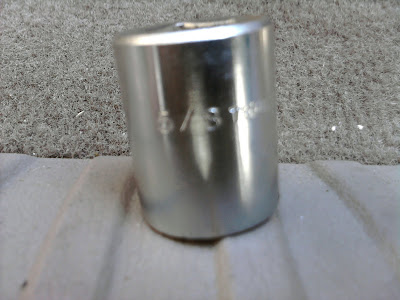
5/8 inch socket for the seatbelt bolt
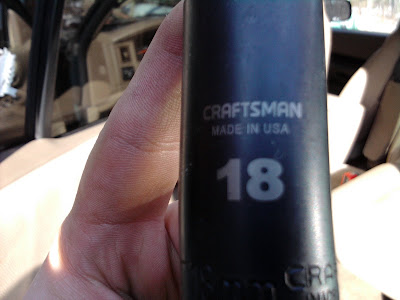
18mm socket for the back (idk its the one that fit for me)

a socket wrench which fits your sockets (mine was 3/8" drive)
some 2 part epoxy (optional, but at the time of this update has been used to hold the sheathed end in tighter)

and a bunch of zip ties (i used a total of 6, but have some extras just in case)
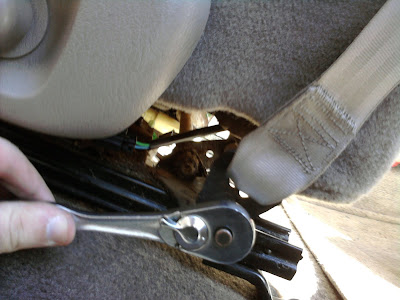
second, run the seat all the way back (im assuming you have power seats here) and remove the bolts that hold the front of the seat down
(use the 1/2" socket for this)
you can see that i have already taken the bolts out in that picture
next run it far enough forward to take the seatbelt end off the seat
(use your 5/8" socket for this)
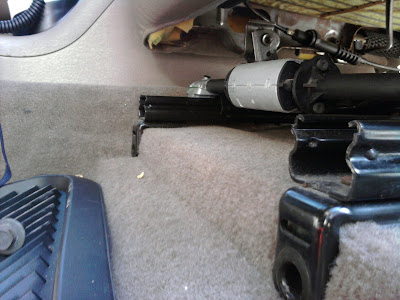
next, slide the seat ALL THE WAY FRONT
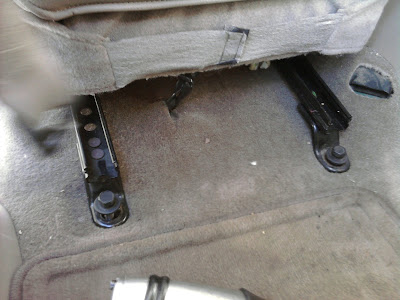
and use the 18mm socket to take out the two bolts that are now exposed
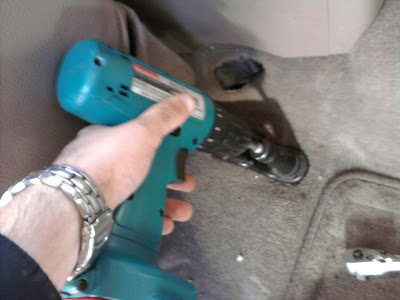
(i had to drag out the impact gun for the outside one it was too much work to do by hand, but was definetly doable, im just impatient and want results quickly)
i used the power drill to aid in getting the bolts out once i had them loose(except the back outside bolt which i used the air gun on)
next run the seat back far enough that you can lean it backwards to get to the power for the adjustment motors and the heating elements, and lean the seat back to get access

now you can take the seat out of the truck and go someplace warm (i did this in January when it was sub 30* outside so i moved it into the basement, anyplace you are comfortable working is fine) note: no pictures of this bc i needed two hands to carry the seat
once in a more comfortable place to work take the side panel with all the controls off, should be 5 screws, one is missing on mine, so give me a break
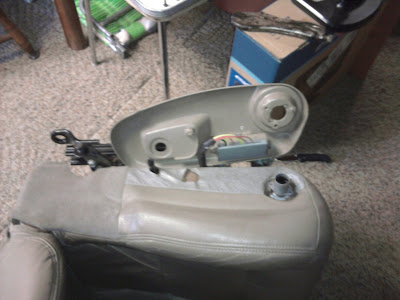
three of the 5 screws are under the wheel which controls the lumbar support, one is in the handle which allows you to recline the seat, right on the shaft part of it actually, and one is pretty easy to find right there on the side.
Once you have this off be careful as the controls for the seat adjustments are still attached, remove one of the two screws which hold it down and loosen the other.
as you can see here i have one of the screws out and the other one loose, i held it in place for the picture
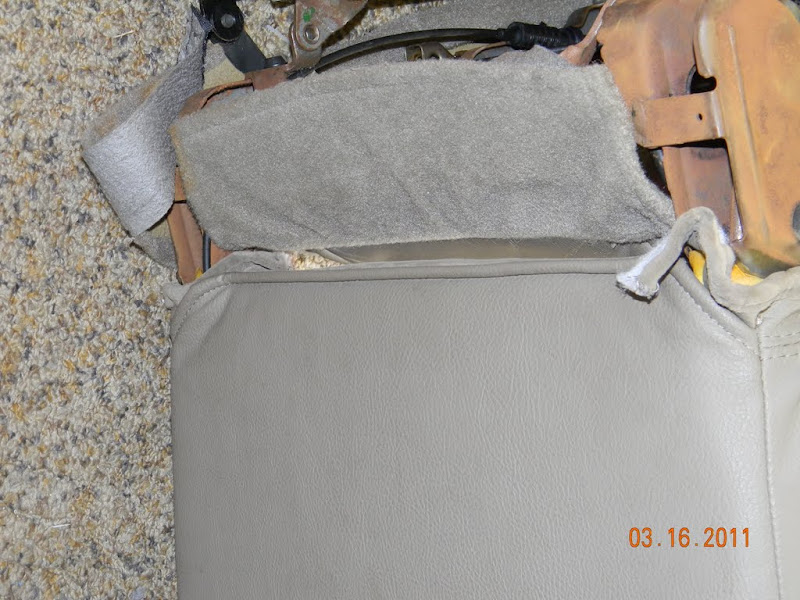
ok now its time to open up the seat cover on the BACK of the seat, this is not an easy task, the seam where it will separate is in between the seat bottom and the seat back, if the seat is in the fully upright position you can reach it

its a very similar 2 piece black clip system to what holds the cover onto the bottom of the seat, you have to push the clips together and separate them, its not easy, but be patient, carefully use a screw driver, and it WILL come apart
now that you have that off you have this(once you pull the back of the seat cover out a little bit)
the cover proved too difficult to take off when this work can be done w/ it on, if you want to take it off im sure you could, but i did not.
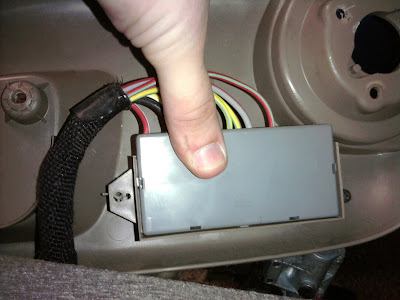
the problem is that the cable sheath popped out of its stop on the side of the seat, all you need to do is put it back in place, i put zip ties around it to hold it in place (yes i went a bit overboard probably) and i also put a zip tie around the other end to make sure it doesnt come out.
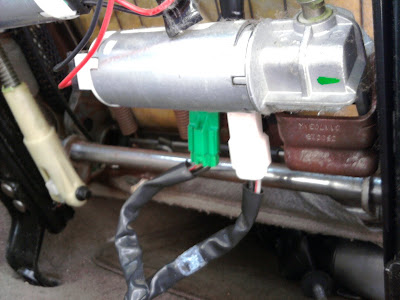
in order to get enough slack in the cable you will probably have to loosen the control end of it (that sticks out the side of the seat), it should look like this when its all the way loose(it can be turned by your finger inside the cylinder at this point)
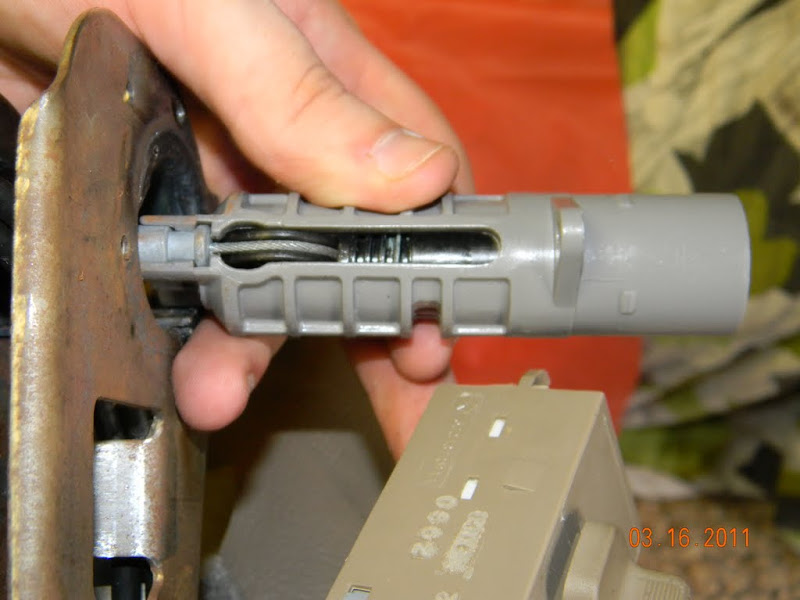
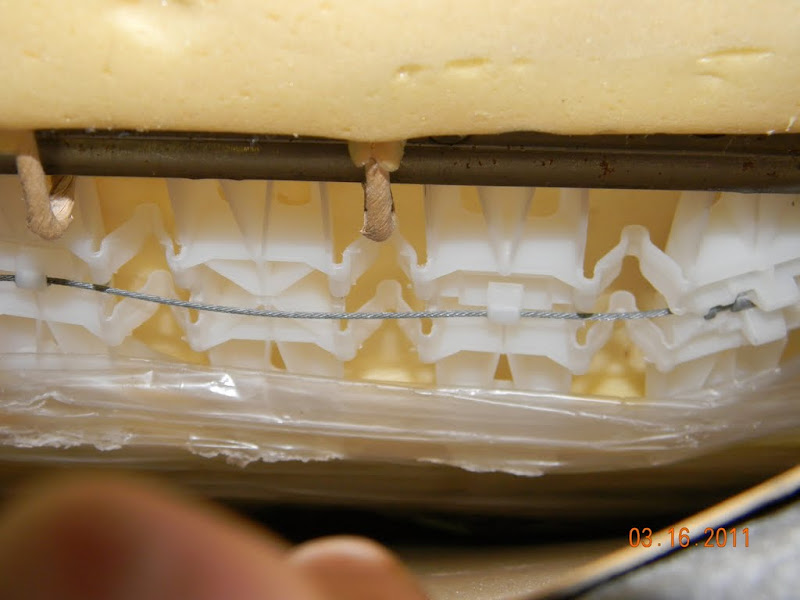
now you can place the cable sheath where it belongs (it SHOULD be fairly obvious) and zip tie it in place as shown (ill show the other end too)


This is the part i epoxied in the 2nd time through(just follow the directions that come w/ the epoxy, mix equal parts, and from my experience i would say be liberal with the mix for this job to make sure you have enough mixed up), just be careful not to get any on the cable, and ONLY around the stop on the end of the cable housing. If you get epoxy on the cable it WILL stop the lumbar support from working.

and the other end just has a stop on it, i didnt want to be opening this up again so i zip tied it in place now (each zip tie you see is a union of two ties, one wasnt long enough alone so i put two together, if you have longer ties you could get away with one)
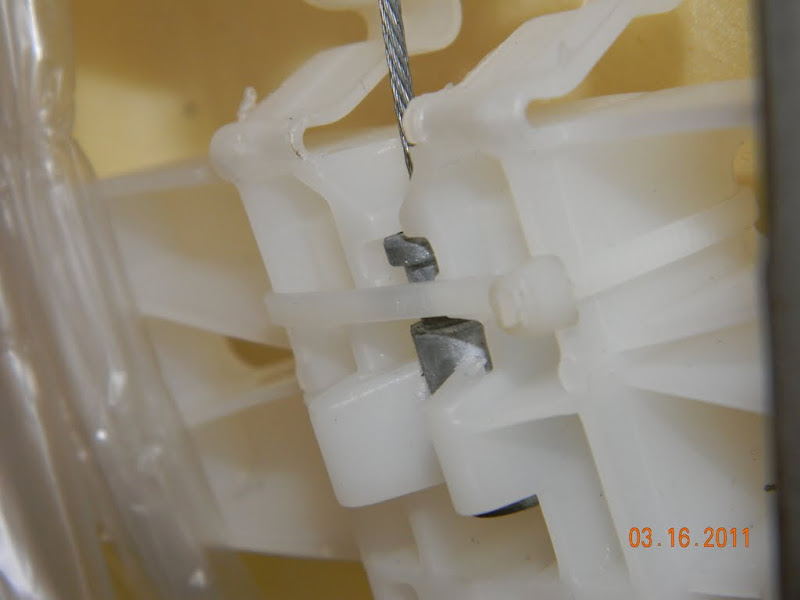
now you should have a functioning lumbar support unit (its really just a cheesy plastic framework which pushes out more or less based on tension in the cable, im sure you dont what the details, just how to fix it)
and how its time to close it all back up, closing the cover is just the opposite of opening it up, just make sure to push it together until you hear it snap, this will take a little bit of effort.
and then you just need to put the seat back in the truck (its simply the reverse of how you took it out, i dont think i need to show you that part)
i am not responsible if you screw this up or make it worse, or damage yourself, or your vehicle while attempting this, JUST SAYIN!!!!!!!
(updated 6/13/11 after one of the zip ties i used decided to let go, the latching tooth busted off on it)
)so i thought it give you a nice write up for anyone else looking to try it
the problem: the lumbar support is not functioning, and the adjustment **** spins stop to stop without any resistance
the procedure
first, park the truck someplace where you can easily and safely open the drivers (or passenger depending) door open ALL THE WAY, and the back door being open helps too.
first grab your tools
1/2 inch socket for the front of the seat
5/8 inch socket for the seatbelt bolt
18mm socket for the back (idk its the one that fit for me)
a socket wrench which fits your sockets (mine was 3/8" drive)
some 2 part epoxy (optional, but at the time of this update has been used to hold the sheathed end in tighter)
and a bunch of zip ties (i used a total of 6, but have some extras just in case)
second, run the seat all the way back (im assuming you have power seats here) and remove the bolts that hold the front of the seat down
(use the 1/2" socket for this)
you can see that i have already taken the bolts out in that picture
next run it far enough forward to take the seatbelt end off the seat
(use your 5/8" socket for this)
next, slide the seat ALL THE WAY FRONT
and use the 18mm socket to take out the two bolts that are now exposed
(i had to drag out the impact gun for the outside one it was too much work to do by hand, but was definetly doable, im just impatient and want results quickly
)i used the power drill to aid in getting the bolts out once i had them loose(except the back outside bolt which i used the air gun on
)next run the seat back far enough that you can lean it backwards to get to the power for the adjustment motors and the heating elements, and lean the seat back to get access
now you can take the seat out of the truck and go someplace warm (i did this in January when it was sub 30* outside so i moved it into the basement, anyplace you are comfortable working is fine) note: no pictures of this bc i needed two hands to carry the seat
once in a more comfortable place to work take the side panel with all the controls off, should be 5 screws, one is missing on mine, so give me a break
three of the 5 screws are under the wheel which controls the lumbar support, one is in the handle which allows you to recline the seat, right on the shaft part of it actually, and one is pretty easy to find right there on the side.
Once you have this off be careful as the controls for the seat adjustments are still attached, remove one of the two screws which hold it down and loosen the other.
as you can see here i have one of the screws out and the other one loose, i held it in place for the picture
ok now its time to open up the seat cover on the BACK of the seat, this is not an easy task, the seam where it will separate is in between the seat bottom and the seat back, if the seat is in the fully upright position you can reach it
its a very similar 2 piece black clip system to what holds the cover onto the bottom of the seat, you have to push the clips together and separate them, its not easy, but be patient, carefully use a screw driver, and it WILL come apart
now that you have that off you have this(once you pull the back of the seat cover out a little bit)
the cover proved too difficult to take off when this work can be done w/ it on, if you want to take it off im sure you could, but i did not.
the problem is that the cable sheath popped out of its stop on the side of the seat, all you need to do is put it back in place, i put zip ties around it to hold it in place (yes i went a bit overboard probably) and i also put a zip tie around the other end to make sure it doesnt come out.
in order to get enough slack in the cable you will probably have to loosen the control end of it (that sticks out the side of the seat), it should look like this when its all the way loose(it can be turned by your finger inside the cylinder at this point)
now you can place the cable sheath where it belongs (it SHOULD be fairly obvious) and zip tie it in place as shown (ill show the other end too)
This is the part i epoxied in the 2nd time through(just follow the directions that come w/ the epoxy, mix equal parts, and from my experience i would say be liberal with the mix for this job to make sure you have enough mixed up), just be careful not to get any on the cable, and ONLY around the stop on the end of the cable housing. If you get epoxy on the cable it WILL stop the lumbar support from working.
and the other end just has a stop on it, i didnt want to be opening this up again so i zip tied it in place now (each zip tie you see is a union of two ties, one wasnt long enough alone so i put two together, if you have longer ties you could get away with one)
now you should have a functioning lumbar support unit (its really just a cheesy plastic framework which pushes out more or less based on tension in the cable, im sure you dont what the details, just how to fix it)
and how its time to close it all back up, closing the cover is just the opposite of opening it up, just make sure to push it together until you hear it snap, this will take a little bit of effort.
and then you just need to put the seat back in the truck (its simply the reverse of how you took it out, i dont think i need to show you that part)
i am not responsible if you screw this up or make it worse, or damage yourself, or your vehicle while attempting this, JUST SAYIN!!!!!!!
(updated 6/13/11 after one of the zip ties i used decided to let go, the latching tooth busted off on it)
Last edited by shrpshtr325; Jun 13, 2011 at 03:55 PM.
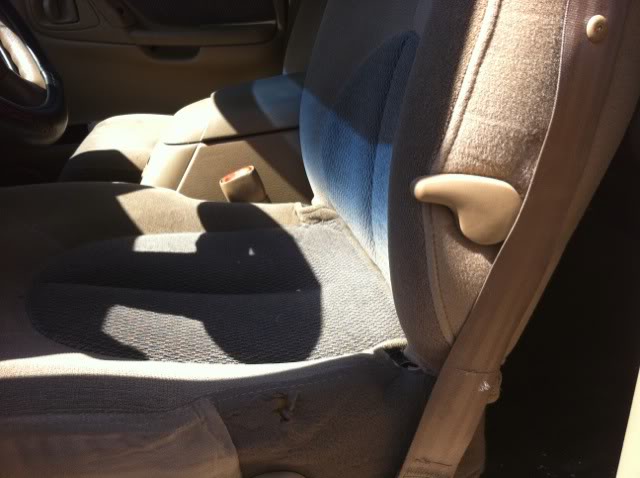
Nice write up shrp. And yes like Indy said when they did the cosmetic change they also changed the seat lumbar setup. As you can see in my picture, the lumbar adjustment **** is on the backrest by the seatbelt area...
Thread Starter
|
THE ULTI-MOD
Joined: Jan 2007
Posts: 19,797
Likes: 36
From: Union NJ
if i dont go back to school im gonna have to start charging you guys for these lol glad you guys like it, ill keep em coming as i do different things
Trending Topics
All Star
Joined: Dec 2006
Posts: 950
Likes: 0
From: MINNEAPOLIS, MN
Good write up Bill..Thx! Mine has that exact same problem. I would probably attempt to fix but at this point I would probably take that opportunity to RE-COVER the leather and add seat heaters.
Thread Starter
|
THE ULTI-MOD
Joined: Jan 2007
Posts: 19,797
Likes: 36
From: Union NJ
honestly magic, it took me longer to get the seat out of the truck then it did to fix the problem, so its really not difficult, and if you actually used the lumbar support its 100% worth it

