

A How-to; On your Heater-Core & Evaporator-Core,..PIC's FIXED


Thread Starter
|
Captain
Joined: Dec 2006
Posts: 509
Likes: 1
From: Midlothian, IL.
First step is to disconnect your Battery.
Make sure your A/C system is discharged.
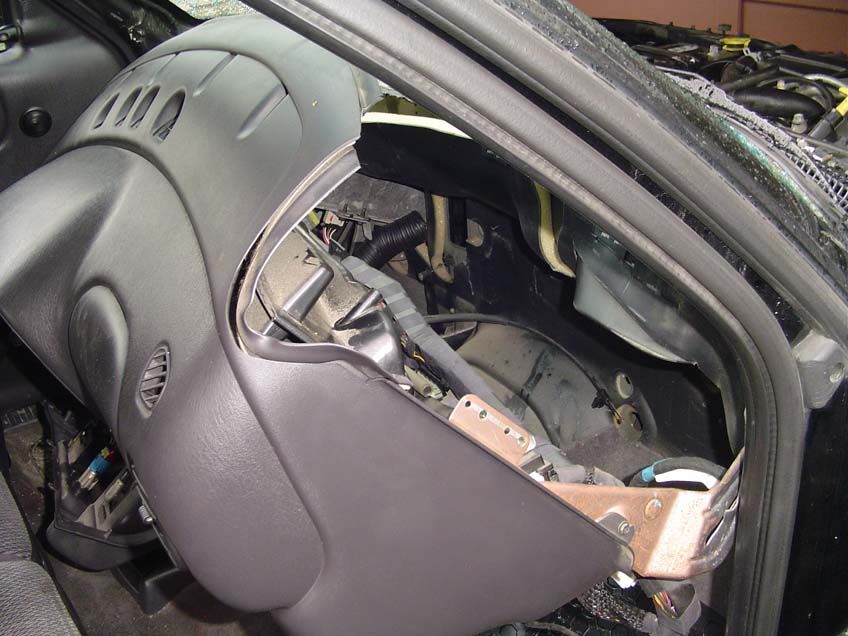
Remove your two interior Kick-Panels. (They just pop off).
Then, both your A-Pillers. They also pop off.
If your Pass-side has a grab-handle, pry the two soft rubber
covers off the bolt holes & there will be two-8mm bolts holding it on.
(Remove these before the A-piller cover on that side).
Fuse-Box cover is next. Then your entire Face-Panel trim on the front of the dash will just pop off.
The Instrument-Panel is next.Torx-bit #20 will work there.
Heater-Control panel is next. 4 Phillip-head screws.
Under the very center of the dash, at the bottom, right behind where your 4x4 shifter lever is, remove
the two, 12mm bolts.
On each side of the lower dash where your Kick-Panels were, remove the two, 10 mm bolts. (remember, you gotta dis-connect
your battery BEFORE you start all this)! That Pass-side bolt is a ground! All kinds of weird things happen if that battery is still hooked
up when you remove that bolt!
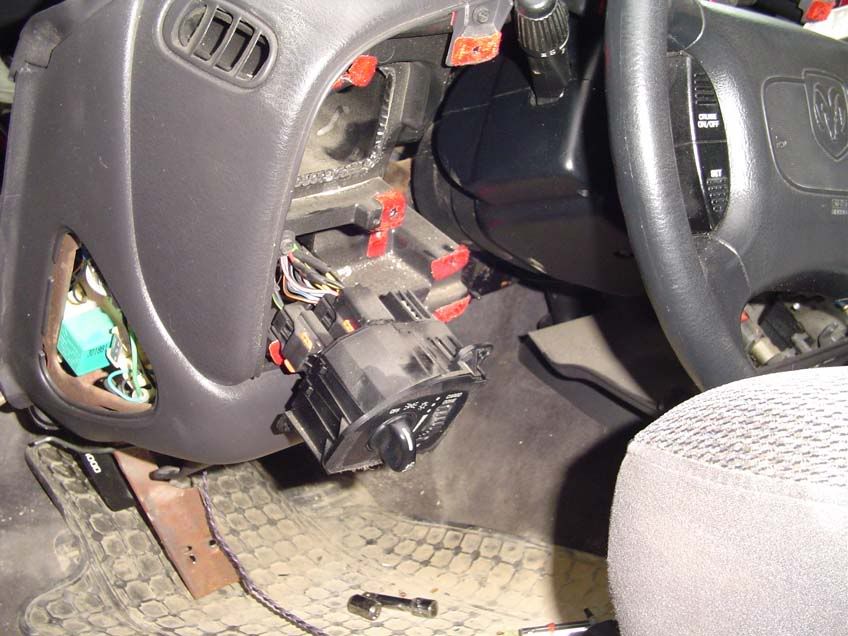
Remove the two, 12mm bolts that hold up your Steering-Columm. They are about half way back to the Fire-wall. While dropping it,
support it with your knees and remove your little tiny Shift-Indicator cable. Look for it, it's real small and can be easily missed.
It won't support any amount of abuse at all so, be careful! Then, lay the columm down on the seat.
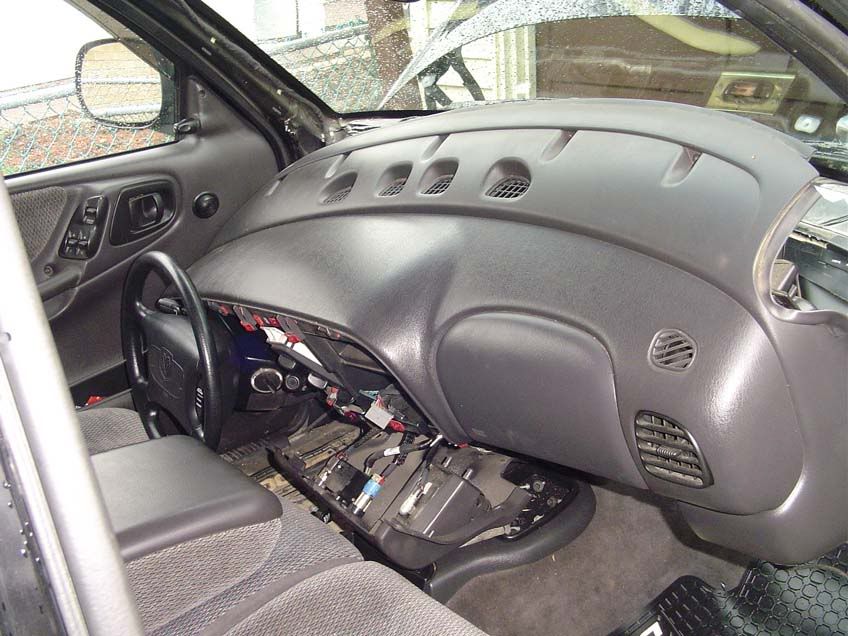
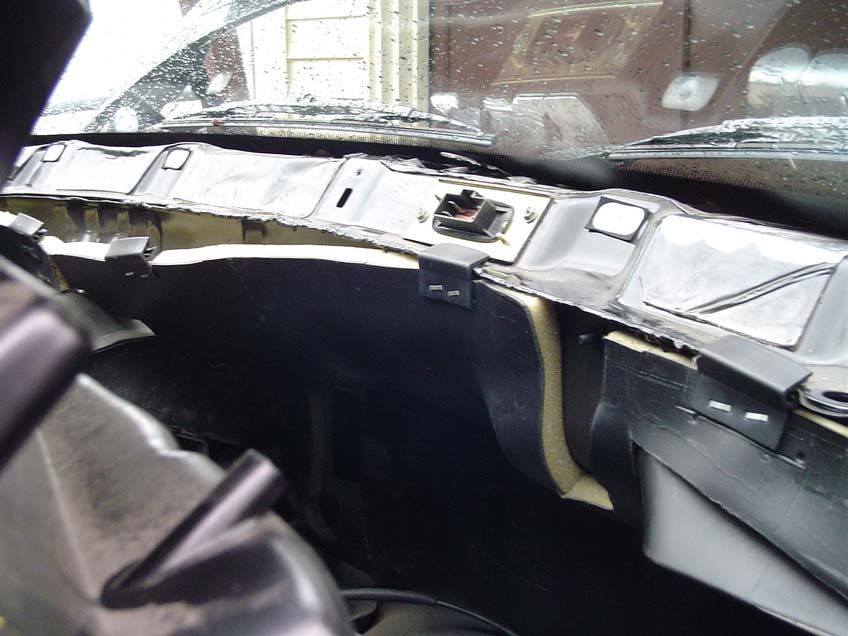
On top of the dash; remove the 8mm bolts all across the base of the windshield. Glove-Box door is next. This is a little tricky,..
Three screws on the inside come out then, if you look under the door at the area where it hinges, you'll see the two outside hinges unhook in one direction and the center one unhooks the exact oppisite of the outer two. Get one outside unhooked by twisting the door a little, reach up and use a small Flat-blade screw driver to pry the center one slightly as you unhook the other outside one.
Ok,.. Stop there,.. Time for beer & Tacos,.. And, start looking for those Fender-Covers,.. Here's a couple of pics;.. .
.

 .
.
I'll continue on a little later.
Make sure your A/C system is discharged.
Remove your two interior Kick-Panels. (They just pop off).
Then, both your A-Pillers. They also pop off.
If your Pass-side has a grab-handle, pry the two soft rubber
covers off the bolt holes & there will be two-8mm bolts holding it on.
(Remove these before the A-piller cover on that side).
Fuse-Box cover is next. Then your entire Face-Panel trim on the front of the dash will just pop off.
The Instrument-Panel is next.Torx-bit #20 will work there.
Heater-Control panel is next. 4 Phillip-head screws.
Under the very center of the dash, at the bottom, right behind where your 4x4 shifter lever is, remove
the two, 12mm bolts.
On each side of the lower dash where your Kick-Panels were, remove the two, 10 mm bolts. (remember, you gotta dis-connect
your battery BEFORE you start all this)! That Pass-side bolt is a ground! All kinds of weird things happen if that battery is still hooked
up when you remove that bolt!
Remove the two, 12mm bolts that hold up your Steering-Columm. They are about half way back to the Fire-wall. While dropping it,
support it with your knees and remove your little tiny Shift-Indicator cable. Look for it, it's real small and can be easily missed.
It won't support any amount of abuse at all so, be careful! Then, lay the columm down on the seat.
On top of the dash; remove the 8mm bolts all across the base of the windshield. Glove-Box door is next. This is a little tricky,..
Three screws on the inside come out then, if you look under the door at the area where it hinges, you'll see the two outside hinges unhook in one direction and the center one unhooks the exact oppisite of the outer two. Get one outside unhooked by twisting the door a little, reach up and use a small Flat-blade screw driver to pry the center one slightly as you unhook the other outside one.
Ok,.. Stop there,.. Time for beer & Tacos,.. And, start looking for those Fender-Covers,.. Here's a couple of pics;..
..I'll continue on a little later.
Last edited by Billiam; Jun 17, 2010 at 07:19 PM. Reason: Picture Insert
Thread Starter
|
Captain
Joined: Dec 2006
Posts: 509
Likes: 1
From: Midlothian, IL.
Here's a few more pics,.. I'll try to post more write-up tomorrow. Then, maybe finish it up Sat.

Last edited by Billiam; Jun 17, 2010 at 07:20 PM. Reason: Pic Insert
Thread Starter
|
Captain
Joined: Dec 2006
Posts: 509
Likes: 1
From: Midlothian, IL.
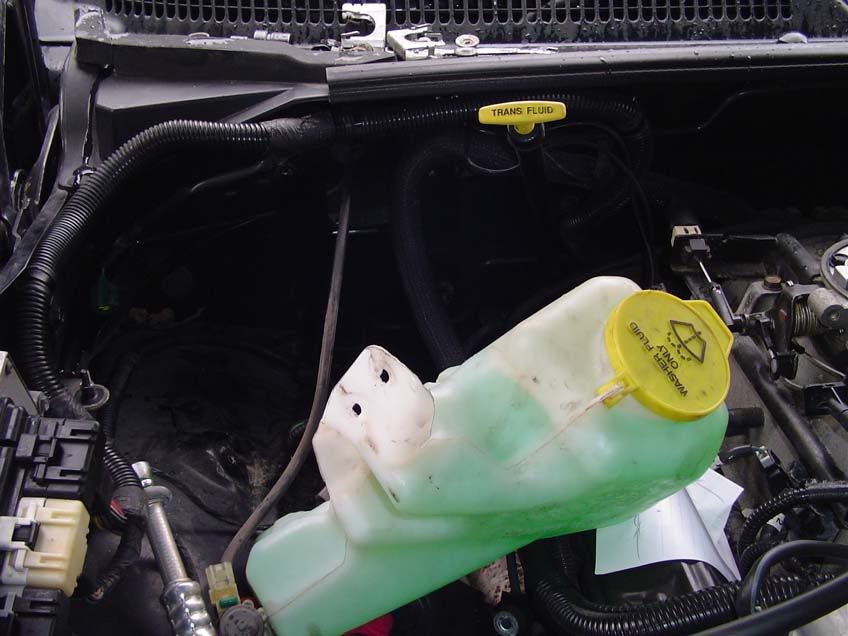
Your going outside now,.. Don't want to scratch up that paint leaning over the engine compartment! Use the fender-covers.
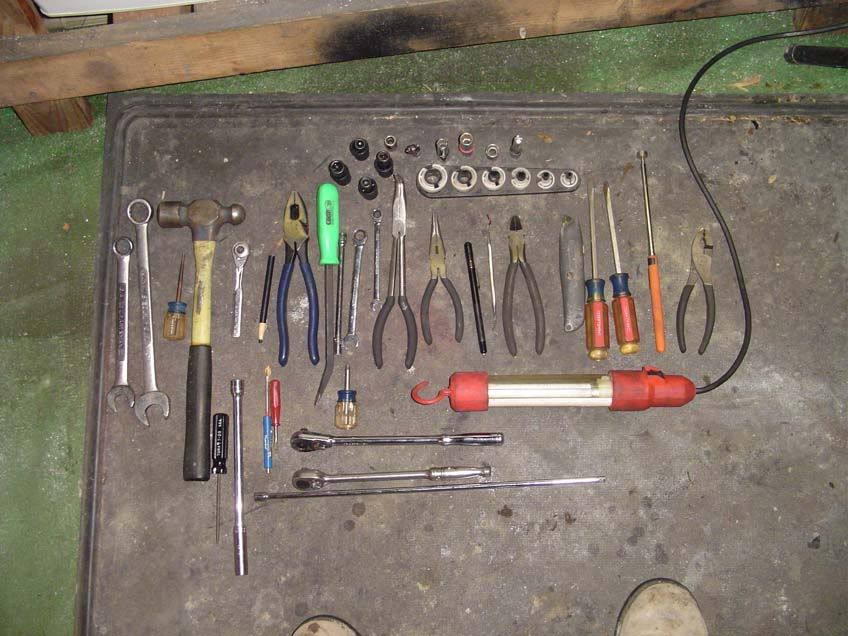
Air-Cleaner Box, Tube & Carb-Air-Hat has to come off now. Washer-Bottle has to come out & un-plug it. Receiver-Dryer has a bracket around it with a 8mm bolt that needs to come off. Use your Quick-Disconnect -Tool to seperate the dryer from the hard lines. (One line is behind the Receive-Dryer & it will be a little tight getting your hand behind there to clip on the Quick-Disconnect tool). The other line is in the front of the Dryer.
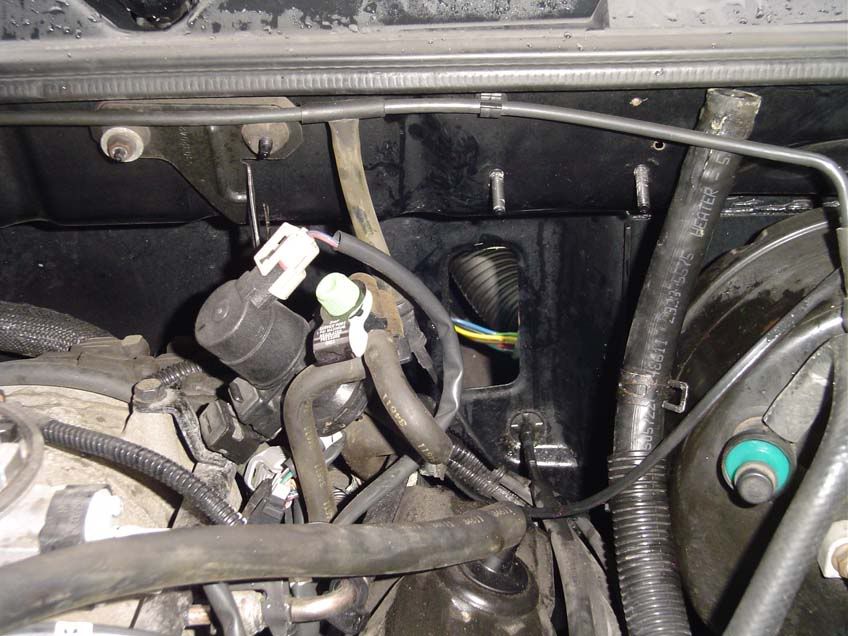
Other side of the motor now,..(Driver-side). is where your Heater-Box Tubes come thru the Firewall. Take both Heater-Hoses off. I decided to change my hoses. (You know it's time to change them if you have to cut them away from those two copper tubes coming thru the Firewall to get them off).
Now, from the those tubes BACK towards the area where your Washer-Bottle & Receiver was, use a Quick-Disconnect tool to take the A/C hard line apart. (Your using the same tool you would use for fuel-line removal on fuel-injected cars). The line that came off the FRONT of the dryer.
Just disconnect it at the next fitting towards the front of the truck. Stand back and take a good look at your Firewall now. You will see the four bolts (10mm) that hold the Air-Box on the inside of your truck. (Look at the pic of the Air-Box, you will see the four bolts with white washers on them). Just look from the heater-tubes to the Evap-tubes. They are in between those. There is one factory push-on one way retainer washer (About the size of a 50 cent piece), it's gotta come off also. Two small flat-bladed screw drivers, one on each side pryiing up at the same time will work it off. Keep working at it, it will come off.
Ok,.. tomorrow, tomorrow,.. I'll post more.
Air-Cleaner Box, Tube & Carb-Air-Hat has to come off now. Washer-Bottle has to come out & un-plug it. Receiver-Dryer has a bracket around it with a 8mm bolt that needs to come off. Use your Quick-Disconnect -Tool to seperate the dryer from the hard lines. (One line is behind the Receive-Dryer & it will be a little tight getting your hand behind there to clip on the Quick-Disconnect tool). The other line is in the front of the Dryer.
Other side of the motor now,..(Driver-side). is where your Heater-Box Tubes come thru the Firewall. Take both Heater-Hoses off. I decided to change my hoses. (You know it's time to change them if you have to cut them away from those two copper tubes coming thru the Firewall to get them off).
Now, from the those tubes BACK towards the area where your Washer-Bottle & Receiver was, use a Quick-Disconnect tool to take the A/C hard line apart. (Your using the same tool you would use for fuel-line removal on fuel-injected cars). The line that came off the FRONT of the dryer.
Just disconnect it at the next fitting towards the front of the truck. Stand back and take a good look at your Firewall now. You will see the four bolts (10mm) that hold the Air-Box on the inside of your truck. (Look at the pic of the Air-Box, you will see the four bolts with white washers on them). Just look from the heater-tubes to the Evap-tubes. They are in between those. There is one factory push-on one way retainer washer (About the size of a 50 cent piece), it's gotta come off also. Two small flat-bladed screw drivers, one on each side pryiing up at the same time will work it off. Keep working at it, it will come off.
Ok,.. tomorrow, tomorrow,.. I'll post more.


Great job on the write-up! I will leave it here for a little while, then move it into the DIY section. Thank you very much for the hard work!
Thread Starter
|
Captain
Joined: Dec 2006
Posts: 509
Likes: 1
From: Midlothian, IL.
Thanks Virused,.. It Was way hard for me to do this job so, I thought if this could make the same job just a little bit easier on someone maybe it would help.
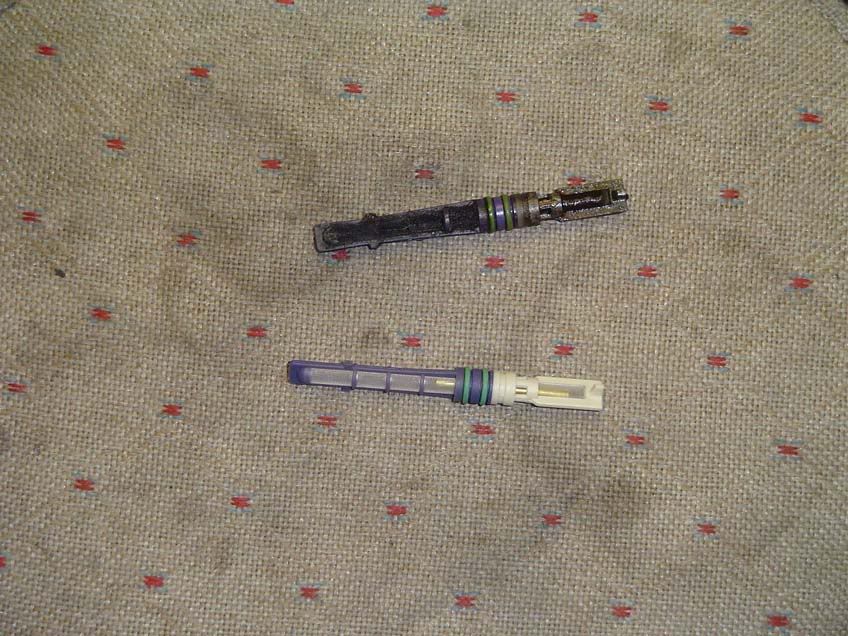
Ok, that hard-line you took off at both ends of the front of the Receiver-Dryer has your Orfice-Tube in it. It's gotta come out of that line and it is NOT serviceable. You can't just clean it and re-use it. Advanced Auto has them for under 4 bucks.
If it's hard to get out of the hard-line, & odds are it will be, try using compressed-air and blow it out from the other end.
I know, I know,.. THAT didn't work so what do I do now??
Get a cheap metal coat-hanger to snag it out. Put a 1/8" bend at 45 degrees on the end of it using a pair of plyers.
Feed the coat-hanger down the tube until you come to the Orfice-Tube then, twist the coat-hanger to grab the tube and yank hard on the coat-hanger to get it out. Once you 've got it, use brake-clean to completely wash out the line the, blow-dry with compressed air.
Inspect your Orfice-Tube; if it's wet, black, & caked with goo on it, your Compressor is probably starting to go bye-bye. A re-man is about 260 bucks so, let's hope yours is good! Some people say if your Receiver-Dryer is opened up it should be replaced,.. I say BHAA. (You will see why later on). Save yourself 70 dollars and re-use the old one.
Ok, time to head back inside,.. There is a small 6 inch bracket shaped like a lazy-S and silver in color that's got to come off. Two 8mm bolts hold it on. it's slightly off-center towards the pass side a little bit.
Driver side now, 4 phillips-head screws to remove your Head-Lamp panel. Once the screws are out, just let it hang there by the wires.
Air-Bag-Plug by the yellow& red thingy near center on the floor has to be pulled off. Next, those two 12 mm bolts at the bottom center of the dash has to come out. And, next to the driver side 12mm bolt is a small ground that has to come off, (I think it's a 3/8" nut holding it on.
Thread Starter
|
Captain
Joined: Dec 2006
Posts: 509
Likes: 1
From: Midlothian, IL.
Couple more pics,..


Last edited by Billiam; Jun 17, 2010 at 07:25 PM. Reason: Pic Insert
Trending Topics

Joined: Mar 2007
Posts: 5
Likes: 0
Boy I hope I don't have to do that! How did you know that your heater core was bad? I get alittle bit of anti-freeze smell every once and a while in my cab, but I don't see any fluid leak, Yet
Thread Starter
|
Captain
Joined: Dec 2006
Posts: 509
Likes: 1
From: Midlothian, IL.
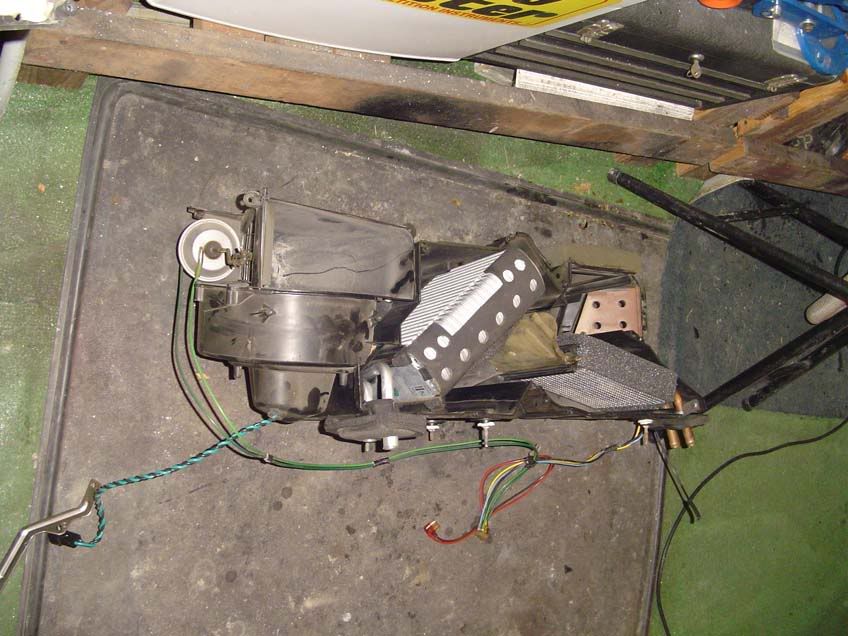
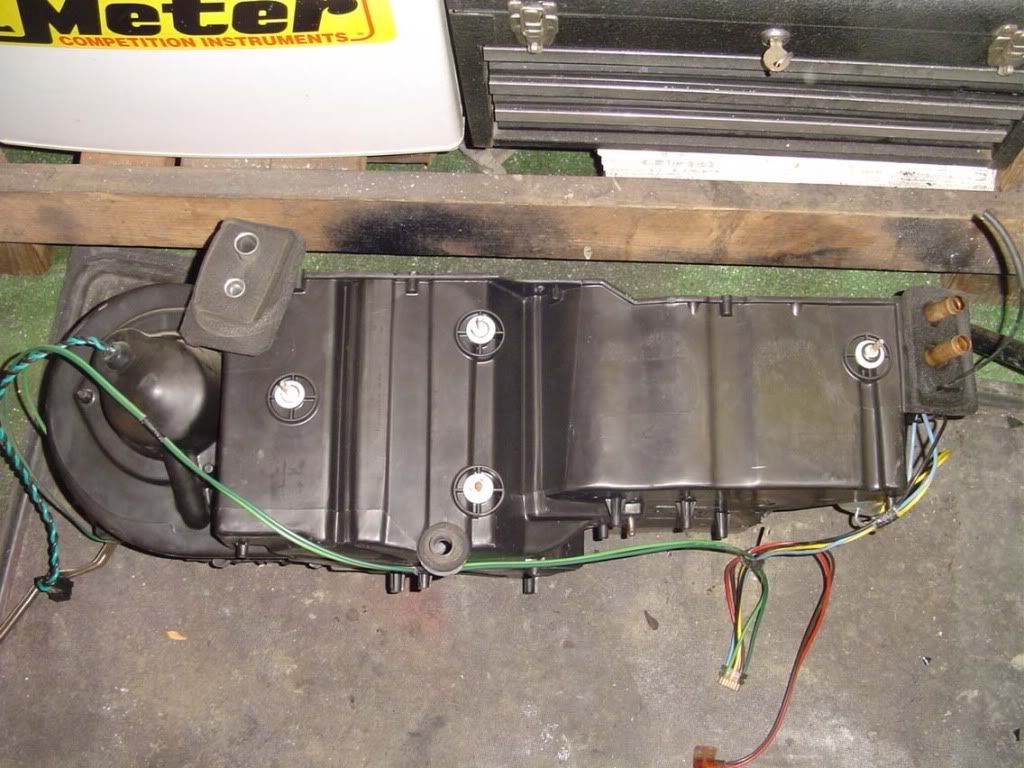
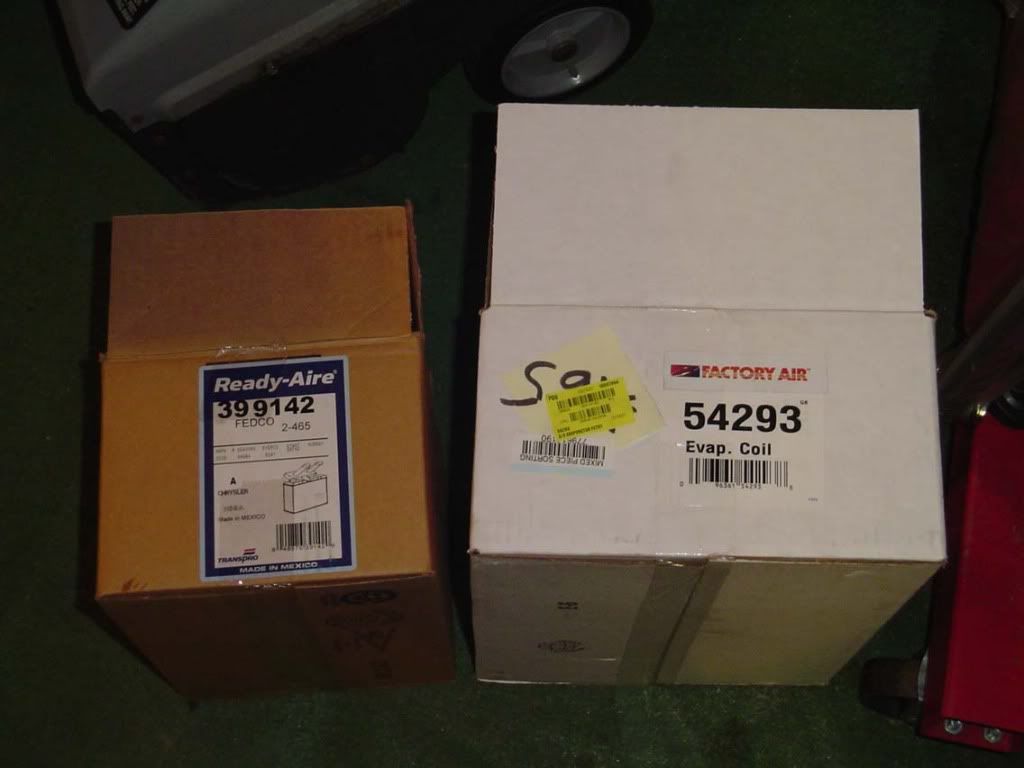
For me, it was the Evaporator-core that had a leak. And, I wanted my Air to work in the summer months. A black truck & you will roast without it. But it was a good idea to simply replace the heater-core cause it's right there. Also, you can replace the blower-mptor too because it there too. Same job for all three. If you get wiffs of Anti-freeze now and then; get your hand up and slightly to the right of the gas-pedal under the carpet and feel if it's damp at all.
Thread Starter
|
Captain
Joined: Dec 2006
Posts: 509
Likes: 1
From: Midlothian, IL.
Here's some more pics,.. I'm still looking for five more but, I think my computer ate them,..


Last edited by Billiam; Jun 17, 2010 at 07:27 PM. Reason: Pic Insert