

Front Door Hinge Pin DIY, Now W/Pics

Thread Starter
|
Record Breaker
Joined: Aug 2010
Posts: 2,241
Likes: 12
From: Ohio
Ok, I just got done doing the hinge pins on my driver door. My door was sagging pretty bad and wouldn't close all the way half the time. I used the hinge pins from LMC Truck.
Here are the other links to DIY's for sagging doors. First is basically free and IMO is a bandaid (you can also slide lower hinge toward the rear of the truck to accomplish the same thing as the washers), second one is for a style of pins that are different than mine. https://dodgeforum.com/forum/2nd-gen...-door-fix.html, https://dodgeforum.com/forum/2nd-gen...-for-30-a.html.
Thought I'd give a DIY a shot.
This was done on a 2001 1500 4x4 Quad Cab with manual windows and manual locks. Sorry, no during pics. but I'll try to describe everything the best I can. Pics are after I was done to help show the what an where of things.
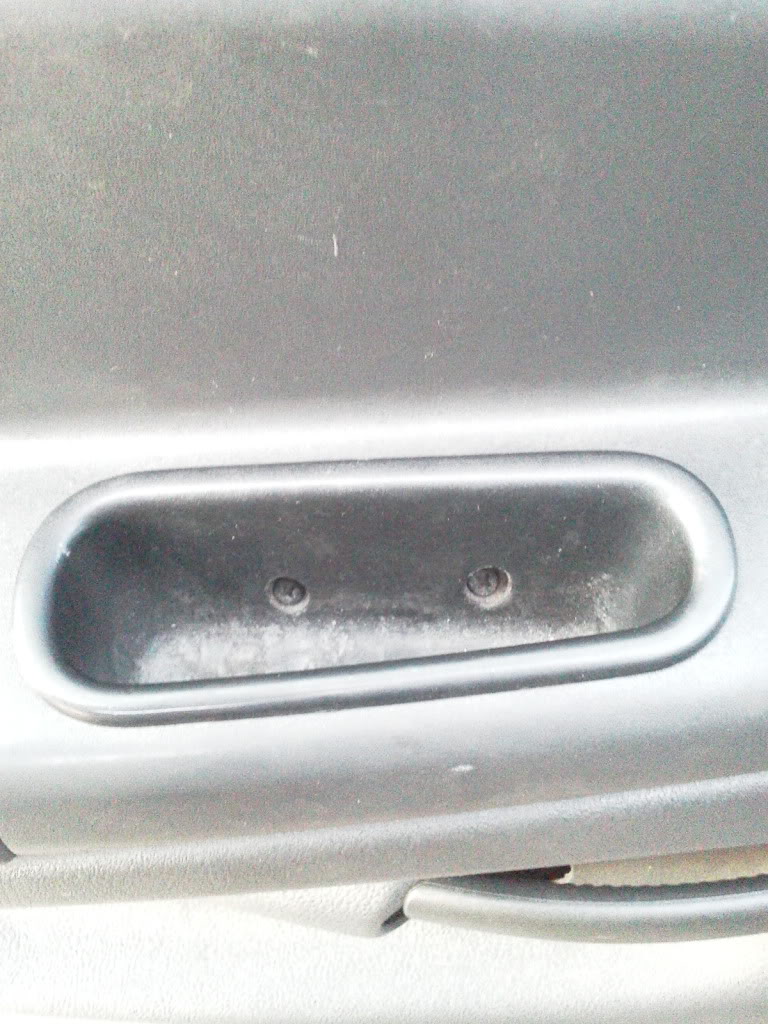
1) Remove door panel. There are 3 screws, the window crank, and a bunch of clips holding the door panel on. Remove the screws. 1 screw is at the mirror next to the window
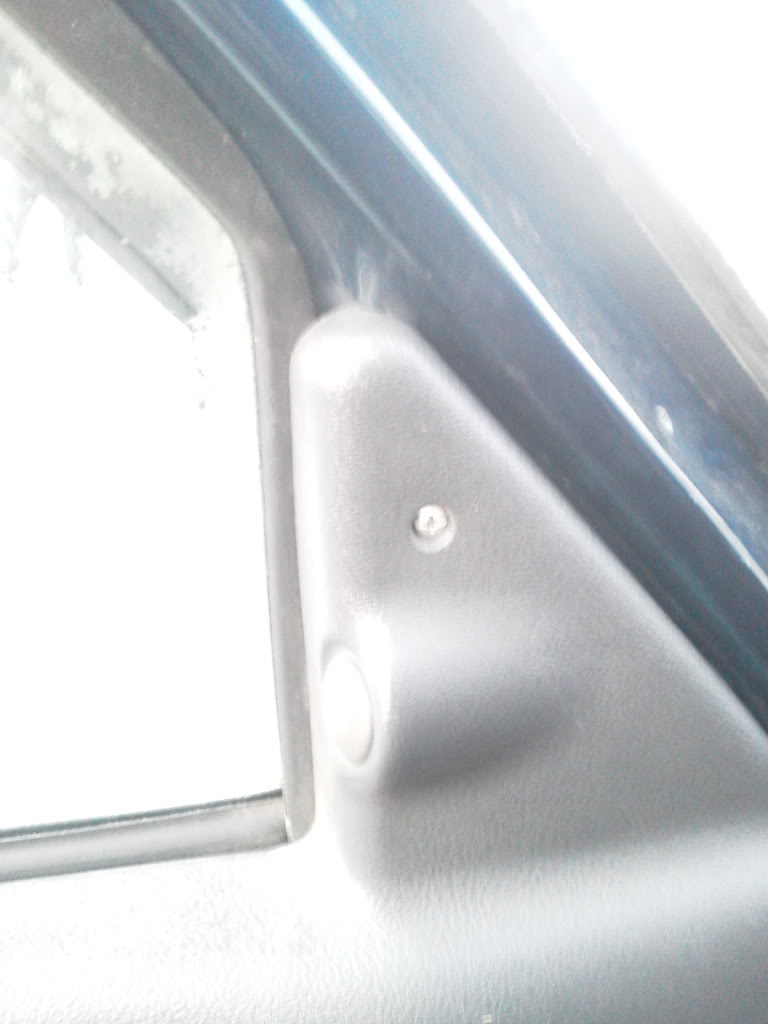 ,
,
the other 2 are in the door pull handle.
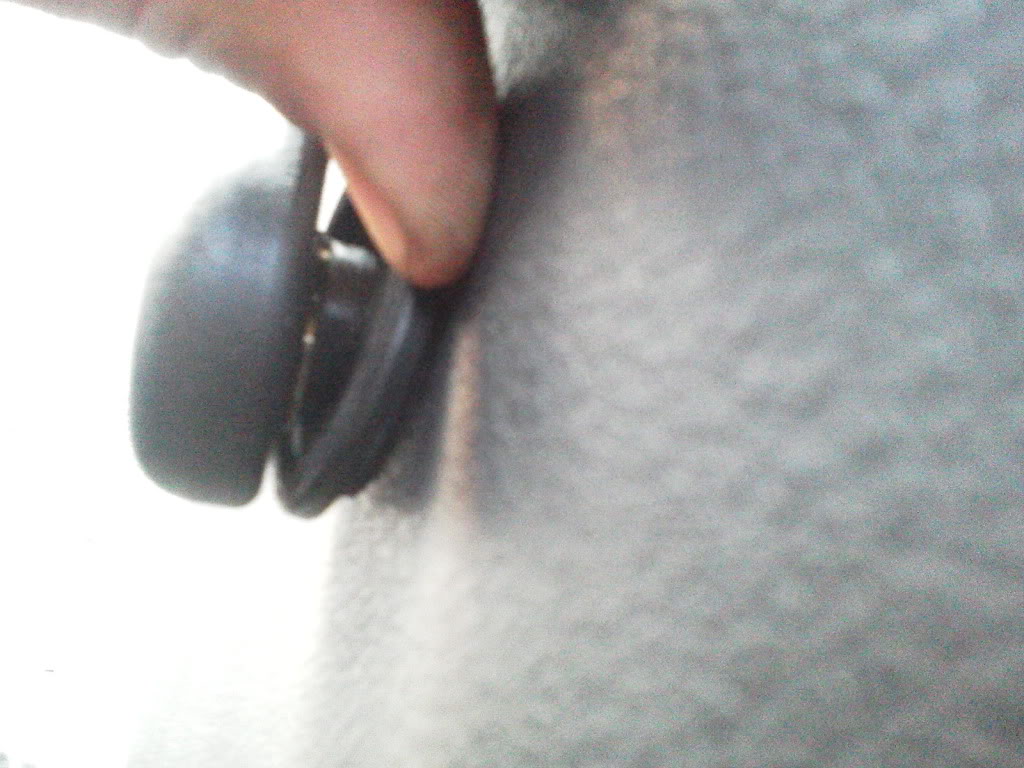
The window crank has a clip behind it where it attaches to the regulator. You can push the door panel in and look inbetween the crank handle and spacer and see the clip. I have the tool the remove the clip but didn't need it. I just used a flathead screwdriver to pop it off.
Now pull the door panel off by feeling behind it for the clips. Grab the door panel as close to the clips as possible and give a good firm yank at each clip. But not to hard or you could break the panel. Now that the panel is off, just set it aside.
2) Remove speaker, 4 screws and the harness. Pry the wire grommet from the door (in door jamb) with a flathead screwdriver (there are no clips holding it, just rubber).
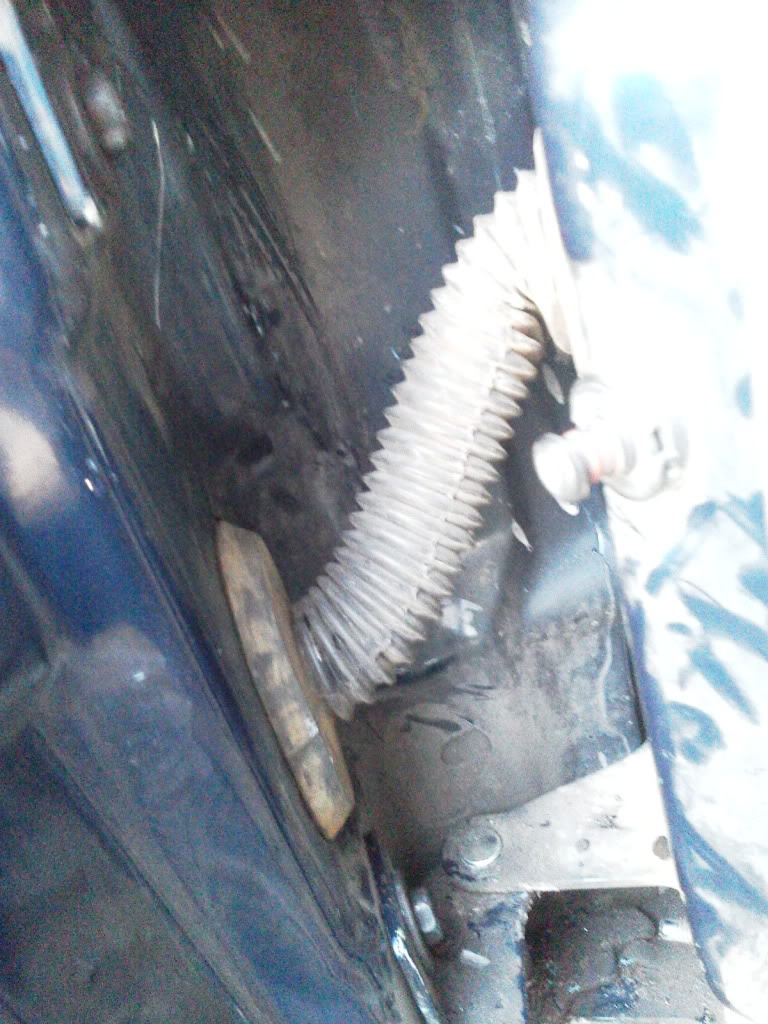
Pull speaker wires from door.
3) Remove door. MARK THE LOCATION OF DOOR TO HINGES TO HELP WITH REINSTALLATION. I did this by myself but helps if you have someone to help you. Remove the nut and bolt (14mm) from lower hinge that go into the door. Remove bolt from upper hinge (again, door side). Now you need to hold the door and remove the nut from upper hinge. Door is now free, set aside carefully.
4) Now it's time to remove the old hinge pins. They are made not to come out so you'll need some way to cut them in half and knock/pull them out. I used a sawsall to cut them and a flathead screwdriver and hammer to tap where I cut them to push them outwards and pliers to pull them the rest of the way out.
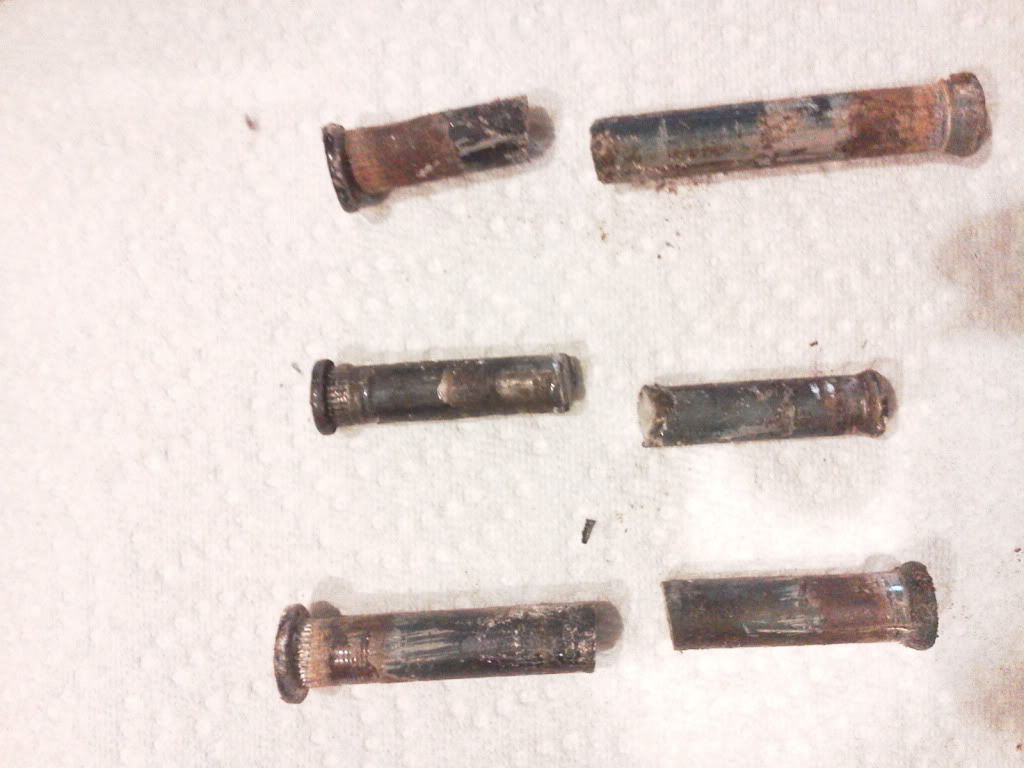
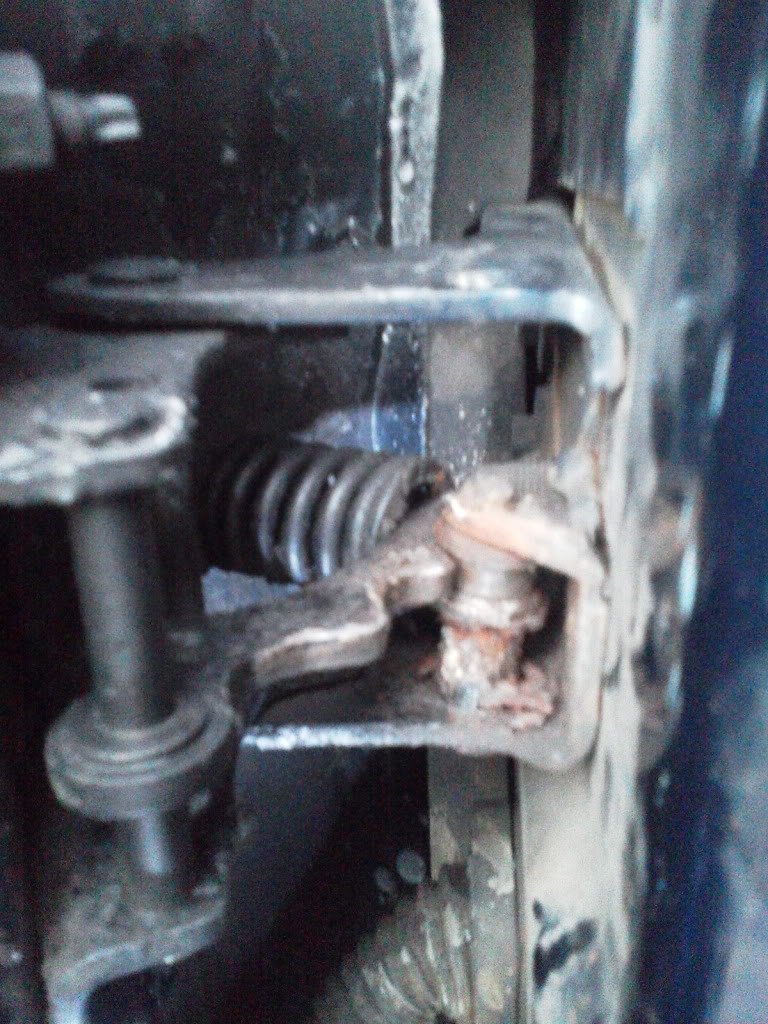
The upper hinge has a large diameter and the small diameter pins. Cut both pins in half then pry/pull/tap them out.
The smaller pin holds the arm for the door spring. There wasn't much tension on it and when you remove the pin the spring and arm will come out. If you feel safer, you can use a screwdriver or pliers or something to pull the spring before the smaller pin is removed.
Once you have them out the door side of the hinge will come off.
Remove the 2 old pin bushings from doorside hinge. I just tapped them from the inside a little then used a flathead screwdriver to pry them out.
Install the new bushings (ones with larger holes) by tapping them in with a hammer with the lip on the upper side on top and lip on lower side on bottom.
Now, the spring arm has a bushing in it also that needs to be removed. I had to grind one side, then tap and pry it out. install new bushing (small hole). I installed it with the lip on top and pressed it in with a vise and socket on the bottom to fully seat it.
5) Install upper door side hinge. Tap the large pin into place and install supplied e-clip. I put the pin in from the top and e-clip on bottom.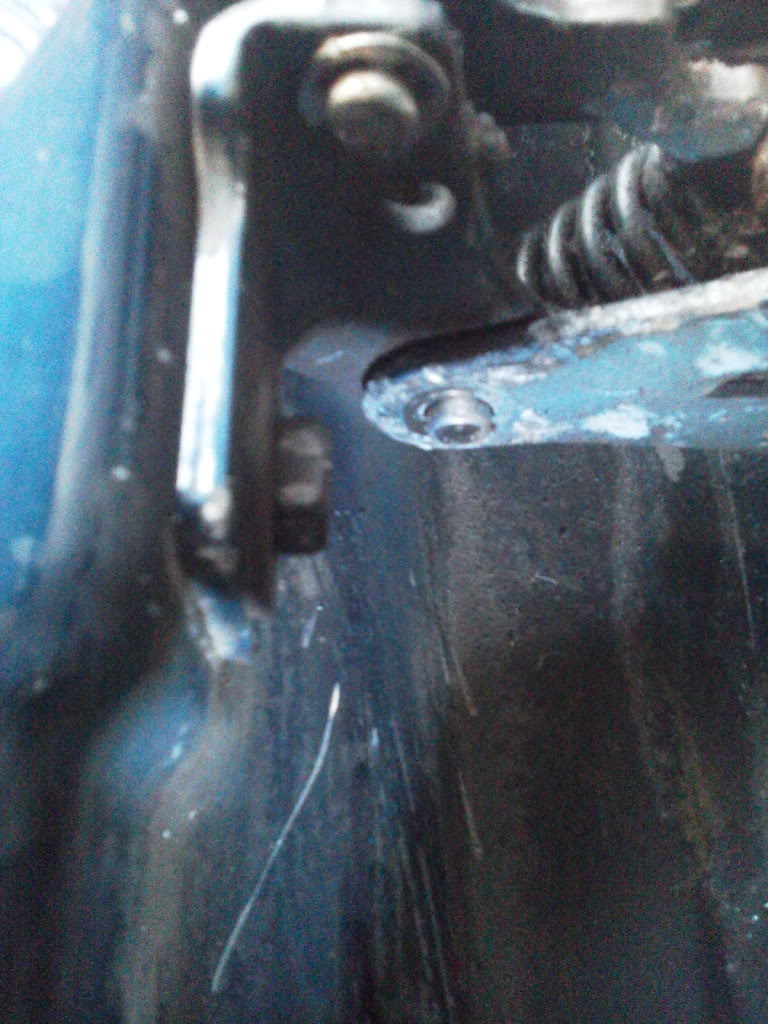
Install small pin from top through hinge then line up spring and arm to tap pin through bushing on arm. You may need to use a socket between the arm and lower side of hinge to hold the arm in place while you tap it in. Once installed, install e-clip.
6) Cut lower hinge pin and remove. Remove the bushings and install new. Tap new pin in and install e-clip.
7) Install door. While holding door up to hinges, install and snug the nut to the upper hinge.
Install the 2 bolts and other nut to hold door but don't tighten until door is aligned to where it was when removed.
Install speaker wires and grommet.
Install speaker.
Check door closing and opening to make sure it opens and shuts smoothly (the way it should).
Align door as needed.
Once door is alinged, reinstall door panel, screws and window crank.
Doing the drivers door only took me about 45-60 minutes.
Now there are obviously more wires and other steps that are not covered here if you have power locks, windows, and mirrors. Use your best judgment on the removal of these wires and the switches and such.
Here are the other links to DIY's for sagging doors. First is basically free and IMO is a bandaid (you can also slide lower hinge toward the rear of the truck to accomplish the same thing as the washers), second one is for a style of pins that are different than mine. https://dodgeforum.com/forum/2nd-gen...-door-fix.html, https://dodgeforum.com/forum/2nd-gen...-for-30-a.html.
Thought I'd give a DIY a shot.
This was done on a 2001 1500 4x4 Quad Cab with manual windows and manual locks. Sorry, no during pics. but I'll try to describe everything the best I can. Pics are after I was done to help show the what an where of things.
1) Remove door panel. There are 3 screws, the window crank, and a bunch of clips holding the door panel on. Remove the screws. 1 screw is at the mirror next to the window
, the other 2 are in the door pull handle.
The window crank has a clip behind it where it attaches to the regulator. You can push the door panel in and look inbetween the crank handle and spacer and see the clip. I have the tool the remove the clip but didn't need it. I just used a flathead screwdriver to pop it off.
Now pull the door panel off by feeling behind it for the clips. Grab the door panel as close to the clips as possible and give a good firm yank at each clip. But not to hard or you could break the panel. Now that the panel is off, just set it aside.
2) Remove speaker, 4 screws and the harness. Pry the wire grommet from the door (in door jamb) with a flathead screwdriver (there are no clips holding it, just rubber).
Pull speaker wires from door.
3) Remove door. MARK THE LOCATION OF DOOR TO HINGES TO HELP WITH REINSTALLATION. I did this by myself but helps if you have someone to help you. Remove the nut and bolt (14mm) from lower hinge that go into the door. Remove bolt from upper hinge (again, door side). Now you need to hold the door and remove the nut from upper hinge. Door is now free, set aside carefully.
4) Now it's time to remove the old hinge pins. They are made not to come out so you'll need some way to cut them in half and knock/pull them out. I used a sawsall to cut them and a flathead screwdriver and hammer to tap where I cut them to push them outwards and pliers to pull them the rest of the way out.
The upper hinge has a large diameter and the small diameter pins. Cut both pins in half then pry/pull/tap them out.
The smaller pin holds the arm for the door spring. There wasn't much tension on it and when you remove the pin the spring and arm will come out. If you feel safer, you can use a screwdriver or pliers or something to pull the spring before the smaller pin is removed.
Once you have them out the door side of the hinge will come off.
Remove the 2 old pin bushings from doorside hinge. I just tapped them from the inside a little then used a flathead screwdriver to pry them out.
Install the new bushings (ones with larger holes) by tapping them in with a hammer with the lip on the upper side on top and lip on lower side on bottom.
Now, the spring arm has a bushing in it also that needs to be removed. I had to grind one side, then tap and pry it out. install new bushing (small hole). I installed it with the lip on top and pressed it in with a vise and socket on the bottom to fully seat it.
5) Install upper door side hinge. Tap the large pin into place and install supplied e-clip. I put the pin in from the top and e-clip on bottom.
Install small pin from top through hinge then line up spring and arm to tap pin through bushing on arm. You may need to use a socket between the arm and lower side of hinge to hold the arm in place while you tap it in. Once installed, install e-clip.
6) Cut lower hinge pin and remove. Remove the bushings and install new. Tap new pin in and install e-clip.
7) Install door. While holding door up to hinges, install and snug the nut to the upper hinge.
Install the 2 bolts and other nut to hold door but don't tighten until door is aligned to where it was when removed.
Install speaker wires and grommet.
Install speaker.
Check door closing and opening to make sure it opens and shuts smoothly (the way it should).
Align door as needed.
Once door is alinged, reinstall door panel, screws and window crank.
Doing the drivers door only took me about 45-60 minutes.
Now there are obviously more wires and other steps that are not covered here if you have power locks, windows, and mirrors. Use your best judgment on the removal of these wires and the switches and such.