

Replacing the A/C compressor


Thread Starter
|
Captain
Joined: Jun 2010
Posts: 556
Likes: 2
From: San Antonio,Texas
Finally fixed the A/C over the July fourth weekend. The job is way less scarey than I thought.
Just a few tools and the right steps, thanks to the FSM and DF for being on.
Remove neg. battery cable and isolate .
Remove air filter assembly.
updatedcamerapics21181.jpg?t=1373390871
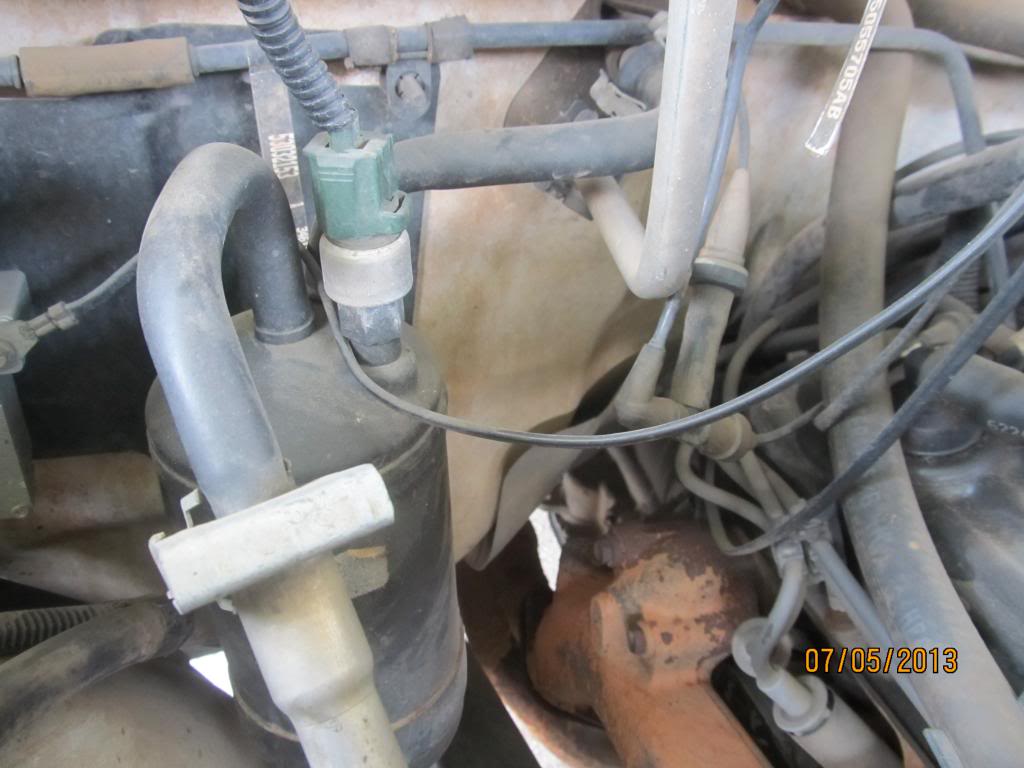
Recover freon from system, connectors don't come off very easily under pressure.
Remove connector for pressure switch, then unscrew switch from accumulator.
You should replaced the accum. also. Its where all the trash goes from the system
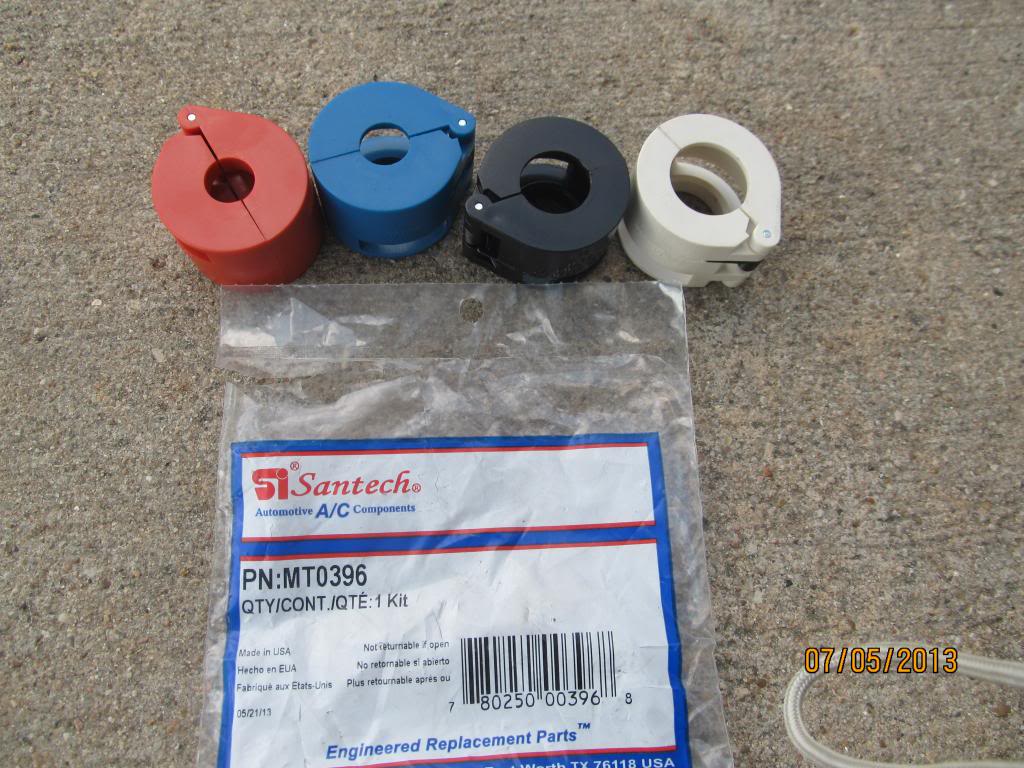
You will need some special disconnect tools.
I picked this set up at the A/C shop where I was getting supplies.
I think there may be one for the fuel line in there so its not that bad.
Remove the keeper cages around the hose union
The disconnects are kind of tricky, find the right sized one , open it up with the collar on the male pipe and close it around the pipe.Push up and it will pop when it releases the spring.
Don't worry the spring will not pop out.
Now you can pull the pipes apart, then remove the tool.
Did it come apart? Maybe try again, some are hard to start, cleaning the joint or pen oil may be needed.
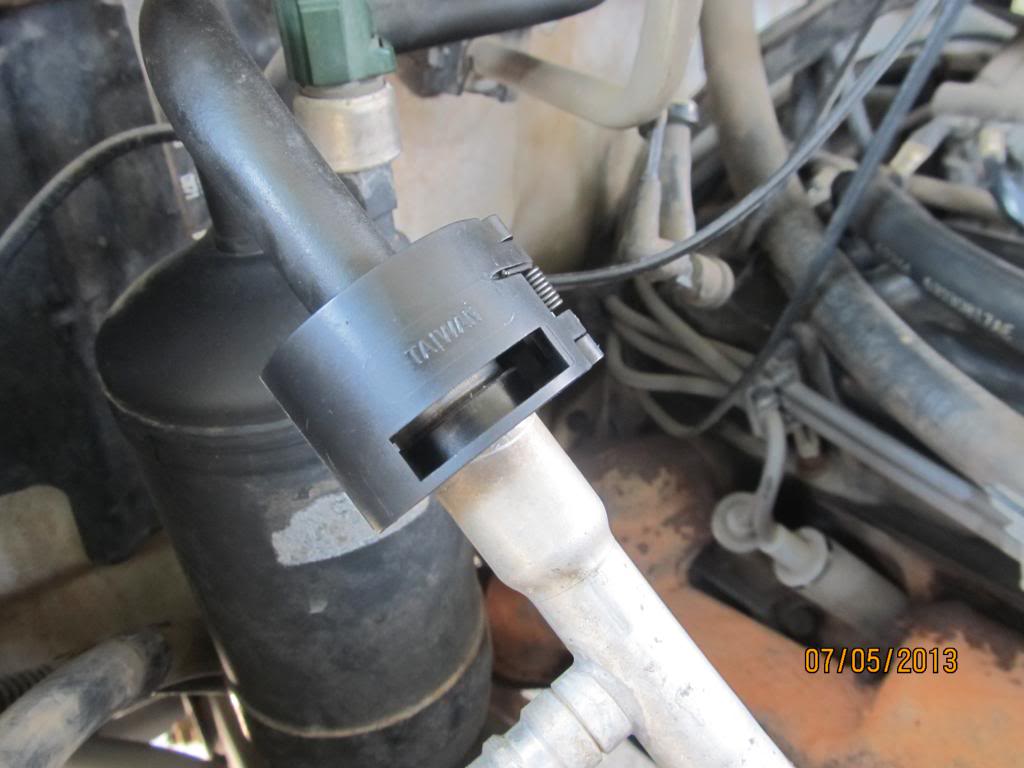
That was the hardest part for me so it came first.
Now the easy stuff. Remove the serpentine belt . A 5/8 box wrench on the middle bolt of the idler pulley. simple.
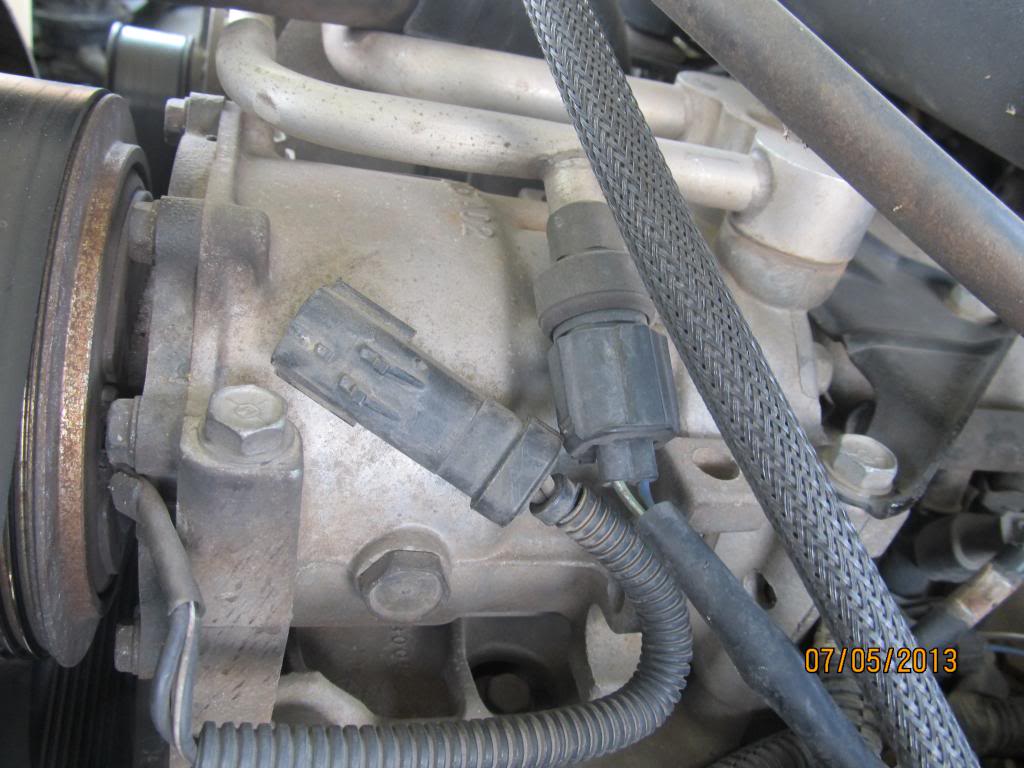
Disconnect the two plugs near the compressor. One is the supply voltage and one is the high pressure switch.
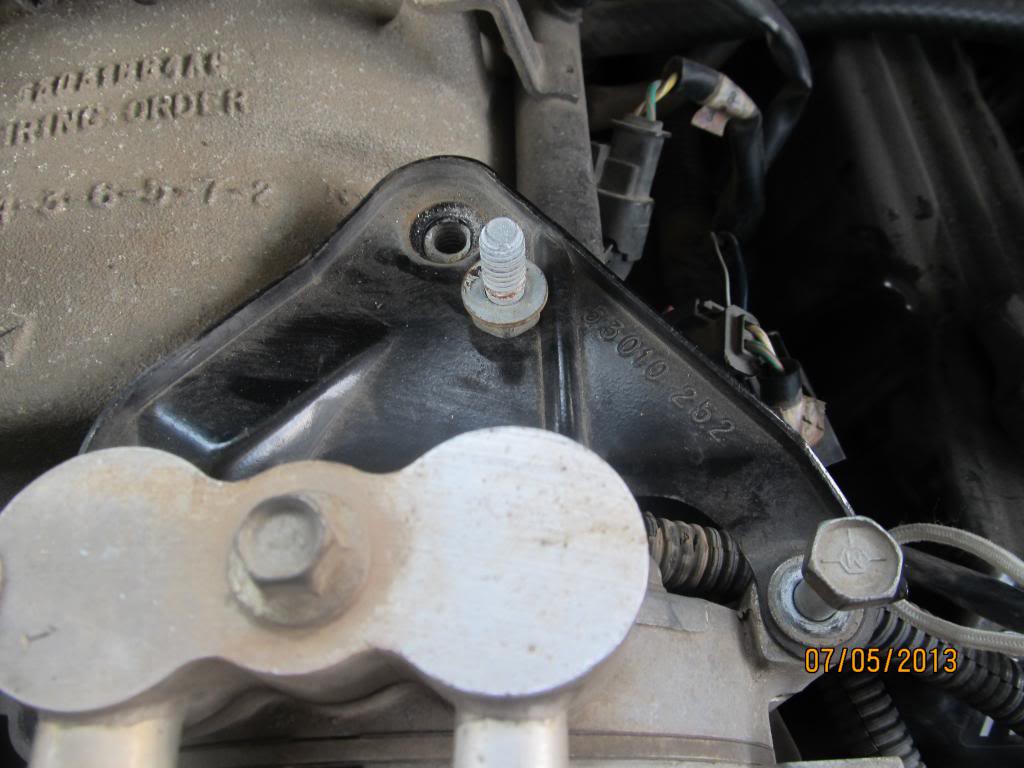
Four long bolts and a bracket with one short one in the back hold the compressor down.
The only thing left is that bolt in the middle of the pipe manifold. 10mm I think.
Compressor can now be wrangled out past the upper rad hose.
When its out, look down at your bypass hose and hose standoff on block.
Now is a good time, when stuff is uncovered, to make other repairs.That is why my jobs take longer than expected. But do it once and do it right has always worked for me.
Okay, I would like to make a joke and say " installation is opposite of removal ", but that is not always true.
Your new compressor will need oil and gaskets.
How much oil will depend on how much you can pour out of your old 1.
Get something to measure ozs. and drain the old compressor.
Do the same for the accum. Add those amounts to the new parts.
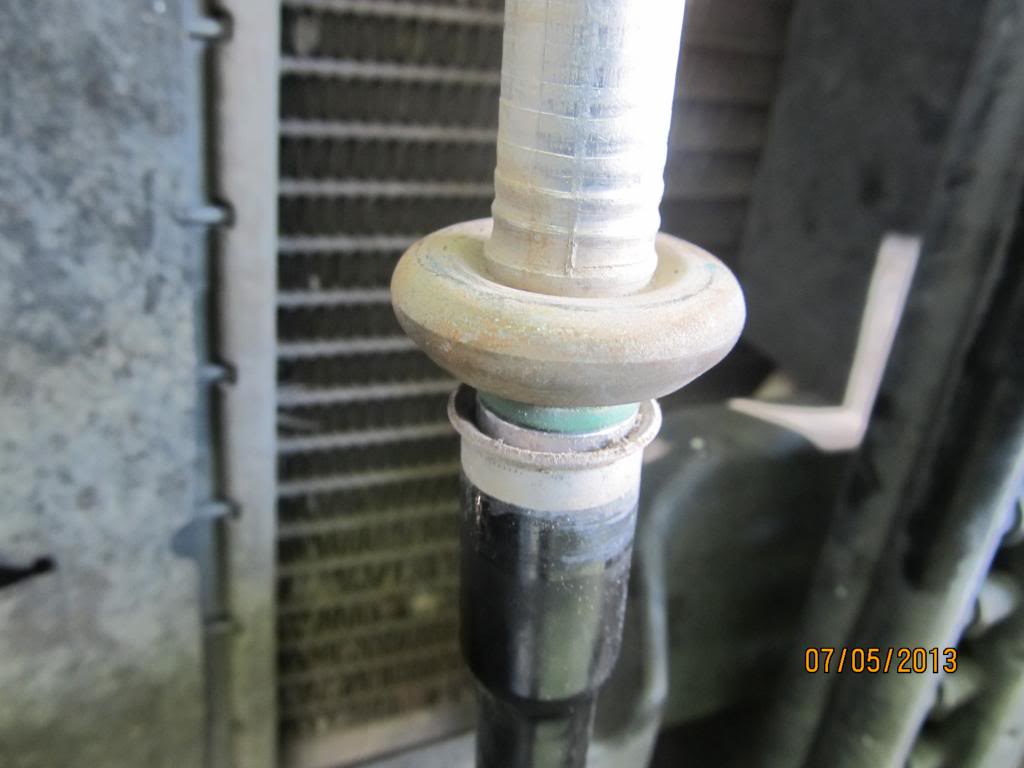
The gaskets for the manifold to compressor are crush type and you should only tighten the bolt to 200 in. lbs
I put anti sieze on the hold down bolts and torqued them to 200 also.
Snap the lines together for the accum. and we are almost done.
Now you will need to pull vacuum on the system and check your work for leaks.
Most shops will do that AND set a charge of freon in there for not too much. Two pounds of freon at $15 , maybe around fifty or sixty bucks .
Or befriend someone with a pump and set of gauges, maybe they would help you with the whole project. Forum members are everywhere.
My system works good now, but I had none before so that is like asking a starving man how his bologna sandwich tastes. ha ha.
I hope this helps somebody.
Just a few tools and the right steps, thanks to the FSM and DF for being on.
Remove neg. battery cable and isolate .
Remove air filter assembly.
updatedcamerapics21181.jpg?t=1373390871
Recover freon from system, connectors don't come off very easily under pressure.
Remove connector for pressure switch, then unscrew switch from accumulator.
You should replaced the accum. also. Its where all the trash goes from the system
You will need some special disconnect tools.
I picked this set up at the A/C shop where I was getting supplies.
I think there may be one for the fuel line in there so its not that bad.
Remove the keeper cages around the hose union
The disconnects are kind of tricky, find the right sized one , open it up with the collar on the male pipe and close it around the pipe.Push up and it will pop when it releases the spring.
Don't worry the spring will not pop out.
Now you can pull the pipes apart, then remove the tool.
Did it come apart? Maybe try again, some are hard to start, cleaning the joint or pen oil may be needed.
That was the hardest part for me so it came first.
Now the easy stuff. Remove the serpentine belt . A 5/8 box wrench on the middle bolt of the idler pulley. simple.
Disconnect the two plugs near the compressor. One is the supply voltage and one is the high pressure switch.
Four long bolts and a bracket with one short one in the back hold the compressor down.
The only thing left is that bolt in the middle of the pipe manifold. 10mm I think.
Compressor can now be wrangled out past the upper rad hose.
When its out, look down at your bypass hose and hose standoff on block.
Now is a good time, when stuff is uncovered, to make other repairs.That is why my jobs take longer than expected. But do it once and do it right has always worked for me.
Okay, I would like to make a joke and say " installation is opposite of removal ", but that is not always true.
Your new compressor will need oil and gaskets.
How much oil will depend on how much you can pour out of your old 1.
Get something to measure ozs. and drain the old compressor.
Do the same for the accum. Add those amounts to the new parts.
The gaskets for the manifold to compressor are crush type and you should only tighten the bolt to 200 in. lbs
I put anti sieze on the hold down bolts and torqued them to 200 also.
Snap the lines together for the accum. and we are almost done.
Now you will need to pull vacuum on the system and check your work for leaks.
Most shops will do that AND set a charge of freon in there for not too much. Two pounds of freon at $15 , maybe around fifty or sixty bucks .
Or befriend someone with a pump and set of gauges, maybe they would help you with the whole project. Forum members are everywhere.
My system works good now, but I had none before so that is like asking a starving man how his bologna sandwich tastes. ha ha.
I hope this helps somebody.