


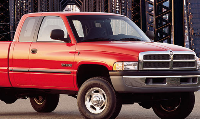
replacing headliner


Thread Starter
|
Registered User

Joined: Sep 2007
Posts: 21
Likes: 0
From: Millersville pa
 replacing headliner
I`m new to this forum but not to owning a dodge !
my question is,
on a 97 slt ccab 1500 4x4
the headliner fabric is sagging starting at the windshield.
the question is
do i have to remove the seats to get the headliner out the door ?
my question is,
on a 97 slt ccab 1500 4x4
the headliner fabric is sagging starting at the windshield.
the question is
do i have to remove the seats to get the headliner out the door ?


Joined: Aug 2007
Posts: 9
Likes: 0
From:
RE: replacing headliner
My Ram regular cab had the same problem, with the headliner looking pretty nasty. I'd suggest you look for something like 3M General Trim Adhesive 08088. The Liquid Stitch that motorbrreath suggested may be similar, but I'd be careful using anything not made specifically for high temperatures in a vehicle sitting in the sun. That 3M adhesive is specifically for automotive use, and mentions "for bonding many automotive materials including carpeting, jute pads... lightweight headliners..." It's not all that hard to find, just run to AutoZone Advance Auto Parts or some place like that. An 18 oz can will set you back $10-12 maybe.
In my case, the headliner was so deteriorated, it took a bit more than simply spraying some glue. I actually went to JoAnn Fabrics as they sell headliner material (hard to believe, huh?) It comes with foam backing so it's ready made for replacing car headliners. I bought about 2 yards just to be safe.
I removed the sun visors, the overhead console, and the A and B pillar trim pieces and was able to wiggle the old piece out. I removed the old, worn out headliner by peeling it away.
I cleaned all the old foam junk off the structure of the old headliner and layed it out on the garage floor. Then I layed the new headliner material on top of the headliner structure, just as a visual "dry fit" and to make sure I had enough.
Once I was sure I had enough, I glued the new headliner material down using the same approach you use to applying vinyl decals. I lifted one half of the material up and layed it back down on the other side of the headliner structure. I sprayed adhesive on the exposed half of the headliner structure, and let it tack for a couple minutes. I then slowly rolled the headliner material back onto that half of the headliner structure, using my hands to press it down as I went. Thishelps to ensure you have good contact the whole way. I did NOT try to stretch the material much as I went.
Once I had the first half attached, I rolled back the other half and repeated the procedure on the other half.
With the square sheet of material all attached, it then came down to trimming the edges, folding over, and using the adhesive to stick it. It was a bit of a chore, but it worked well. The new headliner looks like it came from the factory. And I should mention it has survived a summer of 100+ degree temperatures here in South Carolina (and that's outside temperature, not the furnace-like temperatures you find in the cab while it's sitting outside).
In my case, the headliner was so deteriorated, it took a bit more than simply spraying some glue. I actually went to JoAnn Fabrics as they sell headliner material (hard to believe, huh?) It comes with foam backing so it's ready made for replacing car headliners. I bought about 2 yards just to be safe.
I removed the sun visors, the overhead console, and the A and B pillar trim pieces and was able to wiggle the old piece out. I removed the old, worn out headliner by peeling it away.
I cleaned all the old foam junk off the structure of the old headliner and layed it out on the garage floor. Then I layed the new headliner material on top of the headliner structure, just as a visual "dry fit" and to make sure I had enough.
Once I was sure I had enough, I glued the new headliner material down using the same approach you use to applying vinyl decals. I lifted one half of the material up and layed it back down on the other side of the headliner structure. I sprayed adhesive on the exposed half of the headliner structure, and let it tack for a couple minutes. I then slowly rolled the headliner material back onto that half of the headliner structure, using my hands to press it down as I went. Thishelps to ensure you have good contact the whole way. I did NOT try to stretch the material much as I went.
Once I had the first half attached, I rolled back the other half and repeated the procedure on the other half.
With the square sheet of material all attached, it then came down to trimming the edges, folding over, and using the adhesive to stick it. It was a bit of a chore, but it worked well. The new headliner looks like it came from the factory. And I should mention it has survived a summer of 100+ degree temperatures here in South Carolina (and that's outside temperature, not the furnace-like temperatures you find in the cab while it's sitting outside).
