

Towing Mirror Upgrade How To


Thread Starter
|
Professional
Joined: Jul 2007
Posts: 125
Likes: 0
From:
For all you out there who don't like those tiny stock mirrorshere is the perfect solution, no ugly addons to your mirrors, and you can even keep those stock features! (Of course this only applies to those who have the non-towing mirror option...)
First off, this was perfromed on a 2003 2500, so there might be some differences with your truck, check out the manual for your truck in the FAQ section.
What you need:
Towing mirrors (I went with stock towing mirrors from ebay, that fits the 3rd gen body style)
Philips Screwdriver
10mm box end wrench
Ratchet and 10mm socket
First start off by finding your mirrors... if you can't do this then just stop here, and take it to the shop!

Roll down the window so you can get to the mirror for supporting while removing nuts
Unbolt the onenut that isn't covered up.

Next remove the screw that holds the plastic access panel on.

The panel will not come out (or at least I didn't try and break it) but you can get to everything with relative ease.
Take out the topnut (the one you can see)
Now disconnect the electrical connector (you probably ought to disconnect the battery.... blah...blah... I was listening to music while doing this...)

The release button was on the top on the drivers side, and on the bottom on the passenger side on my truck (no promisses, but they should be top or bottom).
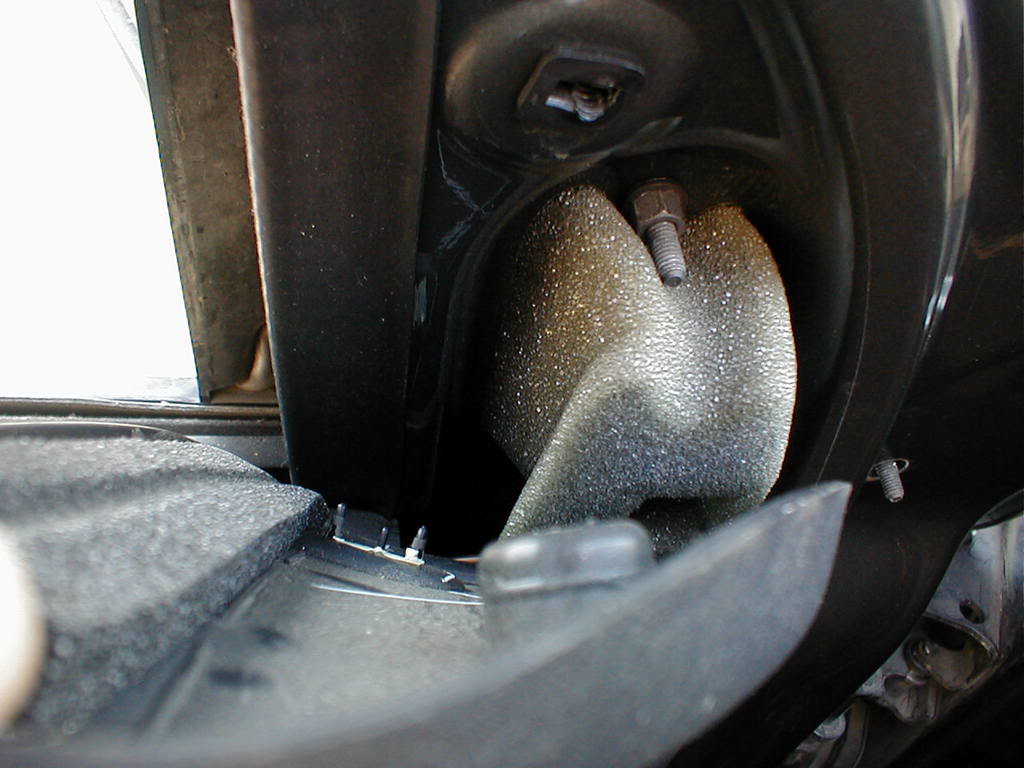
Now the hardest one: There is anut on the bottom of the foam... (I didn't remove that foam, but it might make it easier to see or get to)
This is where the box end wrench comes in handy.

Be VERY CAREFUL not to drop that nut!!! If you do then you will have to take door panel off...
Now taking the mirror off is a bit of a trick, you need to unclip the electrical connector from the door panel. On the inside there are tabs on both sides of the electrical connector to push in to allow the mirror to come out.
Also if you have visors on your windows like I do you will have to work it a little more to get the mirror past those things.
Now install the Towing mirror, reverse of removal, but remember DO NOT DROP THOSE NUTS IN THE DOOR!!!!
Oh and test out the mirror (power and heating to make sure you got a good mirror)
Repeat for other side.
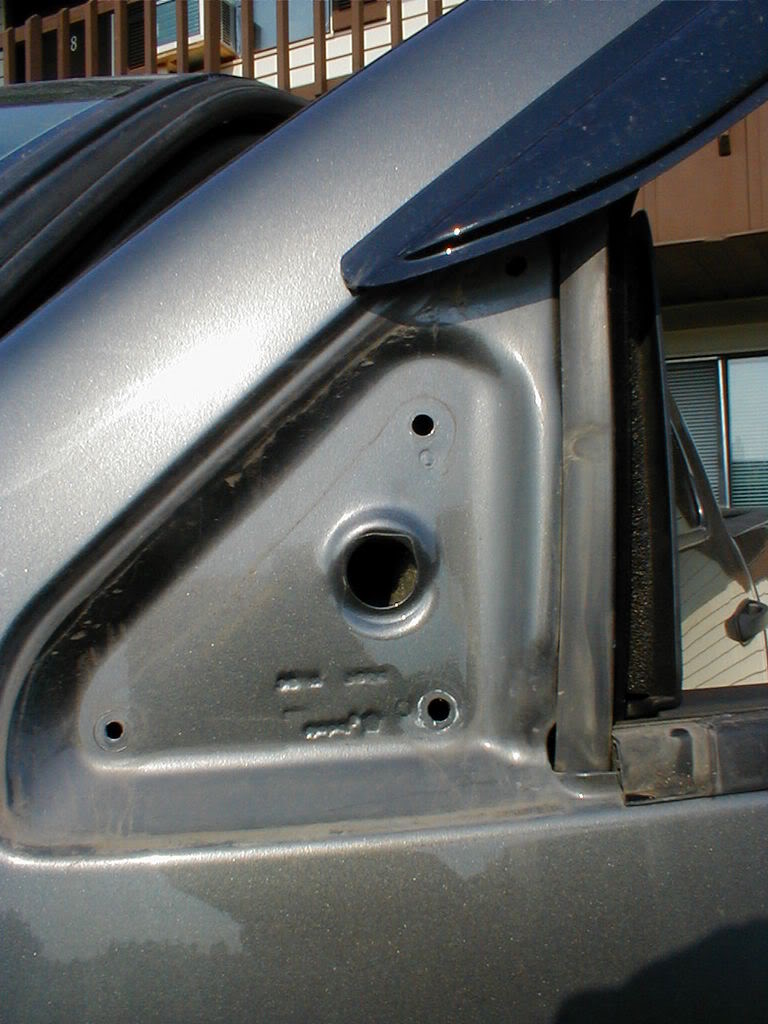
Before

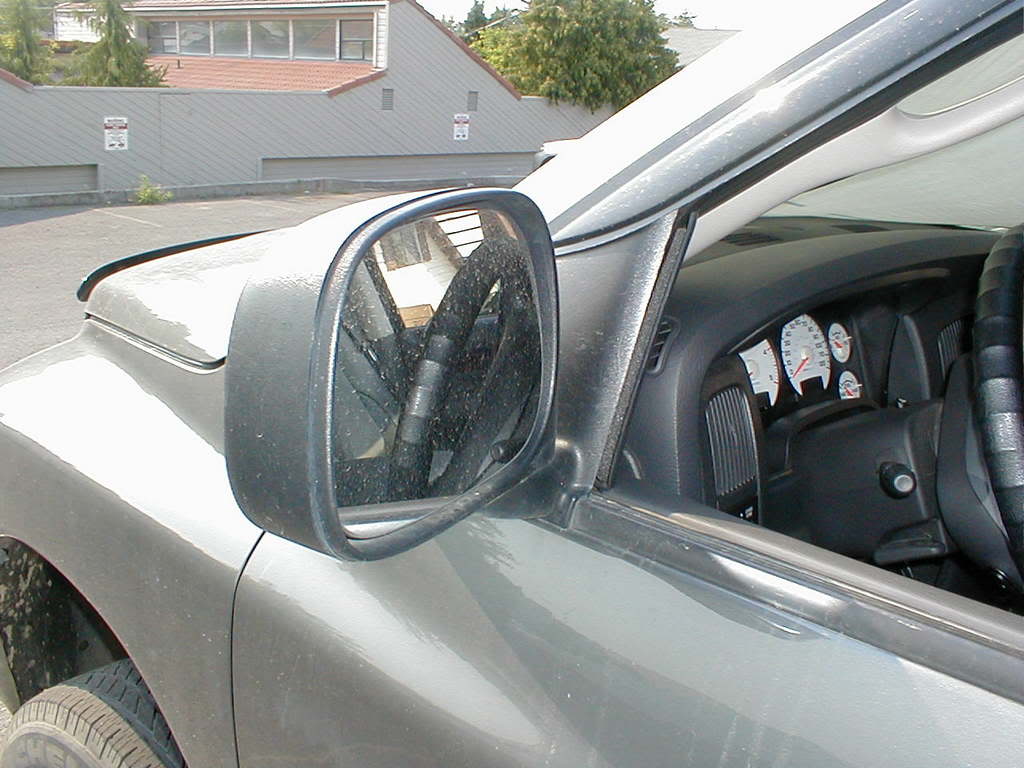
After
Sit back and admire the difference!
This took me approximately 20min. Also some notes on questions I had about this before I did it: The stock mirror is a direct connection, no modifications needed, also the stock power and heating will work, if you had them before. The towing mirrors are flipped out by hand, so no switch needed for that. The "bubble" in the corner is VERY useful for towing (or daily driving)to see things in your blind spot, but isn't perfect so always double and tripple check!
Hope this helps anyone else, or gives someone the idea of doing this instead of adding to those tiny stock non-towing mirrors.
First off, this was perfromed on a 2003 2500, so there might be some differences with your truck, check out the manual for your truck in the FAQ section.
What you need:
Towing mirrors (I went with stock towing mirrors from ebay, that fits the 3rd gen body style)
Philips Screwdriver
10mm box end wrench
Ratchet and 10mm socket
First start off by finding your mirrors... if you can't do this then just stop here, and take it to the shop!
Roll down the window so you can get to the mirror for supporting while removing nuts
Unbolt the onenut that isn't covered up.
Next remove the screw that holds the plastic access panel on.
The panel will not come out (or at least I didn't try and break it) but you can get to everything with relative ease.
Take out the topnut (the one you can see)
Now disconnect the electrical connector (you probably ought to disconnect the battery.... blah...blah... I was listening to music while doing this...)
The release button was on the top on the drivers side, and on the bottom on the passenger side on my truck (no promisses, but they should be top or bottom).
Now the hardest one: There is anut on the bottom of the foam... (I didn't remove that foam, but it might make it easier to see or get to)
This is where the box end wrench comes in handy.
Be VERY CAREFUL not to drop that nut!!! If you do then you will have to take door panel off...
Now taking the mirror off is a bit of a trick, you need to unclip the electrical connector from the door panel. On the inside there are tabs on both sides of the electrical connector to push in to allow the mirror to come out.
Also if you have visors on your windows like I do you will have to work it a little more to get the mirror past those things.
Now install the Towing mirror, reverse of removal, but remember DO NOT DROP THOSE NUTS IN THE DOOR!!!!
Oh and test out the mirror (power and heating to make sure you got a good mirror)
Repeat for other side.
Before
After
Sit back and admire the difference!
This took me approximately 20min. Also some notes on questions I had about this before I did it: The stock mirror is a direct connection, no modifications needed, also the stock power and heating will work, if you had them before. The towing mirrors are flipped out by hand, so no switch needed for that. The "bubble" in the corner is VERY useful for towing (or daily driving)to see things in your blind spot, but isn't perfect so always double and tripple check!
Hope this helps anyone else, or gives someone the idea of doing this instead of adding to those tiny stock non-towing mirrors.