

HID Conversion DIY


Thread Starter
|
All Star
Joined: Jan 2010
Posts: 824
Likes: 1
From: Alberta
So I realized that we did not have a DIY for HID conversions so while I was doing mine I created one.
First, I will start off by saying I replaced the highs and lows, fogs are coming but those are an easy installation (plug and play)
I bought both of my kits from HID extra, high beam are 9005, low beams are H11, and fogs are H10s.
Headlight Removal
First start off by opening the hood and removing the radiator cover by pulling the tabs.
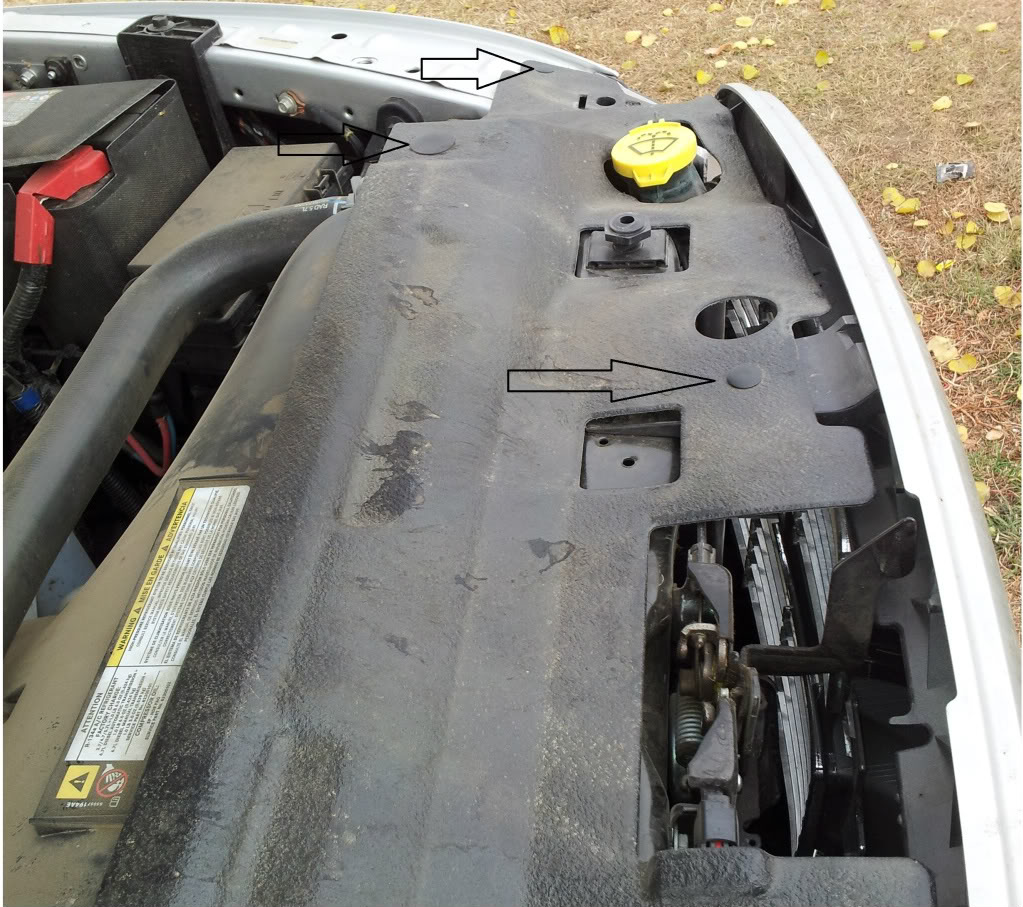
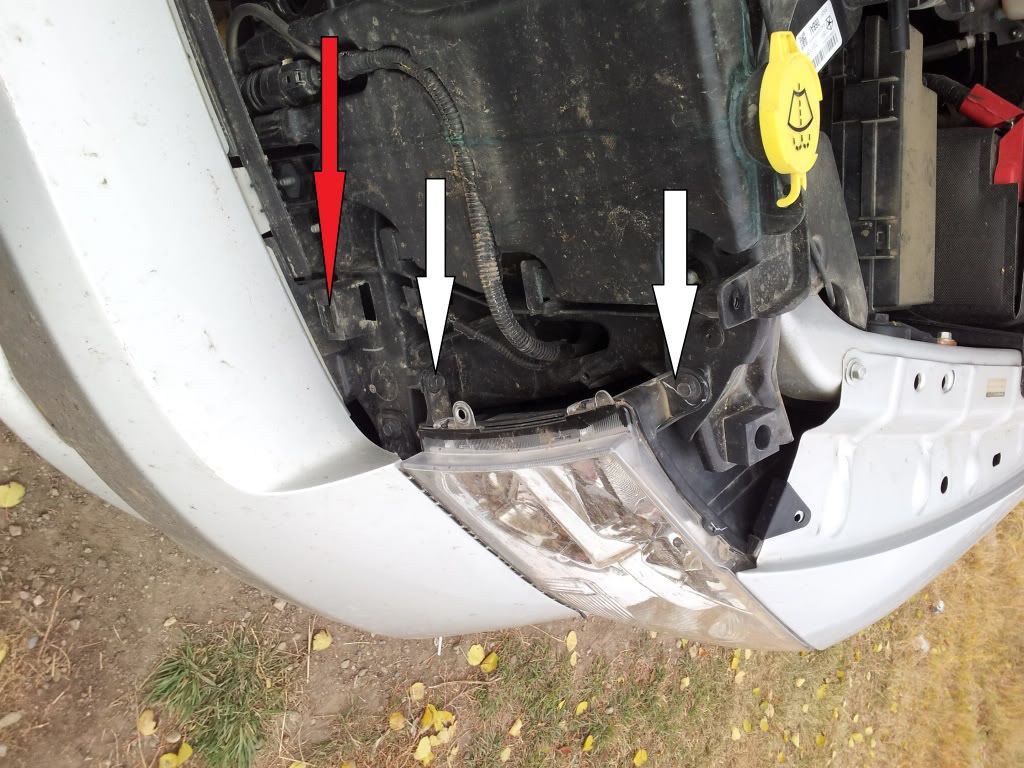
Next pull the bolts (4) out of the top, the grill just slides forward off two tabs on the side. You might have to get in there with a screwdriver to pry them loose but I did no problem. The next photo shows it better once the grill is removed. (red arrow)

Remove the two bolts to the headlight
Now in order to pop the headlight out, you have to push up (or pull down cant remember exactly) on a little white tab at the back. In order to do this you have to open the little cover in the wheel well.
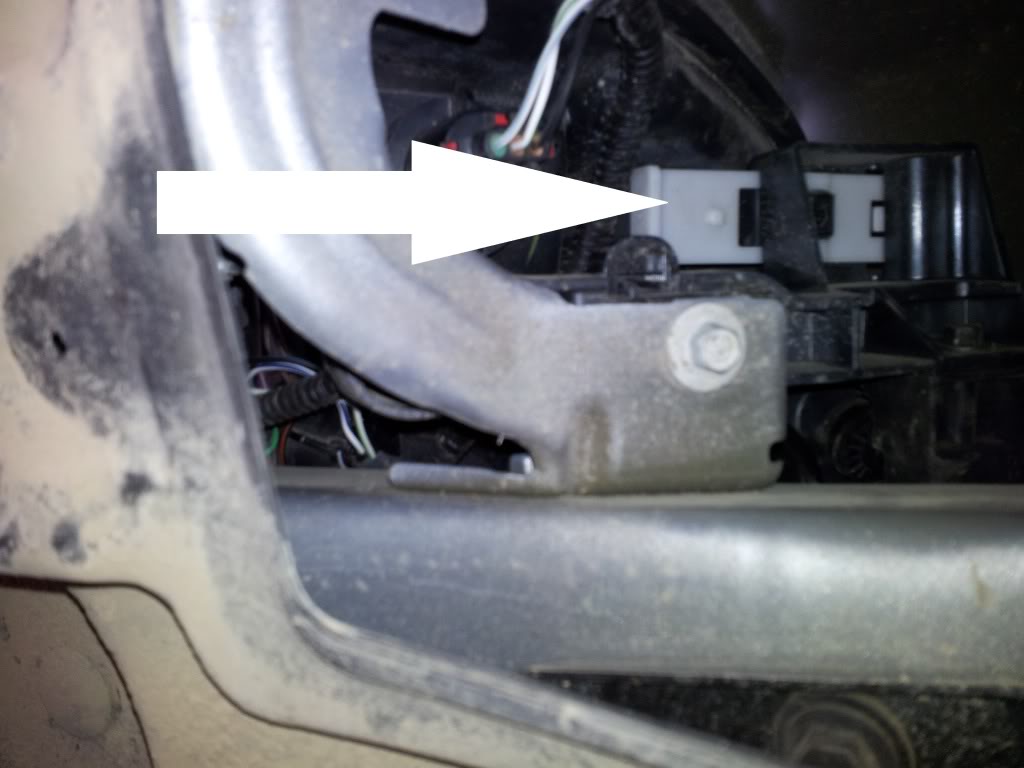
The headlight should just pull out now.
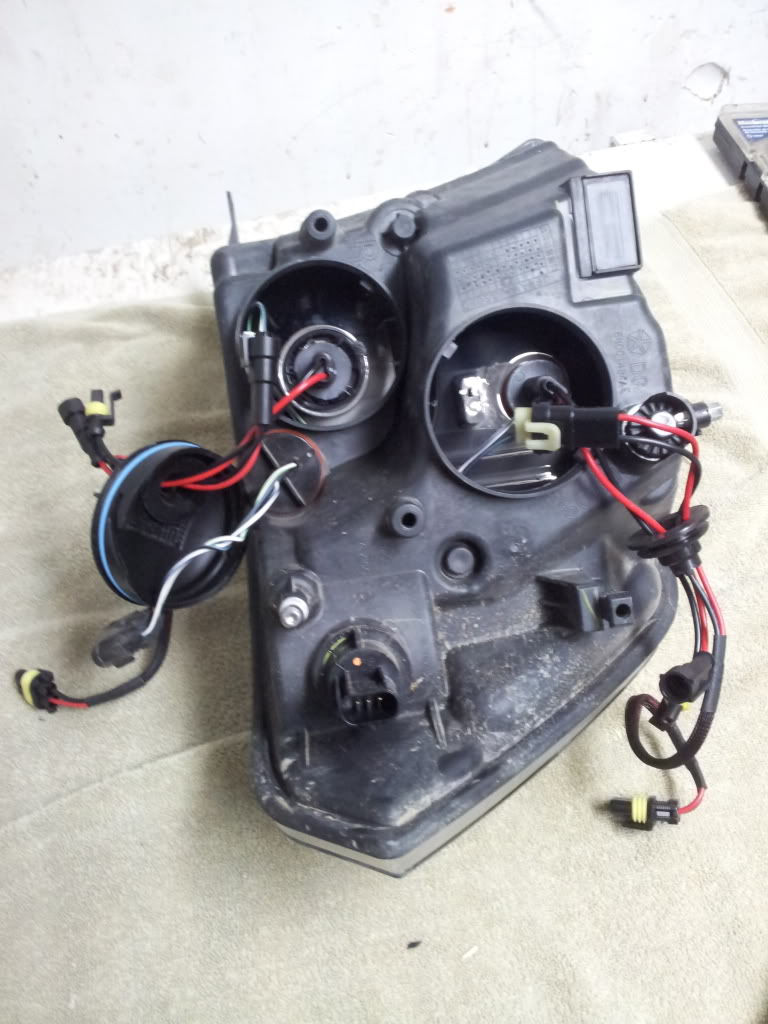
Next comes the wiring. With HID Extra their kits were perfect. Basically you pop the old bulb out. Use the existing wiring harness and run that to the ballast. Then from the ballast to the bulb. There is no relay harness that you need like on the older 3rd Gens, however with this headlight there is no place to mount the ballasts in the housing or attach them to the headlight. Also you will need to run wires through the existing housing. I just went through the access door, that way if I screwed up I just just replace the door not the whole housing. With HID extras kit it came with a nice waterproof seal that had the appropriate wires running to and from. HID extra gave me some capacitors, I did not know if they were nessesary on the 2011s but I put them in anyways.
What I also tried to do was keep the reds and the +s (labled on the side of the ballasts) together. That way things are easier to track if the light does not come on. Polarity does matter. Other then that everything is just plug and play.
*NOTE* I get no error codes on the headlights, but I do get a low tire pressure error every now and then. But it goes out after 5-10 secs.

After that just stick the ballasts in only space available haha and tie them up, and pop the headlight in.
You will see a relay setup for some LEDs that I wired but that is not part of this DIY...

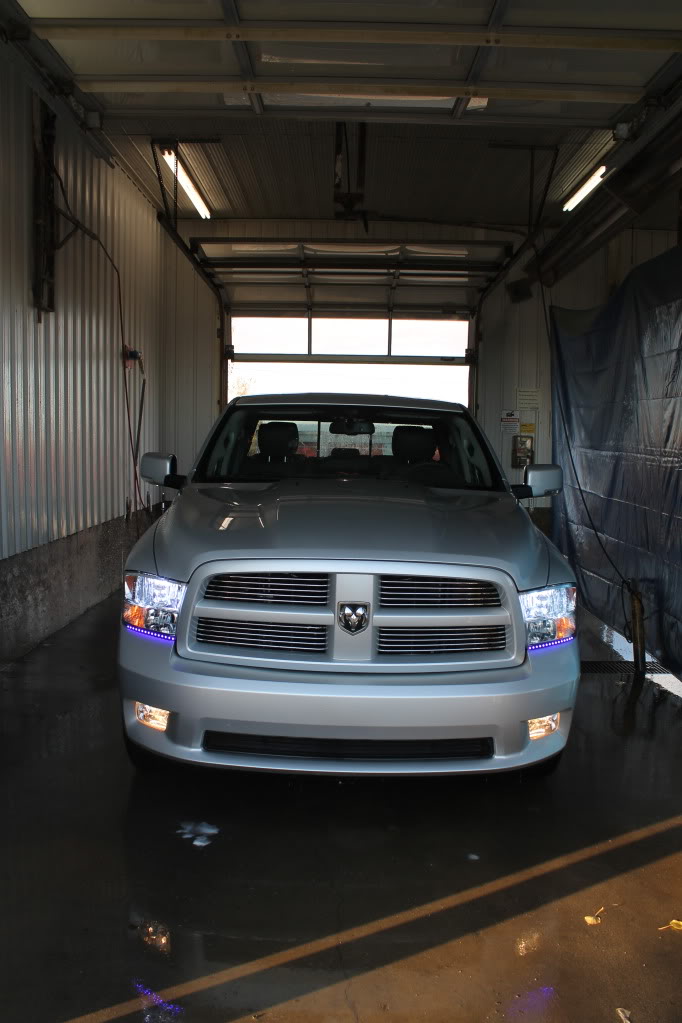
And VOILA!
First, I will start off by saying I replaced the highs and lows, fogs are coming but those are an easy installation (plug and play)
I bought both of my kits from HID extra, high beam are 9005, low beams are H11, and fogs are H10s.
Headlight Removal
First start off by opening the hood and removing the radiator cover by pulling the tabs.
Next pull the bolts (4) out of the top, the grill just slides forward off two tabs on the side. You might have to get in there with a screwdriver to pry them loose but I did no problem. The next photo shows it better once the grill is removed. (red arrow)
Remove the two bolts to the headlight
Now in order to pop the headlight out, you have to push up (or pull down cant remember exactly) on a little white tab at the back. In order to do this you have to open the little cover in the wheel well.
The headlight should just pull out now.
Next comes the wiring. With HID Extra their kits were perfect. Basically you pop the old bulb out. Use the existing wiring harness and run that to the ballast. Then from the ballast to the bulb. There is no relay harness that you need like on the older 3rd Gens, however with this headlight there is no place to mount the ballasts in the housing or attach them to the headlight. Also you will need to run wires through the existing housing. I just went through the access door, that way if I screwed up I just just replace the door not the whole housing. With HID extras kit it came with a nice waterproof seal that had the appropriate wires running to and from. HID extra gave me some capacitors, I did not know if they were nessesary on the 2011s but I put them in anyways.
What I also tried to do was keep the reds and the +s (labled on the side of the ballasts) together. That way things are easier to track if the light does not come on. Polarity does matter. Other then that everything is just plug and play.
*NOTE* I get no error codes on the headlights, but I do get a low tire pressure error every now and then. But it goes out after 5-10 secs.
After that just stick the ballasts in only space available haha and tie them up, and pop the headlight in.
You will see a relay setup for some LEDs that I wired but that is not part of this DIY...
And VOILA!

Thread Starter
|
All Star
Joined: Jan 2010
Posts: 824
Likes: 1
From: Alberta
Its just stuck on with 3M tape on the outside. The thing I like about them is they look purple here, but they are really a deep blue light.
Thread Starter
|
All Star
Joined: Jan 2010
Posts: 824
Likes: 1
From: Alberta
Thought it was needed!...I sure do! I am going to school at the moment so kinda don't have the cash for it haha. I am still going to go with 4300K in the fogs tho...
Record Breaker
Joined: Mar 2011
Posts: 1,035
Likes: 2
From: South, FL
I hear yah, well once you get them you'll absolutely LOVE them lol. You'll be shocked of how wide the beam is!
Trending Topics
Thread Starter
|
All Star
Joined: Jan 2010
Posts: 824
Likes: 1
From: Alberta
Oh im looking forward to it! I have had the first snow here already and im needing that low light to get past the snow!
Record Breaker
Joined: Mar 2011
Posts: 1,035
Likes: 2
From: South, FL
We already got snow here in New Jersey and I parked in a drift and it made the snow glow looked pretty sweet. but then driving during the snowfall it just looks awesome! And installing your HID Fog lights takes less than 25 minutes the longest part was mounting the ballasts lol
Thread Starter
|
All Star
Joined: Jan 2010
Posts: 824
Likes: 1
From: Alberta
Do you not experience a wall of snow with your HIDS? Cause I know with having 6000Ks here, man you could not see anything in our blizzards. Hence why I am going with 4300Ks, might not look as sharp but should help in that aspect!